1978 16ft Super Sport

MNhunter1

Lieutenant Junior Grade
Joined
May 12, 2014
Messages
1,053
I used the instructions from SeaStar when I got their new 4.2 NFB rotary helm set up and everything went in perfect.

Yeah, I'll probably end up with the same one as you seem to be happy with it. Good to know the measurement instructions/directions work as intended. I had to route the steering for the Nova down under the side shelf and behind the panel as it was a bit long from the donor.
 

nrf414

Chief Petty Officer
Joined
Feb 16, 2008
Messages
573
Another vote for 4.2NFB and instructions :lol: I'm going same route to upgrade from rack. Measured mine and will be ordering new cable and NFB system.
 

66Holiday924

Chief Petty Officer
Joined
Aug 21, 2017
Messages
578
We don't mind "boring" pictures :D. Everybody on here has an appreciation for the beauty in what you are doing
 

MNhunter1

Lieutenant Junior Grade
Joined
May 12, 2014
Messages
1,053
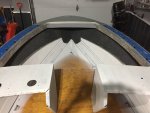
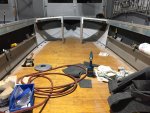
Finished up the install of the gunnels and bow cover with all new rivets. Mocked up the inside trim pieces to check for figment and it all came together, but took a little convincing. Threw in the consoles to use as a template for the wood cuts needed for the console fronts and casting deck. Having 2nd thoughts on running Nautolex along the gunnel sides and might just go with paint. Still plan on doing the tops, but not sure how best to finish and secure the bottom edge if I do the sides, and the bow area is pretty beat up from the previous carpeted pads that were there, as well as the trim in that area. Figured I'd clean it up and paint it and fit new pads to finish it out. The aft area behind the consoles is all ready for paint, but the bow looks like Swiss cheese. Many holes in the tops too, but those will all get covered by the Nautolex.
 

Attachments

  • photo285942.jpg
    photo285942.jpg
    1.3 MB · Views: 7
  • photo285943.jpg
    photo285943.jpg
    1.6 MB · Views: 7

Watermann

Starmada Splash of the Year 2014
Joined
Jan 12, 2013
Messages
13,787
I'd shy away too for vinyl on anything other than flat surfaces, paint is easy and looks great.
 

MNhunter1

Lieutenant Junior Grade
Joined
May 12, 2014
Messages
1,053
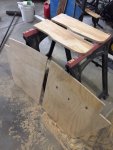
Got some wood cut up yesterday. Need to layout my dash and make the cuts before sealing and decide what to do with the console fronts. Epoxy and paint, or wrap in Nautolex? How is everyone finishing the vinyl edges when wrapping with both sides and edges exposed? Granted, the back will be somewhat hidden under the consoles, but still somewhat visible. Staple on edge and attach some aluminum angle to any exposed edges?

Also, appears the previous owner hacked off the legs of the windshield that extend back to the gunnels. It'll leave more room for fishing, but not sure how it will effect the support and aesthetics? Anyone modify a replacement or know where I might be able to source these short of an entire donor windshield?

Cheers!
 

Attachments

  • photo286001.jpg
    photo286001.jpg
    113.9 KB · Views: 2

ezmobee

Supreme Mariner
Joined
Mar 26, 2007
Messages
23,767
I would epoxy then paint those dash panels. Should leave a nice smooth plastic like finish.
 

MNhunter1

Lieutenant Junior Grade
Joined
May 12, 2014
Messages
1,053
I would epoxy then paint those dash panels. Should leave a nice smooth plastic like finish.

I was hoping you might respond:) Was just skimming through your rebuild and pictures. I noticed you had mounted your console fronts on the inside of the console lip rather than face mounting them from the outside. It also appears yours were completely vinyl wrapped. Did you have a visible seam or any mechanical fasteners exposed, staples, etc. or just glue/adhesive. Also, some of your pictures in your album show a bent windshield leg but I couldn't locate it anywhere in your rebuild thread. Did you repair or replace this? Mine have been cut off, but I'm considering trying to mock something up with aluminum channel as a replacement.
 

Watermann

Starmada Splash of the Year 2014
Joined
Jan 12, 2013
Messages
13,787
For the windshield supports, could you just get a set of these?

IB00197789.jpg
 

MNhunter1

Lieutenant Junior Grade
Joined
May 12, 2014
Messages
1,053
For the windshield supports, could you just get a set of these?

[IMG2=JSON]{"data-align":"none","data-size":"full","height":"127","width":"246","src":"https:\/\/www.iboats.com\/shop\/pub\/media\/catalog\/product\/cache\/image\/700x560\/e9c3970ab036de70892d86c6d221abfe\/1\/9\/IB00197789.jpg"**[/IMG2]

Those would work for structural support, but not sure how they would look with the rake of the side glass?
 

mbroughton02

Petty Officer 2nd Class
Joined
Jan 17, 2015
Messages
198
How is everyone finishing the vinyl edges when wrapping with both sides and edges exposed? Granted, the back will be somewhat hidden under the consoles, but still somewhat visible. Staple on edge and attach some aluminum angle to any exposed edges?

I don't have the answer, but I had the same issue. I decided to gamble and see if I could wrap the front vinyl around the back by about 1", staple it, and then add a back vinyl panel secured with adhesive only, to cover the staples. It's peeling, so when I get the boat out in the spring I'll need to do something different. I am thinking about buying some hidem gimp https://www.sailrite.com/Notions/Trims/Trim-Hidem-Gimp to run along the back edges so that I can staple that vinyl on and not see the staples.

Another piece of advice, but it might be too late, is to test fit your windshield before cutting the console fronts. I had to mess around with the exact angle of the console "legs" to get the windshield to fit right, and the angle of those legs is going to affect the shape of your console fronts.
 

MNhunter1

Lieutenant Junior Grade
Joined
May 12, 2014
Messages
1,053
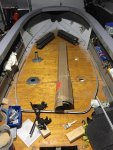
Managed to get some vinyl laid down on the gunnel tops. Was just going to get it all cut a prepped, but I couldn't bring myself to call it a night:). My garage is sitting around 50 degrees, so a little cooler than ideal, but with all the warnings all over the contact cement can, I didn't really feel like cranking up the heat. Glad I had the respirator on hand or it would have been a party in there with all the fumes. Went down pretty well with a few little issues from wrinkles due to the width of the vinyl being a tad less than the beam of the hull. Had to make a few slits to get it all to lay flat, but they should go unnoticed when all is said and done. I had cut the floor of the Nova out of the center of the vinyl with the knowledge that the remaining edges would be used for these gunnel tops. worked like a champ, just a bit of a dance trying to lay it out and glue it down as a one man operation. I loaded some boards on top and will give it a day or two to dry before messing with it further. I had hoped to paint the gunnel sides 1st, but my paint still has yet to ship and I figure any edge overlap will be covered by the trim anyhow.

I think all the waiting between sealing, painting, drying, etc. has come to be my least favorite part of these projects. Another day in the books. Hope for an opportunity for more progress tomorrow.

Cheers!
 

Attachments

  • photo286055.jpg
    photo286055.jpg
    1.5 MB · Views: 7

Watermann

Starmada Splash of the Year 2014
Joined
Jan 12, 2013
Messages
13,787
Yeah that's the tough part, all the kicking around waiting for stuff to dry, cure or show up on the brown truck, but hey she's lookin good!
 

mbroughton02

Petty Officer 2nd Class
Joined
Jan 17, 2015
Messages
198
I hope the contact cement is working better for you than it did for me. I have some major peeling going on which I am going to have to fix this spring...It seems to have worked okay for the vinyl to wood areas but not so much vinyl to aluminum. And yes those fumes are nasty.
 

MNhunter1

Lieutenant Junior Grade
Joined
May 12, 2014
Messages
1,053
I hope the contact cement is working better for you than it did for me. I have some major peeling going on which I am going to have to fix this spring...It seems to have worked okay for the vinyl to wood areas but not so much vinyl to aluminum. And yes those fumes are nasty.

Yeah, we'll have to see how it all holds up. With the rub rail and inside trim pieces, all edges will be mechanically fastened down (hope I can locate all the holes...) to prevent any curling, so I'm hoping all will be good. Not to mention the cleats, tracks, and other rod holders I'll be mounting on top as well. I had better results with the contact cement over the 3M80 when gluing down the Nautolex to the aluminum dash tray in my Nova, so I went that route with the aluminum gunnels. I used the 3M80 on the wood floor of the Nova, and plan to do the same with this one.
 

MNhunter1

Lieutenant Junior Grade
Joined
May 12, 2014
Messages
1,053
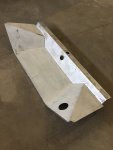
Looks like I'll be throwing together my splashwell tonight đź‘Ť
 

Attachments

  • photo286094.jpg
    photo286094.jpg
    1.2 MB · Views: 5

MNhunter1

Lieutenant Junior Grade
Joined
May 12, 2014
Messages
1,053
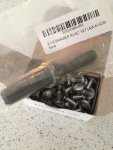
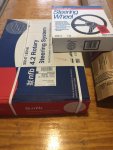
Came home to a couple of boxes:). Now, if my paint would just arrive...
 

Attachments

  • photo286464.jpg
    photo286464.jpg
    113.1 KB · Views: 31

MNhunter1

Lieutenant Junior Grade
Joined
May 12, 2014
Messages
1,053
How does the saying go? Pics or it didn't happen :whistle::nevreness:

Really clean work so far. I'm digging the color too.

Assembled and ready to paint after a quick clean up. Removed some snaps and tried to replace with solids, but they were a bit loose, so drilled them out and replaced with closed end sealed blinds (snap locations only, used the solids for the structural attachment). I'll run a bead of 5200 down the seam and the transom transition once installed.
 

Attachments

  • photo286467.jpg
    photo286467.jpg
    1.9 MB · Views: 5

nrf414

Chief Petty Officer
Joined
Feb 16, 2008
Messages
573
Came home to a couple of boxes:). Now, if my paint would just arrive...

Oh yeah the 4.2NFB. Mine came yesterday too. I dry fitted in console face and then disassembled for final install.


nice work on splashwell!! Looking good man keep up good work
 
Top