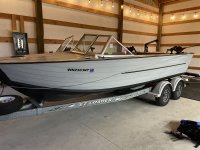
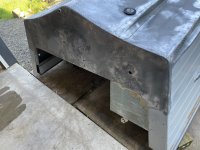
1974 Starcraft 21’ Holiday

Crankerbait

Seaman Apprentice
Joined
Nov 5, 2021
Messages
31
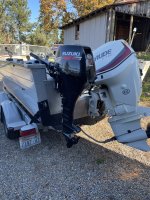
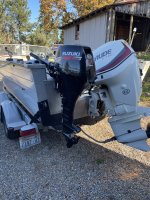
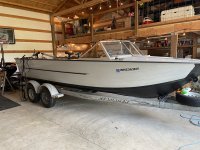
I am starting a project of a recent purchase on a 21’ 1974 Starcraft Holiday. A little back story, I purchased this boat a few months back. The PO told me he had gone through and replace ALL rivets about 9 years ago. He had the bottom of the boat Rhino lined (similar to flex seal or a truck bed liner). The boat has a nearly new 115 Evinrude E-TEC and 9.9 Suzuki kicker.

Now the issues,

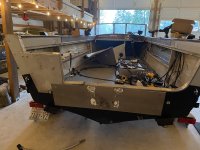
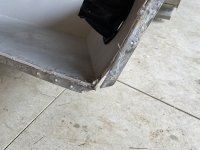
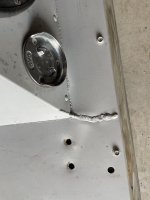
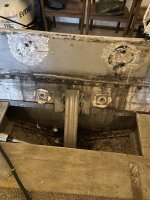
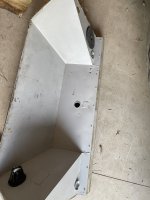
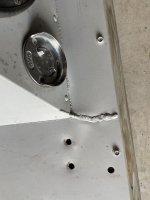
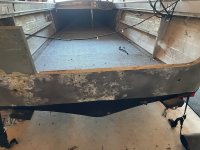
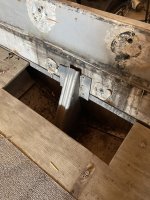
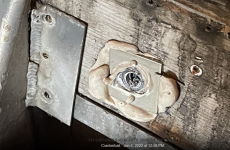
While doing some maintenance I found the knee brace was was damage after what looked like a pretty poor previous repair, the Splashwell had been previously welded in a couple spots but was showing stress and cracking again. The transom was also replace 9 years ago and was in good but not great shape.

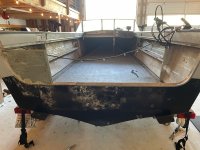
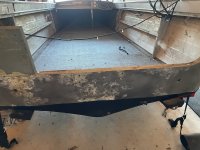
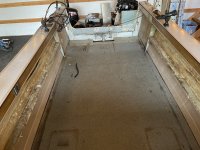
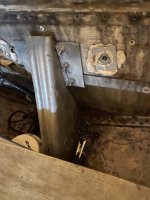
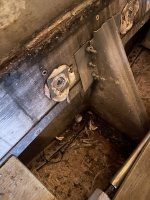
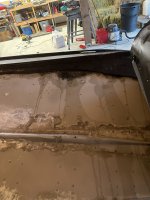
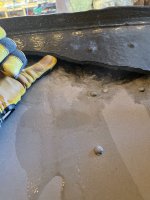
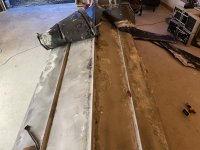
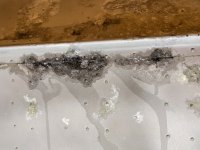
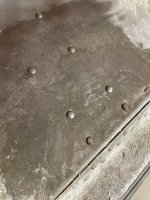
I started to dismantle things and some of my fears were confirmed when I discovered the Rhino lining was trapping moisture between the lining and the aluminum causing corrosion. I’m still in a deconstruction phase to determine how bad things are and how much this project will require.

My plan is to remove the rhino lining, clean, repair and paint the hull, rebuild the transom likely with a new shape and splashwell. I’ll also consider adding extra supports throughout the boat, not really sure about what is necessary.

Anyway follow along if you like. I’ll attach photos of where I’m at now.
 

Attachments

  • 31606B58-10ED-4AC1-BDF5-43B579A56345.jpeg
    31606B58-10ED-4AC1-BDF5-43B579A56345.jpeg
    2.7 MB · Views: 44
  • E798533B-D617-4A14-83E6-F95B722697A1.jpeg
    E798533B-D617-4A14-83E6-F95B722697A1.jpeg
    3.6 MB · Views: 44
  • B6726A5A-BA92-4C23-9180-DEB5B5D2AA83.jpeg
    B6726A5A-BA92-4C23-9180-DEB5B5D2AA83.jpeg
    2.7 MB · Views: 45
  • B6BD5642-E175-44C1-BFFC-23527CC17632.jpeg
    B6BD5642-E175-44C1-BFFC-23527CC17632.jpeg
    2.6 MB · Views: 42
  • 5ADD4C05-44F1-42D8-AA07-52A1C6FE7F8C.jpeg
    5ADD4C05-44F1-42D8-AA07-52A1C6FE7F8C.jpeg
    3.5 MB · Views: 42
  • F2EE3D41-5F29-4490-839D-18AEB81E6792.jpeg
    F2EE3D41-5F29-4490-839D-18AEB81E6792.jpeg
    3.5 MB · Views: 40
  • 3C0244D5-F98E-4054-81C9-CBAC6AFE6AE9.jpeg
    3C0244D5-F98E-4054-81C9-CBAC6AFE6AE9.jpeg
    1.6 MB · Views: 40
  • E3DC5271-89FD-4711-A17E-A8C03EE66AB1.jpeg
    E3DC5271-89FD-4711-A17E-A8C03EE66AB1.jpeg
    2.1 MB · Views: 37
  • 9BDA772A-EB54-4A80-ADD5-355BEBF124CA.jpeg
    9BDA772A-EB54-4A80-ADD5-355BEBF124CA.jpeg
    3.5 MB · Views: 37
  • 339D86A0-25F7-4554-BF1B-585E6B4F2420.jpeg
    339D86A0-25F7-4554-BF1B-585E6B4F2420.jpeg
    1.8 MB · Views: 35
  • 3573FC0F-8BFE-43D8-B23D-0CB555054252.jpeg
    3573FC0F-8BFE-43D8-B23D-0CB555054252.jpeg
    1.8 MB · Views: 33
  • 2A14CE30-C49D-48CE-BD3B-2AEBC4B8DCE3.jpeg
    2A14CE30-C49D-48CE-BD3B-2AEBC4B8DCE3.jpeg
    2.1 MB · Views: 33
  • D2BF1A07-B780-4F58-A937-BB3A674C9B39.jpeg
    D2BF1A07-B780-4F58-A937-BB3A674C9B39.jpeg
    2.2 MB · Views: 43

Crankerbait

Seaman Apprentice
Joined
Nov 5, 2021
Messages
31
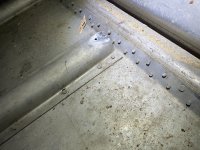
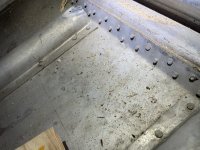
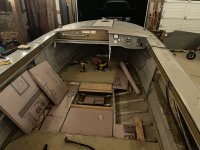
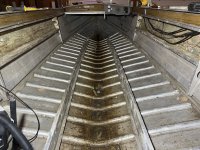
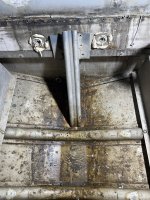
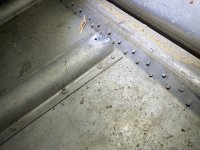
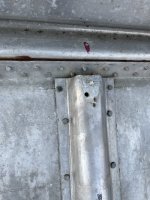
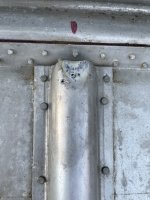
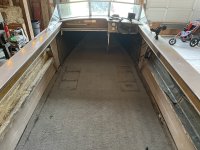
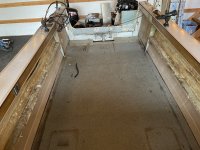
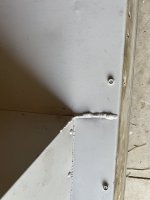
I started pulling up the floor today, everything underneath looks to be in good shape. PO used closed cell foam which seems to have very little or no wear. Stringers and ribs look to be in good shape as well and the hull is pretty clean. There was 1/2 plywood for flooring which flexed a bit. Any know of any issue using 3/4? Also, some of the rivets seems to be worked a little harder on install. Do these rivets look how they should?
 

Attachments

  • 8981FC4B-09AD-47EB-A8CE-2BAD786A84BB.jpeg
    8981FC4B-09AD-47EB-A8CE-2BAD786A84BB.jpeg
    5.2 MB · Views: 21
  • C9B55D4C-A7D2-420C-83DB-BD6EA1E6289B.jpeg
    C9B55D4C-A7D2-420C-83DB-BD6EA1E6289B.jpeg
    4.9 MB · Views: 21
  • F8EEDDEF-C427-48F0-A94B-837854BC03D4.jpeg
    F8EEDDEF-C427-48F0-A94B-837854BC03D4.jpeg
    2.9 MB · Views: 21

Crankerbait

Seaman Apprentice
Joined
Nov 5, 2021
Messages
31
I am starting a project of a recent purchase on a 21’ 1974 Starcraft Holiday. A little back story, I purchased this boat a few months back. The PO told me he had gone through and replace ALL rivets about 9 years ago. He had the bottom of the boat Rhino lined (similar to flex seal or a truck bed liner). The boat has a nearly new 115 Evinrude E-TEC and 9.9 Suzuki kicker.

Now the issues,

While doing some maintenance I found the knee brace was was damage after what looked like a pretty poor previous repair, the Splashwell had been previously welded in a couple spots but was showing stress and cracking again. The transom was also replace 9 years ago and was in good but not great shape.

I started to dismantle things and some of my fears were confirmed when I discovered the Rhino lining was trapping moisture between the lining and the aluminum causing corrosion. I’m still in a deconstruction phase to determine how bad things are and how much this project will require.

My plan is to remove the rhino lining, clean, repair and paint the hull, rebuild the transom likely with a new shape and splashwell. I’ll also consider adding extra supports throughout the boat, not really sure about what is necessary.

Anyway follow along if you like. I’ll attach photos of where I’m at now.
 

Attachments

  • E87F3B4A-0EA8-4CA1-8A6D-DE6D7965C8CE.jpeg
    E87F3B4A-0EA8-4CA1-8A6D-DE6D7965C8CE.jpeg
    2.7 MB · Views: 19
  • DBB94538-2156-4ED5-A69B-B0218D7AB814.jpeg
    DBB94538-2156-4ED5-A69B-B0218D7AB814.jpeg
    4.5 MB · Views: 17
  • 77CC6930-627A-47C3-B48B-97ECEA2C40BC.jpeg
    77CC6930-627A-47C3-B48B-97ECEA2C40BC.jpeg
    4 MB · Views: 16
  • 756B35E6-0DBE-41AF-9A88-5B1AAAD640B1.jpeg
    756B35E6-0DBE-41AF-9A88-5B1AAAD640B1.jpeg
    3.5 MB · Views: 15
  • C20A9580-E837-4026-8BBF-31043AE3231F.jpeg
    C20A9580-E837-4026-8BBF-31043AE3231F.jpeg
    2.1 MB · Views: 15
  • 807CC752-AAEE-4CB1-A68D-18DF0266C414.jpeg
    807CC752-AAEE-4CB1-A68D-18DF0266C414.jpeg
    1.6 MB · Views: 16
  • F7A80A06-2FC3-4291-BE00-AA8A86B87497.jpeg
    F7A80A06-2FC3-4291-BE00-AA8A86B87497.jpeg
    1.8 MB · Views: 17
  • 994FE66D-B52A-4E7B-B816-1CAFAE8B38B7.jpeg
    994FE66D-B52A-4E7B-B816-1CAFAE8B38B7.jpeg
    3.5 MB · Views: 17
  • B976D537-B8F6-408C-88E3-24A2E126C593.jpeg
    B976D537-B8F6-408C-88E3-24A2E126C593.jpeg
    2.6 MB · Views: 20
  • 4A9BB6FE-5238-48E1-ADBB-83676F8D491B.jpeg
    4A9BB6FE-5238-48E1-ADBB-83676F8D491B.jpeg
    3.5 MB · Views: 18
  • 329A9D34-838A-4328-8BC2-3068EBE14F7A.jpeg
    329A9D34-838A-4328-8BC2-3068EBE14F7A.jpeg
    2.5 MB · Views: 18

MNhunter1

Lieutenant Junior Grade
Joined
May 12, 2014
Messages
1,058
The first two pics look great! Nice motors, nice galvanized trailer. My $0.02...these hulls are readily available. Maybe not so much in the 21ft variety, or in your location, but here in MN - I'd strip all the useable parts, scrap the hull and find another base to rebuild. Worth digging into a bit more to see the extent of the corrosion and other potential damage. With the damage to the knee brace and splashwell, it was obviously ran for a bit with a compromised hull and you'll likely find rib end cracks or other hidden damage that was attempting to be addressed by the previous repairs. Not saying it can't all be repaired, but for the time and effort, I'd be tempted to find another hull. My last two builds I was into the hull and trailer for $120 and $100 respectively, that's two hulls and two trailers for $220. You'll likely have more into the materials for the needed repairs and might even be money ahead when you sell off what you won't be using/need.

Not trying to sway you from working with what you've got, but that Rhino lining was added for a reason with no plans to ever remove it, and the thought of the removal process and what might be discovered underneath would be a deal breaker for me personally. Either way, a ton of knowledgeable support on this site and we'll travel the journey with you, wherever it may lead.
 

Moserkr

Chief Officer + Starmada Splash Of The Year 2021
Joined
Nov 23, 2020
Messages
869
Good looking boat, motors, and trailer! As MNhunter stated, rhino lining is the main concern. Maybe you could see how bad the corrosion looks from the inside before peeling off the outside? Hope its worth the time/effort. But with the right tools and time, anythings possible. Im sure someone here knows how to get rhino lining off if you need intel…. As far the the splashwell and brace goes, seen more than a few pics of those issues before. Clean em up, reinforce, repair, should be good to go. Looking forward to what you do with her!
 

classiccat

"Captain" + Starmada Splash Of The Year 2020
Joined
Dec 20, 2010
Messages
3,412
Welcome to the Starmada!

You're on the right path getting that truckbed liner off to fully assess the hull condition.

Hopefully the wooden sidepanels were still there and intact...without those side supports, the outer chine & spray rail tend to flex and crack.

We've seen enough of these to know that the white-washed, checked plywood is the original transom...and precisely why the splashwell & kneebrace cracked not once...but twice!

1641335520571.png

@jbcurt00 loves stripping truckbed liner from aluminum...i'm told that one of his favorite pastimes is hunting through the classifieds for rigs coated with that carp! :ROFLMAO:
 

ShoestringMariner

Lieutenant Commander
Joined
Apr 18, 2015
Messages
1,600
Wow that corrosion is really unfortunate. Is it on the bottom side too, or only the transom?

If the latter only, maybe you could get a fabrication shop to form up a new skin?

If everywhere, is the corrosion pitting deep and extensive, or still shallow?
 

Crankerbait

Seaman Apprentice
Joined
Nov 5, 2021
Messages
31
I live in Oregon and spent more money on the boat then I care to admit. The boat market here is pretty crazy. I just sold a jet boat which had been my first boat. I made almost 10k off it after 4 years. That being said, I can’t bring myself to just sell the boat.

Unfortunately the rhino lining covers the entire bottom of the boat. I was able to peel it off the transom fairly easily and found corrosion beneath the lining. The corrosion seem minor with a couple sports of shallow pitting. Thankfully the lining seems like it should be easy to remove. Took me all of a couple minutes to remove it from the transom.

I removed the floor and was pleasantly surprised to find not broken or loose rivets and I’ve yet to find any damage to the chines or ribs. Only problem I can see so for is the debris clogging the bottom of the ribs and leaving about an inch of standing water through the boat.
 

Attachments

  • 33EC4AF2-1D02-4E27-BEC0-0D145EF706B6.jpeg
    33EC4AF2-1D02-4E27-BEC0-0D145EF706B6.jpeg
    5.4 MB · Views: 18
  • CAED21BE-3627-43B0-8299-5819DABF0A7E.jpeg
    CAED21BE-3627-43B0-8299-5819DABF0A7E.jpeg
    3.1 MB · Views: 18
  • CA63909D-9864-4A88-B19A-F05432EF4488.jpeg
    CA63909D-9864-4A88-B19A-F05432EF4488.jpeg
    5.2 MB · Views: 18

classiccat

"Captain" + Starmada Splash Of The Year 2020
Joined
Dec 20, 2010
Messages
3,412
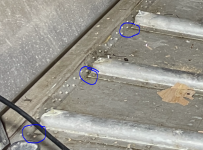
these gaps at the rib ends are a little concerning...that happens when the hull flexes downwards. As @MNhunter1 suggested, be on the lookout for cracks @ those outermost rivets when you get the truckbed liner removed.

Don't panic if you do find them... a few of us (myself included) had to bang-in a few patches as well as add structural reinforcement to the outer chine.

1641347085561.png
 

BOYS & TOYS

Petty Officer 2nd Class
Joined
Mar 1, 2008
Messages
149
I would inspect everything for cracks and corrosion before spending more money. Looking and cleaning is cheap. Transom skins can be replaced. I don't like the idea of a new layer over a corroded mess because water trapped inside will continue corrosion.

I had to replace my transom and fix lots of corrosion holes, some under ribs.

Boats in my area demanded top prices and I never find deals like other members of the mob.
 

Crankerbait

Seaman Apprentice
Joined
Nov 5, 2021
Messages
31
Good eye, glad I have the expertise from people on this forum. I’ll spend some time this next weekend cleaning the inside of the hull then try to flip. Any tips for flipping? I have a cherry picker and plenty of overhead lift points in my shop.
 

Crankerbait

Seaman Apprentice
Joined
Nov 5, 2021
Messages
31
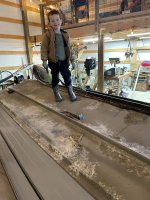
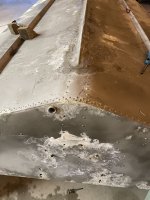
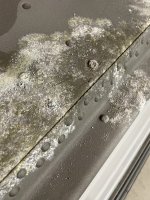
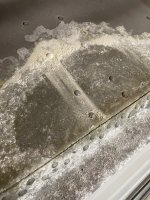
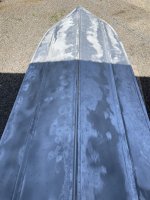
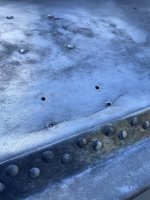
Okay, I got a few things done. Did a quick wash of the inside hull and found a few cracks at the rib ends nothing more than a couple inches long but I would say about 8 rib ends were cracked. I flipped it and and got about 2/3 of the rhino lining removed I found water trapped between the lining and hull. Especially around the keel. There was corrosion throughout. Most of the pitting seemed to be shallow. Several rib ends had rivet heads broken off and corroded. There does seem to be some corrosion around the ribs that run fore and aft on the outside of the hull.

What do you guys think? Salvageable? I am fully aware I will have my work cut out for me if I choose to proceed. It’s safe to say I got played hard by the previous owner. If only I had found these forums prior to buying the boat.
 

Attachments

  • 6D555698-2A36-410D-A58E-5C791B0EE0E4.jpeg
    6D555698-2A36-410D-A58E-5C791B0EE0E4.jpeg
    2.2 MB · Views: 47
  • E31F3FDA-0E8E-41A4-98A3-4A8FEF468DA3.jpeg
    E31F3FDA-0E8E-41A4-98A3-4A8FEF468DA3.jpeg
    2 MB · Views: 47
  • 552EC527-0129-484A-A45F-5A6F3381A166.jpeg
    552EC527-0129-484A-A45F-5A6F3381A166.jpeg
    2 MB · Views: 45
  • F03CD073-F1FF-493B-856E-F61F2AF47B7D.jpeg
    F03CD073-F1FF-493B-856E-F61F2AF47B7D.jpeg
    2.1 MB · Views: 45
  • 00D29A09-4F67-49B6-AE74-B114A08D689C.jpeg
    00D29A09-4F67-49B6-AE74-B114A08D689C.jpeg
    2.4 MB · Views: 44
  • 7840950E-E7A0-40ED-B9DC-4B3EFDE82926.jpeg
    7840950E-E7A0-40ED-B9DC-4B3EFDE82926.jpeg
    2.4 MB · Views: 46
  • 1D10FB1A-2D0D-4E91-9EE3-A4031A79252C.jpeg
    1D10FB1A-2D0D-4E91-9EE3-A4031A79252C.jpeg
    3 MB · Views: 46
  • 1D35D985-5EDF-4E1A-A6EA-CEB7F6A2A833.jpeg
    1D35D985-5EDF-4E1A-A6EA-CEB7F6A2A833.jpeg
    3.5 MB · Views: 47
  • FEB2E594-3E31-4550-A954-2215D40E47FF.jpeg
    FEB2E594-3E31-4550-A954-2215D40E47FF.jpeg
    3.1 MB · Views: 45
  • D46749D4-35AD-4039-9791-8298688B0812.jpeg
    D46749D4-35AD-4039-9791-8298688B0812.jpeg
    2.8 MB · Views: 45
  • 2DFD051E-8C1B-4149-BDB4-089B2A1A273D.jpeg
    2DFD051E-8C1B-4149-BDB4-089B2A1A273D.jpeg
    3.1 MB · Views: 45
ShoestringMariner

Lieutenant Commander
Joined
Apr 18, 2015
Messages
1,600
Ouch. I don’t know if I’d say you got played. The PO may not have known that what he did caused so many issues. Whomever resomodded it appeared to have tried to do an ultimate build. If you looked for a donor hull, you still have a trailer and two great motors..You could repair that hull, though I’d say you might have much less work if you go with another hull as a replacement. You could recoup some costs by parting out the rest and scrapping the bad hull.

I guess it depends on how you want to build/restore it. Maybe Fixing the cracks and re-coating it with rhino lining and You might get another 5-10 years out of depending on its use. Not what I’d do, but maybe that’s all you need to make it last? So many people get caught up in the Mike Holmes “build it right meaning only Mikes way” mentality. Some times good enough to do for X amount of time is what the doc ordered.
 
Last edited:

classiccat

"Captain" + Starmada Splash Of The Year 2020
Joined
Dec 20, 2010
Messages
3,412
if little/none of the corrosion is completely through the hull skin, fixing those cracks and reinforcing the outer-chine, spray-rail is doable. You'll need to get equipped for riveting if you aren't already.
 

Crankerbait

Seaman Apprentice
Joined
Nov 5, 2021
Messages
31
Well I have spent many hours cleaning the corrosion off the bottom of the hull and uncovered about 5 minor cracks at the rib ends and 3 the size of what’s pictured. The corrosions was shallow in the majority of the boat, there were a few small spots of deep pitting, but nothing through the hull. The gray area remaining on the hull is the old primer.

FC62CAE1-40B3-4CDF-8CE4-1A6312E73C85.jpegEF0BD2E7-64B5-4174-B248-C411A22F05A8.jpeg I purchased a sheet of .080 5052 aluminum and riveting materials. I’m about ready to finish knocking out the old rivets and start patching things up.

The crack picture is sunken down creating an uneven surface for a patch. What it the best way to push that crack back out to make things flat again?
 

ShoestringMariner

Lieutenant Commander
Joined
Apr 18, 2015
Messages
1,600
Well I have spent many hours cleaning the corrosion off the bottom of the hull and uncovered about 5 minor cracks at the rib ends and 3 the size of what’s pictured. The corrosions was shallow in the majority of the boat, there were a few small spots of deep pitting, but nothing through the hull. The gray area remaining on the hull is the old primer.

View attachment 358887View attachment 358888 I purchased a sheet of .080 5052 aluminum and riveting materials. I’m about ready to finish knocking out the old rivets and start patching things up.

The crack picture is sunken down creating an uneven surface for a patch. What it the best way to push that crack back out to make things flat again?
Ok so that’s doable. I’d try hammer and dolly work with a helper. Hold a flat bock of steel against it on the outside and hammer the crack on the inside. Work it slowly, back and forth. You may have to remove the rib.
If you aren’t comfortable removing the rib, make a patch large enough to cover the crack and distorted area. Make sure you drill a small hole at each end of the crack or it will continue growing.
 

classiccat

"Captain" + Starmada Splash Of The Year 2020
Joined
Dec 20, 2010
Messages
3,412
+1 on drilling crackstop holes 1st before trying to do anything.

that metal moves very easily (so much so that it's easy to over compensate) Having a helper hold a piece of wood on the outside and gently hit the inside with a deadblow and a piece of wood under the rib end.

you can also work the patch itself to conform to the outer-chine. coat one side of the patch with soap and heat the other side of the patch with a propane torch until the soap burns...then stop. i shaped my patches using a deadblow. In some cases, I temporarily attached the patches to the hull (clecos, drill/tap 6/32 or 8/32 machine screws, sheet metal screws, etc.) for deadblow forming. you'll eventually drill all of the holes up to 3/16 for solid rivets.
 

Crankerbait

Seaman Apprentice
Joined
Nov 5, 2021
Messages
31
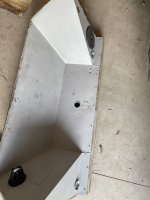
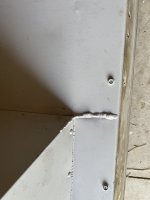
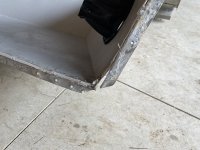
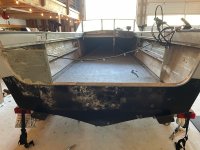
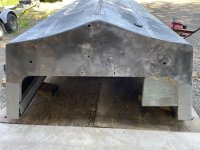
Looking for some advise on the transom. I want to replace and reshape the transom skin, but the skin is riveted to the rest of the hull on the bottom and sides. Which means I would have to bend the edges of the new skin and I’m not sure I have the skill to do that appropriately. What do you guys recommend? If I rivet the new transom skin to the perimeter of the old skin on the transom side of the boat, would that work? Or am I asking for future cracking at that seem?
 

Attachments

  • 4EC328A2-7FE9-4424-A877-B2AA7CBB73DD.jpeg
    4EC328A2-7FE9-4424-A877-B2AA7CBB73DD.jpeg
    4.3 MB · Views: 16
  • 761B1754-71C5-4250-AC25-5D68DAA94A35.jpeg
    761B1754-71C5-4250-AC25-5D68DAA94A35.jpeg
    3.7 MB · Views: 16

MNhunter1

Lieutenant Junior Grade
Joined
May 12, 2014
Messages
1,058
Looking for some advise on the transom. I want to replace and reshape the transom skin, but the skin is riveted to the rest of the hull on the bottom and sides. Which means I would have to bend the edges of the new skin and I’m not sure I have the skill to do that appropriately. What do you guys recommend? If I rivet the new transom skin to the perimeter of the old skin on the transom side of the boat, would that work? Or am I asking for future cracking at that seem?
Looks like you have good enough metal around the edges to rivet a new skin around the perimeter. Keep it on the flat and hammer some solids around the perimeter, 5200 or epoxy buttered in between.
 
Top