1974 Chieftain 25 "Adventurer" Restoration

IslandExplorer

Petty Officer 1st Class
Joined
Oct 21, 2019
Messages
370
Decided to replace a bunch of the loose old rivets on the main runners. Replaced each double with a triple for a little extra strength.IMG_20230701_155100.jpgIMG_20230701_155108.jpgIMG_20230703_175031.jpgIMG_20230703_222743.jpgIMG_20230703_221713.jpg Old fashions definitely help rivets seat properly, pro tip lol
 

IslandExplorer

Petty Officer 1st Class
Joined
Oct 21, 2019
Messages
370
Update: Painted 2x10's, reinstalled aft floor Z-beam supports, tested deck height with a piece of plywood by helm. Thinking I will need to raise steering wheel a bit later on. Word of warning- the aluminum deck supports are extra SHARP! Be careful when rebuilding the floors so you don't get caught an a corner and scratched like I did. It's very easy for this to happen in shorts lol
IMG_20230703_174949.jpgIMG_20230703_223716.jpgIMG_20230703_235818.jpgIMG_20230704_214738.jpg
Almost 3 feet from bottom of hull main beam to deck- about +19" higher than original if you don't include the height of seat boxes or anything.
IMG_20230704_215129.jpg
Steering wheel height will be a bit low.
IMG_20230704_214913.jpg
These now floppy and unsupported side pieces did not match well with my plan of making the cockpit deck totally flat. After much consideration I have decided to remove them as they no longer serve a purpose and are being replaced with the 2x10 beams. I also discovered, much to my surprise, that they do not run level with the floor. They taper lower by at least an inch at the back so I guess removing them had to happen anyway.
IMG_20230704_215255.jpg
Christened with blood. The true theme of restorations lol
IMG_20230704_215421.jpg
 

Attachments

  • IMG_20230704_215222.jpg
    IMG_20230704_215222.jpg
    1.3 MB · Views: 1

IslandExplorer

Petty Officer 1st Class
Joined
Oct 21, 2019
Messages
370
So originally I was just going to notch the plywood for the tank beds but because of the increased water tank size I needed the fuel tanks to be a couple inches farther back. That corner being the one that got me has nothing to do with this I swear.
IMG_20230705_205435.jpg
IMG_20230705_210239.jpgIMG_20230705_210513.jpgIMG_20230705_210458.jpgIMG_20230705_213159.jpgIMG_20230705_213302.jpgIMG_20230705_213227.jpgIMG_20230705_214038.jpgIMG_20230705_213912.jpg
 

IslandExplorer

Petty Officer 1st Class
Joined
Oct 21, 2019
Messages
370
Removed inner gunwale extrusions. The material from them will likely be repurposed later for something else on the boat.
 

Attachments

  • IMG_20230705_173315.jpg
    IMG_20230705_173315.jpg
    1.2 MB · Views: 3
  • IMG_20230705_163725.jpg
    IMG_20230705_163725.jpg
    1.3 MB · Views: 4
  • IMG_20230705_173349.jpg
    IMG_20230705_173349.jpg
    1.1 MB · Views: 4
  • IMG_20230705_173329.jpg
    IMG_20230705_173329.jpg
    1.3 MB · Views: 4
  • IMG_20230705_173312.jpg
    IMG_20230705_173312.jpg
    1.2 MB · Views: 4
  • IMG_20230705_172829.jpg
    IMG_20230705_172829.jpg
    2.2 MB · Views: 4
  • IMG_20230705_173342.jpg
    IMG_20230705_173342.jpg
    1.1 MB · Views: 3

IslandExplorer

Petty Officer 1st Class
Joined
Oct 21, 2019
Messages
370
Below you can see where the rear beams were intruding on the space and trimmed slightly so tanks could go back another couple inches.
IMG_20230705_204738__01.jpgIMG_20230705_204744__01.jpgIMG_20230705_224450__01.jpg
IMG_20230705_231045.jpgIMG_20230705_232214__01.jpgIMG_20230705_214414.jpgIMG_20230705_214401__01.jpg
Planning to mount water tank sideways like this so it fits and just reconfigure the ports. Old drain will become vent, old vent will be supply #1, original supply outlet will be supply #2, and fill will be the same. Figure this way I can put a selector valve in and run on supply 1 until it runs out and know I have about half a tank left when switching over to supply 2. Kinda like the reserve switch on a motorcycle fuel tank. Hopefully that'll work as planned.
 

IslandExplorer

Petty Officer 1st Class
Joined
Oct 21, 2019
Messages
370
IMG_20230715_201451.jpgIMG_20230715_201509.jpgIMG_20230715_224413.jpgIMG_20230715_215919.jpgIMG_20230716_153926.jpg
Doin the Sky Jacker 6" lift kit for helm.
IMG_20230715_211226.jpgIMG_20230715_215910.jpgIMG_20230715_211236.jpgIMG_20230716_192341.jpgIMG_20230716_154029.jpgIMG_20230716_003340.jpg
You can see where I have been fighting the rain. Sun pops out, put paint on, sky instantly turns grey, rain washes paint off. Slowly but surely.
IMG_20230716_183959.jpgIMG_20230716_155706.jpg
 

IslandExplorer

Petty Officer 1st Class
Joined
Oct 21, 2019
Messages
370
Plywood, 3 rolls of neoprene rubber for the fuel tank beds, scrap yard aluminum bin finds, and yet another $100 of hardware from the Depot. Thinking I'll really be able to do some damage with all this stuff. I'm going with 1/2" (15/32) plywood for the cabin floor and 5/8" (19/32) for the cockpit deck. The tank beds I already made are 3/4" (23/32) which seemed a tad overkill. Still waiting on the 1" long rivets to come in for fastening the outboard edge of the tank beds to the rib ends.
 

Attachments

  • IMG_20230718_131244.jpg
    IMG_20230718_131244.jpg
    1.1 MB · Views: 3
  • IMG_20230717_165150.jpg
    IMG_20230717_165150.jpg
    3.1 MB · Views: 3
  • IMG_20230718_204433.jpg
    IMG_20230718_204433.jpg
    1.5 MB · Views: 3
  • IMG_20230718_201542.jpg
    IMG_20230718_201542.jpg
    1.5 MB · Views: 3

IslandExplorer

Petty Officer 1st Class
Joined
Oct 21, 2019
Messages
370
Bathroom floor
IMG_20230722_164403__01.jpg
Kitchen floor
IMG_20230722_164409__01.jpg
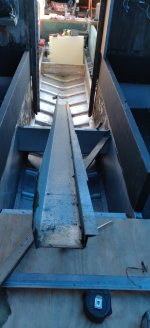
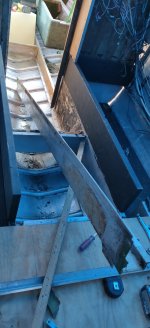
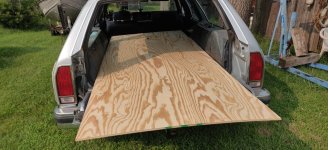
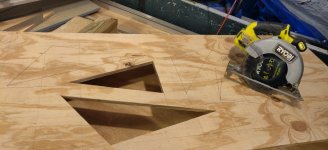
This is the piece I dreaded cutting most. After some careful measurements and planning- it worked out great first try luckily!
IMG_20230722_180730.jpgIMG_20230722_180751.jpg
Scalloped edges done with a jig saw easy enough. Nice and splintery edge, check.
IMG_20230722_183444.jpg
Quick edge routing with 45 degree angle on bottom outboard edges for factory style fitment.
IMG_20230722_184039.jpg

IMG_20230722_184045.jpg
And she's in!
IMG_20230722_190656.jpg
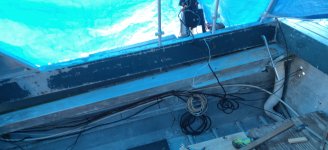
Port side storage looking good.
IMG_20230722_190717.jpg
This was extremely satisfying to see.
IMG_20230722_190707.jpg
Like. A. Glove. 😎 Well, close enough anyhow!
IMG_20230722_190731.jpg
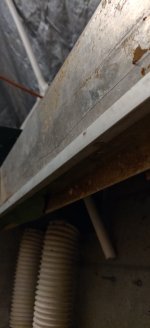
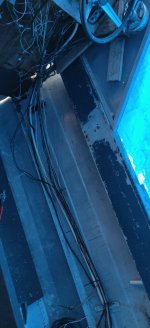
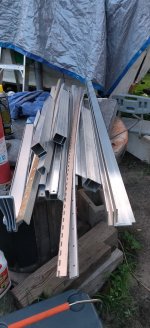
That strip on the left is the plate that goes under the plywood seam here, joining it to next piece. It was through riveted to the stringer tips that overlap just barely to next piece.
IMG_20230722_190746.jpg
Used straps to help get floor under. Was still a pain but a mallet helped. That and disconnecting the front partition walls from the center partition wall for extra clearance till it dropped in place fully.
IMG_20230722_171750.jpg
 

Attachments

  • IMG_20230722_183444.jpg
    IMG_20230722_183444.jpg
    3.4 MB · Views: 0

IslandExplorer

Petty Officer 1st Class
Joined
Oct 21, 2019
Messages
370
IMG_20230723_165314.jpgIMG_20230723_171339.jpgIMG_20230723_171910.jpgIMG_20230723_173916.jpgIMG_20230723_173933.jpgIMG_20230723_174039.jpgIMG_20230723_174310.jpgIMG_20230723_174339.jpgIMG_20230723_174344.jpgIMG_20230723_222430.jpgIMG_20230723_222430__01__01.jpg
This was a tough call- but after much deliberation last night I ultimately decided that due to deck height changes to open up floor space, it makes a lot of sense to also move my stairs all the way up to the cabin wall, thereby losing over 2' of the large trough/stairwell it would've had. This will increase the uninterrupted cockpit floor space as well as provide a huge increase of below deck volume for storage (since I am putting in loads of flotation in addition to the bigger fuel tanks that occupy much of the below floor area). This will be done in combination to switching to having a sliding cabin door that will start at the top of step 1. Goal is to make the door, additional steps, and new wall today.
 

IslandExplorer

Petty Officer 1st Class
Joined
Oct 21, 2019
Messages
370
Got a little sidetracked cutting the other plywood pieces for the cabin first. Door and stairs are next for sure.
IMG_20230724_141930.jpgIMG_20230724_143501.jpgIMG_20230724_143605.jpgIMG_20230724_152258.jpgIMG_20230724_152149.jpgIMG_20230724_153125.jpgIMG_20230724_154712.jpgIMG_20230724_155148.jpg
IMG_20230724_155344__01.jpgIMG_20230724_160247.jpgIMG_20230724_174256.jpgIMG_20230724_174408.jpg
IMG_20230724_174358.jpg
 

IslandExplorer

Petty Officer 1st Class
Joined
Oct 21, 2019
Messages
370
IMG_20230724_182737.jpgIMG_20230724_182743.jpgIMG_20230724_225030.jpgIMG_20230724_234819.jpgIMG_20230724_182730.jpgIMG_20230724_234842.jpgIMG_20230725_005512.jpgIMG_20230725_005530.jpgIMG_20230724_234842.jpg
Sliding door delayed again, had to finish floors in that area and get them riveted down good first. First two floor panels, flotation packed and permanently installed! Riveted in stairs last night too.
 
Top