1973 Starcraft SuperSport 16ft. restoration questions

piperjoe

Chief Petty Officer
Joined
Jul 11, 2013
Messages
563
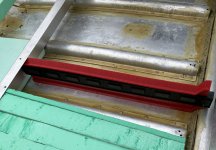
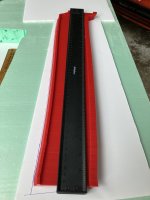
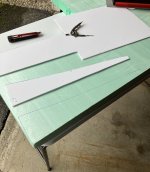
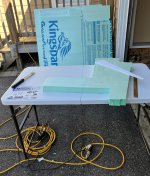
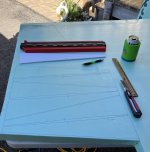
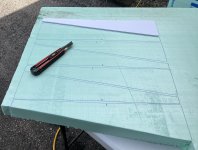
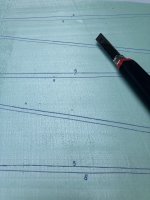
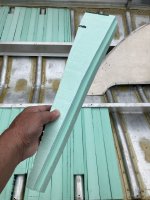
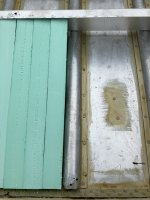
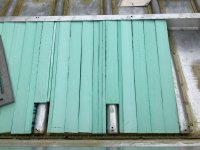
Took the opportunity this morning to try out the new contour gauge and I am pleased to find that the tool worked out fine. Doesn’t have a locking device to keep the numerous contour pins in place when the gauge is moved, however, I just pushed the pins together by pressing in on one end of the gauge and that works fine when transferring the contour pattern. I believe that this tool will pay for itself in time saved while drawing new floatation foam patterns. It started to rain again while we were with the boat so we decided to wait awhile for it to dry up. We presently have 93% humidity and misty fog…and it is warm outside. Feels better in the house with the air conditioning on. 🙂 Think I will go downstairs to the model room and work on one of my projects.

Safe boating,
Joe
 

Attachments

  • 46472546-DB95-42DB-A419-0D78178A924F.jpeg
    46472546-DB95-42DB-A419-0D78178A924F.jpeg
    1.9 MB · Views: 11
  • EEBE6463-EDA2-4497-B23B-8F848ACDCB45.jpeg
    EEBE6463-EDA2-4497-B23B-8F848ACDCB45.jpeg
    1.5 MB · Views: 11
  • AC9BB190-7751-4DEC-A73B-7B99433031BF.jpeg
    AC9BB190-7751-4DEC-A73B-7B99433031BF.jpeg
    1.8 MB · Views: 11
  • B7267660-6DDB-416F-8FB2-A52021B2E25A.jpeg
    B7267660-6DDB-416F-8FB2-A52021B2E25A.jpeg
    2.8 MB · Views: 10
  • 495F5348-4045-4040-AD87-F9D3529089B6.jpeg
    495F5348-4045-4040-AD87-F9D3529089B6.jpeg
    2.2 MB · Views: 10
  • D251BF61-AD2B-4004-BD9F-9EEB80AF2656.jpeg
    D251BF61-AD2B-4004-BD9F-9EEB80AF2656.jpeg
    1.2 MB · Views: 10
piperjoe

Chief Petty Officer
Joined
Jul 11, 2013
Messages
563
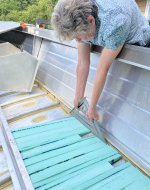
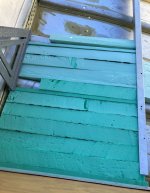
A beautiful day outside and the first time I have really felt good since the yellow jacket drama. The Admiral and I decided to start off slowly because I still am a bit unsteady on my feet. We are putting more floatation foam into the boat and plan to continue with this aspect of the boat restoration through the week and holiday weekend. Weather Man calling for sunshine and warm days through Labor Day. Will be good to spend some time outdoors with the Admiral and the boat. Hope you and yours have a safe and pleasant holiday weekend. 🙂

Safe boating,
Joe
 

Attachments

  • D55340D2-C2BD-4591-B2DA-7AA650F705D6.jpeg
    D55340D2-C2BD-4591-B2DA-7AA650F705D6.jpeg
    2.3 MB · Views: 8
  • 847C8121-F084-4240-9701-C8B22A4AA95B.jpeg
    847C8121-F084-4240-9701-C8B22A4AA95B.jpeg
    3.5 MB · Views: 8
  • 931D694D-26D2-4286-81C0-A2E107348916.jpeg
    931D694D-26D2-4286-81C0-A2E107348916.jpeg
    3.5 MB · Views: 8

piperjoe

Chief Petty Officer
Joined
Jul 11, 2013
Messages
563
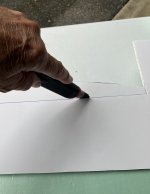
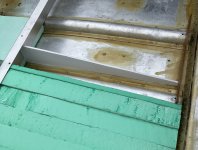
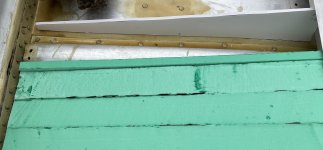
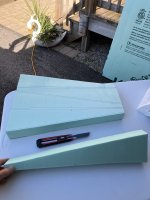
The Admiral and I are continuing to add the floatation foam into the boat. One of the things that struck me was the realization that the hot knife tool really wasn’t working well for the task at hand. Messy and didn’t make for a good, “follow the line”, melt/cut along the drawn pattern lines. I put the hot knife tool away and used a large snap blade knife instead and the work was actually more enjoyable with the cut line being much smoother and very narrow in width. Looking forward to adding more floatation foam into the boat tomorrow.

Safe boating,
Joe
 

Attachments

  • 748C4812-8362-4755-AD76-6C64C477BCAE.jpeg
    748C4812-8362-4755-AD76-6C64C477BCAE.jpeg
    2.3 MB · Views: 13
  • 08A5DFCE-5BD3-43B4-B04E-DA4ADDD607A2.jpeg
    08A5DFCE-5BD3-43B4-B04E-DA4ADDD607A2.jpeg
    1.4 MB · Views: 13
  • 0C30CF00-3C6E-4070-90E3-DD22C5661EEA.jpeg
    0C30CF00-3C6E-4070-90E3-DD22C5661EEA.jpeg
    2.5 MB · Views: 13

junkman306

Petty Officer 3rd Class
Joined
Sep 26, 2011
Messages
92
More floatation foam found it’s way into the boat today (I’ll spare you the photos 🤣). We are on a roll now!

Safe boating,
Joe
Oh no! I need these pics! Lol. You are doing exactly what I need to be doing so I am currently living vicariously through you. :ROFLMAO::ROFLMAO::ROFLMAO:
 

piperjoe

Chief Petty Officer
Joined
Jul 11, 2013
Messages
563
Oh no! I need these pics! Lol.

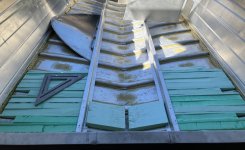
Well, if you insist! 😄. One thing to point out, too, is that some of the floatation foam pieces appear, in the photos, to be standing proud vertically and look to not present a uniform flat surface for the flooring. This is caused by the back surface mating tightly to the inside of the flooring rails. When the knife blade exits the foam it sometimes wants to wonder and leave a small “lip” on top of the foam pieces. It all presses down uniformly though and creates a nice flat surface top for the new flooring. If needed, I can always cut the foam interference down as required. 🙂

Safe boating,
Joe
 

piperjoe

Chief Petty Officer
Joined
Jul 11, 2013
Messages
563
Working on the boat with the Admiral today and she said she was enjoying it. Can’t beat that! We are cutting/adding more floatation foam. One tip: when cutting the actual floatation foam pieces from the foam board, mark a “B” on the bottom edge so that you can install the individual foam pieces correctly. And onward we go!

Safe boating,
Joe
 

Attachments

  • 66947D71-1906-405D-BF7B-C6ECB157B32A.jpeg
    66947D71-1906-405D-BF7B-C6ECB157B32A.jpeg
    2.2 MB · Views: 5
  • 9B0225ED-BFBF-49AD-9E50-BBA819D0F693.jpeg
    9B0225ED-BFBF-49AD-9E50-BBA819D0F693.jpeg
    2.5 MB · Views: 4

piperjoe

Chief Petty Officer
Joined
Jul 11, 2013
Messages
563
More floatation foam into the boat today. Can you say “HOT”? 93 degrees/95 deg. heat index with high humidity and clear blue skies. The Admiral and I came into the house; the cold watermelon tasted great and the air conditioning sure feels nice. We will visit the boat again tomorrow if all goes well.

Safe boating,
Joe
 

piperjoe

Chief Petty Officer
Joined
Jul 11, 2013
Messages
563
No work on the boat today because it is very hot and humid outside. 96 heat index! Too warm outdoors for the Admiral and me at our age, that’s for sure. Will see what tomorrow brings weather wise and we go from there.

Safe boating,
Joe
 

piperjoe

Chief Petty Officer
Joined
Jul 11, 2013
Messages
563
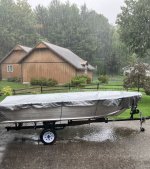
Nope…don’t think so today. ⛈

Safe boating,
Joe
 

Attachments

  • ED473B28-CF45-4B64-8063-FE7D5DC2701E.jpeg
    ED473B28-CF45-4B64-8063-FE7D5DC2701E.jpeg
    4.8 MB · Views: 7

piperjoe

Chief Petty Officer
Joined
Jul 11, 2013
Messages
563
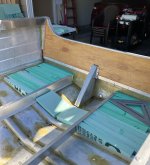
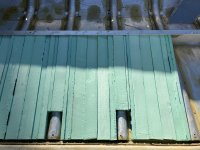
Beautiful afternoon with mild temperature and plenty of sunshine so we took the opportunity to put more floatation foam into the boat. Have to pay attention to the bottom rib curvatures now as part of the task. Glad I started placing the floatation foam at the stern first, and am working towards the bow, as I have the confidence now to continue the task.

Safe boating,
Joe
 

Attachments

  • C16C6DF7-0453-48CE-A36A-A600C916F35C.jpeg
    C16C6DF7-0453-48CE-A36A-A600C916F35C.jpeg
    3.8 MB · Views: 11
Joined
Aug 9, 2023
Messages
20
WOW Joe, You and Joyce are really blessed with truckloads of patience and ambition to tailor each individual piece of foam to its "forever home", even OVER the ribs! Beautiful job!
 

piperjoe

Chief Petty Officer
Joined
Jul 11, 2013
Messages
563
Thank you for the kind comment! We are doing our best to put as much foam under the flooring as we can and this is one way to do it. Takes some extra effort and time though I am pleased with the results, seeing as the Admiral and I are newcomers to boat restoration work. More floatation foam went into the boat today although I had to stop in order to get the lawn mowed. Tomorrow’s weather looks good so we should be back at it again.

Safe boating,
Joe
 

piperjoe

Chief Petty Officer
Joined
Jul 11, 2013
Messages
563
A question: as my original plywood flooring is in less than stellar condition and not fully intact, would it be better to be thinking of drilling all new rivet location holes through the new marine plywood/rib ends/flooring rails or should I make up rivet location patterns of the existing holes to lay over the new flooring? I have the drafting experience to draw up the patterns, however, I question whether that’s a sound idea. Comments?

Safe boating,
Joe
 

Moserkr

Chief Officer + Starmada Splash Of The Year 2021
Joined
Nov 23, 2020
Messages
869
Boats coming along nicely Joe. When I redid the floors in my boat, I tried to use existing holes that were already there. Problem is they had loosened up over the years and sometimes the rivets wouldnt grip anymore. I ended up putting half of them in new holes regardless, and I found out the hard way. So first Id check to see if the original holes are still tight enough to hold a rivet. By that I mean stick the tail in and if it has too much wiggle room, it needs a new hole. If not tight enough, just make new ones and then you know for sure they will hold for another 20-40 years.
 

piperjoe

Chief Petty Officer
Joined
Jul 11, 2013
Messages
563
Thanks for the quick response to my flooring rivets inquiry. Your advice is on par with my own thoughts regarding new rivet holes. I also plan to add a coating of 3M 5200 Marine Adhesive Sealant to the “tail” of each flooring rivet before inserting the new rivet through the flooring; that can add a bit of insurance towards a tightly sealed rivet draw against the aluminum and wood.

Safe boating,
Joe
 

piperjoe

Chief Petty Officer
Joined
Jul 11, 2013
Messages
563
Had one of those palm slap to the forehead moments this afternoon while adding more floatation foam into the boat. Instead of cutting the foam edge off at an angle (which didn’t always turn out so good on the first knife pass 😲), where the foam piece sits against the riveted rib flange, I decided to just right-angle cut the edge off the foam. A 5/8” horizontal cut on the bottom side and a 3/8” vertical intersecting cut does the trick. Quick to do and the foam piece sits correctly and neatly on the hull. Just a little tip for those who are interested. 🙂

Safe boating,
Joe
 

Attachments

  • 7BFB240F-22DE-4370-AB51-AFC043816E00.jpeg
    7BFB240F-22DE-4370-AB51-AFC043816E00.jpeg
    1.5 MB · Views: 4
  • 7509AA05-8DC1-45B3-9462-C9E1A3C956C0.jpeg
    7509AA05-8DC1-45B3-9462-C9E1A3C956C0.jpeg
    1.9 MB · Views: 4
  • B1E07F19-9FAF-4BB0-B1EA-543A8C33ECE0.jpeg
    B1E07F19-9FAF-4BB0-B1EA-543A8C33ECE0.jpeg
    3.5 MB · Views: 4

MNhunter1

Lieutenant Junior Grade
Joined
May 12, 2014
Messages
1,058
A question: as my original plywood flooring is in less than stellar condition and not fully intact, would it be better to be thinking of drilling all new rivet location holes through the new marine plywood/rib ends/flooring rails or should I make up rivet location patterns of the existing holes to lay over the new flooring? I have the drafting experience to draw up the patterns, however, I question whether that’s a sound idea. Comments?

Safe boating,
Joe
I would strongly suggest forgoing the existing hole locations and just drill new holes. The thought of trying to line up all those existing holes for a tight rivet fit while working with 3M5200 gives me a headache and anxiety. It's much more efficient to drill the new holes and I do not believe you are compromising any structural integrity by doing so. May be even improving the integrity with the new(tight) holes.
 

piperjoe

Chief Petty Officer
Joined
Jul 11, 2013
Messages
563
I would strongly suggest forgoing the existing hole locations and just drill new holes.
Where’s the FUN in doing that! 😜😂
May be even improving the integrity with the new(tight) holes.
Unless I manage to drill a new hole through the bottom of the boat at the rib ends! 😲😩

Seriously, new holes sounds like the best way to get the new marine plywood attached. Here is the plan: drill a new hole for the rivet, brush the 3M5200 onto the rivet shank and bottom, push the rivet into the hole (some of the 5200 will fill the void between the new rivet and wood), attach pop rivet tool and “fire away!”. Wipe off all excess 5200 from top of flooring. Repeat as required.

Safe boating,
Joe
 
Top