1972 Checkmate MX-15 Rebuild

kcassells

Fleet Admiral
Joined
Oct 16, 2012
Messages
8,715
Right there with ya! Boats looking real nice!!
images
 

Willyclay

Captain
Joined
Sep 8, 2006
Messages
3,257
Had lunch with my bud who owned a Checkmate like yours with a TOP 150 and told him about your "find". He recalled 62MPH (speedo) at 5,600RPM with his aluminum prop and thinks you will have a lot of fun with the Chrysler 105. I like following all your threads. Good luck!
 

zool

Captain
Joined
Aug 19, 2012
Messages
3,432
OK guys, im gonna re-activate this thread, because im gonna start working on this project again, in conjunction with the Century CC work im doing.

Im at the point where im giving up on the Chrysler 105. Ive been soaking the cylinders for a long long time, but she just rocks a bit, about 1/4 inch......so im thinking theres something wrong in there, aside from just stuck pistons. I may tear it down just to see what the problem actually is.

My new plan is to eventually move the Yamaha 85 from the center console, to this rig, and get a new 115 for the CC. Ill run the 85 on the CC for a season next summer.

Ive bought almost everything I need to upgrade the CC, so now I can throw some coin at this. I have 2 boat slips at my dock so this and the CC will be a good mix.

Ill probably make a new thread for the CC upgrades and refurbish.
 

zool

Captain
Joined
Aug 19, 2012
Messages
3,432
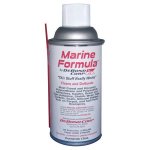
Today I spent some time removing hardware from the cap, while its lowered temporarily on the hull. Small stuff was coming off fine, but the brackets for the ski pylon appear to be adhered with either 5200 or some 2 part adhesive. Xylene didnt budge it, so I ordered DeBond , which was formulated to remove 5200. Pricy for a small can, but if it saves time from fairing ripped gel, it will be worth it.
1627424059947.jpeg
 

zool

Captain
Joined
Aug 19, 2012
Messages
3,432
Thanks Arch!....

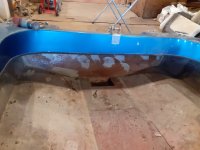
Today I worked on the fuel tank a little, and was figuring how to lay out the tank cradle over the pit. Im taking your suggestions from a while ago and going with the Faria gauges along with the depth gauge with in hull transducer, mounted in the pit with the bilge pump. I was wondering if you glassed in a mounting pad to level off the pit, or just mounted them on the slight hull angle? The tank will have to mount directly over them, but thats ok. FYI, I tried to look back in your Miss Morgan thread, but the link in ur sig goes somewhere else lol.

1627598963397.jpeg
Im starting from the stern, gotta glass in the transom and pit, then design the cradle and rear bench seat setup.
 

archbuilder

Vice Admiral
Joined
Sep 12, 2009
Messages
5,697
So the head unit came with a angled housing that you were supposed to glue to the floor with 5200 or sillycone I think. then fill it with rv antifreeze I think, then bolt in the sounding head. The idea was that you would orient the head so that it would be perpendicular to the bottom of the lake / ocean floor when on plane. Didn't work so good (antifreeze leaked out) so I siliconed the head directly to the fiberglass hull. There isn't enough slope in my hull to really matter anyhow. That sort of worked but the silicone threw off the sounding some. So this sounds a bit wacky, but I just put a thick layer of west systems six-10 epoxy on the bottom of the hull. Taking care to not have any voids in it, then just squised the sounding head down in it. Works great, changing it out will envolve some grinding and hacking lol. I do want to clairfy mine does not require a hole in the hull. They have one that does require that, which yours might. Mine just shoots the sound waves through the hull, not directly in the water. there is no through hole in the hull. Termenology on this is a bit confusing.
 

zool

Captain
Joined
Aug 19, 2012
Messages
3,432
So the head unit came with a angled housing that you were supposed to glue to the floor with 5200 or sillycone I think. then fill it with rv antifreeze I think, then bolt in the sounding head. The idea was that you would orient the head so that it would be perpendicular to the bottom of the lake / ocean floor when on plane. Didn't work so good (antifreeze leaked out) so I siliconed the head directly to the fiberglass hull. There isn't enough slope in my hull to really matter anyhow. That sort of worked but the silicone threw off the sounding some. So this sounds a bit wacky, but I just put a thick layer of west systems six-10 epoxy on the bottom of the hull. Taking care to not have any voids in it, then just squised the sounding head down in it. Works great, changing it out will envolve some grinding and hacking lol. I do want to clairfy mine does not require a hole in the hull. They have one that does require that, which yours might. Mine just shoots the sound waves through the hull, not directly in the water. there is no through hole in the hull. Termenology on this is a bit confusing.
Ok, i get it, they offered an epoxy mix to mount it to the hull at checkout...and yup, its the "in Hull" kit as opposed to the "Thru-HUll kit.

It just comes down to how high the pump and ducer stand proud...may make the rear seat have to be high, because the tank is wider that the splashwell. I have about 17 inches from the pit bottom, to the cap bottom, and the tank is 8" high, and the pump is 3.5" high IIRC. That leaves a 3" cradle and bringe the rear bench height just under the cap. Im thinking skip the rear bench, and just build a frame for a sunpad at cap level....I think 2 ppl is enough in this little thing.
 

zool

Captain
Joined
Aug 19, 2012
Messages
3,432
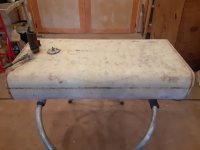
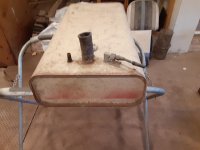
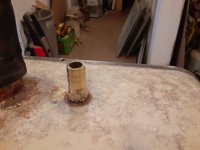
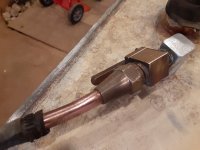
Heres the tank as it came out of the bow, im gonna trace the contour of the tank on plywood, and use them as mini stringers with straps and neoprene isolation strips.

1627605018759.jpeg
1627605073482.jpeg

I took a wire wheel, and the surface rust came right off, the brass and copper fittings are starting to clean up fine and appear serviceable.

1627605257383.jpeg

1627605281957.jpeg
 

zool

Captain
Joined
Aug 19, 2012
Messages
3,432
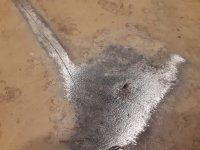
Theres one crater on the top that ill fill with jb weld.

1627605440385.jpeg

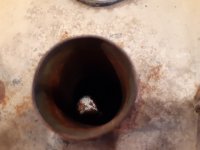
The inside has some surface rust too, so ill give it a xylene soak,
1627605584939.jpeg
 
Top