1971 Starcraft Falcon V14 - Merc400 (Pic heavy)

FoolishOne

Seaman Apprentice
Joined
Jul 28, 2019
Messages
40
I taped off the areas needing repair. Shot primer and white today. Heading out of town for a week so there's going to be a break in the progress. Not that anyone wants to hear about my devil wood deck but its bolted to the bench (under the tarp in the background) while the glue in the seams cures.

7wijQqt.jpg


56gNM9e.jpg


E2uk9mV.jpg


nuyj8xy.jpg
 

Watermann

Starmada Splash of the Year 2014
Joined
Jan 12, 2013
Messages
13,798
Oh man painting outside like that, I've done it once and it about made me crazy with all the bugs and crud. I think oil based paint is crack for bugs :lol:

My hats off to guys who can pull it off, maybe that dueling tree in the background helps relieve some stress too!

I'd imagine your deck choice won't cause you grief if the inside of the boat isn't allowed to be saturated with water, soggy and left to the elements to cause leaching of the copper... but that's always the reason guys want PT wood, so it won't rot when they leave it to the elements for years on end. ;)
 

FoolishOne

Seaman Apprentice
Joined
Jul 28, 2019
Messages
40
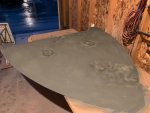
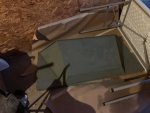
Rained the other day so I worked on a couple pieces in the garage. I cut some aluminum to back the holes drilled into the bow over the years to mount various things. These are held in place with jb weld. I’m not sure if I should use gluvit or jb weld to fill the holes on the top side. I imagine either would work fine but I’m not familiar with gluvit.

wAAACH5BAEKAAAALAAAAAABAAEAAAICRAEAOw==


I primed the underside of the splash well. It will be painted white along with everything else.

wAAACH5BAEKAAAALAAAAAABAAEAAAICRAEAOw==


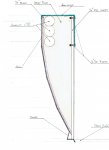
I would like to hear anyone’s thoughts about this plan. I’m thinking of using 1x3 verticals from the floor up to the gunwales to frame it and then sheeting with a composite board. Likely this would be pvc panel. Then running a couple of conduits in this wall space for controls and electric. I would like to spray foam the entire space inside of these walls but I’m concerned that this would prevent any future access to the hull. A solution I considered is to lay 1/4” foam board against the hull and tapping all of the seams and joints before spraying foam. This way the spray foam will adhere to the foam board instead of the hull and could be removed with the gunwales.


wAAACH5BAEKAAAALAAAAAABAAEAAAICRAEAOw==
 

FoolishOne

Seaman Apprentice
Joined
Jul 28, 2019
Messages
40
[No message]
 

Attachments

  • photo318786.jpg
    photo318786.jpg
    52.8 KB · Views: 4
  • photo318787.jpg
    photo318787.jpg
    45.4 KB · Views: 4
  • photo318800.jpg
    photo318800.jpg
    191.6 KB · Views: 4

Watermann

Starmada Splash of the Year 2014
Joined
Jan 12, 2013
Messages
13,798
Gluvit is not designed for filling holes, it's too runny.

Not sure about the 1x3 vertical, are you talking about using dimensional wood. If so it'is not ideal, most of us use aluminum to make our frames and supports..

What kind of foam are you spraying? The stuff for filling small voids like around doors?
 

jbcurt00

Moderator
Staff member
Joined
Oct 25, 2011
Messages
25,061
If I understand your rendering, I'd have your 1/2in sheet land on the plywood dexk, not at the edge of the chine.

Chine cracks are commom problem from rotten decks not adding support for the original gunwale side panels.

Your new side panels should also be fastened to.the deck w an aluminum angle, similar to original.

And I had the same questions as Watermann does...

Doesnt look like the 1X3s are shoqm in your rendering....
 

FoolishOne

Seaman Apprentice
Joined
Jul 28, 2019
Messages
40
Watermann said:
Gluvit is not designed for filling holes, it's too runny.

Not sure about the 1x3 vertical, are you talking about using dimensional wood. If so it'is not ideal, most of us use aluminum to make our frames and supports..

What kind of foam are you spraying? The stuff for filling small voids like around doors?

I've dropped the 1x3s entirely.

I was considering two-part polyurethane foam kits. The rep. I spoke with for a previous project (ice shack) confirmed the foam is closed cell and does not wick water (beyond the open pores on the surface of course).

jbcurt00 said:
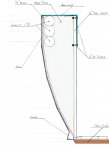
If I understand your rendering, I'd have your 1/2in sheet land on the plywood dexk, not at the edge of the chine.

Chine cracks are commom problem from rotten decks not adding support for the original gunwale side panels.

Your new side panels should also be fastened to.the deck w an aluminum angle, similar to original.

Thank you for the advice. I'm not sure how accurate my drawing actually is given that the boat is sitting about 45min from my house.

I actually did not know that the boat had side panels originally. There were none when I started working on it and I'm not seeing any in the old pictures from when my brother in law picked it up either.

I uploaded two edited pictures with the side wall shifted to rest on the deck. One shows a piece of 1/2" as an L bracket. The other shows an L bracket attached to the back side of the side wall and fixed to the deck with flooring over the top.

Not sure how comfortable I am with an exposed aluminum edge on the floor around bare feet. I suppose I could fold it back over but that still leaves the heads of the fasteners.

jbcurt00 said:
And I had the same questions as Watermann does...

Doesnt look like the 1X3s are shoqm in your rendering....

1x3s were not in the drawing, I don't think they serve much purpose.
 

Attachments

  • photo318824.jpg
    photo318824.jpg
    383.9 KB · Views: 2
  • photo318825.jpg
    photo318825.jpg
    392.4 KB · Views: 2

Watermann

Starmada Splash of the Year 2014
Joined
Jan 12, 2013
Messages
13,798
The angle AL would screw to the deck behind the side panel and then be riveted through the panel into the angle using large flange rivets making a smooth clean install.
 

FoolishOne

Seaman Apprentice
Joined
Jul 28, 2019
Messages
40
The angle AL would screw to the deck behind the side panel and then be riveted through the panel into the angle using large flange rivets making a smooth clean install.

Gotcha! Thanks!

If I went with aluminum framing what stock would be appropriate? I have several hundred feet of .027 coil and some 2” round schedule 80 on hand right now. The .027 could go in the brake to make something more structural (square tube?).
 

Watermann

Starmada Splash of the Year 2014
Joined
Jan 12, 2013
Messages
13,798
.027 is pretty light, may have to double it but yeah sure it could work.
 

FoolishOne

Seaman Apprentice
Joined
Jul 28, 2019
Messages
40
Been a couple of weeks since I have posted anything on here. I got side-tracked from the boat with a few other projects and with deer season starting soon my attention has been elsewhere.

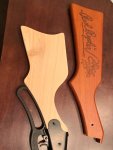
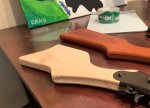
I made up a new stock for my sons BB gun, raising the comb and shortening the length of pull. I also did a "trigger job" since he needed to use 2 fingers to pull the factory trigger back. He's been practicing almost everyday now.

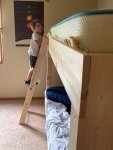
My son has been asking for a bunk bed, and my wife and I have been wanting a better solution for a guest bed. We worked up some plans and built a bunk bed that can un-stack. The top and bottom can sit side-by-side to create a king bed. They can also sit separate to have two twinXL or of course stacked for the bunk-bed. It wound up taking more time than I had expected. Got a couple pictures from the first test fitting

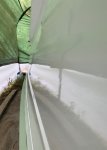
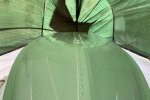
For the BOAT, I built a hoop house to work in ~ 20' x 10'. It keeps the bugs and rain out. The bottom couple of feet are covered with a mesh fabric (the type used for lawn chairs) since my mother-in-law had a full bolt of it. Laid out 4 sheets of ply and drove 9 fence posts, 4 per long side and 1 end post. Fastened 1in pvc to a fence post and bent them over to attach to the opposite fence post - creating the arch. Covered with a big tarp. Wound up buying a new tarp and putting that over the first since it was pretty old and weathered. Total cost for the shed was about 26$ since I had everything else on hand already.

I've finished the hull repairs - tightening leaky rivets and resealing the keel seam with gluvit. I have laid 3 coats of white mixed 1:1 rustoleum pro grade and acetone from an HVLP sprayer. Allowed each coat to cure for 24hr or more then wetsanded. The first coat was laid thicker than the others so I would actually have something to sand - still went through the paint in a couple of spots which meant I needed to re-prep those areas with SE primer before the next coat. I was sanding with 400 grit. The next two coats were laid thinner since there was some thickness to actually work with now. I switched to 800 grit and wetsanded both layers. The final coat including hardener has not been sprayed yet. That will be laid this weekend along with the blue stripe. Also, on the agenda for this weekend is to get the bow cover sprayed as well as the gun wales. (Pictures below)

The following weekend I will get the boat turned back over. Lay in the foam and floor. Install the transom. Install bow cover and gun wales. Hopefully have time to get the new dash(?) cut and mounted. Possibly start on the front seat boxes.

At this point, I kind of have a choice. I can either set aside some ideas - such as the live-well and get the boat finished in time to fish the fall walleye or I can just say I won't be able to finish by then and this will turn into a winter project.

I'm leaning towards trying to get on the water ASAP and putting some projects on hold until we get ice.
 

Attachments

  • photo320106.jpg
    photo320106.jpg
    949.7 KB · Views: 4
  • photo320107.jpg
    photo320107.jpg
    1 MB · Views: 3
  • photo320117.jpg
    photo320117.jpg
    1.8 MB · Views: 3
  • photo320118.jpg
    photo320118.jpg
    1.8 MB · Views: 3
  • photo320133.jpg
    photo320133.jpg
    1 MB · Views: 4
  • photo320134.jpg
    photo320134.jpg
    943.3 KB · Views: 4
  • photo320135.jpg
    photo320135.jpg
    1.4 MB · Views: 4

Watermann

Starmada Splash of the Year 2014
Joined
Jan 12, 2013
Messages
13,798
Oh man lots of paint sanding, one of my least favorite things to do but it always seems to be a necessary evil. From what I can see you've got some shine going on :thumb:
 
Top