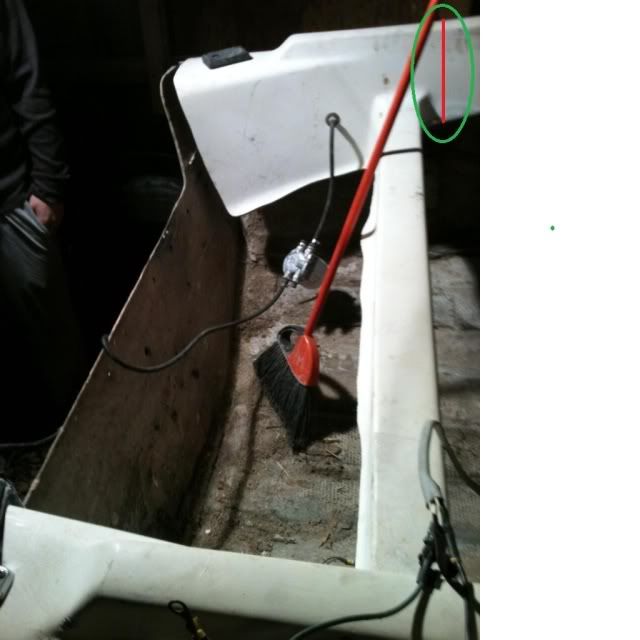
1968 Larson rebuild

bp1313

Petty Officer 3rd Class
Joined
Oct 26, 2012
Messages
84
Re: 1968 Larson deck help

Re: 1968 Larson deck help

funny... I was so in denial when I first started taking this thing apart. "yeah...it looks pretty solid. Maybe I can just replace the decking." "the foam feels dry and the stringers seem okay." psh... The foam was soaked through and through. The planks on top of the foam were rotten as hell. There wasn't really stringers in the boat to begin with. I can only hope that I wasn't/am the only one that goes through the denial phase with their boat project :)

Either way... I think I'll have the hull ground completely out after my next session. I like the idea of cleaning the whole lip out, but I'm not sure if I'm up for it and if I can put it back together strong I'll probably leave it. Now about the transom... There's no flex at all in it that I can tell. I can hang on the motor and I do see any flexing. A sub par job with the filleting on the starboard side left a small gap and yeah...water on the wood. I'm going to drill some test holes next time out to see how deep it's in there and then decide what to do at that time. The rest of it looks like it's sealed up pretty good and I loathe the idea of having to replace it. My brother is totally trying to talk me out of replacing it, but he's young and just wants to get on the water for as little time and $$ as possible. I'd prefer to spend a little more of each to make sure this thing is totally sound and be able to tell the future owner that it's rock solid.

I'll make sure to take lots of pics after the next go around and post them up here. My brother and I are going to pull her out of the garage and give the inside a good flush. That dust is crazy. If someone could just come up with a great use for the dust I tell ya...

Oh...one last thing. I think I came up with the name for this old girl. I'm thinking..."Bad Timing" :) My wive loves the idea and It's because she coined it by telling me that over and over before I bought this thing. No joke...I brought this thing home during my first week of recent paternity leave. Haha!! talk about an early mid life crisis over here. She looked at it when I brought it home and it didn't look all that bad. She looked at it just the other day...rolled her eyes at me started to walk out of the garage. I think she said "that thing looks like a piece of #@$%." Just wait honey...just wait :)

Again...thanks for all the help. I really appreciate the generous advice and patience everyone has with the newbies :)
 

bp1313

Petty Officer 3rd Class
Joined
Oct 26, 2012
Messages
84
Re: 1968 Larson deck help

Re: 1968 Larson deck help

And one pic for good measure. Just a tiny Coho I caught this last summer on the South East side of Anderson Island in South Puget Sound. I went out on my buddy's boat and I got the boat bug again. May have been tiny (4.5 lbs)...but it tasted fantastic. With any luck, I'll be out doing that this coming summer on "Bad Timing." :)

IMG_0476.jpg
 

greenbush future

Lieutenant Commander
Joined
Aug 28, 2009
Messages
1,814
Re: 1968 Larson deck help

Re: 1968 Larson deck help

That's a good eater sized fish, thje salmon we catch here in the great lakes do not hold a candle to the salt water fish. Best thing we can do is smoke em here, but some do bake or broil or grill.
The boat looks like a big project, as is mine- "61 Lone Star glass, take your time. sounds like you want it done right. Let's hope your transom is rock solid and doesn't need to come out, that alone will save you a bunch. You can also save on pour in foam, by getting the pink slabs from home depot. Just an idea to help on the wallet.
 

Woodonglass

Supreme Mariner
Joined
Dec 29, 2009
Messages
25,927
Re: 1968 Larson deck help

Re: 1968 Larson deck help

Nice fish!!! I highly agree with your Brother. Core sample the transom and make 100% certain it's in perfect condition. If not...Replace it. You can remove the lip or leave it...Your choice. ONce the new deck is glassed in only you and us will know it's there. the First link in my signature below has some helpful drawings and details. I Like your Boat!!!!
 

bp1313

Petty Officer 3rd Class
Joined
Oct 26, 2012
Messages
84
Re: 1968 Larson deck help

Re: 1968 Larson deck help

love the quote wog
 

bp1313

Petty Officer 3rd Class
Joined
Oct 26, 2012
Messages
84
Re: 1968 Larson deck help

Re: 1968 Larson deck help

So here's some more pics I took today.

here's a pic looking back at the transom
SAM_0986.jpg


here's a close up of the starboard side of the transom and what I believe is the problem area.
SAM_0992.jpg


It's hard to see in the picture, but the dark stuff on the bottom is a pile of shavings that came out of the holes I drilled. I think I already know what I have to do...so asking might be moot. Most of the transom looks okay and comes out light colored dry wood, but that lower corner produces dark, moisture filled shavings. It almost looks like there was no PB fillet or tabbing at all. This allowed water to get between the hull and the bottom of the transom wood. there's a 1/8th inch gap between them at this point. I have No doubt that there's moisture all through that area. Even though the wood might last for a handful of years if I just put a band aid on it... that nagging feeling that I'm doing the wrong thing and cutting a corner is telling me to suck it up and replace it. I mean really? The whole thing is stripped down to the hull...why put a real nice deck, stringers, fiberglass job, and duraback bedliner coat on this baby just to have to rip it up in the future?

So here are a few things I'm wondering...

What's the best way to remove the transom wood? I'm sure I would just get in there and start tearing it out, but any experienced people with some tricks might be nice to save time. Circular saw set to the right depth with a good chisel and hammer probably..

cutting an access hole in the splashwell... Coolbri cut one for his rebuilt and I'm wondering if it's necessary. I bet it's easier to remove everything from the top and probably easier to put back in. I could probably do it without, but that only saves me some work on refiberglassing the hole i cut back into place.

so... off will come the motor, and out comes the transom. Such is life with a 40+ year old boat that wasn't treated with care. I'm not sure about flipping her over and giving the bottom a nice new finish, but I'll deal with that after I rebound from the realization that this is nothing short of a complete rebuild. Think positive...I know this thing will be solid as a rock when she's done and I'll know it inside and out (literally.) The experience/journey is the whole point and will be the silver lining with the rebuilding of...."Bad timing." I've got a bet with my father-in-law that this thing is splash tested by June 2013. He lives on Puget Sound and I plan on honking the horn and picking him up at the beginning of the summer with my hand out for his crisp $100 bill. :)

I'll keep the pics coming and thanks for all the advice and feedback.
 

Woodonglass

Supreme Mariner
Joined
Dec 29, 2009
Messages
25,927
Re: 1968 Larson deck help

Re: 1968 Larson deck help

determine the thickness of your transom. Set a Circular saw to 1/32" less than that and cut a series of kerfs both vertically and horizontally about 2" square. A hammer and chisel will to the rest pretty easily. Finish up with a Grinder an 24 grit discs.
 

bp1313

Petty Officer 3rd Class
Joined
Oct 26, 2012
Messages
84
Re: 1968 Larson deck help

Re: 1968 Larson deck help

That looks like the ticket. What do you think about cutting the splashwell? There's no way to get all the wood out and back in without removing the cap. I can make a cut in the splashwell like coolbri did, but I think I can get it done without doing that. If I work from the inside and cut horizontally from the upper edge toward the sides, I can remove that without cutting the splashwell or removing the cap. I could also get the new piece back in. This will leave the old wood (which is dry) in the corners that flare further out and upward. I don't think that this is structural, but correct me if I'm wrong and the whole piece needs to be taken out. I can drill some holes and use some hardware and 2x4's as a clamping mechanism to hold it down while the PB cures. If I seal up the seam really well from moisture and it's not structural...do you see a problem with this? I read your post about transom replacement and it looks good. Lots of glass on that bad boy!

Till next time and TY
 

coolbri70

Lieutenant Commander
Joined
Oct 6, 2011
Messages
1,554
Re: 1968 Larson deck help

Re: 1968 Larson deck help

it was easy for me to decide to cut the splashwell as the motor hanging on the sagging transom had ripped a crack across it so my splashwell was halfway cut allready:facepalm:. i used the claw end of a hammer, the hooked end of a wrecking bar, and a big hammer to get the transom out, the glass was thin and brittle on the inside i cut it out and redid it thicker. the upper corners on mine were separate pieces encased in their own glass they were solid and dry so i left them be,
 

bp1313

Petty Officer 3rd Class
Joined
Oct 26, 2012
Messages
84
Re: 1968 Larson deck help

Re: 1968 Larson deck help

Good point. The decision was pretty much already made for you :) Good to know that those upper side pieces were separate in yours. That reinforces the idea that it's not necessary to mess with them when redoing the transom for structural reasons. I'm going to try to get the transom out and back in without cutting the access hatch in the splash well.

Alright...Looks like the plan is coming together. Now I just have to find the time. The good part is...it's pretty cheap to tear her apart and there still more of that to go. Once it's all out and clean...then we get to the fun part that costs some $$.

For the rebuild...

I'm going to fabricate the transom and install it following the instructions from WOG's signature link to the "T." I'm not going to try to recreate an updated version of the old stringer system. I'm going to go with two full length stringers made from 3/4 ply on either side of the keel. I'll run 3 sets of bulkhead braces spaced from front to back making sure that one of them find it's way under the front seats and all of them have limber holes for drainage. All of this will follow as closely as possible the instructions in the same signature link from WOG as well. I gotta say... Dang it's awesome to have access to this forum and be able to pick the brains of people who done it before. I can only imagine what this would have turned out like if this info wasn't available. After the deck is glassed in... I'm guessing somewhere between 15 and 20 cubic feet of pour foam will be needed (strictly from an eyeball measurement :) )

I can probably stop there since I just listed months worth of effort and I'm getting far too ahead of myself. Pics will come as I have them. Thank you to all. 7 months till boating season!!
 

bp1313

Petty Officer 3rd Class
Joined
Oct 26, 2012
Messages
84
Re: 1968 Larson deck help

Re: 1968 Larson deck help

Took the motor off today and washed the dust out of it. Looks like I'm going to have to cut the access into the splash well like you did with yours coolbri. I don't think that I can get the new transom back in and clamp it right without having better access.

I made a stand for the motor out of some scrap wood I had. Worked pretty well...

IMG_0717.jpg


Came up with a cool idea for taking the motor off. I backed the boat into the garage just under the truss. I lowered the tongue of the trailer to get the motor as high as possible and then tied it up as best I could. After I pulled the bolts out...I lifted up on the tongue of the trailer until the motor came off. Then it was a matter of getting the stand underneath and putting it on. Worked pretty well and I didn't have to do any fancy work with pullies or a hoist.

IMG_0716.jpg


till next time :)
 

bp1313

Petty Officer 3rd Class
Joined
Oct 26, 2012
Messages
84
Re: 1968 Larson deck help

Re: 1968 Larson deck help

Update...

The transom is out, the windshield is removed, almost all the hardware has been removed from the boat (buttons for the cover, rod holders, antenna, etc.), and the splash well was cut to allow access to the back.

I've got to take some more recent pics, but these are pretty close to where I'm at:

IMG_0736.jpg


IMG_0732.jpg


My brother went and cut the splash well out while I was at work. It isn't exactly how I would have done it...but it's all fixable and it should look good by the time we're done. Like I should complain considering he's put a bunch of work in tearing it down. I'll just remain thankful :) One more grinding session and the back of the boat will be ready for the new transom. There are still some minor spots that will need to be touched up and/or cleaned prior to installing stringers and deck...but we're almost done breaking her down. A few more stubborn pieces of hardware to remove and the cap will be almost down to bare bones.

Hey Coolbri... any info on how you reattached the splash well on yours? (what materials did you use, did you glass the bottom and then fill the top? did you glass the top? etc.) Any info would be great. Thanks.

I'll keep checking in as I go.

Thanks,
 

coolbri70

Lieutenant Commander
Joined
Oct 6, 2011
Messages
1,554
Re: 1968 Larson deck help

Re: 1968 Larson deck help

bottom first with resin dripping down my forearms:facepalm: used csm with poly resin, then the top with the same. i like the csm for this it kinda floats in the resin and fills gaps the big holes for the old steering linkage and fuel cap, i used cloth on the inside, then csm to fill it in, sand it smooth paint it and now i can't tell where the holes were. oh and i had to do all kinds of propping with boards and weighing down to get the peices to line up so i could get it to stay while i glassed it
 

Woodonglass

Supreme Mariner
Joined
Dec 29, 2009
Messages
25,927
Re: 1968 Larson rebuild

Now I'm just an...
OldDumbOkie.jpg
, but I would cut the splashwell at the gunwales. This way you will have much more room and you can do the repairs to it "On the Bench" Which will be much easier. Fixing the cuts on the gunwales on the re-install is a real easy process.:thumb:


cuttingsplashwell.jpg
 

bp1313

Petty Officer 3rd Class
Joined
Oct 26, 2012
Messages
84
Re: 1968 Larson rebuild

It's coming off. I visualized myself laying under that thing trying to patch it up with the current cut.... no thank you. I'll fix it on the bench for sure.

Thanks to both of you.
 

bp1313

Petty Officer 3rd Class
Joined
Oct 26, 2012
Messages
84
Re: 1968 Larson rebuild

It hasn't come off yet and I'm not so sure it will anymore. I'll worry about it if it becomes an issue later. For now....

I purchased the wood for the transom, titebond III, some glass mat, some 1.5 csm, and enough resin to do the transom. I've cut both layers of the plywood and their ready to clean up and laminate together. Here's a couple pics from fitting the first piece that I used as a template to cut the 2nd.

IMG_0751_zps92e9f268.jpg


and another..

IMG_0750_zpsceb7aa76.jpg


If I can get the time this weekend..I hope to have the wood prepped and ready to attach to the boat. I still need to get some cabosil (or some other filler) before I can do it.

I'll keep ya posted
 

Woodonglass

Supreme Mariner
Joined
Dec 29, 2009
Messages
25,927
Re: 1968 Larson rebuild

Transom fits well! Hope you find the time to get it installed.
 

bp1313

Petty Officer 3rd Class
Joined
Oct 26, 2012
Messages
84
Re: 1968 Larson rebuild

I got both pieces for the transom cut out, prepped, and laminated together on Friday. I used Titebond III very liberally between the two pieces after a good sanding and screwed it all down tight with deck screws. That set up overnight and yesterday then it got cleaned up. Hopefully these pics work out. PB was giving me fits trying to edit them to size.

IMG_0754_zps5f271ba4.jpg


IMG_0755_zps7fc3cdfd.jpg


I removed the screws, sanded the whole thing down nicely, and figured why not try and put a layer of glass on it :) This was my first go with glassing. I've read a whole bunch...but experience and know how comes from doing right?

I went with a layer of CSM on the back of the transom board to start. After cleaning the are with acetone I measured and cut the CSM that I would need. I put that aside and then mixed up 20oz of resin to get started. We (my brother and I...and a 2nd hand is great!) wet out the back of the board liberally and gave that time to soak in. Then we put the CSM down and wet the whole thing out with the remaining resin. I had to mix another 12oz (which was a couple oz too much) to make sure we had enough resin to finish. I didn't have a roller...so I used some flat spreaders from HF and they worked great. Here are the pics:

IMG_0756_zps582b2c80.jpg


IMG_0757_zpse3cf2ab7.jpg


It's all set up now, no bubbles, and I'm fairly pleased with the result. Next step is the front side and then putting it in! I'll keep ya posted.
 

bp1313

Petty Officer 3rd Class
Joined
Oct 26, 2012
Messages
84
Re: 1968 Larson rebuild

Been awhile since I posted. I hope everyone enjoyed their holidays and is doing well in general. here's the progress since last post...

The transom was glassed over with a layer of CSM on both sides. I did a separate job around the edges to make sure I had as complete a seal as possible before mounting. I clamped it in place on the boat and drilled my motor mount holes with the intent of using those as the clamp holes as well.

I have to admit...I tried using PL premium to set the transom in the first time. (the pics show that) I decided to give it a try after the research I had done. There's plenty of people that are against it...but there's also some that have used it successfully. The unfortunate part is I screwed up and don't know if it would have worked if I did it right. I got it all set, glued, and clamped into place, but I was in a rush and failed to get the heat going in the garage. It stayed 30 or under for the next 3 days and it most definitely didn't set up. I had to remove everything and clean it all out before trying again.

This time I mixed up peanut butter and put it in that way. I used heaters this go around and it was solid as a rock in no time. I've tabbed it in, but I've still got to glass a full layer of mat over it before I move on to the stringers.j I'll grind a couple of bubbles down, but overall it looks really good. these pics are actually of the first failed attempt with PL. I'll get some newer ones that show the successful job using PB resin.

IMG_0805_zps078034bf.jpg


IMG_0806_zps092644c3.jpg


32835bb1-d77a-4e56-936e-61cf80d0e4fb_zpsd6959959.jpg
 

bp1313

Petty Officer 3rd Class
Joined
Oct 26, 2012
Messages
84
Re: 1968 Larson rebuild

Another progress report:

Stringers were fabricated and glassed. Here's a pic of the starboard stringer being tabbed in (blurry... sorry)'
IMG_0905_zps2ef4116e.jpg


After both stringers were glassed in place... we measured and cut the deck boards to see if the level of the stringers was accurate. Here's the start of that and it also shows the stringers.
IMG_0912_zpsc11e2b20.jpg


Here's with all the deck boards laying in the boat

IMG_0919_zps8a52e028.jpg


We used PB and 1708 to tab pretty much everything. I'm going to put another larger piece of tabbing in place during the next round of glassing. Instead of buying the 12' planks for the stringers... I laminated two 10' planks together and it turned out pretty good. I laminated them together using the same technique as the two boards for the transom piece.

Next steps:

Measure the bulkhead pieces and cut them. Clean up grinding the lip where the edge of the deck will sit. Glass the underside of all the cut deck pieces and the bulkhead pieces. Install the bulkheads... then I'll be able to lay the deck down. Originally I didn't want to use screws to secure the deck to the stringers, but I think I'm going to now. I'll use them sparingly and make sure I do my best to keep it all sealed up.

Hope all is well. If anyone sees anything they question and wants to give some tips... bring it :) Till next time.
 
Top