1963 75hp Starflite Rebuild

yorab

Ensign
Joined
Jul 6, 2002
Messages
960
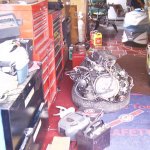
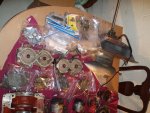
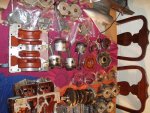
So I'm nearly finished rebuilding my motor. I started this project more than 3 years ago and for a while, I wasn't sure if I'd ever finish. During that time, I had to finish my Bachelor of Science and my Master of Science degrees from Penn State. And since they were both Honors programs, I ate, slept, and breathed school work. I had very little time to devote to fun projects. Also, when I started this rebuild, I lived in a place with a full basement. One year later, I moved in with my girlfriend who has a studio apartment. I had to store my parts in boxes in her tiny storage closet outside. Luckily, a few months later, my buddy allowed me to store my parts and to work in his basement. But, he has a family and it's tough to find a good time to work on my project without interfering with their family life. But I've managed.

I'm going to collect all of the lessons that I have learned and post them here. I feel confident that if I had to rebuild another motor, I would have no trouble. However, I'd like to help the next guy who may be rebuilding a similar motor. After all, getting help AND helping others is what this whole thing is all about. Of course, there is absolutely no way that I could have gotten as far as I have without help from all of you. THANK YOU!

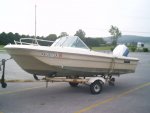
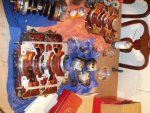
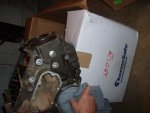
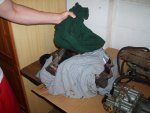
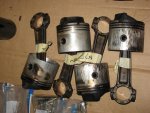
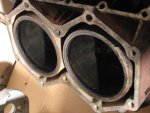
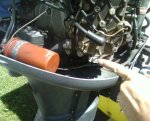
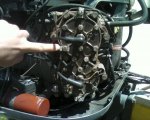
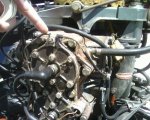
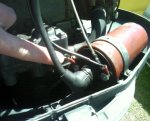
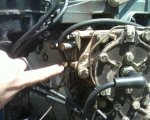
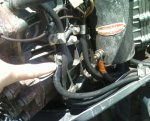
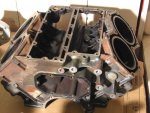
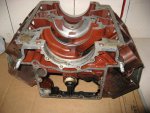
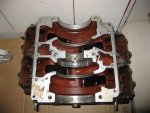
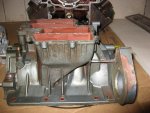
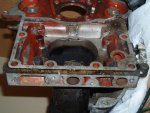
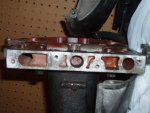
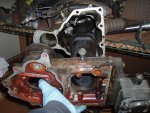
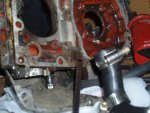
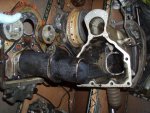
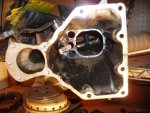
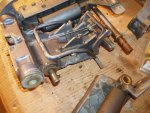
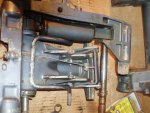
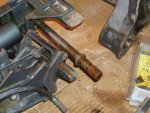
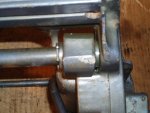
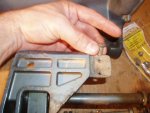
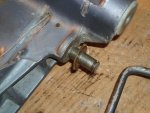
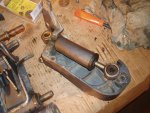
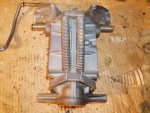
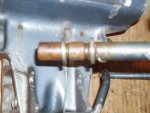
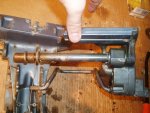
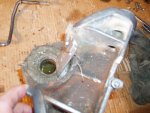
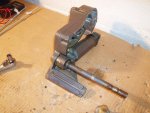
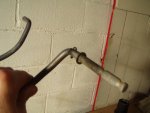
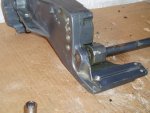
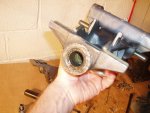
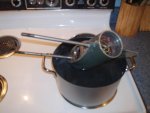
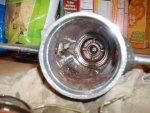
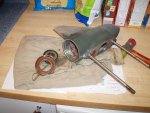
I can't find many pics of my motor as it was when I was using it a few years back, but here are a few:
 

Attachments

  • Picture 017.jpg
    Picture 017.jpg
    136.3 KB · Views: 1
  • Picture 033.jpg
    Picture 033.jpg
    140.9 KB · Views: 1
  • IMAG0112.jpg
    IMAG0112.jpg
    138.9 KB · Views: 1

yorab

Ensign
Joined
Jul 6, 2002
Messages
960
Re: 1963 75hp Starflite Rebuild

Well hopefully it won't take me as long to document the rebuild as it did to actually complete the rebuild! But anyway, I've been searching for all of my pics relating to this rebuild. I bought a new computer recently and I have my old pics scattered about in different places. I'll eventually find them all.

Again, I'm going to document this rebuild for the sake of anybody who may try to rebuild a similar motor in the future. I certainly don't know everything about this motor and many things may be left out, but it will be a decent place to read about the mistakes that I made so that the next guy can avoid them altogether.

If you're gonna rebuild a motor, keep it organized. A bit of labeling and organization goes a LONG way to making the job do-able (especially if you move in the middle of the rebuild and have to keep your parts stored in boxes). I disassembled my motor along with my parts motor. I'm glad that I had a parts motor. It saved me plenty of time and $$ on more than one occasion. It may be worthwhile to get a parts motor if one can be had for cheap.
 

Attachments

  • P1010049.jpg
    P1010049.jpg
    149 KB · Views: 2
  • P1010048.jpg
    P1010048.jpg
    153 KB · Views: 2
  • P1010051.jpg
    P1010051.jpg
    151.4 KB · Views: 2
  • P1010107.jpg
    P1010107.jpg
    137.6 KB · Views: 2
  • P1010109.jpg
    P1010109.jpg
    144.3 KB · Views: 2

yorab

Ensign
Joined
Jul 6, 2002
Messages
960
Re: 1963 75hp Starflite Rebuild

For anybody beginning a rebuild, buy the authentic Factory Service Manual (FSM) for your motor. I believe that this advice is universally accepted among professional and hobby mechanics.

However, there is some disagreement about the "aftermarket" repair manuals such as Seloc or Clymer. I have read many posts on the forum that compare the aftermarket manuals to Charmin--not good for anything but wiping. I happen own the FSM, the Seloc and the Clymer manual. I'm glad that I bought the aftermarket manuals. I believe that the FSM was written for professional OMC mechanics who should already know the basics of the two stroke OMC motors. The FSM skips much of the basic information pertaining to two stroke operation. In the aftermarkets, however, there are decent tutorials to help get you up to speed. I needed these tutorials when I began tinkering with my motor.

With that being said, the FSM contains much better information relating to actual maintenance steps and it is very specific to your exact model. It's not advisable to rebuild without it. The aftermarket manuals usually comprise many different HP motors from many years. Much of the information in the aftermarkets won't even apply to your motor, but some will.

My opinion is based on the FSM and aftermarkets for a 1963 Evinrude. Perhaps the FSMs for newer models include the basic information that was included with my aftermarkets that I found to be very helpful. If this is the case, then I suppose the aftermarkets aren't necessary. But I can only comment on what I found to be helpful with my early '60s manuals.

Some public libraries have the aftermarket manuals and if you're new at outboard repair, you could check one out of your local library. This would allow you to use both the FSM (which you will need to buy) and the aftermarket, which you can borrow for free from your library.

Just my $0.02
 

vettenuts

Seaman
Joined
Sep 6, 2010
Messages
62
Re: 1963 75hp Starflite Rebuild

I have a 1965 75hp Johnson that I am thinking of rebuilding, at least to some degree as I don't know if it runs and the boat it is on now needs stringers, floor, etc. I for one would be very interested in photos and lessons learned even though I won't get to mine for some time yet.
 

yorab

Ensign
Joined
Jul 6, 2002
Messages
960
Re: 1963 75hp Starflite Rebuild

Keep an eye on this thread, vettenuts. I'll keep posting as many pics as I can when I get time. I'll also try to post some of the lessons that I learned along the way. I also put in a new transom, stringers and floor in my tri-hull. I'll eventually get around to posting that stuff in the boat restoration forum. I certainly won't have all the answers that you are looking for, but I hope that I can help with a problem or two that you may come across.
 

yorab

Ensign
Joined
Jul 6, 2002
Messages
960
Re: 1963 75hp Starflite Rebuild

I tore down the powerhead. When I did, I found that one of the "labyrinth" seals was broken. OMC calls these the "crankcase seal rings". They look like heavy duty pistons rings and they seat onto the webs of the crankshaft. They're supposed to keep pressure from leaking between adjacent cylinders.

I also found plenty of damage to the pistons and cylinder walls. The deep wall scoring doesn't show up too well with my camera, but believe me, they needed attention. You can also see the scoring and smearing of the piston skirts. Most likely from an overheat condition which was, in turn, caused by lean fuel. The damage could have been caused by other things, but from my research, this seems to be the best explanation. If anybody has a different opinion, please chime in.
 

Attachments

  • Labyrinth Seal.jpg
    Labyrinth Seal.jpg
    153 KB · Views: 0
  • Piston.jpg
    Piston.jpg
    142.3 KB · Views: 0
  • Wall.jpg
    Wall.jpg
    137.9 KB · Views: 0

SeaKaye12

Lieutenant Junior Grade
Joined
Jul 3, 2005
Messages
1,110
Re: 1963 75hp Starflite Rebuild

Hey Yorab...thanks for your efforts here! I for one will follow your thread.

Your engine; one of the earlier V4's.....seems to be known for dismal fuel consumption...yet yours managed to run lean enough to do all that damage! Go figure!

Chuck
 

yorab

Ensign
Joined
Jul 6, 2002
Messages
960
Re: 1963 75hp Starflite Rebuild

If you have cylinder wall damage, whether it be obvious scoring or a not-so-obvious out-of-round condition, the cylinders may need to be bored out in order to get them back to a smooth, round condition. If what I just said is new to you, then you don't want to tackle this yourself. It takes expensive measuring and boring equipment to accomplish. Take your block to a shop that works on marine engines. Many auto machine shops may not be able to bore cylinders because they are blind holes and their equipment may not be able to do that. This was the case with my block. There is a very reputable auto shop here in my town that could not bore my cylinders due to the blind hole situation. Perhaps newer blocks don't incorporate blind holes, but mine did.

When the cylinder holes are bored to a larger diameter in order to remove damage, larger diameter pistons must be used. Each motor has a standard set of availabe OverSize (OS) pistons. OS pistons that are available for my motor are 0.020" and 0.040". You'll have to do some basic research to determine what is available for your motor. Your machine shop guy will let you know the minimum bore size that he can attain after removing any cylinder wall damage and out-of-roundness. He'll then have to bore the cylinders to match the available OS pistons.

I had to go with 0.040" OS pistons for my block. These were the largest OS pistons available for my motor. I'm glad that I had a parts motor because it turned out that the parts block was in better condition than my original block. If my shop guy had to remove more wall material than that, there would be no pistons available and the block would be trash. Removing too much wall material also leads to issues of undesirable heat tranfer and other problems.

If it turns out that only one of your cylinders is bad, you can have only one hole bored and then an OS piston used for that cylinder only. I had to have all 4 of my cylinders bored. This wasn't too bad because I got lucky and found a set of 4 OS pistons for $40 including shipping. Can't beat that.

All of this is basic info related to cylinder health intended for any rebuild newbies out there. If anybody has any other bits of good knowledge, by all means, post away.
 

yorab

Ensign
Joined
Jul 6, 2002
Messages
960
Re: 1963 75hp Starflite Rebuild

Here's a few more pics of my motor before I tore it down. I believe that I specifically took these pics so that I could see the wire and hose routing when it came time to replace wires and hoses. I think that I was also pointing out the wire anchoring points. The last pic in the next post is a restored Starflite from the 2009 Tomahawk show. I can't quite make out the rear applique, but I believe that it is a 1963 Starflite V, the same as mine.
 

Attachments

  • Photo-0079.jpg
    Photo-0079.jpg
    142.8 KB · Views: 0
  • Photo-0078.jpg
    Photo-0078.jpg
    140.3 KB · Views: 0
  • Photo-0077.jpg
    Photo-0077.jpg
    147.1 KB · Views: 0
  • Photo-0080.jpg
    Photo-0080.jpg
    137.2 KB · Views: 0
  • Photo-0086.jpg
    Photo-0086.jpg
    136.3 KB · Views: 0

yorab

Ensign
Joined
Jul 6, 2002
Messages
960
Re: 1963 75hp Starflite Rebuild

A few more:
 

Attachments

  • Photo-0083.jpg
    Photo-0083.jpg
    139.6 KB · Views: 0
  • Photo-0081.jpg
    Photo-0081.jpg
    141.6 KB · Views: 0
  • Tomahawk2009-43.jpg
    Tomahawk2009-43.jpg
    92 KB · Views: 0

yorab

Ensign
Joined
Jul 6, 2002
Messages
960
Re: 1963 75hp Starflite Rebuild

Here's some more pics that I found of the block after disassembly.
 

Attachments

  • Picture3.jpg
    Picture3.jpg
    141.9 KB · Views: 0
  • Picture5.jpg
    Picture5.jpg
    144.6 KB · Views: 0
  • Picture4.jpg
    Picture4.jpg
    141 KB · Views: 0
  • Picture2.jpg
    Picture2.jpg
    146.1 KB · Views: 0

yorab

Ensign
Joined
Jul 6, 2002
Messages
960
Re: 1963 75hp Starflite Rebuild

What I found to be helpful was to digitize my parts lists. I scanned my parts manual into Adobe Acrobat and then I converted the scanned images to text. Acrobat makes it really easy to do that. I only had Adobe Reader on my computer, so I downloaded the 30-day free trial version of Acrobat just for this purpose. If anybody wants to try this with their parts lists and are having problems, let me know and I'll help you out.

I then imported the text into Excel. I found the Excel file to be much easier to work with when searching for parts. For instance, when requesting a large lot of parts online, it was much easier to cut and paste than it was to manually type in every part number. I've probably ordered more than a hundred parts and the Excel file saved me loads of time. Another good thing is that the part descriptions are with the numbers. I always felt it best to include a description with a part number to avoid any confusion.

By the way, if anybody wants that Excel file for a 1963 75hp Starflite, let me know.
 

yorab

Ensign
Joined
Jul 6, 2002
Messages
960
Re: 1963 75hp Starflite Rebuild

Here are some pics of the exhaust tube and swivel bracket assemblies in various stages of disassembly:
 

Attachments

  • P1010014 (2).jpg
    P1010014 (2).jpg
    148.7 KB · Views: 0
  • P1010013 (2).jpg
    P1010013 (2).jpg
    138.2 KB · Views: 0
  • P1010004 (2).jpg
    P1010004 (2).jpg
    143.2 KB · Views: 0
  • P1010046.jpg
    P1010046.jpg
    135.3 KB · Views: 0
  • P1010047.jpg
    P1010047.jpg
    150.2 KB · Views: 0

yorab

Ensign
Joined
Jul 6, 2002
Messages
960
Re: 1963 75hp Starflite Rebuild

and
 

Attachments

  • P1010023 (2).jpg
    P1010023 (2).jpg
    135.2 KB · Views: 0
  • P1010031.jpg
    P1010031.jpg
    148.9 KB · Views: 0
  • P1010045.jpg
    P1010045.jpg
    148.5 KB · Views: 0
  • P1010043.jpg
    P1010043.jpg
    142.3 KB · Views: 0

yorab

Ensign
Joined
Jul 6, 2002
Messages
960
Re: 1963 75hp Starflite Rebuild

and more
 

Attachments

  • Swivel Bracket 008.jpg
    Swivel Bracket 008.jpg
    149.4 KB · Views: 0
  • Swivel Bracket 011.jpg
    Swivel Bracket 011.jpg
    148.1 KB · Views: 0
  • Swivel Bracket 005.jpg
    Swivel Bracket 005.jpg
    137.3 KB · Views: 0
  • Swivel Bracket 010.jpg
    Swivel Bracket 010.jpg
    148.7 KB · Views: 0
  • Swivel Bracket 009.jpg
    Swivel Bracket 009.jpg
    148.3 KB · Views: 0

yorab

Ensign
Joined
Jul 6, 2002
Messages
960
Re: 1963 75hp Starflite Rebuild

still more
 

Attachments

  • Swivel Bracket 015.jpg
    Swivel Bracket 015.jpg
    137.3 KB · Views: 0
  • Swivel Bracket 004.jpg
    Swivel Bracket 004.jpg
    133.1 KB · Views: 0
  • Swivel Bracket 012.jpg
    Swivel Bracket 012.jpg
    139.4 KB · Views: 0
  • Swivel Bracket 014.jpg
    Swivel Bracket 014.jpg
    148 KB · Views: 0
  • Swivel Bracket 013.jpg
    Swivel Bracket 013.jpg
    145.9 KB · Views: 0

yorab

Ensign
Joined
Jul 6, 2002
Messages
960
Re: 1963 75hp Starflite Rebuild

more
 

Attachments

  • Swivel Bracket 007.jpg
    Swivel Bracket 007.jpg
    148 KB · Views: 0
  • Swivel Bracket 020.jpg
    Swivel Bracket 020.jpg
    136.1 KB · Views: 0
  • Swivel Bracket 006.jpg
    Swivel Bracket 006.jpg
    139.9 KB · Views: 0
  • Swivel Bracket 016.jpg
    Swivel Bracket 016.jpg
    131 KB · Views: 0
  • Swivel Bracket 017.jpg
    Swivel Bracket 017.jpg
    145.1 KB · Views: 0

yorab

Ensign
Joined
Jul 6, 2002
Messages
960
Re: 1963 75hp Starflite Rebuild

and finally
 

Attachments

  • Swivel Bracket 021.jpg
    Swivel Bracket 021.jpg
    134.5 KB · Views: 0
  • Swivel Bracket 032.jpg
    Swivel Bracket 032.jpg
    144.8 KB · Views: 0
  • Swivel Bracket 018.jpg
    Swivel Bracket 018.jpg
    145.4 KB · Views: 0
  • Swivel Bracket 033.jpg
    Swivel Bracket 033.jpg
    146.2 KB · Views: 0
  • Swivel Bracket 029.jpg
    Swivel Bracket 029.jpg
    143 KB · Views: 0

yorab

Ensign
Joined
Jul 6, 2002
Messages
960
Re: 1963 75hp Starflite Rebuild

I had few, if any, problems in disassembling the powerhead. I simply followed the manuals and everything went smoothly. I had a broken bolt or two to deal with on the exhaust cover plate, but they came out pretty easily with heat and PB Blaster.

I did have some problems getting the swivel bracket assembly apart though. I thought that I was somehow missing some fastener or else something was welded. It ended up being a case of corrosion. I learned that this is typical with these motors and that saltwater motors are usually much worse than mine was. I had a particularly tough time getting the stern bracket pivot pin out of the stern bracket. This is shown in the first and fourth picture in my last post (post #18).

I found that a good substitute for an arbor press is an automotive ball joint press. The ball joint press worked well for pressing out the stern bracket pivot pin. I used the ball joint press on a few other occasions while disassembling my motor and I'll post that info in future posts.
 

yorab

Ensign
Joined
Jul 6, 2002
Messages
960
Re: 1963 75hp Starflite Rebuild

I then disassembled the lower unit. For the most part, it was smooth work. I followed the steps in the manuals. I did, however, have a bit of trouble getting the gearcase head (also known as prop shaft bearing carrier) removed. With a bit of finagling, it came off. I also had some trouble with the front prop shaft bearing, race, and coil (#91 and #93 in my diagram). These parts live up in the pointed end of the "torpedo" and require a special puller to remove. After some good advice from the forum, I decided to use heat to expand the torpedo so that the bearing and coil would drop out. I dropped the torpedo into boiling water for about 3 minutes. I then tapped the torpedo on the countertop and the parts fell out. The race was still in there and I was going to repeat the procedure, but my buddy has some nice tools that he uses to do visual inspections of Scuba tanks, so I borrowed him to do a visual on the race. It looked good, so I left it in there.
 

Attachments

  • Gears.jpg
    Gears.jpg
    146.3 KB · Views: 0
  • Gear Cone 005.jpg
    Gear Cone 005.jpg
    134.2 KB · Views: 0
  • Gear Cone 001.jpg
    Gear Cone 001.jpg
    133 KB · Views: 0
  • Gear Cone 003.jpg
    Gear Cone 003.jpg
    137.9 KB · Views: 0
  • Gear Cone 002.jpg
    Gear Cone 002.jpg
    145.6 KB · Views: 0
Top