1962 Merc 450 restoration ..

GA_Boater

Honorary Moderator Emeritus
Joined
May 24, 2011
Messages
49,038
The key keeps the carrier from turning. All that holds the carrier place is the O-ring friction and cover nut. My cover nut calls for 100 ft. lbs., I think. I just moved and manuals are in one of these boxes. :doh:

Is your nut metal or plastic?
 

merc850

Commander
Joined
Jul 7, 2010
Messages
2,046
Check the F gear by reaching into the gearcase and turning it - it should turn smoothly with no "catching" the same with the propshaft to see if the R gear is OK, clean the propshaft end and look for scoring. Rotate the driveshaft and see if it is turning smoothly. When you re-assemble it replace the large O-ring on the bearing carrier and any bad seals, use anti-corrosion grease or Perfect Seal (Mercury) on the bearing carrier and the nut. From your pics the gears and clutch dog look good.
 

sphelps

Supreme Mariner
Joined
Nov 16, 2011
Messages
11,468
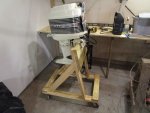
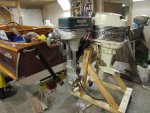
Sorry no posting lately .. Been super busy doing other stuff but did manage to get a stand built for it .. Also working on adding some counter top work space to try and keep things organized as best I can ..
IMG_0813.JPGIMG_0810.JPG
A little bigger than the speeditwin but not too much .. I wonder what each one weighs ...
 

GA_Boater

Honorary Moderator Emeritus
Joined
May 24, 2011
Messages
49,038
A normal Merc 450 weighs about 175-200. You're on the low end cuz it doesn't have a lower unit. :lol:


I know, I know it's being rebuilt. :smile:
 

racerone

Supreme Mariner
Joined
Dec 28, 2013
Messages
38,071
The 1974 version 4 cylinder 50 HP is listed at 170 lbs .-----The 450 might be lighter.
 

mickyryan

Rear Admiral
Joined
Apr 18, 2016
Messages
4,214
I have adventured out of the resto forum ... Got my eye in ya :) do anymore tear down yet?
 

sphelps

Supreme Mariner
Joined
Nov 16, 2011
Messages
11,468
Nope not yet Mick ..
‘Replacing the admirals bathroom sink and vanity atm ..
 

sphelps

Supreme Mariner
Joined
Nov 16, 2011
Messages
11,468
Back to tinkering here .. With the lower unit off I would like to hook a hose up to the water tube and try and run the motor . So the po cut all the wires to switch and to control box .. The controls are the single lever with a warm up bar .. And only a toggle switch .. I assume the toggle is a kill switch ?
So I need a start switch and choke button .. Anyone have a diagram for the switch hook up ? I dont want to start the thing without a way to shut it down . Is there a procedure I should follow on starting it ?
 

GA_Boater

Honorary Moderator Emeritus
Joined
May 24, 2011
Messages
49,038
My source for old motor wiring diagrams dried up. Maybe @merc850 has one?

Do you have a choke knob under the cowling? It would be above the carbs.
If you do, that's an easy way shut it down. Another way is to use a jumper wire to ground the stud on the side of the magneto. A white wire, I think. Or yellow.

Now you know how to stop her, here's how to start her.

Takeoff the cowl wrap.
Put jumper on the magneto stud with the other end hanging.
Squeeze the bulb until hard.
Do a small squirt of pre-mix into the carbs.
Start pulling.

We'll make you a Merc Man! LOL
 
Last edited:

sphelps

Supreme Mariner
Joined
Nov 16, 2011
Messages
11,468
Thanks GA , yes it has a Manuel choke . The little knob that sticks through the the cowl is missing but I can still operate it .. The battery leads are fine so so was gunna hook a battery up to see it the starter works .
I did squirt a little fuel in the carbs the other day and pulled the rope .
I got a loud pop so I stopped ..
I’d like to hear this thing run before I start taking things apart too much ..
 

racerone

Supreme Mariner
Joined
Dec 28, 2013
Messages
38,071
Check and make sure belt timing is correct.-----Make sure the plug wires are on the correct cylinder.----Posts on magneto are numbered.
 

merc850

Commander
Joined
Jul 7, 2010
Messages
2,046
The magneto has a post on the side DO NOT put +12v on this post it is grounded to kill the spark.
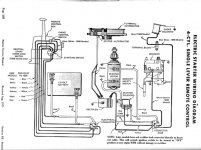
If you can, hook up the electric choke it will make starting it easier and connect the alternator and rectifier to the + side of the battery so it isn't destroyed; connect the throttle cable too so you can advance and retard the throttle and maintain some control; don't "rev the hell out of it" when it's running in neutral - keep it just above idle.
4cyl-wiringsmall.jpg
 
Last edited:

merc850

Commander
Joined
Jul 7, 2010
Messages
2,046
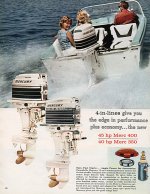
Way back (7 or 8 years) there were a lot of Merc catalogs, ads and memorabilia online so I bought all I could, this is a page from the 1961 Catalog; definitely the long shaft model.
61-Merc400.jpg
 

sphelps

Supreme Mariner
Joined
Nov 16, 2011
Messages
11,468
Thanks for the diagram merc ! .
I picked up a start switch with the key push choke ..Now to get a little time away from work …
 

merc850

Commander
Joined
Jul 7, 2010
Messages
2,046
If your motor has an alternator (look for [2] yellow wires) on the Stbd. side that run from under the flywheel to the rectifier, you can get a standard marine tach to tell rpms. which is important for proper operation {5,200 - 5,600 rpms}. When you re-install the driveshaft and shiftshaft in the engine grease the splines on the sides only with a hi-pressure grease. You can run the motor at a 50:1 ratio with a TCW-3 marine oil (I use Amsoil synthetic). This forum might help you with props etc. https://johnsoldmercurysite.com/phpBB3/index.php?sid=c1eedb7960442074f2594ee023b0274f
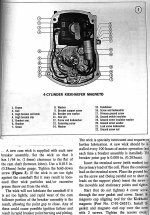
I would check the magneto for point opening and corrosion; you undo 4 - 7/16 bolts and it drops down; there is a blanked spline to re-align it on install.
The starting procedure is Nr 2 on the initial page of this forum.
kiekhaefer-magnetosmall.jpg
 

sphelps

Supreme Mariner
Joined
Nov 16, 2011
Messages
11,468
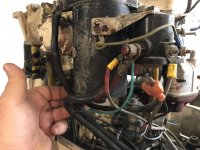
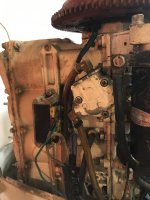
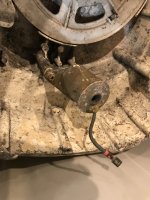
It does have an alternator ..
Yellow wires to rectifier . Single wire going to solenoid..
On the diagram the left side has electrical connector and the right side connector base ..
I don’t have that connector ..
 

sphelps

Supreme Mariner
Joined
Nov 16, 2011
Messages
11,468
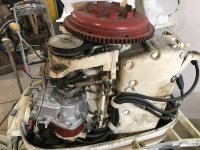
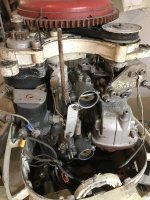
1B574C82-EEBA-46A9-8F52-C5EBE261CA11.jpeg17A92BC4-320E-483B-8149-A185DEEC68B5.jpeg
 

Attachments

  • 38172396-EF89-4A2A-A87B-75079AEDEF07.jpeg
    38172396-EF89-4A2A-A87B-75079AEDEF07.jpeg
    2.8 MB · Views: 8

sphelps

Supreme Mariner
Joined
Nov 16, 2011
Messages
11,468
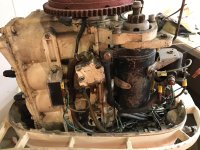
A0B910D5-9F55-4F2C-8163-E4DF8B300C56.jpeg8F5EE6D8-7745-46BD-8BAA-25633820CBF8.jpegA0B910D5-9F55-4F2C-8163-E4DF8B300C56.jpeg8F5EE6D8-7745-46BD-8BAA-25633820CBF8.jpeg
 

Attachments

  • 5E2807D2-17DB-4500-982A-A68E657F936A.jpeg
    5E2807D2-17DB-4500-982A-A68E657F936A.jpeg
    1.4 MB · Views: 6

sphelps

Supreme Mariner
Joined
Nov 16, 2011
Messages
11,468
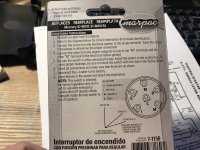
image.jpg
This is the switch I picked up .. So without the electrical connector as shown in diagram I can still bypass that to go directly to switch right ?
 
Top