1960 40hp Evinrude Mystery

AlTn

Commander
Joined
Mar 9, 2010
Messages
2,813
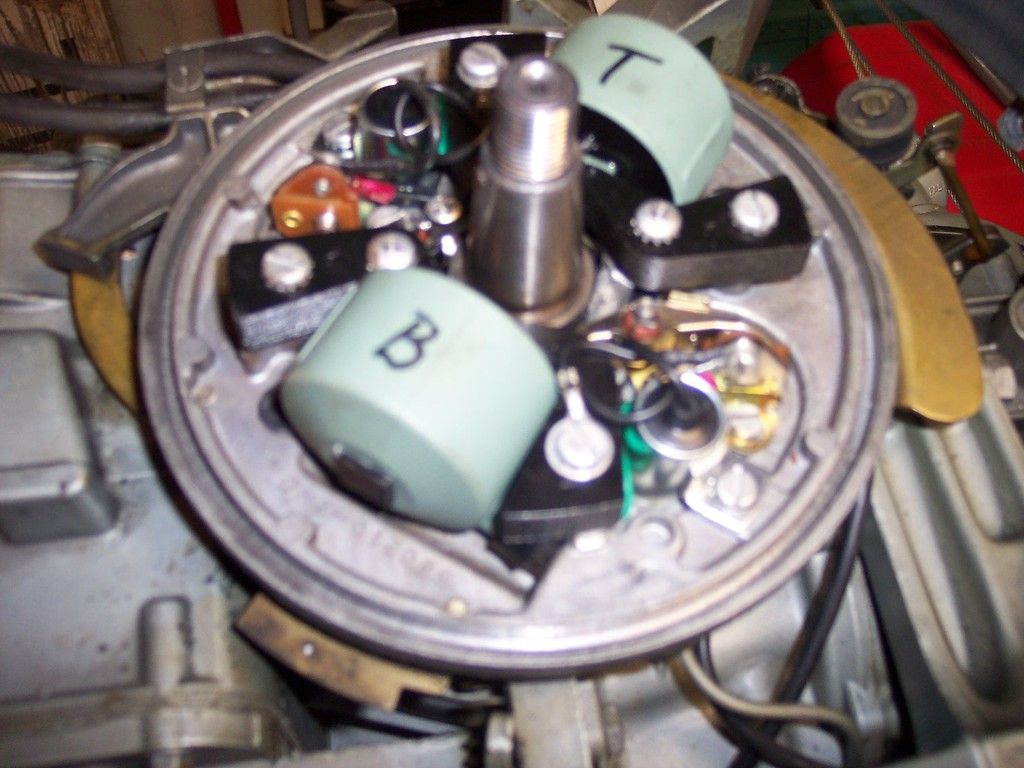
+1 with High on the new plug wires...I'd also install new boots and terminal ends as well...if you'll look under the Top Secret Files for Universal Magneto Troubleshooting you'll find a wealth of info...from my experience, do one ignition wire replacement at a time and only loosen, not remove, the clamps that hold them underneath the mag plate....if necessary, apply some lube to the wires so they'll slide by one another easily, it's a tight fit under there...take a pic of the top side of the mag plate as well as the underside before you remove any of the components...note that the coil for the top cylinder is the one closest to the carb...keep all wires to the points and the coil ground wire as flat as possible as the underside of the flywheel is unforgiving in its "milling" action...you'll probably take a misstep or 2 the first time around, but none will be fatal nor uncorrectable
 

oldboat1

Fleet Admiral
Joined
Apr 3, 2002
Messages
9,612
Thanks oldboat1, very helpful video. I get a small amount of resistance with my ohmmeter between the coil ground and the spark plug boot -so I guess I am good to go. I tried re-positioning the boot also as you suggested and it did allow me to just get the coil flush with the boss. Thank you.

You're welcome. I use that method as a down and dirty test after a reinstallation (like you are doing), or as part of initial tests with a motor I've just picked up, or after I've tested for spark and have a no-spark condition for unknown reasons. Sometimes saves time and energy (sometimes money) chasing down phantom ignition problems.

Check to insure wires are tucked in (looks good in the pic) -- no abrasion from flywheel contact. Installation sounds good to go. Nice clean motor.
 

HighTrim

Supreme Mariner
Joined
Jun 21, 2007
Messages
10,486
I just re read your post 39. What do you consider a small amount of resistance? The secondary winding is very thin and long. You should get 3000 to 8000 ohms on the secondary with your meter on the x100 scale. This is between spark plug boot, and the coil ground wire. The amount depends on the coil manufacture.

It is the primary winding, which is short and fat, where you will get darn near 0 ohms on the x100 scale, or continuity. This is tested between the coil ground wire, and the lead that goes to the points/condenser.

Might just be semantics on what you tested, but just ensuring you are testing correctly.

Now, something else to note on this. Just because you get continuity, does NOT mean that you will have spark once on the water under load when the ignition has heated up. You will need better test equipment, which puts a load on the coils for that. Reason is, there are some secondary windings that will test good the way you tested them, but will not provide spark while on the water after running. Reason is, the secondary is fractured some what. When testing, it is just slightly touching, and will pass. Then, while running, it heats up, expands and the fracture separates. This gives you spark loss.

When you get back to the dock, and test, it will test fine again. As it has now cooled and retracted. Can be troublesome to troubleshoot until you know what you are looking for, and have the equipment like a Mercotronic, to test for it.
 

oldboat1

Fleet Admiral
Joined
Apr 3, 2002
Messages
9,612
Well I finally got the new ignition parts and tackled the replacement of the coils, condensers and points. I have a couple of amateur questions:

How can I tell if ok without torquing down the flywheel ?

Can initially test for existence of spark by replacing flywheel with partial torque -- carefully spin clockwise by hand, plugs out, using spark tester. (Looking for a no-spark condition that way, which would likely mean points issue). For testing spark quality, best to test after full torque and reassembly, using electric starter (plugs out). If spinning that way, better to have the l.u. in a tub of water to protect the new impeller. If you have good spark reestablished, think I would be inclined to test motor operation again before moving on to carb rebuilding (ref. your earlier post). If it ain't broke....
 

ssdale

Starmada Splash of the Year 2016
Joined
Nov 4, 2011
Messages
285
The reason for not removing the armature plate was to not introduce more problems by disconnecting the spark advance. reconnecting/replacing the spark plug boots etc...Also, don't you need to re-synchronize the advance and the carb after removing the spark advance linkage? It all looks and sounds so complicated that I am trying to solve one problem before I introduce 5 more (novice).

If you tell me that I can remove all linkages from the plate, then remove the plate , plug wires etc... , then simply re-install, I know I can do that. Please advise. I have repeatedly been honest about my novice status, and have tried to reasonably inform myself before asking questions. Can I get correct wire and boots at Automotive store?

Oldboat1, was just going to tackle carb now with flywheel off as it seems a lot easier to remove starter and carb with flywheel out of the way. Otherwise, I would love to test ignition before possibly introducing more troubles with the carb than may be present. (if it ain't broke). Also would love to hear her at least cough before I keep spending money. I know this is all novice indecision, but that's why I am on this forum, asking for advice. Pic of completed ignition system install. Tried to keep wire tucked
Thanks,
Dalehttp://
 
Last edited:

HighTrim

Supreme Mariner
Joined
Jun 21, 2007
Messages
10,486
Don't worry about that, you will see how easy it is after you do it once I promise. If you were close to me, or are close, you could bring it over and I would walk you through it. Take the 4 screws out to remove mag plate (2 through coils, 2 not), disconnect brass arm and lift her off.

You need 7mm metallic core wire. NOT graphite auto wire. Your local deal, NAPA, etc... will carry it.
 

ssdale

Starmada Splash of the Year 2016
Joined
Nov 4, 2011
Messages
285
I finally got back to the motor and took off the mag plate and reinstalled the coils. I inspected the plug wires and decided to just nip off the ends to get fresh copper and reinstalled. They look to be in excellent condition. Re-gaped the points. So all should be good with the new ignition system.

I did buy new a carb kit from iboats that included a new screen sock filter and gasket for the bowl under the fuel pump. Does the screen just push up onto the fuel pump housing above the bowl?

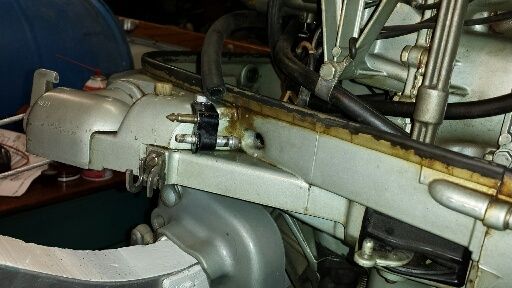
Also purchased new alcohol resistant fuel lines for tank to fuel pump and for fuel pump to carb, but ran into a problem. My problem is that the outside diameter of the new fuel line is at least 10% larger than the original line and will not pass through hole in the the lower motor housing to the point of the tank connection. Tried to get a pic of it. My idea is to simply drill out the hole to large enough diameter to accommodate the new, larger line. Has anyone else ran into this problem ?
Dalehttp://
 
Last edited:

HighTrim

Supreme Mariner
Joined
Jun 21, 2007
Messages
10,486
Yes that is common. It is your motor, drilling it out a bit wont hurt anything.

On the smaller hp motors, the fuel line was actually 5/32". That is not very common, so most guys buy 3/16", which is a touch bigger. Another issue is the fuel line clamps wont fit on the larger ID hose.
 

ssdale

Starmada Splash of the Year 2016
Joined
Nov 4, 2011
Messages
285
Ok, will drill out. Just wanted to know if there was another answer before modifying. I bought a box of new hose clamps to replace the original wire ones that will work great. Thanks,
Dale
 

ssdale

Starmada Splash of the Year 2016
Joined
Nov 4, 2011
Messages
285
Got the hole through the case big enough for the new fuel line by carefully drilling out the existing hole,

It's 13 degrees outside so I decide to tackle the carb rebuild before I re-torque the flywheel and try to start. The starter came off really easily and opens up a lot of room to get to everything carb related. The Lark II has a water choke so a little extra plumbing to disconnect.

I disassembled according to instructions with the iboats rebuild kit and was pleasantly surprised with how clean everything is. The high speed adjustment needle is in perfect shape with no imperfections. I asked for a kit with a new float, but the one they sent did not have one so I reused my old cork float.

Couple question:
1. The new float needle valve came with a small clip to attach the needle to the float arm. It does not seem to fit very well and my old needle valve didn't have one. How important is this clip or should I just forget it?
2. The diagram sent with the kit depicts a gasket sliding over the main vertical (up and down) jet that is threaded into the upper half of the carb. Is this gasket cork, or a red plastic disk (they are identical in size) as none of the pieces in the the kit are labeled? Also when I removed this jet there was no washer present in that location. ?? Does my carb require this washer and if so which one?

With all of your help I am really getting to understand this old motor and it is not a Mystery to me anymore. I want to get her back together and the next 50 degree day try to FIRE HER UP! All help appreciated,
Dale
 

oldboat1

Fleet Admiral
Joined
Apr 3, 2002
Messages
9,612
on the clip: I use it if using the needle with the black tip -- assumption (mine) is that the new needle might have a tendency to stick if I use it without the clip. If the clip and new needle works, I use them. If the clip doesn't fit, I would probably go back to the original needle if it's in good shape, with a seat and washer from the kit.

As long as the carb is kept clean, though, I think it probably makes no difference.

The gasket that goes over the nozzle -- used to seeing cork, but think either will do. (I think I've seen both in disassembling various carbs.)

If the float is in good shape, I would just reuse the existing float without concern.

...Might be some other input/advice.

[ed. I checked a parts diagram for the '60 40hp, and don't see the gasket listed for that hp -- with that in mind, would conclude it wasn't left out of yours by accident -- would leave it out. But again, maybe some better advice there too. Sorry.]
 
Last edited:

S.A. Baker

Petty Officer 1st Class
Joined
Aug 9, 2015
Messages
227
Don 't EVEN attempt to crank it over in any manner without the flywheel properly torqued !
 

ssdale

Starmada Splash of the Year 2016
Joined
Nov 4, 2011
Messages
285
I rebuilt the carb last night and did use the clip on the new needle valve. As none of the gaskets in the kit seemed to be the right size to fit over the main jet, and there was not one there when i disassembled, I reassembled without it. Got the carb back on the engine but still need to re install the starter and then re-torque the flywheel.

I read that you can check your ignition and spark by leaving out the plugs and spinning by hand before torquing down the flywheel. Any suggestions? My main concern now is that I will be able to get her torqued to 105 and that there is good clearance, although I think I have everything tucked and positioned correctly.

19 degrees this morning. going to need warm weather to give her a good barrel test to see if I have been successful with all this. Fuel is 24:1. Would never have attempted without this forum and all your help!
Dale
 

oldboat1

Fleet Admiral
Joined
Apr 3, 2002
Messages
9,612
You can check for spark by snugging the nut down with a wrench, then spinning clockwise by hand -- plugs out, using a spark tester. Make sure the wheel is seated properly over the key. Don't crank it with the starter that way (would need to torque the nut down to specs first). If you don't get spark, look to points cleaning and resetting first.
 

HighTrim

Supreme Mariner
Joined
Jun 21, 2007
Messages
10,486
I always check spark first before torqueing down, nothing wrong with that. Don't want to have to pull it again if you have no spark.

Always use that spring clip on the float with the black rubber tip needles. As stated, they will stick if not used. The first run of them (if you buy NOS parts) did not have the spring clip, and motors would not start due to stuck needles, so, they added the spring clip.

So why use the black rubber tip? The original needles would sometimes corrode in the seat, again not allowing for fuel flow. Always use the needle with the seat that came with it. Do not swap them around, they do have minor variations between different brands, etc... and the motor will flood.

I like to put a new seal on the main jet, regardless if the motor has a fixed high speed jet, or an adjustable. That is technically the difference on whether to use one or not. I feel it cannot hurt either way to install it.

It would have been a thick fat gasket like a donut.

The aftermarket kits don't come with floats, if you want one, you have to buy an OEM one from the dealer. The floats will still be cork though for the 40hp, but a different variety. If it still floats though, and is not swollen, use the original one. If they need to be re coated, use a model airplane dope, or crazy glue. Not too much though, just couple light coats, or it will add weight to it and cause it to sink, flooding the motor.
 

ssdale

Starmada Splash of the Year 2016
Joined
Nov 4, 2011
Messages
285
You can check for spark by snugging the nut down with a wrench, then spinning clockwise by hand -- plugs out, using a spark tester. Make sure the wheel is seated properly over the key. Don't crank it with the starter that way (would need to torque the nut down to specs first). If you don't get spark, look to points cleaning and resetting first.

Thanks! This afternoon, before I read your post, I snugged the flywheel down and did exactly as you describe above. No spark. Nothing from either plug. I have my starter switch in the "on" position. Before i replaced the ignition, I had a weak spark, so I am assuming all the safety switches were/are ok.

1. I will look at cleaning and resetting the the new points tomorrow as you suggested. Any other ideas as to what could be wrong or what I should try next if not the points?
2. When I hand spin the flywheel, the mag plate jumps and moves some. I have all wires tucked and the coils are even with the bosses. DO the magnets make this happen or does this mean that something is out of place??
 
Last edited:

oldboat1

Fleet Admiral
Joined
Apr 3, 2002
Messages
9,612
not serious IMO, but will want to pull the flywheel again (don't pry it -- can stick pretty tight. Use the puller.) Checking back....

[ed. plate is loose, but check some of the earlier posts (HighTrim).]
 
Last edited:

oldboat1

Fleet Admiral
Joined
Apr 3, 2002
Messages
9,612
It sounds like you probably ended up removing the plate. If you also removed the ring and support underneath, you may not have reassembled them correctly or may not have gotten the plate screwed down flush. There should be no wobble.

If back under there, make sure the new wires are installed correctly at the coils and clamped flush underneath (think there was an earlier post or two on the wires). While you are at it, make sure the spring connectors in the boots at the plug ends are in contact with the wire core (spikes punched through to the wire core). Will need some more troubleshooting if you get it secure and reassembled, but still no spark.

Can always take a pic of your magneto assembly and post it.
 

ssdale

Starmada Splash of the Year 2016
Joined
Nov 4, 2011
Messages
285
Today I cleaned and re-gapped the new points with the cam at "top" to .020. Still no spark from either plug wire. ???? I have continuity from the plug boot to the coil ground screw.

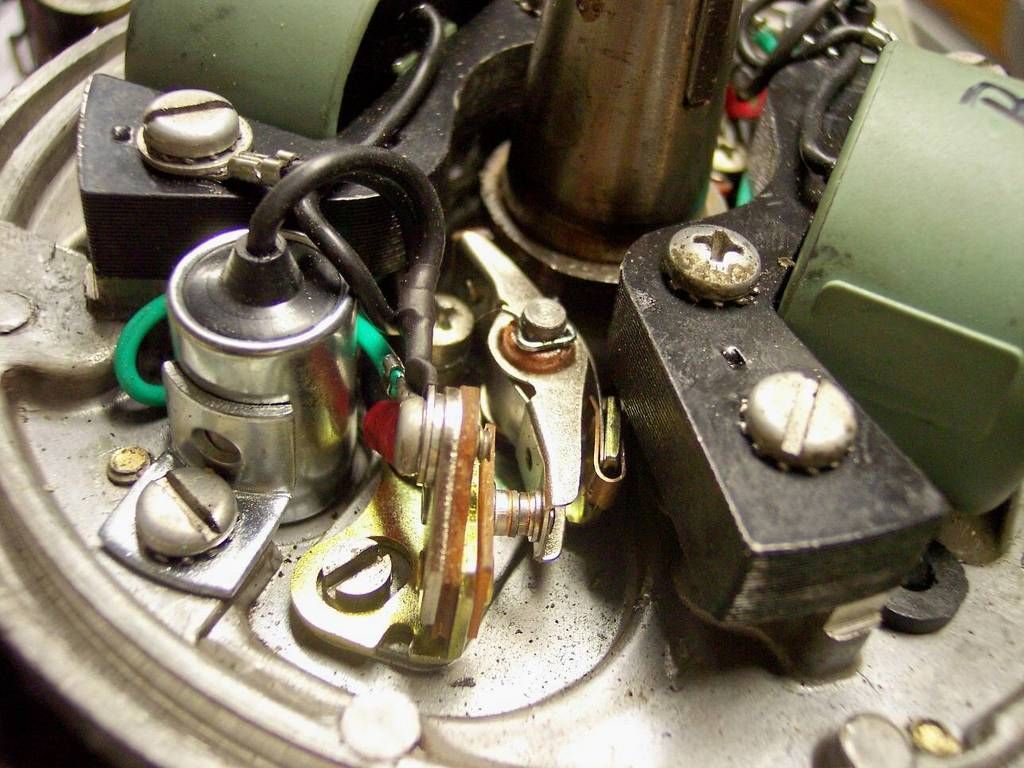
I changed out one side of the ignition at a time as people here suggested. Here is closeup of new ignition. It is a little misleading as I had to loop the coil grond kind of behind the condenser. I can't understand what I could have wrong? Any help appreciated.:confused:. I hope someone makes me feel like an idiot by quickly pointing to my error.

Black coil wire to ground
Green coil wire to points
black condenser wire to points
black kill wire w/red connector from switch to points
Dale
http://
 
Top