1959 Starcraft Jet... Boat Rebuild attempt #2

Camlee98

Petty Officer 2nd Class
Joined
Aug 7, 2009
Messages
110
Re: 1958 Starcraft Jet... Boat Rebuild attempt #2

Re: 1958 Starcraft Jet... Boat Rebuild attempt #2

That looks great JT!!! I will certainly call upon your knowledge at some point I'm sure!
Thanks KFa and jb those post will get me started in the right direction I'm sure!

Well I guess it's time to put on the Tvyek suit and respirator, get out the grinder and 60 grit flapper wheel and a little talc for the itching.............OH WAIT I FORGOT....I don't need that stuff anymore LOL!
 

kfa4303

Banned
Joined
Sep 17, 2010
Messages
6,094
Re: 1958 Starcraft Jet... Boat Rebuild attempt #2

Re: 1958 Starcraft Jet... Boat Rebuild attempt #2

That's right! More like grab a hammer, some JB weld, a can of spray paint and Voila! new boat :) Gotta love those tinnies! Especially when they're as nice as jtrom's has turnned out.
 

jbcurt00

Moderator
Staff member
Joined
Oct 25, 2011
Messages
24,894
Re: 1958 Starcraft Jet... Boat Rebuild attempt #2

Re: 1958 Starcraft Jet... Boat Rebuild attempt #2

Well I guess it's time to put on the Tvyek suit and respirator, get out the grinder and 60 grit flapper wheel and a little talc for the itching.............OH WAIT I FORGOT....I don't need that stuff anymore LOL!

I heard that, and it has been noted :eek:

I had planned to say your welcome, but now.........

Keep moving forward & it will be quick hopefully...
 

Captmills

Petty Officer 1st Class
Joined
Aug 22, 2009
Messages
374
Re: 1958 Starcraft Jet... Boat Rebuild attempt #2

Re: 1958 Starcraft Jet... Boat Rebuild attempt #2

jrom, nice job on the deck, I thought something looked different about those ribs, that ought to help camlee out alot! this site is awesome! you guy's are the best.:)
 

Camlee98

Petty Officer 2nd Class
Joined
Aug 7, 2009
Messages
110
Re: 1958 Starcraft Jet... Boat Rebuild attempt #2

Re: 1958 Starcraft Jet... Boat Rebuild attempt #2

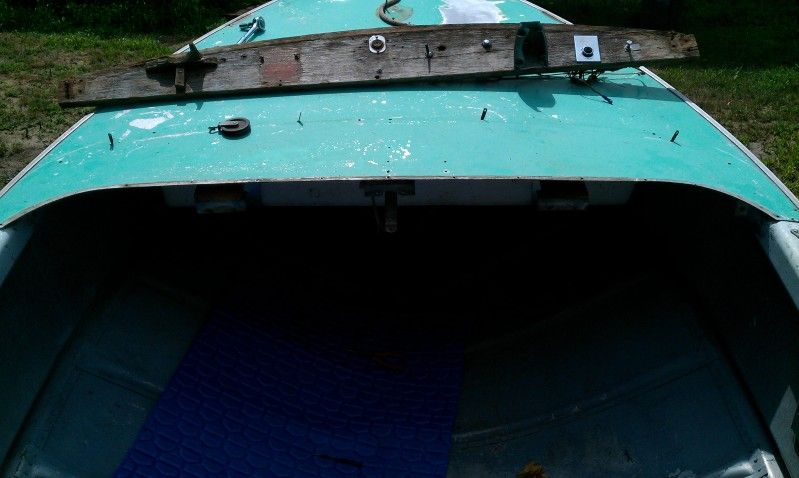
Ok got everything stripped off the boat and I got the dash out...(It wasn't as easy as I thought it was going to be lol).
IMAG1021.jpg

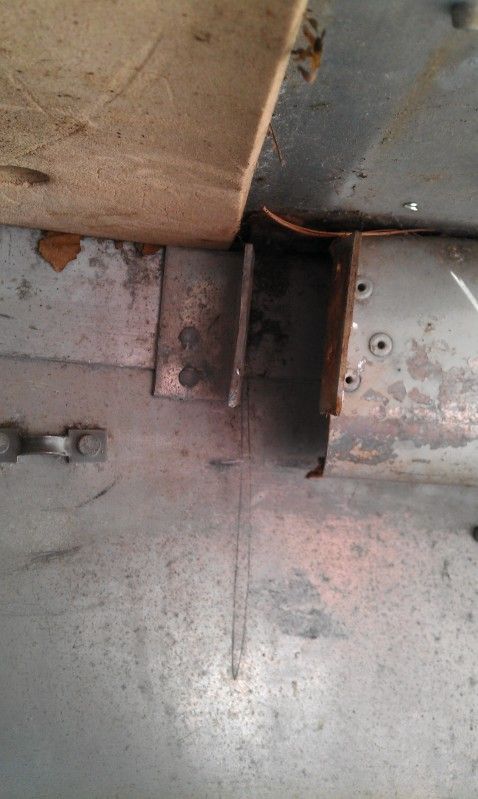
These were a little tricky to get to but once I was able to knock the bolts out the dash slid out.
IMAG1025.jpg

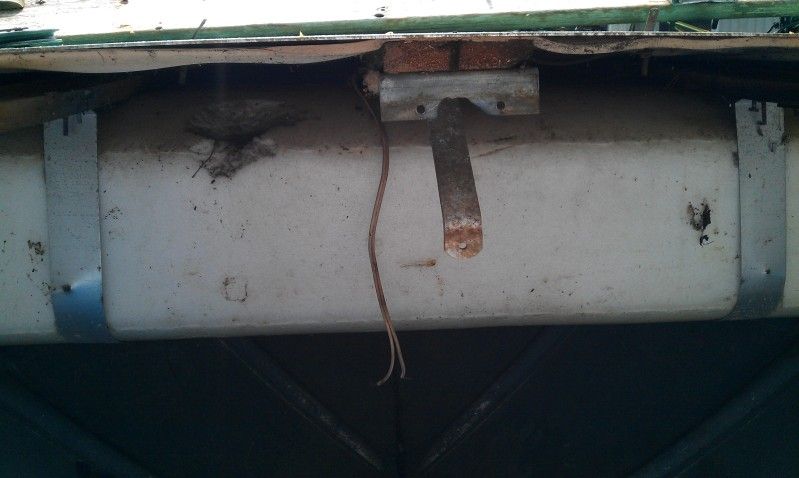
Incase anyone is wondering what's behind the metal plate under the bow...here ya go a big honk'n piece of foam!
IMAG1022.jpg

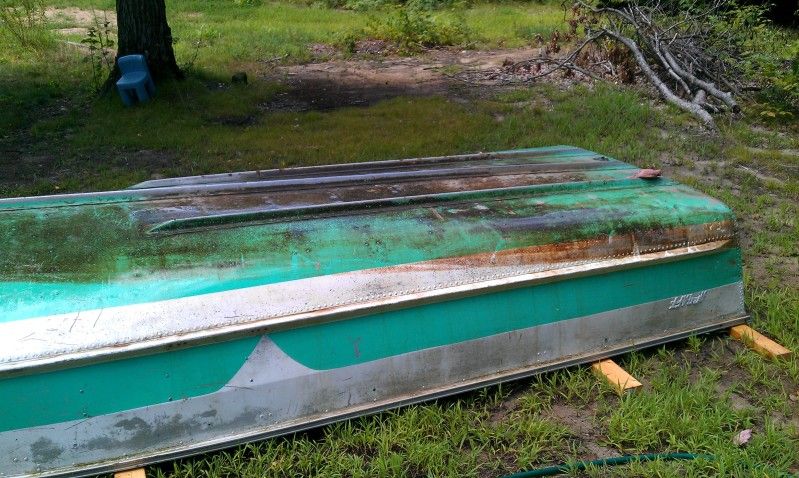
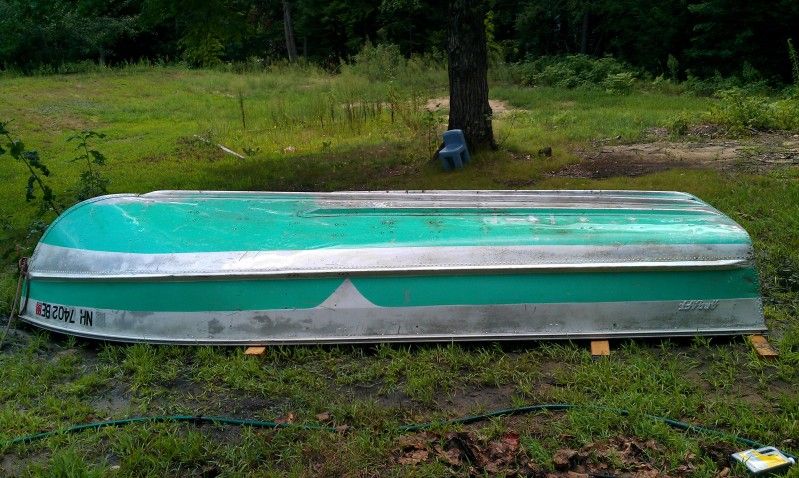
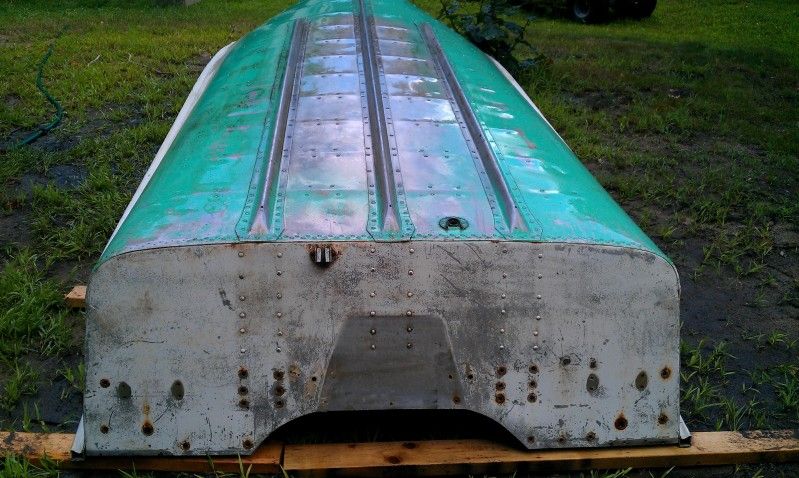
Next I pulled her off the trailer and flipped her over. Then proceeded to give her a nice scrub'in! Before
IMAG1026.jpg

After
IMAG1033.jpg

IMAG1034.jpg

Now on to the trailer...strip, prime, paint and add the new hardware!
Then I'll get started on the new transom and dash.
 

jasoutside

Supreme Mariner
Joined
Dec 20, 2009
Messages
13,269
Re: 1958 Starcraft Jet... Boat Rebuild attempt #2

Re: 1958 Starcraft Jet... Boat Rebuild attempt #2

Great progress, that dash is a huge pain!
 

Captmills

Petty Officer 1st Class
Joined
Aug 22, 2009
Messages
374
Re: 1958 Starcraft Jet... Boat Rebuild attempt #2

Re: 1958 Starcraft Jet... Boat Rebuild attempt #2

Lookin good, did you have to cut the dash to get it out?
 

Camlee98

Petty Officer 2nd Class
Joined
Aug 7, 2009
Messages
110
Re: 1958 Starcraft Jet... Boat Rebuild attempt #2

Re: 1958 Starcraft Jet... Boat Rebuild attempt #2

No I just had to get the two bolts out on each side that came in thru the gunwhale side to the bow. I used a hammer and punch to coax them out lol. Once those were free I was able to slide the dash out in downward direction. This was in addition to all the screws that ran across the top of the dash and the bolts holding up the brackett that holds up that chunk of foam.
 

Camlee98

Petty Officer 2nd Class
Joined
Aug 7, 2009
Messages
110
Re: 1958 Starcraft Jet... Boat Rebuild attempt #2

Re: 1958 Starcraft Jet... Boat Rebuild attempt #2

Questions for ya
Should I gluvit all rivets and seams inside the boat just to be safe? Does this affect primer or paint?
Can I get spar urethene at the box stores....HD, Lowes ect.?
I'm not sure if I'll be stripping the boat completely....if I don't should I primer the whole boat with the etching primer or just the bare spots? Will I have issues if I do the whole boat with the etching primer then with regular primer?
 

jtrom

Petty Officer 1st Class
Joined
Apr 21, 2010
Messages
220
Re: 1958 Starcraft Jet... Boat Rebuild attempt #2

Re: 1958 Starcraft Jet... Boat Rebuild attempt #2

Questions for ya
Should I gluvit all rivets and seams inside the boat just to be safe? Does this affect primer or paint?
Can I get spar urethene at the box stores....HD, Lowes ect.?
I'm not sure if I'll be stripping the boat completely....if I don't should I primer the whole boat with the etching primer or just the bare spots? Will I have issues if I do the whole boat with the etching primer then with regular primer?

I used Rustoleum marine spar varnish that I bought at the box stores. Make sure it says "marine" on it so it will have uv protection. I used about 7 coats but you can also use a coat of epoxy and 3 coats of the varnish as an alternative.

You should glu-vit all the inside seams and rivets. (I used a product called "Coat -it"..same stuff at half the price and my '59 Jet is dry as a bone.) Very important: these pre-1960 Jets have a seem that can only be sealed on the outside under the splash rails...use a wire brush to remove all the old sealant before re-sealing.
The glu-vit or coat it will not affect paint and primer. I also water tested it by filling the boat with water to the water line and looking for loose and leaking rivets before applying the coat-it. You can re-buck any loose rivets.

I stripped my entire boat but it took MANY hours of labor and gallons of stripper....that is your call...if you don't strip it you can sand the old paint and use the self etching primer on just the bare spots. Woodonglass has a excellent thread on painting using rustoleum...use the search function and type in "painting with rustoleum".

Also that dash will be a bear to re-install,,be patient in coaxing it it
and start investing in some stocks in stainless steel hardware!!!

On a side note about installing a deck..I think my deck has added a lot of dead weight as these boats never came with decks before 1960...I think it has affected my performance a little bit if that is important to you...just something to think about :)............have fun with the project!
 

Camlee98

Petty Officer 2nd Class
Joined
Aug 7, 2009
Messages
110
Re: 1958 Starcraft Jet... Boat Rebuild attempt #2

Re: 1958 Starcraft Jet... Boat Rebuild attempt #2

Thanks that helps a bunch!! Are you talking about Woodonglass's tractor paint thread? I can't find one of his with rustoleum?
The PO had made his/her own transom and from the looks of it went much thicker and routed out the areas around the knees and such.
The boat is rated for 50hp so I should be alset using the thickness of the old transom correct?
I'm gonna search now for the answer but will a quart cover the bottom of my boat twice (keel to gunwale)? I a little goes a long way.
 

jtrom

Petty Officer 1st Class
Joined
Apr 21, 2010
Messages
220
Re: 1959 Starcraft Jet... Boat Rebuild attempt #2

I'm not sure if it's the tractor one or not...you might want to private message him for the link.
The new transom should be 1.5 inches think...it will then be able to slide behind the 2 end knee braces and rest on top of the center one. Laminate 2 pieces of 3/4" plywood together with titebond waterproof glue. If you can get the old one out in one piece it makes a great template. Coat the finished transom with epoxy (I used poly resin cuz I'm cheap) and three coats of marine spar varnish. My transom holds my 50 hp Johnson just fine.
And a quart of Coat-it did the whole boat easily...don't mix it all at once in the same container or it will get hot and harden before you can apply it all
 

jbcurt00

Moderator
Staff member
Joined
Oct 25, 2011
Messages
24,894
Re: 1959 Starcraft Jet... Boat Rebuild attempt #2

Paint your boat for $100 post from WOG:
Ok Here's my recommended formula for Majic Oil Based Acrylic Enamel Paint for Roll n' Roll and for Spraying.

21.jpg


This Should yield one THIN coat on a 14-16 foot boat hull.

For aluminum boats, Acid wash the boat (lots of guys just use 50/50 mix of white vinegar and water) then use a Self Etching Primer (I like the SEM Primer shown below) on ALL bare aluminum spots, and then coat the entire boat with the Majic Oil Base Metal Primer Shown above.


$%28KGrHqIOKkIE1qUPbU1RBNi9,RtMiw%7E%7E_12.JPG


For Fiberglass Boats I recommend using the same Majic Tractor and Implement Primer - Gray

Even though it says metal primer, in speaking with their rep's it will work fine on Fiberglass and Gelcoat.

If you have Deep sides you may need to adjust the amount of Paint you buy. I recommend Majic's Oil Base Metal Primer. IF your boat is NOT left in the water for MORE than 3-4 days at a time, this will work fine. This is NOT for boats left in the marina for the season.


This is for Roll n' Roll Application


Final sand with 180 grit and wipe down with acetone.
Two coats of Primer. Roll n' Roll technique is the same. Thin coats!!!
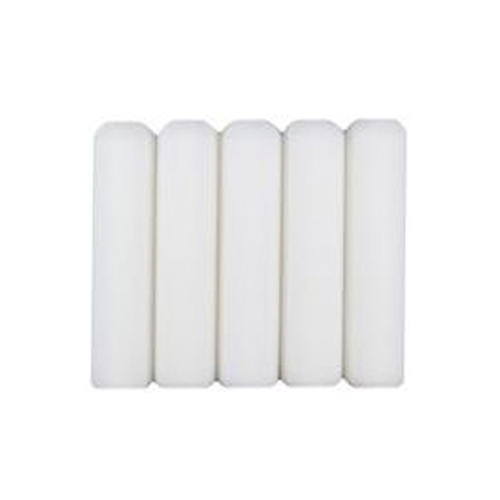
Use the Ultra Smooth Whizz Brand High Density 6" Foam Rollers
732087940657xl.jpg


Mixing Formula

2 cups Paint
1/4 cup of Majic Reducer
57796.jpg

1 oz of Hardener (1/8 cup/2Tablespoons)(Sold @ Tractor Supply Stores)

8-0950-4_Majic_Catalyst_Hardener_-_05_Pint.jpg


Roll n' Roll Technique
Wet roller with paint an roll out about 4-6 sqare feet. Thin coats work best and help prevent runs. If you can HEAR the paint (Sticky Sound)you are rolling too long. Put the first roller in a Plastic bag and use another roller. wet it out but wring out almost all of the paint and then Re-roll the area you just painted. Use a very LIGHT stroke and the paint should lay down with NO Bubbles!. Put this roller in the bag and use the other roller again. Repeat this process untill the boat is painted. Always do the re-roll with a damp roller with very little paint in it and LISTEN. You will hear the sound that lets you know when it's time to stop. It's kind of a sticky sound.
Here's a link to 2 videos showing the technique.
http://www.youtube.com/watch?v=MekW6qu_HT4&feature=mfu_in_order&list=UL


For Spraying.

Final sand and wipe down with acetone.
Two coats of Primer. Use HVLP spray gun with a 1.2 - 1.4mm Tip. Thin coats!!!


21.jpg


For 1 qt paint
3/4 cup of Acetone & 3/4 cup of Majic's Reducer.In High Temps use Acrylic Enamel High Temp Reducer sold at some Auto Supply stores. I used Acme Finish 1.)
2oz of Hardener (1/4 cup/4Tablespoons)
(NOTE: Only add Hardener to the amount of Paint that you will use in an 8hr period.) DO NOT use after this 8hr period.

I mixed up 2 cups (1/2 qt) at a time using 1oz of hardener, 3/4 cup of reducer.

One Quart should yield two coats of Paint.
Shoot first coat in the morning.
Wait 4-8 hours.
Wet sand with ScotchBrite Pad LIGHTLY to knock down any nubs or bugs.
Dry.
Tack cloth off with 50/50 mix of Mineral Spirits and Acetone.
Dry.
Shoot second Coat.
Let dry over night
Repeat wet sand and Tack cloth
Shoot 3rd and 4th coat if needed.

HINT: If you want a COLOR that you cannot find, then you can use Acrylic Artists OIL paint thinned with acetone from any Art supply store that you buy in tubes or use another color of the Majic Paint. Google search to find out how to mix paint to get the color you're wanting. It's not to hard to do. Start with small amounts, keep track of the ratio and then multiply it to get the amounts you need. You can get ANY Color in the Rainbow and it works GREAT!!!!


Ambient Temperature, Relative humidity and Spray gun settings all play a big role in how the paint will lay down on the surface to be painted. Also, Remember, your paint job will only be as good as your surface prep. The primer will tell the story. If you can SEE it when it's in primer you'll see it in the finish coat. Sand it and fill it if you want it smooth on the final coat. 3M Premium Marine Filler is good stuff. I like to mix my own filler using the following formula...1cup resin, 1.5% MEKP, 1 Heaping tablespoon Cabosil and mix enough Glass bubbles till the mixture is like mayonaise or slightly thicker. I might use slight less MEKP if I want to extend the working time. I do not recommend using Bondo. Some people use it but it will absorb water if the paint chips on it. For small blemishes and surfaces scratches and above the water line It might be ok. A high build primer can also be used to take care of those.
TCP Global sells a good High Build Primer for Fiberglass, as well as Acrylic Enamel Paints and supplies (nice HVLP Spray Guns) at reasonable prices. I might try their paint on my next boat project.

This is a good article on how to setup most HVLP Spray Guns...
http://purplesagetradingpost.com/sumner/techinfo/HVLPspraygun.html


Camlee98

Petty Officer 2nd Class
Joined
Aug 7, 2009
Messages
110
Re: 1959 Starcraft Jet... Boat Rebuild attempt #2

Ok I have everything stripped off the trailer. I started sandblasting it and it's working pretty well. I was humid today and I now have a clog. This would be easier with another person to control the media flow.
Couple questions regarding blasting(This is my first time doing this).
While moving around to different spots can I let the deadman's switch\valve close without shutting off the media flow?
What is the best way to get this thing unclogged?
Do I force air thru the nozzle with the media valve open?
On to a different topic. Did woodonglass change the paint type above? Because I swear it was a different type of paint that I did not see at the Tractor supply store.
Thanks for all the help!
 

jbcurt00

Moderator
Staff member
Joined
Oct 25, 2011
Messages
24,894
Re: 1959 Starcraft Jet... Boat Rebuild attempt #2

Yes, the paint changed, but it isn't WOG's doing. Tractor Supply discontinued carrying the Valspar implement paint line & now 'produce' their own private label implement paint, Majic. Valspar products are probably still available, and are still good choices, but it seems like Tractor Supply is in many markets, close to many of the folks doing resto's on boats. Tractor Supply is a good source for tools & equipment, parts & pieces for trailers, screws/nuts/bolts & etc, and are relatively inexpensive, so using their paint makes them all the more a one-stop shop, and being relatively inexpensive helps!

Media blasting, humidity clogged nozzle..... Yeah, I got nothing, sorry. Only used the shop's blaster once, and it didn't go very well, so....

BTW: it was a humidity clog too:facepalm:
 

Captmills

Petty Officer 1st Class
Joined
Aug 22, 2009
Messages
374
Re: 1959 Starcraft Jet... Boat Rebuild attempt #2

Never had good luck with a blaster no matter what the medium was, some people swear by them, I swear at them :mad:
 

Camlee98

Petty Officer 2nd Class
Joined
Aug 7, 2009
Messages
110
Re: 1959 Starcraft Jet... Boat Rebuild attempt #2

Lot's of rain past couple days. Hoping to try that blaster again tomorrow. If it doesn't go well I know how to use the sander lol.
Motor question
I bought a Mercury 50 last year and have not started yet. I want to get at the very least a new impeller and change the gear oil.
Should I buy the water pump kit or just get the impeller?
If the kit do you guys like mallory or sierra better?
I'll throw this in with the wrench monkey's and see what they say also.
 

TruckDrivingFool

Lieutenant Commander
Joined
Jul 30, 2007
Messages
1,818
Re: 1959 Starcraft Jet... Boat Rebuild attempt #2

On the motor I'd pull it apart and inspect it before ordering parts.
 

Camlee98

Petty Officer 2nd Class
Joined
Aug 7, 2009
Messages
110
Re: 1959 Starcraft Jet... Boat Rebuild attempt #2

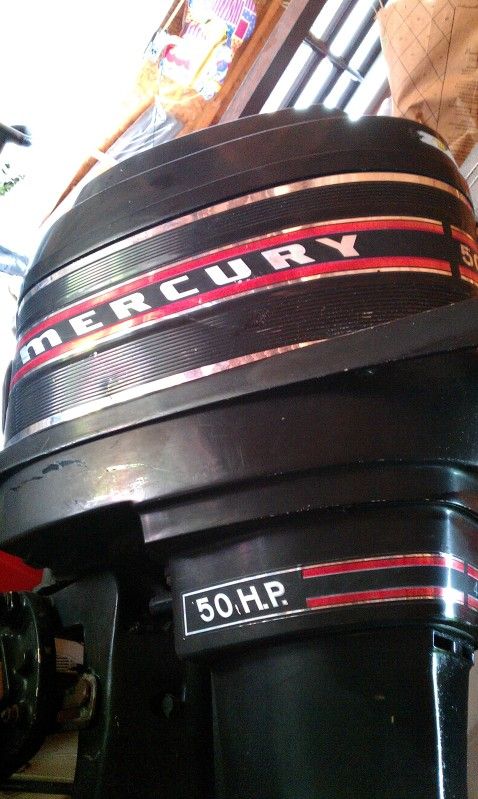
That's what I'm doing now figure I have to try it out sooner or later. I'm not having any luck pulling it apart but have have a thread going in the mercury outboard forums. Here's a pic of the outboard I'll be running. (Hopfully)
IMAG0101.jpg
 
Top