1959 Lone Star El Dorado "Project Texas Tornado" - Winner 2016 Resto SOTY Award

Watermann

Starmada Splash of the Year 2014
Joined
Jan 12, 2013
Messages
13,787
That's just the opposite of me, I look forward to the painting. Sounds like you have it all figured out, looking forward to seeing the end results. :joyous:
 

Woodonglass

Supreme Mariner
Joined
Dec 29, 2009
Messages
25,927
Luke,

I've investigated the SW paint you're going to use. It's basically the same formulation that Rustoleum uses and Majic Paints uses and all other Oil Alkyd Based Paints. Rustoleum doesn't recommend using hardener either but... it works just fine. It's your boat and your decision but this paint is NOT rated for total immersion. If it's only for inside the boat and above the water line then the use of a hardener is probably fine. But...If it for the outer hull, I'd recommend you use the hardener. It'll work just fine.;)
 

Luke000

Restoration Forum Splash of the Year 2016
Joined
Aug 19, 2013
Messages
346
Luke,

I've investigated the SW paint you're going to use. It's basically the same formulation that Rustoleum uses and Majic Paints uses and all other Oil Alkyd Based Paints. Rustoleum doesn't recommend using hardener either but... it works just fine. It's your boat and your decision but this paint is NOT rated for total immersion. If it's only for inside the boat and above the water line then the use of a hardener is probably fine. But...If it for the outer hull, I'd recommend you use the hardener. It'll work just fine.;)

Thanks for your input, I'll be sure to pick up some hardener when I get the zinc chromate primer! This paint will be for the outside hull and the top side. I don't see the boat ever being in the water for more than two or three days at a time the rest of the time it will be in the water for an afternoon and then go right back on the trailer.
 

Luke000

Restoration Forum Splash of the Year 2016
Joined
Aug 19, 2013
Messages
346
Alright, 4 gallons of paint are ordered up and should be here my the end of the week! I am going to make a run and also pick up some zinc chromate and enamel hardener soon as well. If anyone knows where to find some zinc chromate, that would be helpful! Next step is to get the boat lifted up and start to prep the bottom (maybe next week as the crane is being used for another project)
 
Last edited:

Watermann

Starmada Splash of the Year 2014
Joined
Jan 12, 2013
Messages
13,787
I use self etching primer and then regular primer over it, never have used the zinc stuff on my tin and the paint holds on like a pitbull with a t bone. ;)

The brand I use is VanSickle and they carry it all at my local farm store so maybe SW makes SE and the alkyd primer too?

4 gallons!
 

Luke000

Restoration Forum Splash of the Year 2016
Joined
Aug 19, 2013
Messages
346
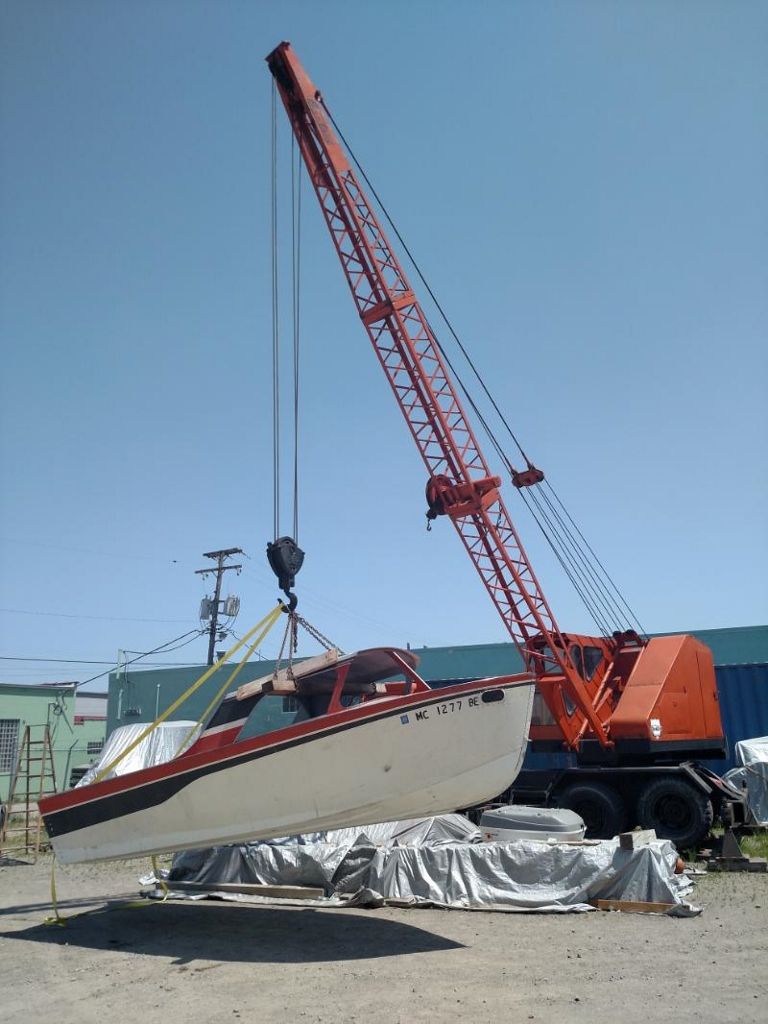
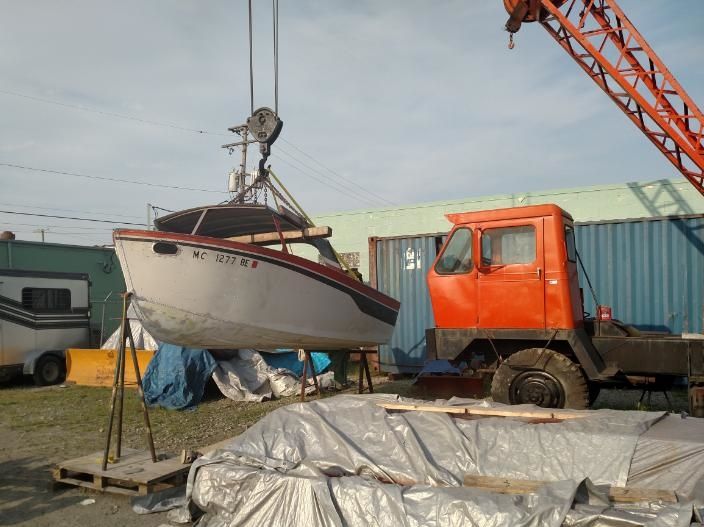
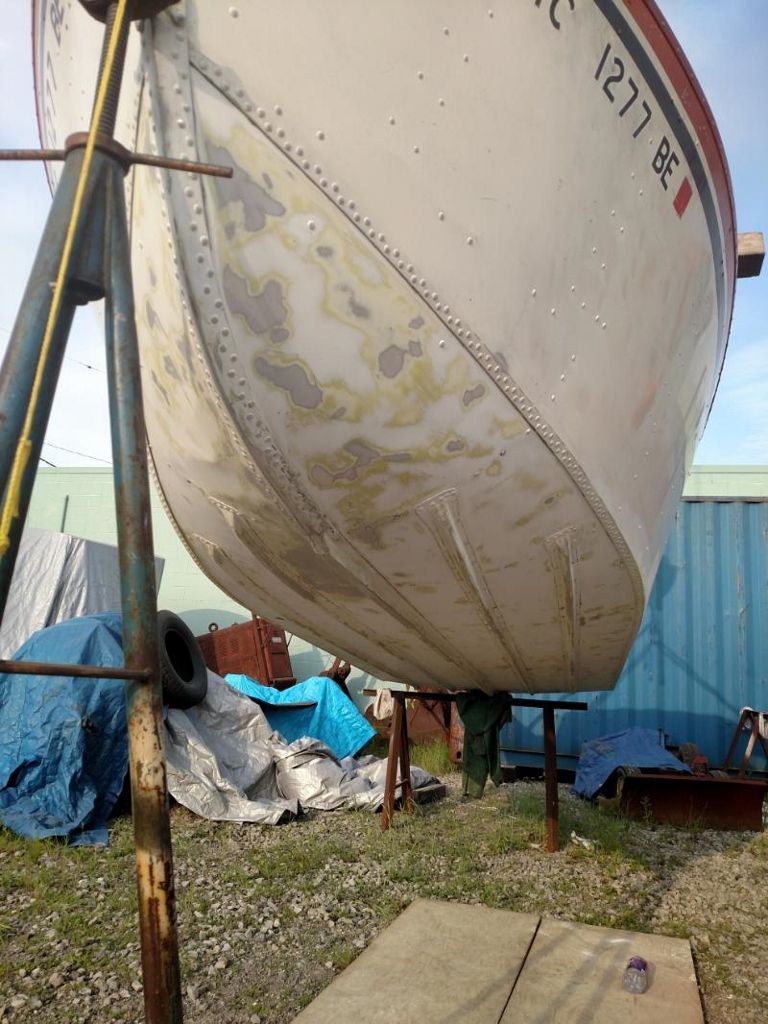
Still waiting on my paint to arrive and get tinted (primer didn't ship last time and my store did not have the correct toner for the top coat) So unfortunately there will be no painting this week, hopefully can get the bottom done on my days off next week as long as the weather holds out (Tuesday and Wednesday) But yesterday I did get the boat lifted up off the trailer and got the bottom sanded, ready for some paint! My arms felt like jello and I thought I would never get clean. I used an orbital for most of the space and then got around the rivets with some aggressive scotch brite pads.


Tnstratofam

Commander
Joined
Aug 18, 2013
Messages
2,679
Okay I'm really wishing I had a crane! I could really get into trouble with one, but it would really come in handy.:D

Nice work on the hull sanding. I bet your arms were jello. Sanding or doing anything over head puts more strain on your sholders and arms than you might think. That's the advantage to flipping the hull over for bottom prep and paint. Ofcourse it requires removing the pilot house in your situation which presents its own problems.

Keep up the good work. Can't wait to see her painted.
 

Luke000

Restoration Forum Splash of the Year 2016
Joined
Aug 19, 2013
Messages
346
Okay I'm really wishing I had a crane! I could really get into trouble with one, but it would really come in handy.:D

Nice work on the hull sanding. I bet your arms were jello. Sanding or doing anything over head puts more strain on your sholders and arms than you might think. That's the advantage to flipping the hull over for bottom prep and paint. Ofcourse it requires removing the pilot house in your situation which presents its own problems.

Keep up the good work. Can't wait to see her painted.

Thanks ! Unfortunately the crane is not mine, it belongs to my friends whose shop the boat is at. But a crane is definitely on the list of tools I need in the future. I have seen it make life a lot easier! As much as the prep work sucks, I'm now really looking forward to spraying some paint! I think will be about 4 weeks of paint for me as I only have 2 days off each week and 3 colors to do.
 

Watermann

Starmada Splash of the Year 2014
Joined
Jan 12, 2013
Messages
13,787
I can imagine using chemical stripper up under the there would've been even more of a challenge. :lol:
 

monriverguy

Petty Officer 2nd Class
Joined
Oct 28, 2013
Messages
190
Cant wait to see your paint job Luke, I have been working on mine to but did not paint it as good as yours yet my goal was to get it in the water i hope to launch it in the next two weeks just to see how the old girl floats... here is a quick pic of the inside of mine i will update my post soon.....

Thanks again for all your help Luke and the rest of ya out there......
 

Attachments

  • P4070167.JPG
    P4070167.JPG
    216.7 KB · Views: 3
  • P4070168.JPG
    P4070168.JPG
    251.6 KB · Views: 3
  • P4070170.JPG
    P4070170.JPG
    210.3 KB · Views: 3

Luke000

Restoration Forum Splash of the Year 2016
Joined
Aug 19, 2013
Messages
346
Cant wait to see your paint job Luke, I have been working on mine to but did not paint it as good as yours yet my goal was to get it in the water i hope to launch it in the next two weeks just to see how the old girl floats... here is a quick pic of the inside of mine i will update my post soon.....

Thanks again for all your help Luke and the rest of ya out there......


Looking good! glad to see someone is making good progress with their lone star!

I finally got notice that my paint is ready for pickup, they did tell me that the seaguard universal primer that is sold for the paint is not something they can get (im not sure if it is unavailable/discontinued/etc) but they did tell me that an alternative primer was in stock at the store near where I work on the boat and the primer is called "DTM Wash Primer" and reading about it it sounds like it will work well with the aluminum boat. (link attached) And the lady at SW assured me that the paint is compatable with my topcoat and application. Other good news is is water based so I dont have to buy a few gallons of xylene that I would have to for the seaguard primer, It does not require an airless sprayer that the seaguard primer did, they have multiple gallons available at the local store in case I need more, and last but not least its $25 less a gallon than the seaguard! The weather looks good for paint early next week as of now so fingers crossed!

PS: paint experts, do you thing the self etching primer is still needed for the bare aluminum spots with this new primer?
 

Watermann

Starmada Splash of the Year 2014
Joined
Jan 12, 2013
Messages
13,787
I've done some painting on old tin boats but am far from being an expert. That being said after reading that the primer is designed for aluminum and galvanized steel I would have to say that it is an etching primer and should work out great.
 

ssdale

Starmada Splash of the Year 2016
Joined
Nov 4, 2011
Messages
285
My one time experience with self priming paint has been a good one-did not use zinc chromate on a old Appleby 14 foot v bottom. About 5 years old and still looking great.
Keep up[ the good work with your cool project.
Dale
 

Luke000

Restoration Forum Splash of the Year 2016
Joined
Aug 19, 2013
Messages
346
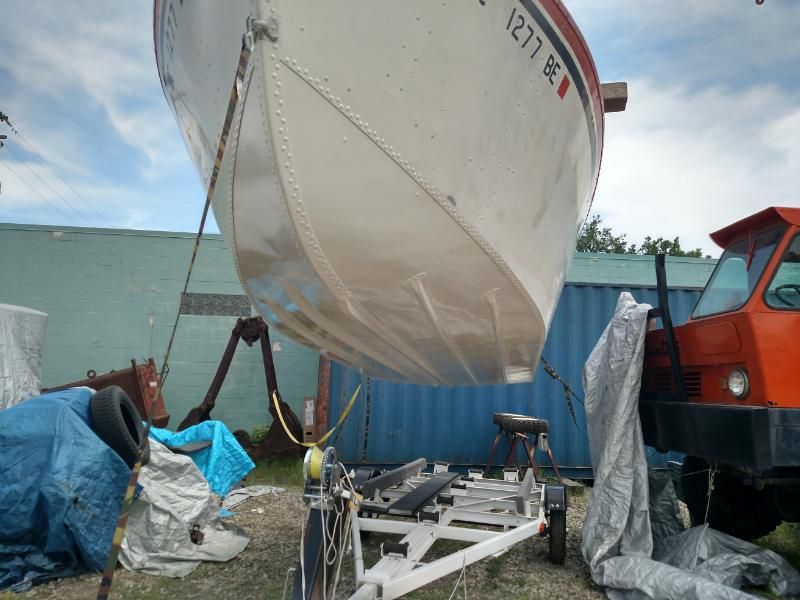
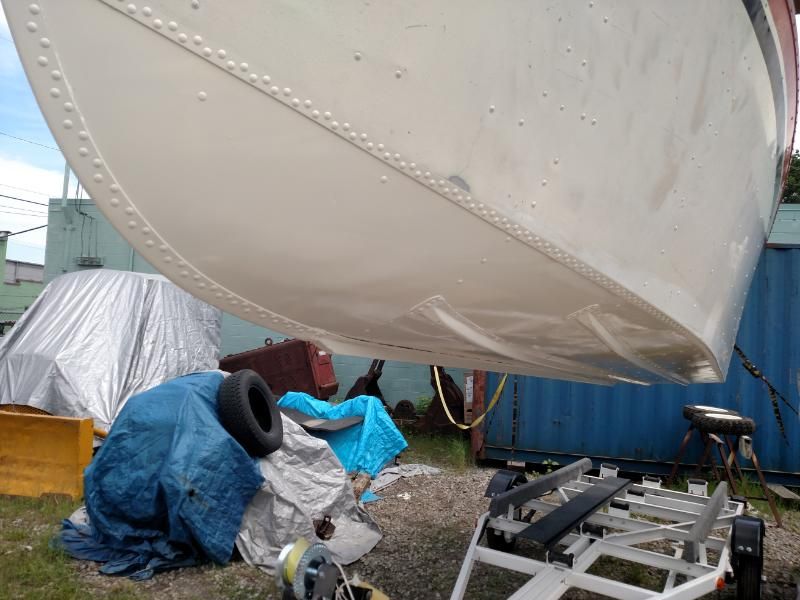
Thank you everyone for the input on the primer, after picking the brain of the guy at the store he sad the DTM wash primer is good to go straight onto aluminum as well as over previous paint. Yesterday I got the primer and first coat sprayed, and this morning I sprayed the second coat. Now to let cure for a few days or so before I put it back on the trailer. did use the Majic hardener and it seemed to work well. I did learn a few things that I will be using for the rest of the boat, the main one being the primer sprays nicely, but even thinned out (twice the recommended amount) the Seaguard 100 is too thick to spray with my gun (1.7mm tip, HVLP @28psi incoming) I got a lot of pulsing/sputtering from the gun resulting in uneven coverage and a few drip mark that will never be seen. I dd make it all work for the bottom and t turned out well, like the color (slight cream tint) But for the rest, am going to spray the DTM primer and roll the Seaguard. Slowly but surely the boat is coming together!

Primed:


Second coat:


Woodonglass

Supreme Mariner
Joined
Dec 29, 2009
Messages
25,927
Uhmmm I think you need to UP your pressure. HVLP guns usually shoot best at about 38PSI
 

Watermann

Starmada Splash of the Year 2014
Joined
Jan 12, 2013
Messages
13,787
Hey that looks pretty darn good to me at least from here!

I use the 1.4 tip for paint and primer, the 1.7 I don't have but hear it's for things like a high build primer. I have 40 psi at the handle which gives it 8 psi at the cap and helps with the proper atomization of the paint so you get fewer sags if the fluid control is set right for the paint.
 

Luke000

Restoration Forum Splash of the Year 2016
Joined
Aug 19, 2013
Messages
346
Interesting! I am no pro painter by any stretch, so I will take any tips/tricks. My gun is a gravity feed marked 28psi max at the inlet, the only reason I did not go any higher than that. But I will give it a second try on some scrap with some higher pressure before I do the next section. The problem looked like the paint could not keep up with the air coming out and it would flutter, like in this picture:
http://www.contrastequipment.com/images/interpat.jpg

And I did check for a clogged vent hole in the cup, it was free.
 
Last edited:

Watermann

Starmada Splash of the Year 2014
Joined
Jan 12, 2013
Messages
13,787
My HVLP gun is a few years old and a different brand so things could be different with yours. I'm confident you set yours up from a base starting point per their instructions. Does your gun have a gauge/valve at the handle you're setting to 28 psi? If so what do you run for line pressure from the compressor? Using that 1.7 tip I would imagine the fluid control would have to be set way different than what a 1.2 or 1.4 is set at.
 

Woodonglass

Supreme Mariner
Joined
Dec 29, 2009
Messages
25,927
When I shoot my 1.8 tip with Primer, I run 110psi at the compressor and 38psi at the gun. I thin the primer approx 10%. If you're thinning that paint at a 50% ratio and it won't shoot thru a 1.7mm tip then it HAS to be the air setting. Gelcoat is very thick and you can shoot it thru a 1.8mm tip thinned @ 20% but...At 40-45psi at the gun. You have to push it out the tip with the fluid control set high and let the air atomize it. If they're both set to low it WILL sputter and blotch.
 
Top