18' Starcraft SuperSport restoration

Status
Not open for further replies.

ezmobee

Supreme Mariner
Joined
Mar 26, 2007
Messages
23,767
Re: 18' Starcraft SuperSport restoration

The dealer sold it out from under me. It was NOT cool. They had originally accepted a low offer from me and I think he probably reconsidered and fed me some BS story. It was too far to drive though just to bust him. It was for an '05 Buick Rainier. I'm going to take it as a sign that we should really just stick to looking for Pacifica's since we already know we like them a LOT.
 

ezmobee

Supreme Mariner
Joined
Mar 26, 2007
Messages
23,767
Re: 18' Starcraft SuperSport restoration

Windshield is on. Doesn't look perfect but it's acceptable. It was quite a pain. The bow rails are also now on. My dad is coming over to help me do some more work. We'll see that else we can bang out. Pictures this evening.
 

jspano

Senior Chief Petty Officer
Joined
Oct 30, 2009
Messages
790
Re: 18' Starcraft SuperSport restoration

EZ
The dealer sold it out from under me. It was NOT cool.

we went to look at a car once told the lady we were coming, drove an hr to get 1 blk from her house and she calls me to say she just sold it!!!!!!!!!

can't wait to see more pics!
 

ezmobee

Supreme Mariner
Joined
Mar 26, 2007
Messages
23,767
Re: 18' Starcraft SuperSport restoration

Ok, I lied, no pictures. Nothing too interesting. However, much progress was made. My dad was a ton of help with getting the King StarBoard dash panels cut and fit perfectly. He cut out 1/2" plywood panels to fit behind the StarBoard for stiffening. I don't want any fasteners visible on the dash panels so I planned to screw in the plywood and then glue the StarBoard to it. My dad was concerned that unless we recess the plywood a bit the StarBoard would not look nice having to bend a bit around the console metal and plywood screws. So he took the plywood home and is going to rout out the edges a bit. They are going to look great.

While he was doing that, I got all the holes drilled in my transom (oversized). I then got it back out of the boat. It's ready for epoxy. I then patched a bunch of extra unneeded holes in the aluminum transom skin with JB Weld. On larger ones I used a backer of a small piece of flashing.

I'm confident I can get the transom done this week and then get the motor hung and rigged.
 

BobsGlasstream

Commander
Joined
Sep 11, 2009
Messages
2,128
Re: 18' Starcraft SuperSport restoration

EZ,
Sounds like you made a lot of good progress. Hopefully your plan works out.
Bob
 

sprintst

Commander
Joined
Apr 18, 2009
Messages
2,066
Re: 18' Starcraft SuperSport restoration

I'm thinking of doing the same on mine with the starboard. It will be cool to see what you did as I'll more than likely copy you :)
 

ezmobee

Supreme Mariner
Joined
Mar 26, 2007
Messages
23,767
Re: 18' Starcraft SuperSport restoration

sprintst, I had originally intended to buy 1/2" starboard but accidently ordered 1/4". At first I was pissed but then I realized it would probably look nicer not adding all that visible thickness. And I'm not sure if even the 1/2" would have been sturdy enough to support the helm without additional bracing. I think it will turn out nice. I'm going to prime it with primer meant for plastic and then painting it a medium gray for contrast.
 

fishrdan

Admiral
Joined
Jan 25, 2008
Messages
6,989
Re: 18' Starcraft SuperSport restoration

Are you thinking of painting the starboard? I'd test a piece first as I don't think anything will stick to it, well at least there's only 1 glue that will stick to it, expensive stuff. I tried some 5200 on it, and after the 5200 was cured,,, it came right off the starboard.
 

ezmobee

Supreme Mariner
Joined
Mar 26, 2007
Messages
23,767
Re: 18' Starcraft SuperSport restoration

Are you thinking of painting the starboard? I'd test a piece first as I don't think anything will stick to it, well at least there's only 1 glue that will stick to it, expensive stuff. I tried some 5200 on it, and after the 5200 was cured,,, it came right off the starboard.

Fan-friggin'-tastic. Did about a half hours worth of research and completely confirmed this. There is a lovely $40-50 adhesive from 3M that will work but I can't tell how much you get for that price and it looks like a nightmare to use. They say no paint will stick to it. I really gotta wonder if that plastic primer I bought would at least sorta work.

The good news is, left white they still won't look bad. And they really won't need to be fully adhered as all my accessories like helm, gauges, switches, etc. will hold them in place. The passenger side on was going to have one of these in it http://www.consumersmarine.com/modp...e=Tackle-Storage&aID=701E&merchID=1009&r=view which would also hold it on place. I could just use 5200 to at least aid in the process.
 

kilowatts

Petty Officer 1st Class
Joined
Apr 3, 2009
Messages
299
Re: 18' Starcraft SuperSport restoration

Hi Guys:

I think I might be able to offer some advice regarding Starboard.
I've made a console fascia for my 215 Grew/Slickcraft control gauge panel out of black 1/4 inch starboard. Bolted to the existing fiberglass with great results. I also replaced a teak bow pulpit on the same boat with black 1/2 inch starboard bolted three deep. It's really great material but nothing will stick to it so don't try! In large spans it will also slump so be careful of the span it covers. Bolts work much better than screws as they seem to work loose, so be warned. Other than that it seems to be completely inert and immune to sun, salt and everything else boaters can throw at it. It's a great replacement for trim as you can shape it using woodworking tools very easily. Hope that helps!

kilowatts.
 

fishrdan

Admiral
Joined
Jan 25, 2008
Messages
6,989
Re: 18' Starcraft SuperSport restoration

The passenger side on was going to have one of these in it http://www.consumersmarine.com/modp...e=Tackle-Storage&aID=701E&merchID=1009&r=view which would also hold it on place. I could just use 5200 to at least aid in the process.

Yup, the 5200 would help conform the box to the rough surface of the Starboard and seal it to some degree, but it won't "glue" it in. I built a couple rod holders by riveting small pieces of painted EMT tubing to starboard, and then used 5200 to form fillets between the tube and starboard,,, so the tubes wouldn't rock/loosen. The 5200 worked great to form the fillets (unseen), but was easily peeled off the Starboard, in a few places where I got carried away with the 5200...
 

ezmobee

Supreme Mariner
Joined
Mar 26, 2007
Messages
23,767
Re: 18' Starcraft SuperSport restoration

I just placed what is hopefully the last high dollar order of boat stuff. This was a biggie. Got pretty much everything I need to finish the boat.

Steering system (thanks a ton to umOrion who clued me in on an ebay seller who has these cheap)
Splashwell train tubes and cable boots
Horn and horn switch
Stern light
Battery tray
Fuel tank
Fuel vent and withdrawal line
New windshield supports
Carb and fuel pump rebuild kits
Some nifty organizer things
Dock lines

And this bad-*** transom mount tilt switch to allow me to easily tilt the motor from back
at the motor http://www.wholesalemarine.com/p/T-H-TTC-1/
 

ezmobee

Supreme Mariner
Joined
Mar 26, 2007
Messages
23,767
Re: 18' Starcraft SuperSport restoration

I got a coat of epoxy on the transom last night. I used up all my Clark Craft epoxy on the deck. I didn't know how much the transom would need and I didn't want to over order. Tim Fives graciously gave me a gallon of epoxy from a large order he got a great deal on from ebay. The plan is just to use what I need and then reimburse him for what I used. Now, not to look a gift horse in the mouth....and I really appreciate Tim helping me out, but I did have to inform him that he's going to be hating life when he goes to do his deck boards with this stuff. He did his transom with West System so he's going to be comparing it to the best. You guys thought I used a lot of epoxy before? Sheeet, this stuff is even worse. It's stinky, sticky and doesn't go far. "Special low viscosity formula" my foot. And it's still tacky (although it's been cool). Oh well. I'm not too concerned since it's not like I'll be walking on it or anything. I was hoping to get another coat on tonight but that ain't happenin'.
 

HopeSheFloats

Lieutenant Commander
Joined
Jun 12, 2009
Messages
1,674
Re: 18' Starcraft SuperSport restoration

Oh yeah, gotta get me of of those tilt buttons...sweet
I haven't much experience with epoxy but I sure was impressed with the stuff I used from US Composites, easy to work with imo, total 8 gals used in my Imperial project.

Speaking of epoxy & transom's...I did mine in epoxy and today I coated it with some leftover epoxy paint....bad idea? or overkill but fine?

Dude you'll probably be bored with your SS and looking for another project before I get finished ;)
 

BobsGlasstream

Commander
Joined
Sep 11, 2009
Messages
2,128
Re: 18' Starcraft SuperSport restoration

Nice list of supplies EZ, I really like that remote trim switch too. I can see where that would come in handy.
Bob
 

ezmobee

Supreme Mariner
Joined
Mar 26, 2007
Messages
23,767
Re: 18' Starcraft SuperSport restoration

Kenny, I don't think it will be overkill. Mine may be painted as well if for no other reason than I'd rather not see wood on the inside of the boat. Looking for another project? Hah! You are overestimating my enjoyment of this :p

Bob, my friend has my same motor but a few years newer and it has tilt buttons mounted right on it. It's very cool and I was like I have to figure a way to rig that. I was pretty happy to find this switch for $20.

Andy I'll get some (boring) pics soon.
 

SBTOM

Petty Officer 1st Class
Joined
Jul 22, 2009
Messages
275
Re: 18' Starcraft SuperSport restoration

I'm a little late to the game on this one, but if you end up needing into join that Starboard material or add fasteners or anything, you can use a plastic welder. I used this exact product a while back to fix the gas tank on my enduro bike.
http://www.google.com/products/catalog?q=plastic+welder&cid=7409289531630890909&sa=title#p
I can tell you right now that it is a complete waste of money. Its basically just a soldering iron that you can feed the plastic welding rod through. It gets clogged up so you end up using it "tig" style anyway. Point is: if you want to join it, order a couple sticks of the plastic welding rod and stick a rounded off piece of metal in the end of your basic soldering iron, and you are good to go.
 

McGR

Senior Chief Petty Officer
Joined
Jun 19, 2004
Messages
664
Re: 18' Starcraft SuperSport restoration

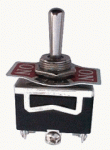
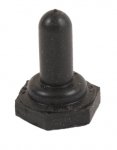
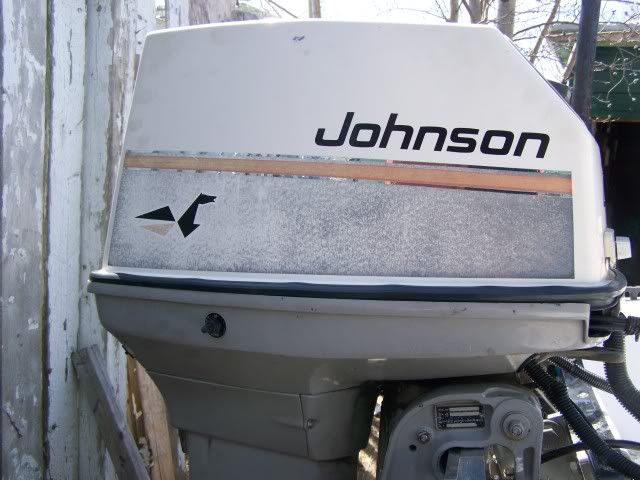
EZ - I added a similar tilt switch to my old 85hp when I added a CMC t-t unit. I did it even cheaper than $20. I just picked up a center off three position momentary toggle switch and wired it to activate the relays on the trim unit. I also bought a boot to go over switch lever to protect the switch from the elements. The pics shown below are similar to what I used. These parts are readily available from various sources (eBay will have them). I think it cost me about $8 in parts. I just simply drilled a 3/8" hole in the lower cowling and installed the switch and boot. It works like a charm. If you haven't ordered the other switch already, you may want to consider this option.
 

Attachments

  • sw559_small.gif
    sw559_small.gif
    17 KB · Views: 0
  • Switch%20Boot.jpg
    Switch%20Boot.jpg
    46.6 KB · Views: 0

tallcanadian

Captain
Joined
Sep 7, 2006
Messages
3,245
Re: 18' Starcraft SuperSport restoration

When I installed my CMC power trim unit, my control had the trim button on it, so I used the original CMC switch and installed it right on my motor. So convenient. McGr is right, a 3 position momentary switch is all it is. Nice.

100_1992.jpg
 
Status
Not open for further replies.
Top