14' Larivee restore

zool

Captain
Joined
Aug 19, 2012
Messages
3,432
Re: 14' Larivee restore

Mothane is the equivelent of Pettit Easypoxy 2, its a 2 part Polyurethane Enamel. It shouldnt peel off under the water line if not left submerged for more than a week or less. If you trailer ur boat, and dont dock it in a slip for extended periods of time, it will generally hold up, at least as much as other boat polys like Imron, Easypoxy, and LP's like Awlgrip. Few paints will hold up submerged for extended periods of time which is why a barrier coat and bottom paint is used almost exclusively over factory gel.

Budget = Easypoxy 1 & 2, Mothane, PPG Essential, and other enamels like tractor paint/Rustoleum.

Middle road = Supermarine, PPG Delfleet Evolution

Top shelf = Awlgrip, Imron, PPG Concept.

All have their place as well as their querks. Some lend themselves better to rolling and tipping as opposed to spraying, like Easypoxy, Awlgrip because they have a long dry time and the paint blends out the brush marks while curing, others like Essential/Evolution/Concept are pretty much spray only. Some have finite color choices, while others have infinate color options like the auto paints.

If im not mistaken, WOG used Easypoxy on the Flamingo, but he could answer that better than me..

Hope I didnt confuse you more ;)
 
Last edited:
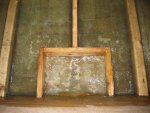
sphelps

Supreme Mariner
Joined
Nov 16, 2011
Messages
11,462
Re: 14' Larivee restore

I used the Valspar tractor paint but I don't leave it in the water for long periods of time . It stays on the trailer in the garage when not in use . Been using it quite a bit and no peeling of the paint below the water line has has happened so far . I did have some paint scuff off where the hull was hitting the center bunks at a bad angle . It slid down a hard edge of the bunks and scuffed about 6 or 8" of paint on both sides of the hull . I have since rounded the hard edges, readjusted the bunks and added a center roller . So far that has cured the problem ..We,ll see how it holds up over the next few years and go from there . That being said I don't know of a single type paint that you can,t scratch if you try hard enough .. It comes down to basically how much you wish to spend .
Which ever way you go I'm sure it,s gunna turn out great ! :)
 

friderday

Chief Petty Officer
Joined
Apr 1, 2012
Messages
463
Re: 14' Larivee restore

Thanks sp-yeah I cringe every time I put one of my boats(4) on the trailer. No matter how I design my bunks & rollers it always seems like the boat finds a way to hit a crossframe or piece of metal hardware that leaves a gash. I had a nice discussion(PM) with wog last nite. He patiently went over some of my options. I have an estimated month to make a final decision. Yesterday, I got my bilge box built and glassed in. It came out perfect. Glassing & fabricating has become pretty easy on this resto. When my son & I did his boat, our first, it took us over a year. I'm hoping for a splash date before end of 2013(I got this boat on July 30). And, I helped him considerably with his. This one I'm pretty much on my own. Rewarding hobby, for sure. Today, need to put a bulkhead between the bilge box & forward bulkhead. My son & I had different opinions on this one. The distance between bilge box & end of outer stringers(i.e.forward bulkhead) is 88". But as he pointed out, there is only 10" on either side of center stringer & outer stringers. He thinks I don't need a middle bulkhead. My reasoning, as I looked at her last nite was, why not? I cut them out & fit them in less than 30 minutes last nite. Just need to scuff/sand the existing area, acetone, & PB & quick tab in today. This way with addition of cleats on center stringer & the two bulkheads, I will have plenty of support for deck. I'll post some pics later. Thanks again for all your advice(good). Have a gr8 Sunday!!
 

Jim Hawkins

Chief Petty Officer
Joined
Mar 11, 2013
Messages
499
Re: 14' Larivee restore

What a great little boat. I love the Lapstrake. I had a similar project and did some of the things you mentioned, bench seats and poured in foam. I used high density foam and glassed directly on top of the foam.

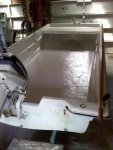
Fishwish foam.jpgFishwish roven.jpgFishwish painted.jpgFishwish inside.jpg

I also removed the boxes that served as seats and bulkheads so the hull needed stiffening.

I did the foam pours a section at a time because one big pour was too hard to calculate. Then a layer of woven roven on the foam and a layer of mat on top of that. This boat was not meant for show so the only sanding on the glass was what was needed for the layers to bond, Nuthin fancy.

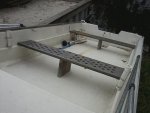
I bolted a piece of 1/8 aluminum angle to the sides of the boat and used 2x12 PT as bench seats. I planed the wood down to 1 1/8 thick, about like a stair tread then drilled it full of holes. I wanted this boat to be as light as I could possibly make it. I toyed with the idea of cutting square hole to make the seats look like hatch hold covers but decided round holes were far easier and lightened the seats up just the same.

The last picture is taken after years of use so it's not so shiny anymore but it has been a real workhorse. That little 15HP Johnson will move the boat at 21 MPH.

Hope something here helps.
 
Last edited:
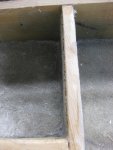
friderday

Chief Petty Officer
Joined
Apr 1, 2012
Messages
463
Re: 14' Larivee restore

Wow, Jim. Lots of similarities. Yeah, still a ways off, but that's my current idea for the seats. My only difference is I have a fabricating friend who suggested an aluminum pipe with flange at bottom to deck to brace the center of seats. I will have to glass in some sort of ledge for them to rest upon as my hull/sides don't have it like yours. Keep watchin'. Heading out now to do my bulkheads before it gets too hot.
 

Jim Hawkins

Chief Petty Officer
Joined
Mar 11, 2013
Messages
499
Re: 14' Larivee restore

I considered the center seat brace connected to the deck as I thought otherwise they would be thumping up and down over waves but that just didn't happen. The brace thats there was just something temporary I did that never got replaced.
 
Last edited:
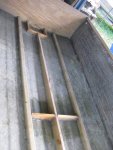
friderday

Chief Petty Officer
Joined
Apr 1, 2012
Messages
463
Re: 14' Larivee restore

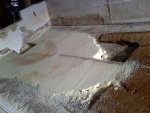
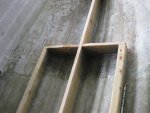
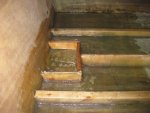
001.jpg005.jpg006.jpg007.jpg008.jpgHere are the promised pics of progress, slow-but steady. Got my bilge box in yesterday & finished tabbing in last foot or so of outer stringers. I hadn't tabbed that area as I was waiting for box & tabbing to be all in one shot; tie them all together. Pleased with that. Argued with myself last nite about a center bulkhead. I won & it went in today. Will add cleats next to center stringer & bulkhead areas for more surface area for deck & deck screws to hit. Just as I was cleaning up, proud of my work, I noticed my glass tab in front starboard bulk was completely separated from the wood, as if I didn't wet wood or use enough resin. Ah poop! Just when I thought the grinder could take a break. Neighbors are getting tired of hearing it, I'm sure. So tomorrow, will grind that area out until "air bubble/pocket" & give it another shot. Nothing I can't fix & soooo glad I saw it before the deck got laid. Hoping that will be done some time this wk(later). Nothing like a deck to demonstrate real progress. Getting excited, but trying to not miss anything along the way. A big thank you to wog & sphelps for their encouragement via pm last nite in regards to paint. Soon, I will be at that stage & we can discuss further on this thread so others can learn. Time to give the kids a little time. They're starting to get jealous of the boat.
 

sphelps

Supreme Mariner
Joined
Nov 16, 2011
Messages
11,462
Re: 14' Larivee restore

Good progress fdd ! Did you pre wet the wood before you tabbed it in . Might have been a little dry so the wood may have absorbed to much resin out of the glass . I don.t remember are you using epoxy or poly ?
 

friderday

Chief Petty Officer
Joined
Apr 1, 2012
Messages
463
Re: 14' Larivee restore

Good catch, sp..yeah, I did wet it, but I think what mite have happened is sorta just what you mentioned. You know when you're doing a small area like this or the box, you tend to get impatient & not let things happen in the order they are supposed to. It's just a quick layup so I (a)don't think I let the resin soak in to wood enough & (b)don't think I let 1708 take the time to soak up enough resin. After 3 showers yesterday, I got back from time with kids & turned on the grinder. It was a mess. I cleaned real good after with acetone & then soaked with resin(poly). I let that kick & then tore some csm patches to fill that area of the bulkhead. Heading out this morning to do a nick tab of 1708 to finish her up. Wanted to go in small steps to correct this instead of multiple layers all at one shot. She'll be strong at a tank by noon today. Then I gotta walk away from her for today. Back to work later & schoolwork with the youngest this morning(homeschool). If I could dedicate solely I'd have this done in couple wks, but life sure gets in the way. Cleats on tomorrow & deck should be ready to go on later in wk after I resin & csm underside. Have a great wk sp. Thanks for ridin' along.
 

friderday

Chief Petty Officer
Joined
Apr 1, 2012
Messages
463
Re: 14' Larivee restore

I will be posting updates & pics in next couple days. Quick question for now, though....does the hull need to be "acetone clean" for the pourable foam? Getting very close to laying down some deck & trying to think ahead. Obviously, acetone wash would be impossible once the deck is glued & screwed. I don't plan on leaving it filthy dirty under there, but just wondering if it needs to be acetoned just like when ready to glass. Thanks for the thoughts.........
 

friderday

Chief Petty Officer
Joined
Apr 1, 2012
Messages
463
Re: 14' Larivee restore

Thanks, wood! Sounds great..so excited to almost have deck under my feet..That is always a milestone. Things went so easily this time cutting the deck. Measured & cut(ok & prayed a little), no monkeying around. My youngest & I threw it in for a test fit & it was as close to perfect as I could have hoped.. About a 6" spot on one side that needed the flap wheel, but other than that, perfect fit. I resined back side today(slow kick) then put a layer of csm on. Did another test fit this afternoon & she looks great. Work gonna get in the way tomorrow, but I'll be back at her on Monday & Tuesday. I'll follow-up with pics mid-week. Enjoy the rest of your weekend & thanks, as always for the good word!
 

friderday

Chief Petty Officer
Joined
Apr 1, 2012
Messages
463
Re: 14' Larivee restore

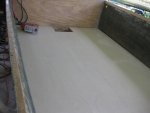
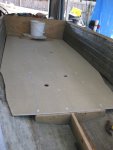
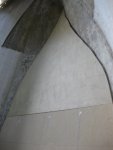
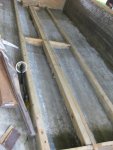
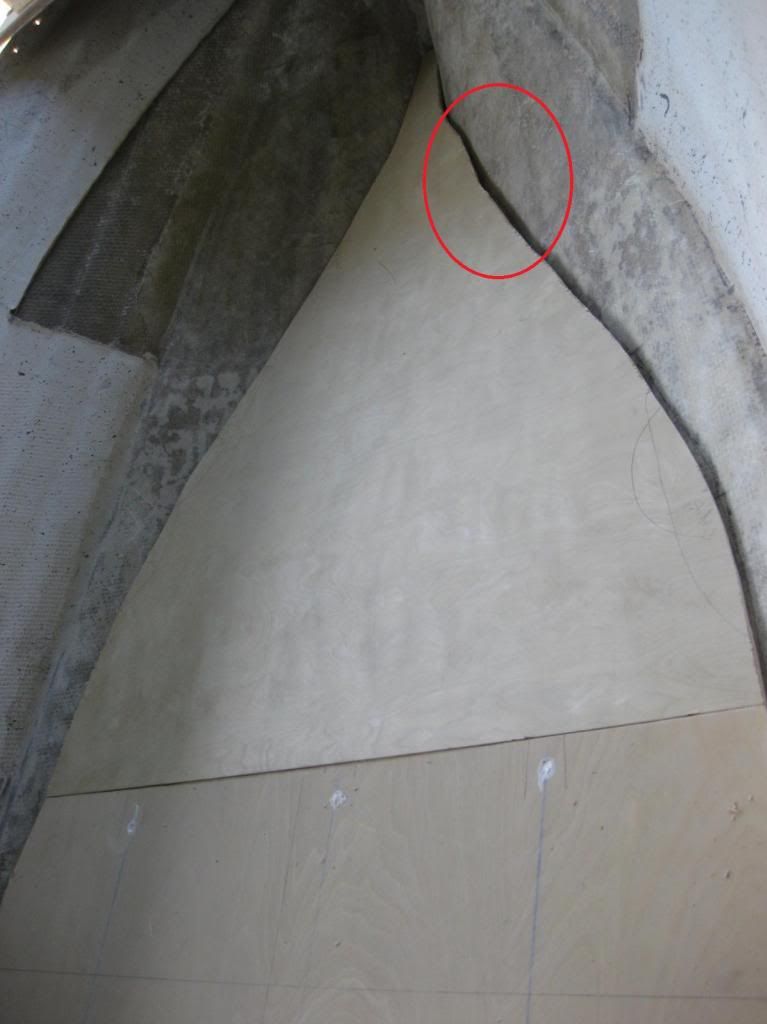
003.jpg004.jpg006.jpg026.jpgHappy Saturday to all. Been a while since my promised update. As you can see, I've made a little progress. I measured the deck six ways to Sunday with almost as many different measurements. The boat Gods must have been smiling upon me, as my first test fit was as close to good as I could have hoped for. Minor flapping on one edge and voila, deck under my feet. I took it out and flipped it over, giving it a good soaking of slow kick resin, then a layer of csm. I cut some of my access holes in this piece before I glued & screwed because just not a lot of room under it & didn't want to hit bottom of boat I just built up. Boy, it sure is difficult to put holes in a perfectly nice piece of wood; kinda like skydivers jumping out of a perfectly good plane...just don't make sense. Got the front piece test fit. Just about ready for it to go in tomorrow. Got a quandary maybe some of you could make some suggestions...notice on the picture with the deck screwed in. See that small area at the edge of deck out where it starts to curve in. Since the deck doesn't come up higher, I had to cut it to fit where it hit at the bottom of hull, not completely out to sides. Up towards the bulkhead & on further to bow, this is inconsequential, but in that 15" or 20" area, there's quite a drop-off from deck to hull. I want to make this a smoother transition so as to not have an area for water to pool, but certainly don't want to just fill it with PB. Any suggestions???? I was wondering if I could use the scrap pieces that I cut off in this region & somehow plane them down a bit & lay them in there with some PB & tab them in. They're already cut to fit that curve. Would just need to take a little off the outer edge & plane the bottom. What do ya'll think??
 

Attachments

  • 001.jpg
    001.jpg
    142.6 KB · Views: 9

Woodonglass

Supreme Mariner
Joined
Dec 29, 2009
Messages
25,927
Re: 14' Larivee restore

Not sure I "SEE" the area in question. A Red circle would certainly help me understand what you are asking.;)
 

friderday

Chief Petty Officer
Joined
Apr 1, 2012
Messages
463
Re: 14' Larivee restore

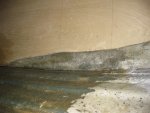
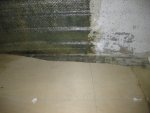
027.jpg028.jpgAw, poop Wood...I knew someone would ask me to do that & embarrass me for not knowing how to do that whole circle or outline my pictures. So, to save face, I went out on the patio & just took another couple pics. You can see them in fuller view on the previous post, in the pic with the bucket near the bilge. These 2 areas are on both sides, right where the deck begins to cut in. Had I made the stringers higher, the deck would have just gone to the sides most of the way forward, but I didn't want the deck that high. Any thoughts? And yes, feel free to school me in drawing on my pics.. Thank you sir!!
 

sphelps

Supreme Mariner
Joined
Nov 16, 2011
Messages
11,462
Re: 14' Larivee restore

Maybe fill in with some 3/8 or 1/4" ply to build it higher . Or multi layers of thick glass . I can see where it could create an undesirable duck pond with out some filling ..
 

jigngrub

Fleet Admiral
Joined
Mar 19, 2011
Messages
8,155
Re: 14' Larivee restore

Using the scrap pieces and planing them dow will be fine, and as you said set them in PB and tab them in.

Everything's looking real good... especially for an ol' girl doing it!:laugh: J/K ya FDD, it looks real good for anyone doing it.

What kind of plywood decking is that, it looks mighty clear (no knots or patches)?
 

Woodonglass

Supreme Mariner
Joined
Dec 29, 2009
Messages
25,927
Re: 14' Larivee restore

Ok, Now I gotcha. Yeah I think your plan would be fine. I use MS Paint on my PC to Draw the Red Circles Copy and paste your pic into Paint, Draw the Circle, then upload the pic back into Photobucket and post it into your thread.

cirlcepic.jpg
 

friderday

Chief Petty Officer
Joined
Apr 1, 2012
Messages
463
Re: 14' Larivee restore

glad you got the idea, sphelps & jig. Yeah, I'm gonna play around with that idea tomorrow. Sure with persistence & general knowledge I can whoop it. I originally thought of 1/4" too, sp, but figured I'd just give it a try on the scrap piece as it's already the contour of what I need on at least one side. I used 1/2" sandy ply. Not my first choice, but used it for couple reasons: trying to keep things lightweight(always one of the perils of a rebuild-it becomes super heavier, in a good way), & figured the glass adds the strength anyway. One layer of csm on underside, plus plan on one layer of 1708 & finish with layer of csm on top. This boat has plenty of support under deck(stringers only about 10" apart) plus bulkheads. We used this method in my son's boat, & super strong deck. I'll let you know how things work out on filling this void efficiently. Thanks for the vote of confidence & appreciate the compliment jig. Doing this one all by my lonesome. My son is caught up in life right now, so just have him have look see every night or so & give his advice. Labor is all me, so safe to say pretty proud of my progress so far. Indeed, making this ol' girl feel even older...slow & steady gets me closer to splash. Thanks again fellas. Enjoy the rest of your wknd.
 

friderday

Chief Petty Officer
Joined
Apr 1, 2012
Messages
463
Re: 14' Larivee restore

Actually, Wood, that's not the spot. I'm so sorry for not being clear on this..It is on both sides, about 10" behind that front bulkhead. About 10" toward the transom from the front end of that 8' piece of deck. You can't see it in the pic you posted. Look at the one with the bucket back toward the transom. The areas in question are to the extreme left & right of my foam access holes, all the way over to the edges of the deck. Sorry, again. Heading for bed. Will try to figure out the marking my pics thing after some much needed slumber.
 
Top