"0" Compression

racerone

Supreme Mariner
Joined
Dec 28, 2013
Messages
38,016
Please take the time to search " google " for " hooke's law "-------Also be aware that OMC factory manuals are very good and very clear as well.----They have few mistakes if any at all.--------Myself I am not in favour of hydro-electric power on smaller rivers.----------Nature has rivers so that fish can get up there to spawn.-------200 years from now folks might say-" we do not need cheap electricity, we need fish to eat "----Just my opinion.
 

nwcove

Admiral
Joined
May 16, 2011
Messages
6,293
---Myself I am not in favour of hydro-electric power on smaller rivers.----------Nature has rivers so that fish can get up there to spawn.-------200 years from now folks might say-" we do not need cheap electricity, we need fish to eat "----Just my opinion.

....well said racerone! i do doubt it will be 200 years from now tho when people realize they cant eat a source of energy that keeps the lights on, its looking like that issue will become evident in the next 20 years. jmo
 

Bosunsmate

Admiral
Joined
Apr 7, 2012
Messages
6,129
Please take the time to search " google " for " hooke's law "-------Also be aware that OMC factory manuals are very good and very clear as well.----They have few mistakes if any at all.--------Myself I am not in favour of hydro-electric power on smaller rivers.----------Nature has rivers so that fish can get up there to spawn.-------200 years from now folks might say-" we do not need cheap electricity, we need fish to eat "----Just my opinion.


Yep il look it up later this evening, il try and do it justice and not just stick to wikipedia articles.
The hydro dams here were all done decades ago, many during the great depression. I think there has only being one major one done in the last thirty years with all the rest put off due to environmental concerns including what you mention about the fish. A couple of new ones have being done but they are small and they have some spillway system on the side which the fish are suppose to find and climb their way up the water to their natural spawning grounds. Im sckeptical about that but i have no experience in it so have to take their word for it.

Electricity demand is actually dropping right off here, mostly it seems due to much better efficiency such as LEDs rather than economic issues or solar power uptake. Kettles still seem to be the biggies. Any new power stations have being geothermal and they are just replacing the old dirty thermal coal ones.
 

Brock O

Seaman
Joined
Dec 26, 2014
Messages
60
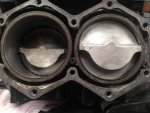
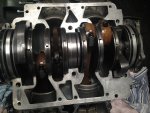
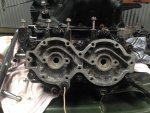
Well its slow going but the crank is in and we have started changing the pistons over on the rods, will be re-using the old bolts with a little oil, mate said no to lock tight even though I was in favour, Never uses it with his builds so that was that. He was actually against the oil on the bores and pistons, said that's old school and not required, this one I got my way....a little will be applied as per the manual.

Q) With the rods, it does not matter which way these face, as long as the piston is facing the right way for starboard and port ?. They seem identical and were installing new bearings.

Hopefully a few photo's of the bottom end complete tomorrow....only getting about an hour each arvo to get a little done.

Cheers for the replies.
 

racerone

Supreme Mariner
Joined
Dec 28, 2013
Messages
38,016
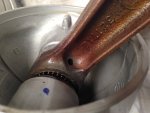
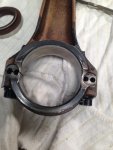
Most rods have a wee hole for oil !!!----Post picture of both sides of rods near the pin end.
 

Bosunsmate

Admiral
Joined
Apr 7, 2012
Messages
6,129
One place that undoubtedly needs locktite is the four screws that hold the base down on the top of the motor that the timing base swivels on, if you dont then those screws often jiggle loose and means the timing plays up- ive seen that happen a few times. Some manuals do recommend lock tite on them.

I always put some two stroke oil on those con rod bearings to keep it lubed while i check for binding when the crankcase is back tight.
Sounds like its going well. Hope your hull is in good shape to handle the hp and the fremantle Doctor
 

Brock O

Seaman
Joined
Dec 26, 2014
Messages
60
OK, yes found the wee hole easy enough after looking at the write end, and after reading the manual more carefully it clearly states all wee holes must face the fly wheel. So we now have all four rods and piston back in and the unit turning nicely, just waiting on a socket adapter before doing the final torque up on the caps, this will need to wait until Monday due to the new house build getting priority this weekend. Will get a few more photo's before closing it all up. Yes some lock tight will be applied to the 4 screws....from memory the manual states these should be replace, but will read over this again before finishing off.

Rod photos...not that it shows a lot except for the wee hole is at the other end....Cheers for the replies again! Boat 012.jpg Boat 011.jpg
 

racerone

Supreme Mariner
Joined
Dec 28, 2013
Messages
38,016
Consult a factory manual.--------Read steps 3 times if not sure what it says !--------Ask before making expensive mistakes !
 

Brock O

Seaman
Joined
Dec 26, 2014
Messages
60
Hi Guys

Progressing nicely, most of the motor was hooked up today except for intake and linkages, we managed to snap one of the small nozzles / nipples that screw to the block and intake manifold, 4 off in total on the motor with 2 located between the carby's, they feed oil I think to the crank and bypass covers...does any body know what these are and what part number, I can not find them on the diagrams ??

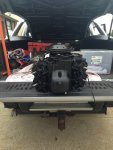
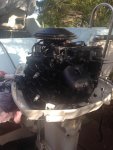
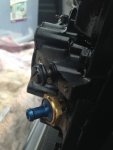
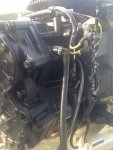
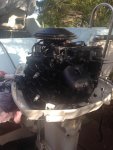
Few photo's below, everything is turning nicely, new water pump was fitted today also. Stuck with standard deflectors and installed new tell tale at top of cylinder number 1, does this look alright? was tempted to go to top of head as I believe there could still be room for air in there.Also second last photo, the srcew any idea what its for ? need to look it up!
Boat 016.jpg Boat 018.jpg
Boat 017.jpg Boat 020.jpg Boat 024.jpg Boat 023.jpg Boat 025.jpg
 

Attachments

  • Boat 024.jpg
    Boat 024.jpg
    123.3 KB · Views: 1

Bosunsmate

Admiral
Joined
Apr 7, 2012
Messages
6,129
Looks good and the ute too.
That telltale looks like a big improvement from the base of the exhaust jacket, as you say on the top would be best but the rocking of the boat should get most of the air out, and a lot more than the original set up.
Interesting that on that motor the temp overheat sensor is down the bottom, on the v4 i recently worked on for a mate it was up near the top.
As for those little nipples, they scavenge oil etc stuck in the bottom bearings and also help it to have a bit more fuel in the cylinders. They have a one way valve in them too so that nothing blows back through, ie its all one way traffic out of the motor so nothing builds up inside.

That screw you a wondering about, do you mean the one with the blue base on it?
 

Bosunsmate

Admiral
Joined
Apr 7, 2012
Messages
6,129
If it is that blue one you mean, it looks like the pulse thing for the fuel pump, the screw might just be to plug the hole for the older fuel pump hookup.
Those little nipple valve things you mention, scavenge from the main bearings i think, there was a guy asking a question about them yesterday il go find the link
 
Last edited:

Bosunsmate

Admiral
Joined
Apr 7, 2012
Messages
6,129
One question for ya Brock, are you sure that right head is installed the correct way up? The left looks good with the heat temp sender in the correct place but the right looks improper- the sensor should be near the top.

Correction- actually it must be the right way as the water outlet is down the bottom, just seems a peculiar place to stick the sensor as the other head with it higher up would therefore need a slightly different sender if they both are meant to trigger off at the same head temp but they are listed as the same part. On all ones ive worked on that sensors being up in the vicinity of the top half of the top cylinder on each bank.

Itd be good if you did some running videos of her with the 030s when you get her wet, thats 2100 unique views on this thread, not cumulative.
 
Last edited:

Brock O

Seaman
Joined
Dec 26, 2014
Messages
60
Cheers Bosunsmate, yea screw above the pulse valve...don't remember it in the pull down stage but will have another look when we finish of the VRO connection, I guess ill do it up...tight

Yes your right, left head sensor high, righ head sensor low.

Thanks heaps for the part number, only need one and the local marine shop here couldn't identify them at all, yea they complete a loop from crank back to intake manifold. The one we broke is right at the bottom so stopped us from completing installation today. So next Sunday should see this complete, extra oil in the fuel as per manual and hopefully hear some noise.

Fingers crossed...
 

Bosunsmate

Admiral
Joined
Apr 7, 2012
Messages
6,129
No worries, looks good in black, ive never managed to rebuild a powerhead without doing a paint job too.

Interesting that you are going to keep with the VRO , each to their own.
Good luck getting the part, yeah thatd be a nasty job replacing that check valve with the engine in place,

Amazing how much weight those back fold down lids of utes take, i had a complete Honda 90hp unintentionally on my hiluxs back lid once, it didnt flinch. Must of being like 300kgs or so, needed a tractor to hoist it on there to begin with
 

emdsapmgr

Supreme Mariner
Joined
Dec 9, 2005
Messages
11,551
The replacement rubber water diverters look good in the block. Properly installed. Appears to be plenty of clearance for water flow. You should consider overhauling the carbs prior to first startup of the new block. Always good to pull them down and inspect the 3 sets of jets for each carb throat. Pull all the jets out for a visual inspection of each to be sure nothing is plugging them up. I always put a new impeller in the lower unit too.
 

racerone

Supreme Mariner
Joined
Dec 28, 2013
Messages
38,016
The screw above the pulse limiter is a plug for the pulse port for a standard fuel pump.-----It must be tightened.-------That location is used on the 88 hp model and some commercial model motors.
 
Last edited:

Brock O

Seaman
Joined
Dec 26, 2014
Messages
60
Hello Again

Manage to have the motor all hooked up and started a few weeks back! started and sounded great, we did have one problem which was water flowing from the front off the motor! flowing out were the power head meets the lower unit, pulled the leg back off and re-checked the water pump for a second time! could not answer to way water was coming from were it was let alone see the exact spot......any way the mate said we have to pull the power head back off! this made me see red after the work we had done to get it all connected again.....but once we looked at it, it was simple as we only had to disconnect the power and earth...mounting bolts and linkages....this took around 15min each way which had me smiling again.....in the end it was me who had put the gasket on the wrong way...being in a rush the week before after driving home from the work shop, jumping out of the ute and throwing it on solo! any way got it up and running at high ideal until warm! this didn't take long compared to previously....may be the water running up past the heads now and out the tell tale..not sure...but water from tell was hot quick.

Following weekend we took it out for a run varying the RPM's over an hour period, the intermittent alarm did come on shortly after a minute or so at WOT so brought the RPM's back down to around 4500 and all sweat...so not sure if the VRO is struggling at the higher RPM scale which was the 5500rpms, which is max as per manual. we got it home and checked the timing..backwards I know! was sitting at 0 at BTDC so we advanced to the 4 stated in the manual...this put us at around 1500 rpms which is high! still to work out how to lower the rpms with out bring the timing back down but will go back through the procedure. I guess the plan would be to pull the VRO down also for a clean and inspection...not sure if parts or seals are available for these as I'm yet to investigate.

All in all, very glad I went through with the rebuild at this stage, have no interest in sitting at WOT throttle in this now...I think ill settle with 4500 to 5000 max for piece of mine.

Cheers for reading, apologies for the long spill..
Brock
 

Bosunsmate

Admiral
Joined
Apr 7, 2012
Messages
6,129
I just drop idle down until its almost conking out, i do that by retarding the timing by adjusting the idle stop timing screw and the throttle cables,.. that should drop it down well below 1500rpm, you will blow your gearbox shortly at that rpm when selecting gear.
Take a pix or video of your linkages if you still have problems with it
 
Last edited:
Top