"0" Compression

Brock O

Seaman
Joined
Dec 26, 2014
Messages
60
I do not doubt your statement with the common problem of these motor's......2003 - 115 2 stroke...any issue you know off, did they sort there issues ? Or should I avoid the old Johno all together ? even this one here in Oz seems cheap!
 

racerone

Supreme Mariner
Joined
Dec 28, 2013
Messages
38,016
People who operate fine machinery usually only know about " turning the key " and it should start up.-----Many motors are not maintained properly or taken in for proper maintenance.---Just picked up an 89 Johnson 3 cylinder 70 hp yesterday.------Outlet for the pisser has not been relocated to the top of the block even though a service bulletin indicating it should be done came out 20 years ago !----Have about 5 of those 60 degree motors for rebuild too. Holes in pistons on 2 motors that I have never seen in the older cross flow designs.------Make sure you do a full inspection and an on the water test or " dyno run " before shelling out the coin.-----Might want to check parts availability on this newer 115 hp too.
 

Bosunsmate

Admiral
Joined
Apr 7, 2012
Messages
6,129
Racerone makes a excellent point about relocating the water pisser outlet to the top, it stops air bubble blocks forming in the block.
Heres an article on the service bulletin on it
http://forums.iboats.com/forum/engi...aq/228380-johnson-evinrude-adding-a-tell-tale

I wonder what your alarm going off was meaning...
Also whats this butterknife trick you do? Any tip you can for removing rusty bolts will be greatly appreciated here at least, all mine a salties.
 

Bosunsmate

Admiral
Joined
Apr 7, 2012
Messages
6,129
You could rebuild this for a lot less than that $3500
These are US prices but the Aussie dollars not too bad at the moment.I order them here to NZ no problems from the States
Pistons are about $99 each and come with rings, rings are about $30 for replacing on the other cylinders.
The wrist pins are about $20 and the big ends ar about $55. Ive never had a failure from either of them and they are normally in alright condition so i never do either of those on a rebuild.
Upper and lower crank seals total- around $30
Powerhead gasket set $108
And a waterpump kit $60
You can make waterdeflectors out of hose from supercheap/repco

So as you say i suppose you need to know if the block will be smooth if overbored to the max piston .030"
Maybe someone could resleeve although ive never had to do that
 

emdsapmgr

Supreme Mariner
Joined
Dec 9, 2005
Messages
11,551
Likely those pistons are standard size. Usually when you get oversize, they are stamped as such on the crown/face of the piston-and yours have no such markings. Just replace any new pistons so that they are from the same manufacturer as the other two. Bombardier makes factory replacement pistons for the V4 crossflows in these sizes: standard: 5006658, .020 over 5006703, .030 over 5006669, .040 over 5006704. All of these pistons are sold with ringsets and piston pins in the box.
 

Brock O

Seaman
Joined
Dec 26, 2014
Messages
60
Thanks for the reply's, its good to hear about the bearings and the availability in the pistons, If I can get a hand with the rebuild ill sort the removal and parts as I'm in a dog box rental atm until the new house finishes in a few months. I'll be back with more photo's and questions when this happens.

Bosunsmate, alarm would be the over heating for sure, it did shut it's self down a few time's before the alarm problem went away, I guess the damage was still done, this all happened after the new thermostats were in place. The butter knives were for assistance in replacing the Thermos, on this model there is no room between the motor and the lower covers, so id insert the new thermos and springs, hold them in place with the butter knives while a mate put the cover and bolts back on, so little room.

Appreciate the price list and bulletin!

Brock
 
Last edited:

racerone

Supreme Mariner
Joined
Dec 28, 2013
Messages
38,016
You might look at WISECO after market pistons.---Totally different ring set-up.---But wait you will get those that say they are no good too.
 

Brock O

Seaman
Joined
Dec 26, 2014
Messages
60
Thanks racerone!, well the decision was made today, the motor is now stripped ready for removal, tried to remove myself but thing is stuck...back to the manual now to make sure the right bolts were removed to allow the power head to come off, only took a few hours so kept the fun police at bay :).

Haven't done a full search yet, but can I continue here with the rebuild or should I start another thread in a different section ? Will need help with this!, hoping to hit the mate up at work tomorrow, races 2 stroke bikes and does his own rebuilds so this is as close a pro as I get with out going the the stealer shop!!

Cheers

Brock
 

Bosunsmate

Admiral
Joined
Apr 7, 2012
Messages
6,129
Just keep writing here Brock that way i dont have to follow two threads...
Removing those powerheads bolts are actually the hardest part i find to do on any outboard rebuild when they seize up in their grooves, sometimes i spend a day and a half getting the powerhead off and only half a day rebuilding.
Id drop the LU out as well that way you rule out any driveshaft to crank shaft damage or seizing. Anyway you will need it out later to go over the impeller etc
 
Last edited:

Bosunsmate

Admiral
Joined
Apr 7, 2012
Messages
6,129
The two rear stud nuts are easy to miss on v4s, they are under the rear exhaust cover, dropping the cowl exposes them
 

emdsapmgr

Supreme Mariner
Joined
Dec 9, 2005
Messages
11,551
There's a lot of brain power/experience on this website...should be enough to help you through an overhaul on your crossflow engine.
 

Brock O

Seaman
Joined
Dec 26, 2014
Messages
60
Cheers Guys, still to check the manual but am certain all bolts are out, 6 long going through from bottom, 4 small front... These were tight and was worried of a break! Rear 2 bolts and nuts and internal mounts....gear shift disconnected also! From memory the manual said a lifting unit would be required! I'll drop the leg next while working a way to pry without damaging.

Photos to come..
 

mstahl1171

Petty Officer 1st Class
Joined
Mar 16, 2010
Messages
209
Keep us posted...I am working on a 1988 150V6 with a broken ring. To lift the head off...here is what I did. I lowered the tongue on the trailer all the way down so the transom was high. Placed a six foot ladder on each side of the motor, placed a 2"x6" accross the top of the to each ladder. Bolted a chain to the sides of the block and over the 2x6. I then raised the tongue of the trailer which lowered the transom and seperation was complete. I took me and a neighbor to lift the motor onto a work bench. Hope that helps!!
 

Brock O

Seaman
Joined
Dec 26, 2014
Messages
60
Thanks mstahl, very quick push and pull today seen the front loosen and lift but not the rear, I've applied plenty of inox so will look again tomorrow night.

Now from the previous comments I take it we can over bore 1 cylinder while leaving the others, any issue associated with this ? I now have mate who's sponsoring his workshop who has close connections to a very good machine shop..though they specialize in drag all should be good as they do some marine apparently! I haven't purchased any parts yet until we pull it down, acid bath and to the machine shop.

At the moment I have on the list;

Piston ring set x 2 - 0394930 - 0.030 OS....worse case
Ring set x 2 standard - 0394930
Power head gasket set 0391300 if available as a set, or are these required individual ?
Seal upper 0339620
O ring sleeve 0337087
Seal lower 0337085

Also thermos and water pump to reassess.

Anything else as a minimum ?, yes budget! but do not want to cut corners to save a few hundred. Also had a quick look online today, do we know of a shop that does all this stuff, contact is hard so am online only atm....1 stop shop purchase would be good, any PM's appreciated if noting retailers on the site is an issue with site sponsors...sorry had to ask.

Appreciate the reply's

Brock
 

emdsapmgr

Supreme Mariner
Joined
Dec 9, 2005
Messages
11,551
You can overbore just one cyl. As long as you bore up to .030 over, you do not have to rejet that throat of the feeding carb. If you go .040 over, likely you will need a slight increase in jet size to keep the cyl cool at WOT. The powerhead 391300 gasket set has been superceded to 439085 by Bombardier. For some reason your above parts list shows the same part number for standard and oversize pistons/ringsets: 394930. A typo?
 

Brock O

Seaman
Joined
Dec 26, 2014
Messages
60
Cheers, yes typo...0.030 set is 0396588

So again, if bottom has to go to 0.030 over but top only 0.020 for instance no issue or need to play with carbs ? so in saying that all four could have different size bores for no issue, too small to worry about ? Was almost thinking to take the whole lot out to 0.030....more cubes!! :plane: but more money too...think this thing will bleed me more after this as well!

Had a quick look at bambardier for piston ring set today, will look more closely tomorrow.
 

racerone

Supreme Mariner
Joined
Dec 28, 2013
Messages
38,016
Do all 4 cylinders with new pistons.-----Look at WISECO pistons and rings.---Cheaper to do it right the first time !!!!----I can not remember how many of these I have done.
 

emdsapmgr

Supreme Mariner
Joined
Dec 9, 2005
Messages
11,551
Bombardier part number 396599 supercedes to 5006669. It really depends on the condition/wear on your existing cyl walls. If the cyl walls are still relatively straight (not egg-shaped) and not gouged, you should be able to just rehone and install new ringsets on the two still good standard bore original factory pistons. You really need to have a boring expert look at all four now that you have it apart. Keep in mind you be sure to keep all 4 pistons from the same manufacturer. If you decide to go with non-factory pistons, (you'd have to do all 4 new at that point) you'll want to let the machinist know that upfront. Some pistons require different bore sizes due to different rates of thermal expansion during warmup and running.
 

racerone

Supreme Mariner
Joined
Dec 28, 2013
Messages
38,016
Look at post # 18 again .----- read it twice if you must.---When rings bounce around in the top groove it damages the grooves in the piston.----I do not recommend putting new rings in damaged grooves !!-----You can not see this damage with a casual glance , but you can with a stereo microscope set at 10 times magnification !!---Every body works to a different standard.
 

Brock O

Seaman
Joined
Dec 26, 2014
Messages
60
Cheers Guys,

Getting some prices now on the gear needed, yes it will be new piston and rings through out, this does knock the price up but is the best way forward. Got 2 prices already with a big difference, could be sierra piston and ring set yet but still to decide after a few more prices come in, as long as there all the same I'm not too fazed which one's unless there's some to stay away from ?.

Finally got the motor off today, I've had the leg off not to long ago and should have dropped that first, seems the studs coming through the front were corroded making the job hard, few photo's below after lugging to the car ready for pull down new years day at the work shop!

I want to go ahead and purchase 0.020" OS now so we have something to machine too, unless I have the new pistons how do we give them the tolerances to machine too ?.

Also, the head! mine looks Phuked but may have to be cleaned up and reused! no cracks as such even thought the indentations are stress raisers to a degree in my eyes, will polish these up and stick up for another look later, not sure what affect the marks will have on compression or future issues, one on ebay atm for $60 doesn't seem to have the coil supports on it like mine and seem to have rings gouge's / marks the same as mine....don't wont to spend $200 on a new one unless totally necessary.
Next will be to pull down the motor, will read the manual over first, mate should know some basics on marking things so as to re assemble correctly and not disturb the timing if that's possible.

Will get the leg off and get the water pump and internals all cleaned up ready for refit later also.
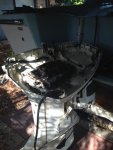
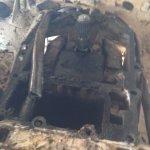
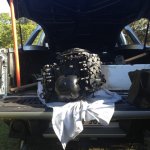
Boat 011.jpg Boat 013.jpg Boat 014.jpg Boat 017.jpg
 
Last edited:
Top