Re: The whole shebang. 16' aluminum shell to fishing machine.
What am I missing?
I've heard that before. I really like the little motor and we truly have small water here. Going anywhere fast just means we save a couple minutes getting across a lake. Is getting up on plane more important than going faster? I think I'm burning less fuel with the 5hp pushing water than I would with a 25hp on plane.Cool old boat. The only thing I have to add is that I don't think that Honda 5 hp will get this boat on plane, though I could be wrong. I checked one of these out a few weeks back to maybe pick up as a kicker, and it was louder and shook more than my 2 stroke twin cylinder 4 hp. If you can find a 9.9 or 15 hp 2 stroke it will be a much better match. You could probably sell/trade your 4 stroke for a higher hp 2 stroke. Just my $0.02...good luck with the project!
What am I missing?
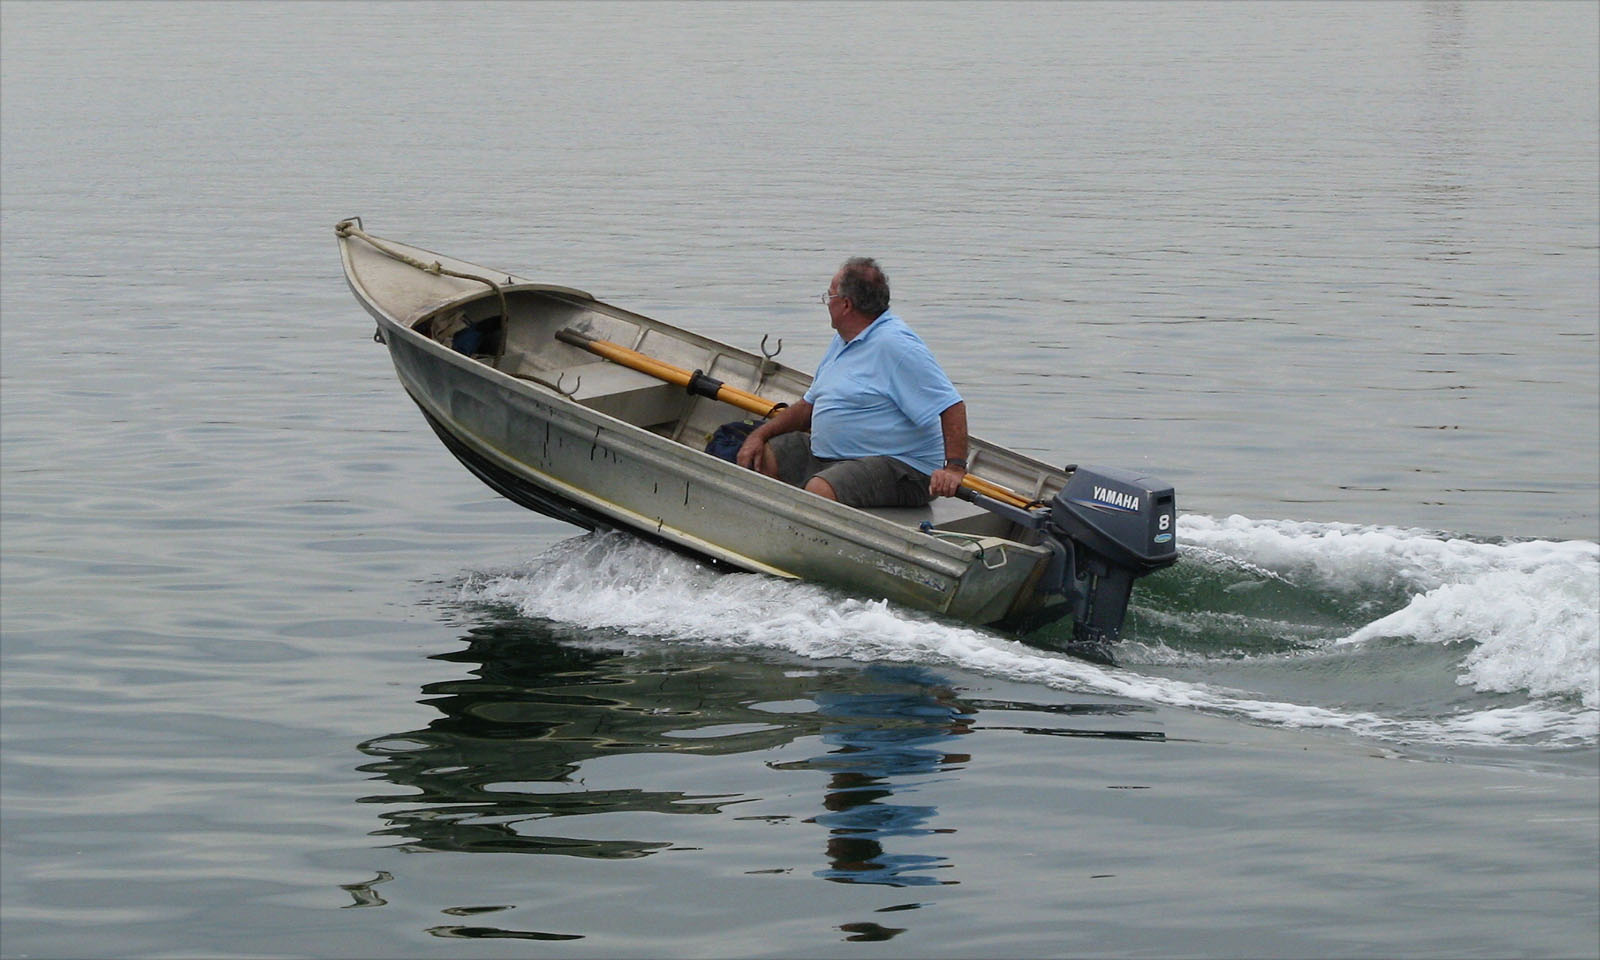


") , look how close the bow is to the water allowing the boat to run flatter over the water, NOT plowing. The water is spraying up & out of the way of the boat, not boiling up under the keel at the bow like it is in the other 2 pix
, look how close the bow is to the water allowing the boat to run flatter over the water, NOT plowing. The water is spraying up & out of the way of the boat, not boiling up under the keel at the bow like it is in the other 2 pix