Starcraft Holiday Reno and Hull Repair

fishingron

Seaman
Joined
May 28, 2009
Messages
62
Re: Starcraft Holiday Reno and Hull Repair

Grandad, nice to see you back working on your boat. It looks great!!!
Keep up the good work,
Ron
 

Brenn

Petty Officer 1st Class
Joined
Jul 10, 2011
Messages
251
Re: Starcraft Holiday Reno and Hull Repair

just reaf through your thread,nice boat and nice work
 

captainnate

Petty Officer 2nd Class
Joined
Apr 19, 2011
Messages
190
Re: Starcraft Holiday Reno and Hull Repair

Grandad, very nice work. I have a 1972 18' Starcraft Nova with a 120 mercruiser. I will be happy if I can do half as well as you did with your boat.

Nate
 

Grandad

Lieutenant Commander
Joined
Jun 7, 2011
Messages
1,504
Re: Starcraft Holiday Reno and Hull Repair

Thanks Nate. I see you got the engine on your Nova running. She sounds good in the video. Only a 120 HP like mine, but will probably push a Nova pretty good. Get onto the rebuild, will ya? Need lotsa pictures. - Grandad
 

Grandad

Lieutenant Commander
Joined
Jun 7, 2011
Messages
1,504
Re: Starcraft Holiday Reno and Hull Repair

Well, it's been a year since I first posted, so I'll add some progress reports. I got her back in the water a few times this past summer (sorry, no splash pics). We never had more than a tablespoon of bilge water when I pulled the plug out as is my habit when we trailer. That tablespoon may have been from spray while I entertained the grandkids and exercised the hull repair on the biggest waves I could find.

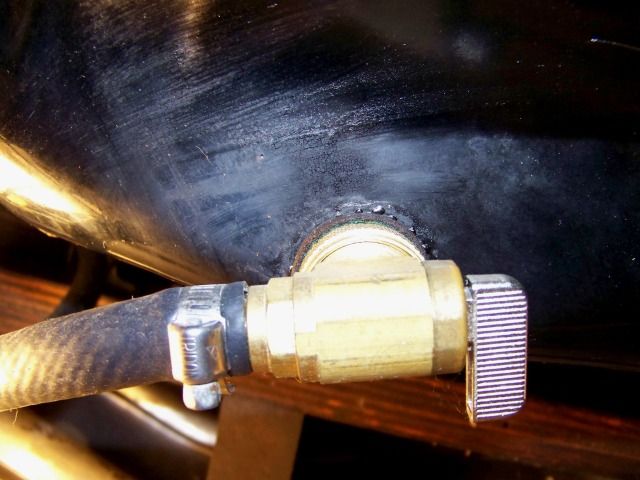
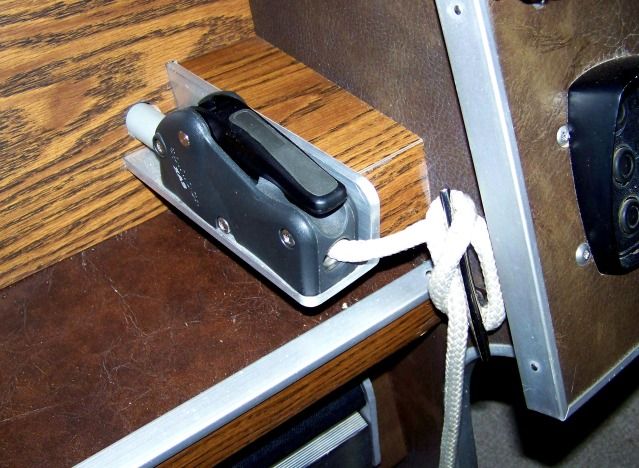
I decided I didn't like the location of the anchor line safety cleat on the helm side of the console and relocated it where it's more convenient, right beside the rope clutch. It's good to avoid clutter, but some things are probably better where you can keep an eye on them. I had some difficulty anchoring as the shockle passed through the bale on the bow roller. I made a larger SS bale, but it was still troublesome, so I removed the shockle altogether. Surprisingly, the delta anchor doesn't rattle or bounce at all in the roller, which was my sole purpose for using the shockle.

100_4407.jpg


When I decided to install a bow roller, I knew I had to replace the combination red/green bow light and settled on locating individual red and green lights on either side of the roller. I planned to use a Bruce claw anchor type, but changed my mind after a salesman convinced me that a Delta would self-launch better. OOPS. I had the lights mounted and wired when I realized that the Delta has a higher profile than the Bruce and the flukes would obscure the lights when viewed from straight ahead. So they had to move again.

100_3456.jpg


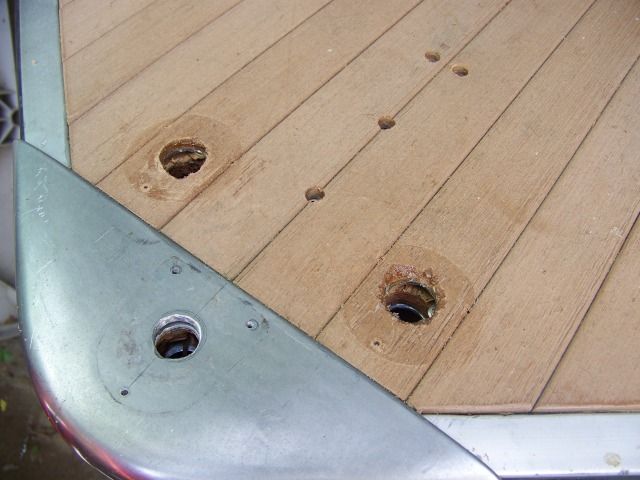
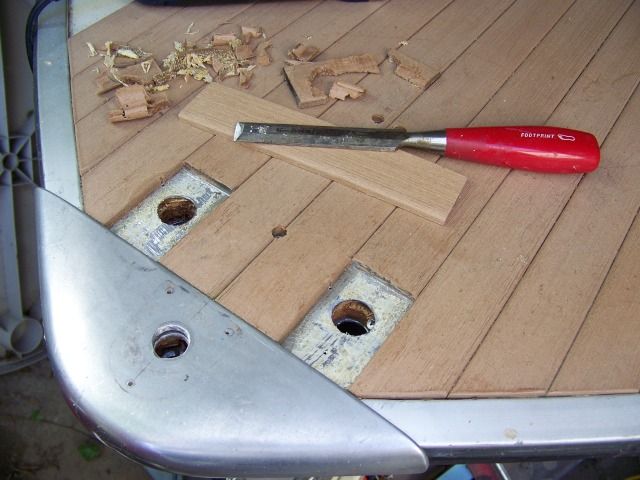
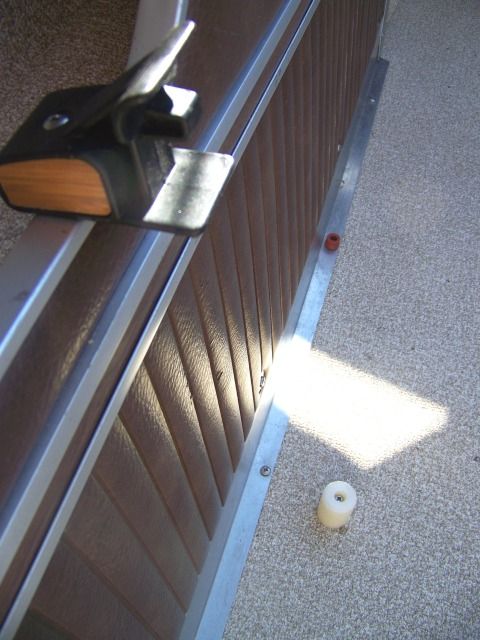
I still had scraps of the composite decking available, so my best option was to replace the holed pieces of decking. I found that the material was actually very easy to cut with my oscillating saw and then chisel out in prep for new material.

100_3458.jpg


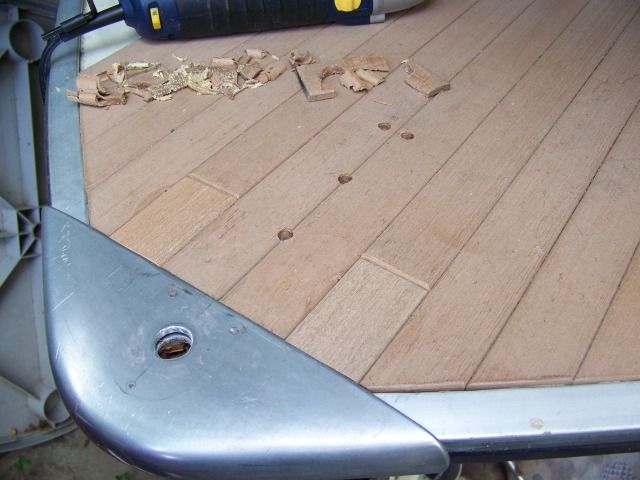
I don't like the additional butt seams, but overall, the repair is not that noticeable.

100_3459.jpg


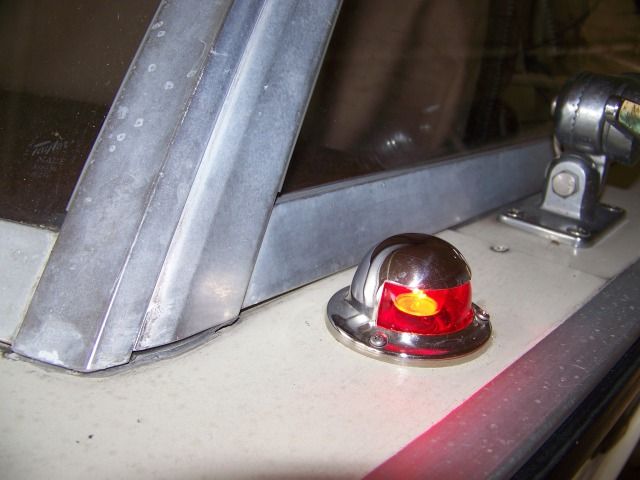
I relocated the lights (their 4th location) to a point on either side of the windshield. They are compact and low profile, but visible throughout their required range. - Grandad

100_4409.jpg
 

Grandad

Lieutenant Commander
Joined
Jun 7, 2011
Messages
1,504
Re: Starcraft Holiday Reno and Hull Repair

As per plan, I'm still working on cramming as much flotation into the boat as possible. I managed to add a 2" layer of foam board pieces between the foredeck stiffeners and secured it solidly in place with extruded aluminum straps.

100_3996.jpg


At this point, the bulk of the flotation is forward, yet obviously most of the boat's weight is in the stern. Flotation is most needed near the stern and as high as possible to avoid the boat turning turtle with pointy end up in the event of a capsize. Foam is flammable and exposed bottles are ugly and may melt, if not burn, so I chose foam covered in a layer of cork. I bought rolls of 1/8" cork (actually measures closer to 3/16") and glued it to blocks of foam. Such a thin layer of cork probably isn't the best fire barrier, but I expect it to delay the foam from igniting long enough for someone to extinguish a carburetor fire.

100_4032.jpg


I glued the cork covered blocks up under the stern deck using foam glue.

100_4039.jpg


The foam blocks had to be hot wire cut more smoothly than by freehand as I did before so that the cork would laminate securely to the foam without voids. To accomplish this, I made a table attachment for my foam cutter. It's just 1/2" plywood screwed to a 2" x 6" that's clamped to the cutter by the workmate. A rudimentary fence C-clamped to the table allows for a smooth controlled cut.

100_4031.jpg


I also put wedges of foam on each side of the hull just forward of the transom and concealed them with removable panels of heavyweight Formica for fire protection. There are ducts and passageways in the foam from the gunwale mounted air intake scoops to floor level at the transom for bilge ventilation.

100_4041.jpg
 

Grandad

Lieutenant Commander
Joined
Jun 7, 2011
Messages
1,504
Re: Starcraft Holiday Reno and Hull Repair

Although the toilet was in place as in previous pictures, the plumbing was still incomplete at that time. I purchased a ShurFlo mini pump to supply fresh lake water for flushing. Although its flow rating is only 1 gal per minute, I'm hopeful that it will be sufficient. If it isn't, I'll install a small accumulator tank to momentarily increase water volume. I mounted the pump and a strainer to a removable plastic panel (sign board material) that's secured to the gunwale via SS wing nuts.

100_4044.jpg


A lighted switch mounted within the privacy enclosure controls power to the pump which has a self contained pressure switch. The pump starts as water pressure falls when the flush pedal is pushed. I installed a super bright white LED in the bottom of the switch box that casts a pool of light on the floor and on the side pocket located toilet paper.

Untitled.jpg


The cast SS thru-deck pump out fitting arrived marked "waste" and had the required threaded port, but curiously, it had a cap security chain that passed through the fitting and secured inside near the bottom. The chain would prevent a marina's pump out vacuum hose from properly screw connecting to the fitting. After confirming my suspicions at a local marina, I removed the chain and its anchor point before installing the fitting into the deck. Now I need to come up with a float for the cap. Maybe an aluminum cigar tube. Any ideas? It needs to be max 1 3/16" diameter by at least 5" long.

I put a lakewater thru-hull intake in the transom, a couple of inches from the bilge drain. I expect the boat to be at rest when the toilet is in use. As much as I'd like to have installed a seacock, I can't justify the cost. I used a Marelon fitting, sealed in place with 3M 5200. The intake hose is auto heater hose, double SS clamped to the thru-hull and secured to the transom above the water line. There should be no stress on the thru-hull fitting as the hose has a natural curl between the fitting and the support. In the picture, the yellow puddle below the drain hole is cured Gluvit.

100_4033.jpg


And while the camera's still in the bilge, here's pictures of the bilge pump and of the oil drain hose connection. Every trailered I/O should have an oil change fitting like this. I have about 4' of hose connected to the fitting. For an oil change while on the trailer, I push the hose out through the bilge drain hole into a collection pail and just turn the ball valve to drain the oil. Unfortunately, the filter change is just as messy as ever though.

100_4038.jpg


100_4036-1.jpg
 

Grandad

Lieutenant Commander
Joined
Jun 7, 2011
Messages
1,504
Re: Starcraft Holiday Reno and Hull Repair

The 30" high gunwale is a bit of a challenge for us seniors and I don't like having people step on the vinyl seats, so I built a ladder with 7-1/2" steps. I purchased a 6' Cosco aluminum step ladder for the parts I needed. This gave me nicely rounded aluminum extrusions and very solid steps that I wanted. The top of the ladder secures to the inside of the gunwale using a pair of homemade stainless steel keyhole plates that trap the round heads of 1/4"-20 bolts. The white material in the photo is UHMW cut to fit inside the side rail and tapped to hold the bolt. There are keyhole plates on both gunwales so the ladder can be used on whichever side we're docked.

100_4242.jpg


I added wider step plates made of 3/4" bamboo hardwood. The step plates are rounded smoothly and are bare foot friendly. I was able to exactly stain and satin varnish the steps to match the bamboo grained Formica laminate that I used previously throughout.

100_4244.jpg


The original ladder came with a carry handle that doubled as a locking device for carrying the folded stepladder. I was able to modify and use it to lock the new ladder in its storage location between the port side sleeper seat and the side wall.

100_4247.jpg


A floor mounted round UHMW stop (white) and a rubber snubber (red) pin the ladder securely and quietly in position.

100_4249.jpg


Sleeper seat removed in the picture. - Grandad

100_4248.jpg
 

djpeters

Lieutenant Commander
Joined
Jun 9, 2010
Messages
1,824
Re: Starcraft Holiday Reno and Hull Repair

WOW!, Your work is above top notch! That is going to be a great boat.
 

Grandad

Lieutenant Commander
Joined
Jun 7, 2011
Messages
1,504
Re: Starcraft Holiday Reno and Hull Repair

Thanks dj. I appreciate the compliment. - Grandad
 

jbcurt00

Moderator
Staff member
Joined
Oct 25, 2011
Messages
24,871
Re: Starcraft Holiday Reno and Hull Repair

wow.gif

Fab work on the ladder looks GREAT! Done right good on the rest of your recently posted work too
wink2.gif
 

Grandad

Lieutenant Commander
Joined
Jun 7, 2011
Messages
1,504
Re: Starcraft Holiday Reno and Hull Repair

Thanks jb. It's coming along. - Grandad
 

Grandad

Lieutenant Commander
Joined
Jun 7, 2011
Messages
1,504
Re: Starcraft Holiday Reno and Hull Repair

I added a CTEK US3300 battery smart charger/tender mounted on the stern cross member accessible within the port side storage cubby. At 3.3 amps, it's adequate to keep my two 27H batteries charged between uses and I plan to keep them charged over the winter. I'm gonna leave the batteries in the boat this year, stored outdoors. In past years, I've stored them indoors to prevent freezing, but if I keep them charged, I think they'll survive the winter.

The CTEK has been great so far. I like the LED indicators confirming the charge status and if I'm in the boat puttering while it's on the trailer, I'm not concerned about playing the stereo. It came with a quick disconnect 12V attachment plug that I've wired into the conveniently located fresh water supply pump circuit. If I find I need to remove the charger from the boat, only 2 mounting screws need be removed. The 12V and 120V wiring is routed in an aluminum lay-in channel behind the cross member for easy removal. I manually choose which battery to use/charge using the main battery selector switch.

100_4404.jpg


OK, I'm getting near the end of this season's story. In progress is the wakeboard tower that I previously showed CAD drawings of. It's not a finished product, but I can show you the 2" tubular aluminum frame now welded and temporarily secured by ropes to prevent folding.

100_4239.jpg


I made my own mounting hardware that swivels in every direction needed. The aft mounting hardware shown in the picture will allow the tower to fold toward the stern when pins are removed from the forward mounts. When folded, the forward tube will be just about level with the top of the windshield at a point when the aft tube is supported for travel in a cradle yet to be constructed.

100_4255.jpg


The welder did a great job. I plan to smooth all the welds and fill a few dents made by the Greenlee one-shot bender that I used to make the large radius curves at the top as well as the sharper bends at the corners. I also have to flesh out details of a new soft top that will mount on and fold with the tower. Hopefully, in the first few warm days in the spring, I'll be able to paint the tower and get it mounted. - Grandad
 

Seasonally.boating.jon

Petty Officer 1st Class
Joined
Jul 10, 2011
Messages
283
Re: Starcraft Holiday Reno and Hull Repair

This is the first time I've noticed your thread. The part that cought my eye was....Over 180,000 veiws and only three pages!:eek:
Now I see why. Very......very nice ride.
 

jbcurt00

Moderator
Staff member
Joined
Oct 25, 2011
Messages
24,871
Re: Starcraft Holiday Reno and Hull Repair

Great looking tower!
 

djpeters

Lieutenant Commander
Joined
Jun 9, 2010
Messages
1,824
Re: Starcraft Holiday Reno and Hull Repair

Yeah, nice tower. What's it anchored to under the gunnel?
 

Grandad

Lieutenant Commander
Joined
Jun 7, 2011
Messages
1,504
Re: Starcraft Holiday Reno and Hull Repair

Yeah, nice tower. What's it anchored to under the gunnel?
Each of the 4 mounts have three 1/4"-20 bolts threaded up into tapped holes in them through the deck, each one reinforced by 24" long 2" x 3" x 1/4" pieces of structural aluminum angle. The angles are also bolted to the hull, each with three 5/16" SS carriage head bolts tucked high under the rub rail. I dry fit the angles to sit tight to the underside of the gunwales, then peanut buttered (dare I say it, fiberglassed) the hull side of the angles to get solid conformity with the curve of the hull before snugging the bolts. I put the angles in before re-installing the sidewalls after the hull repair in anticipation of the tower. Unfortunately, to reach the underside of the two forward mounts, I'll have to pull the walls out again. That means that the seats gotta come out again and maybe even the head, too. But, I'm not putting the tower in a second choice location just so I can reach the bolts. - Grandad
 

Grandad

Lieutenant Commander
Joined
Jun 7, 2011
Messages
1,504
Re: Starcraft Holiday Reno and Hull Repair

This is the first time I've noticed your thread. The part that cought my eye was....Over 180,000 veiws and only three pages!:eek:
Now I see why. Very......very nice ride.
Ya, that's over 3,000 views per post. I appreciate the comments everyone. - Grandad
 

low277

Petty Officer 2nd Class
Joined
May 23, 2011
Messages
117
Re: Starcraft Holiday Reno and Hull Repair

Incredible job on this boat, the details are amazing. May I ask what you do for a living? You have some serious skills!
 
Top