1991 Searay 225 BR Transom and Stringer Evaluation

GCartwright

Petty Officer 2nd Class
Joined
Jul 1, 2012
Messages
149
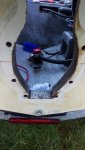
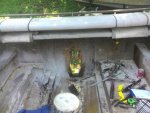
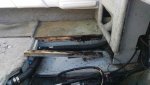
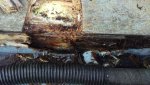
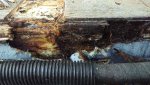
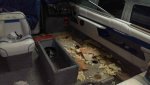
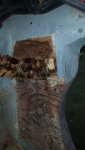
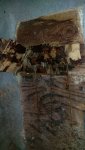
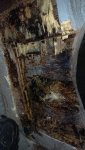
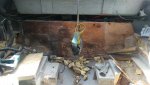
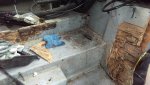
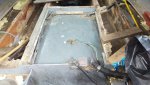
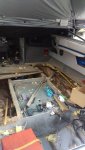
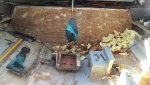
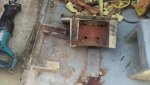
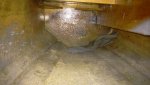
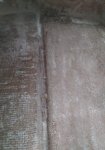
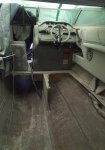
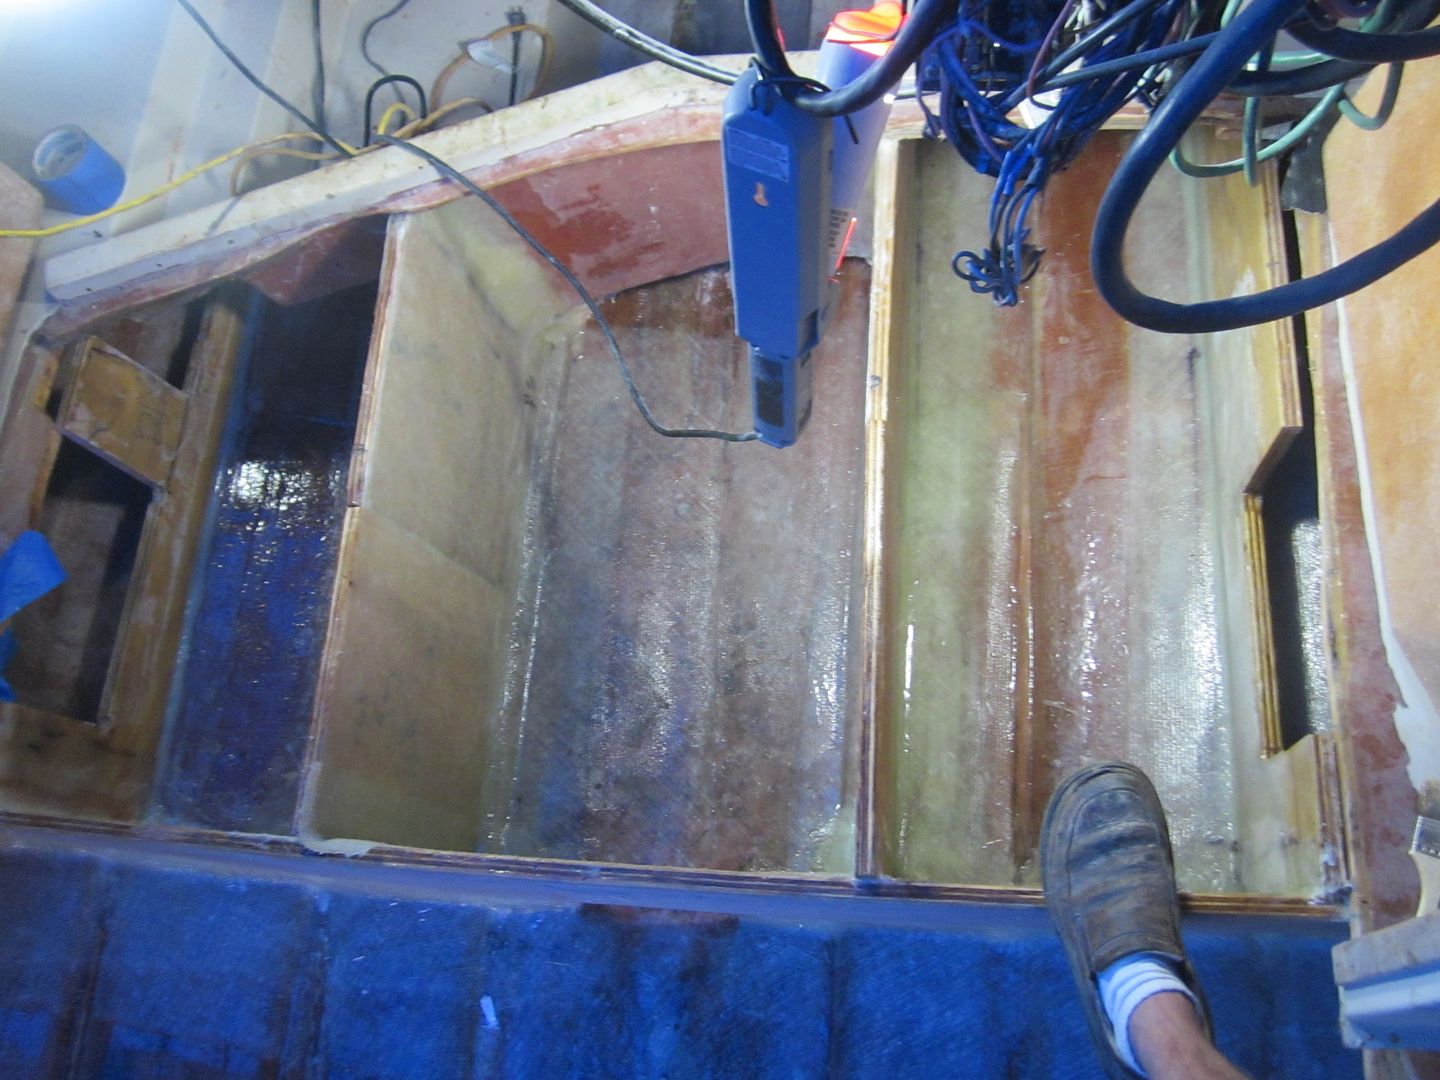
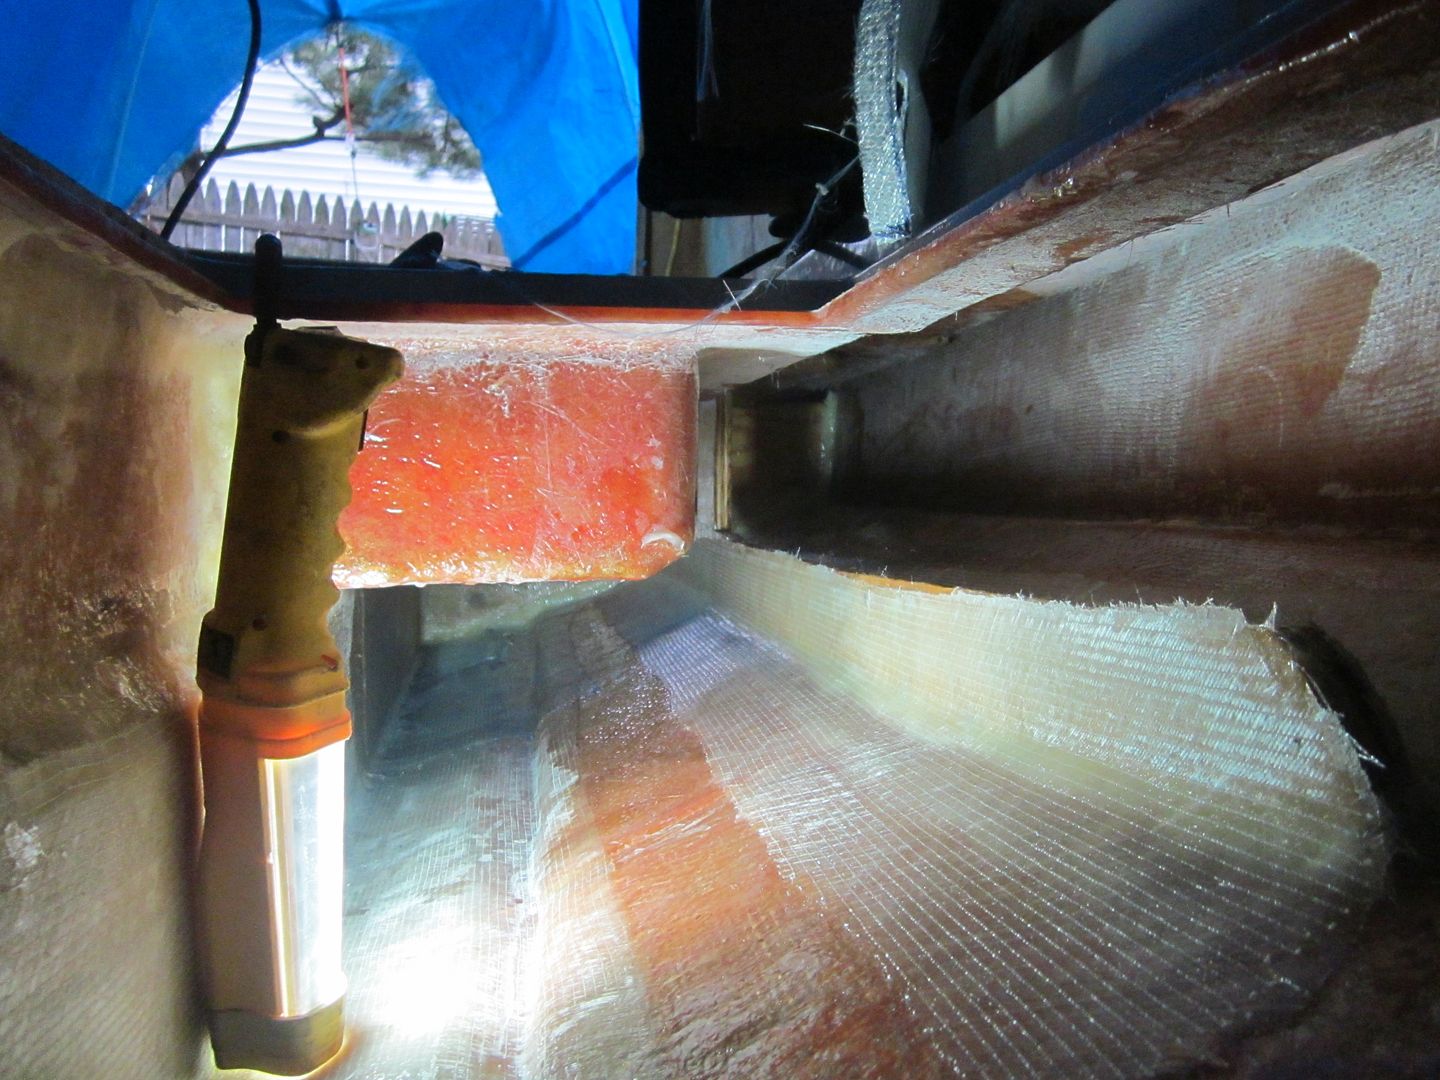
I'm looking for some guidance on evaluating the condition of the transom and stringers. I have removed the engine for a steering swivel pin seal leak and now have good access to the transom for inspection.
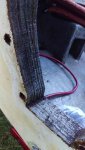
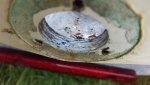
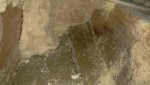
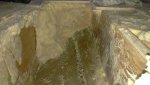
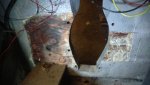
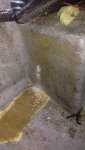
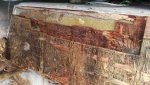
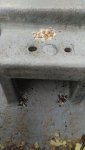
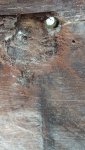
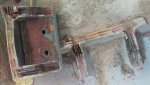
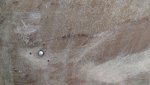
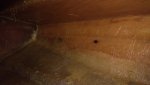
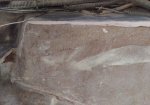
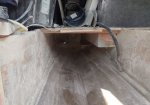
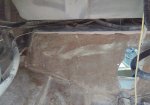
The keyhole area seems dry and solid. When I drilled exploratory holes into the lower transom water was dripping out of the drilled holes. The lower thinner section of the transom is about 3/8" thick, about 3/16" of gel coat and 3/16" of plywood and inner skin. Water was able to get access around the garbord drain not being sealed properly. The few holes I have drilled in the thicker area of the transom appears to be dry wood.

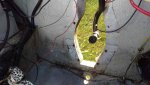
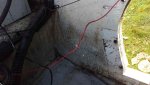
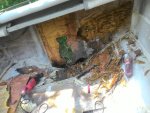
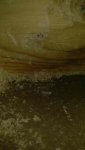
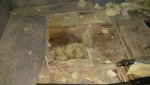
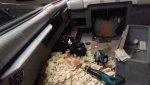
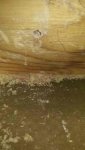
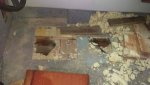
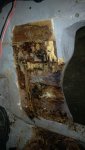
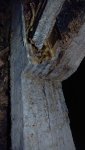
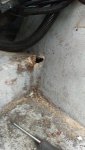
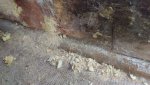
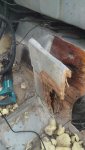
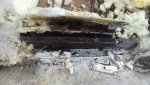
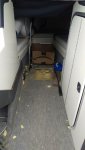
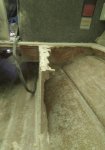
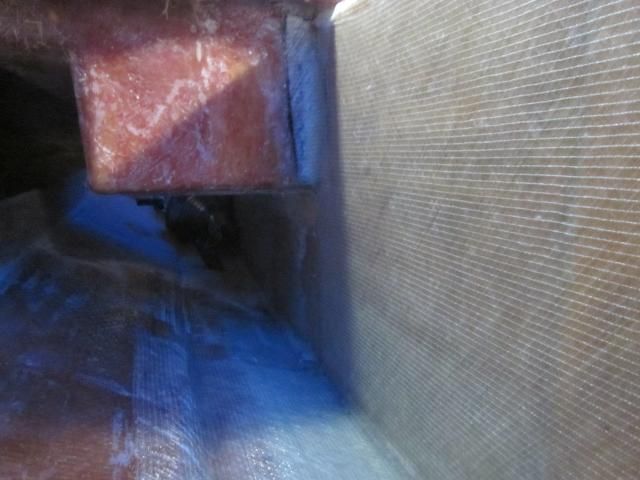
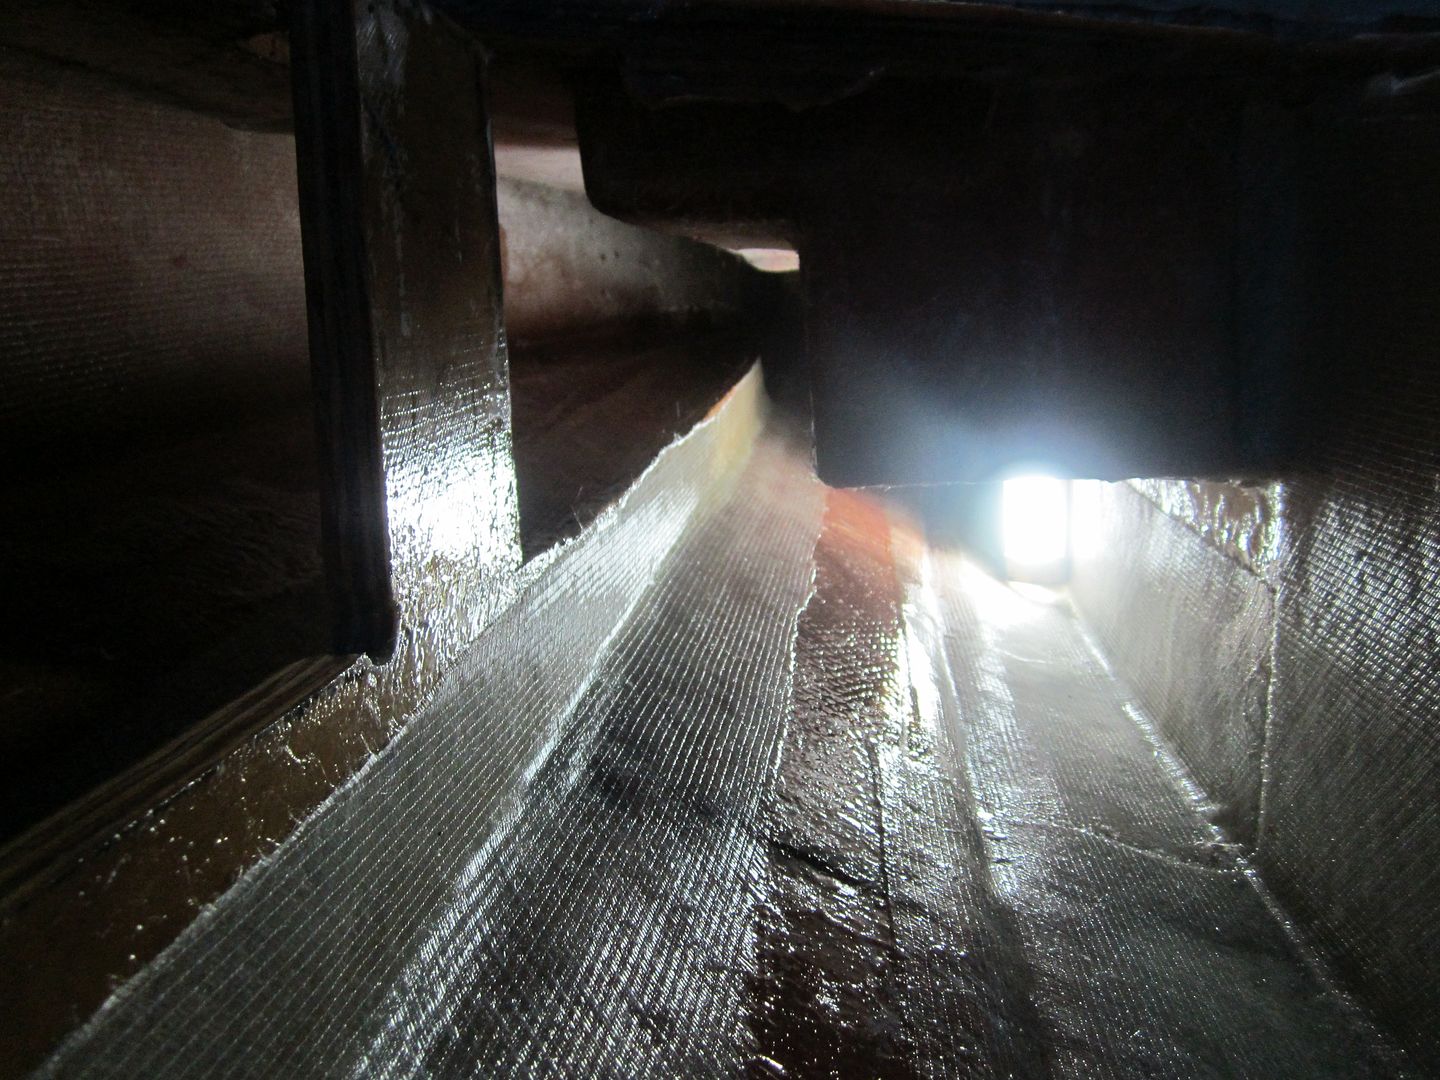
I can see rot in one of the stringers where an engine bay access cover was screwed into a cleat, water got into the cleat and rot spread to the stringer, will get pictures posted of this shortly.
Would appreciate opinions on what I may be dealing with and recommendations on more tests etc
 

Attachments

  • photo280144.jpg
    photo280144.jpg
    71.5 KB · Views: 6
  • photo280145.jpg
    photo280145.jpg
    72.9 KB · Views: 6
  • photo280146.jpg
    photo280146.jpg
    66.7 KB · Views: 6
  • photo280147.jpg
    photo280147.jpg
    85 KB · Views: 6
  • photo280148.jpg
    photo280148.jpg
    100.3 KB · Views: 6
  • photo280149.jpg
    photo280149.jpg
    104.7 KB · Views: 6
  • photo280150.jpg
    photo280150.jpg
    98.1 KB · Views: 6
  • photo280151.jpg
    photo280151.jpg
    63.3 KB · Views: 6

chevymaher

Commander
Joined
Mar 29, 2017
Messages
2,915
No Title

It don't look good, mine was just like your describing. Solid keyhole. Water running out when drilled. It was a mess when I peeled the skin off tho.
It didn't look bad I had already decided I was replacing everything because I found rotted stringers like you found. In the first pic it is covered with fiberglass dust. Second is where I peeled the fiberglass off. The upper right was where the water was coming from. That wood I literally took out with my hands. Looked like wood but was soft.

You got confirmed rot and water in the transom. Somebody will chime in but to me it time to open it up. Kind of get ready to do what I am doing. Gut and rebuild. To me just do it all is the only logical choice. That way you know what you got. I found much more as I demo'ed it than i originally thought it had.
 

Attachments

  • photo265060.jpg
    photo265060.jpg
    86.2 KB · Views: 4
  • photo265259.jpg
    photo265259.jpg
    91 KB · Views: 4

tpenfield

Moderator
Staff member
Joined
Jul 18, 2011
Messages
17,711
for about $30 you can get a 'contact' type of moisture meter for wood at the big box home improvement stores. That way you can get some measurements of the exposed wood at the transom.

You could also drill slightly through the fiberglass coating of the stringers in various areas and use the meter to get a reading of the wood inside the stringers.

With a 1991 boat and already some indication of water retention, you probably will find a bit of water throughout the structure.

You mentioned a rotted stringer area, but I did not see that in the pictures (?)
 

GCartwright

Petty Officer 2nd Class
Joined
Jul 1, 2012
Messages
149
No Title

Thanks for the comments and advice.

Here is a few pictures of one of the stringers I started to dig into. I'm not sure how far the damage goes from this point which was where water was able to enter the stringer
Boat is put away for the season, I can still access it but I wont have power to work with. I'd like to get more core samples and as much removal as I can with battery powered tools over the winter to get a head start when I can pull the boat out in the spring.
I read about using pvc pipe to core out the foam.which I would want to do along the stringers. Any tips or methods on doing this , 3" hole saw through decking ?
 

Attachments

  • photo280182.jpg
    photo280182.jpg
    94.8 KB · Views: 5
  • photo280183.jpg
    photo280183.jpg
    145.7 KB · Views: 5
  • photo280184.jpg
    photo280184.jpg
    146.9 KB · Views: 6

chevymaher

Commander
Joined
Mar 29, 2017
Messages
2,915
That is pretty much what I found doing exploratory surgery in mine. It is probably all through the boat. Just takes a minute to get used to but. Best is just gut it and put in all new.

When I was at the point your at. I said that it I am fixing it right. No mysteries where else is it. it is all going to be new so I don't have to deal with it for another 30 years when I am close to 100 years old.

And if you look in my boat thread. I wasn't wrong it needed it.
 

JASinIL2006

Vice Admiral
Joined
Feb 10, 2012
Messages
5,548
Well, you know at least some of your transom has absorbed enough water to drip after drilling test holes. You know at least one of your stringers has aft has rot (and from the looks of it, has been wet for a while). What is the likelihood that the water has stayed in those two isolated spots (i.e., it hasn't wicked into the wood and migrated)? I have to agree with Ted and chevymaher that you'll likely find water elsewhere, and likely some more rot, too. I hope that's not the way it turns out, but we don't see many of those kinds of happy endings here...

I'd be drilling a number of test holes into the bottom sides of stringers and engine mounts, to see if there is any wet wood. If you want to core sample your foam, you can drill a hole slightly larger than the pipe you're using to core sample; it doesn't have to be a 3" hole, unless that's the only hole saw you have.

After seeing my transom and discovering how rotten it was behind the fiberglass, even though it didn't look that bad before I peeled back the skin, I would expect the worst. Even if it's not badly rotted now, there's water in there and I think it's unlikely to get out, so the problem is only going to get worse.
 

GCartwright

Petty Officer 2nd Class
Joined
Jul 1, 2012
Messages
149
I do want to repair this boat properly as it really fits our needs at the moment and want to be safe on the water. That could mean no boating next summer but at least gas money can go towards a rebuild.
I'm going to take more samples in the next few days to get an idea of just how far the rot goes
 

GCartwright

Petty Officer 2nd Class
Joined
Jul 1, 2012
Messages
149
[FONT=Times\ New\ Roman]Did some exploratory work over the past couple of weeks and I definitely have some work to do. I removed sections of the deck and foam mostly on the starboard side and the stringer are in bad shape near the transom and get better moving towards the bow. The core samples I took of the bulkhead under the helm and the stringers at that location looked and felt nice and dry.
All the close-up pictures are from the forward section of the stringer and under helm bulkhead[/FONT]


[FONT=Times\ New\ Roman]I will be pulling all the deck up to get a better look at the stringers. Hopefully a partial stringer replacement along with the transom will be all that’s required. The deck is real solid with no sign of rot.[/FONT]

[FONT=Times\ New\ Roman]I won’t be pulling the boat out of storage for another month so I’m only able to work with cordless tools at the moment.[/FONT]

[FONT=Times\ New\ Roman]I'm looking for any suggestions and guidance as this will be my first time doing this type of work and can seem a bit overwhelming. My biggest concern is whether or not my back can hold with this type of repair.[/FONT]


[FONT=Times\ New\ Roman]One question I have is would an 5" wet air grinder work well and keep the dust down? When I start grinding I will be right next to my neighbours driveway and vehicles. Not sure I would have the air supply to run a air grinder (5.4 cfm @ 90psi)[/FONT]


[FONT=Times\ New\ Roman]Happy Easter![/FONT]
 

Attachments

  • photo287368.jpg
    photo287368.jpg
    16.6 KB · Views: 5
  • photo287369.jpg
    photo287369.jpg
    48 KB · Views: 5
  • photo287370.jpg
    photo287370.jpg
    41.2 KB · Views: 5
  • photo287371.jpg
    photo287371.jpg
    42.8 KB · Views: 5
  • photo287372.jpg
    photo287372.jpg
    24.1 KB · Views: 5
  • photo287373.jpg
    photo287373.jpg
    43.3 KB · Views: 4
  • photo287374.jpg
    photo287374.jpg
    41.9 KB · Views: 3
  • photo287375.jpg
    photo287375.jpg
    45.3 KB · Views: 5
Last edited:

GCartwright

Petty Officer 2nd Class
Joined
Jul 1, 2012
Messages
149
Did some digging into the transom, lots of wet wood in there. The two plywood sections that make up the thick area of the transom separate easy from each other as if no glue was used or has broken down?

The picture of the drilled hole sample is from the motor mount, wood felt dry in that area.

Will hope for the best but plan for the worst as far as a complete gut goes.

I'll have the boat back at the house in a week or two then I'll be able to go at it with some power tools.
Sounds like an oscillating saw works good for cutting into the transom then chisel away.
 

Attachments

  • IMAG1852.jpg
    IMAG1852.jpg
    328.8 KB · Views: 5
  • IMAG1916.jpg
    IMAG1916.jpg
    337.8 KB · Views: 5
  • IMAG1914.jpg
    IMAG1914.jpg
    287.2 KB · Views: 5
  • IMAG1915.jpg
    IMAG1915.jpg
    350.6 KB · Views: 5
  • IMAG1917.jpg
    IMAG1917.jpg
    418.4 KB · Views: 5
  • IMAG1864.jpg
    IMAG1864.jpg
    390.9 KB · Views: 5

GCartwright

Petty Officer 2nd Class
Joined
Jul 1, 2012
Messages
149
I'm still at it, new transom and partial stringers replacement at the very least. The bow section stringers look in good shape, I did find some wet wood in the bulkhead in the front of the ski locker which will be replaced. More coming on this

A few things I have found during the tear down:
-I believe the trim tabs were factory installed, the holes drilled for the mounts are not centered, port side upper mount is off by 3/8" compared to other side putting the pipe nipple and elbow right beside the stringer, it looks like the fiberglass on the stringer was damaged and a repair at some point was attempted .

-under the ski locker and tank was nasty with wet foam and rotted out center dagger stringer (if that's what it is) didn't even looked like it was wrapped in fiberglass.

-where stringers were joined there's close to 3/8" difference in the stringer height, both outer stringers have a three foot section were there not glassed into the hull.

I'm going to have quite a few questions for the rebuild phase when I get there.

Some pictures of the carnage:
 

Attachments

  • photo297032.jpg
    photo297032.jpg
    641.3 KB · Views: 3
  • photo297033.jpg
    photo297033.jpg
    591.4 KB · Views: 3
  • photo297034.jpg
    photo297034.jpg
    616.5 KB · Views: 3
  • photo297035.jpg
    photo297035.jpg
    765.5 KB · Views: 3
  • photo297036.jpg
    photo297036.jpg
    654.6 KB · Views: 3
  • photo297037.jpg
    photo297037.jpg
    645.8 KB · Views: 3
  • photo297038.jpg
    photo297038.jpg
    1.2 MB · Views: 3
  • photo297039.jpg
    photo297039.jpg
    934.4 KB · Views: 3

JASinIL2006

Vice Admiral
Joined
Feb 10, 2012
Messages
5,548
Good to see you're still at it, although it's shocking how sloppily they threw together some of these boats.

Fire away with questions as you get deeper into this!
 

GCartwright

Petty Officer 2nd Class
Joined
Jul 1, 2012
Messages
149
A few more pictures of rotten wood removal
 

Attachments

  • photo299021.jpg
    photo299021.jpg
    1.3 MB · Views: 5
  • photo299022.jpg
    photo299022.jpg
    898 KB · Views: 5
  • photo299023.jpg
    photo299023.jpg
    845.6 KB · Views: 5
  • photo299024.jpg
    photo299024.jpg
    1.3 MB · Views: 5
  • photo299025.jpg
    photo299025.jpg
    1.2 MB · Views: 5
  • photo299028.jpg
    photo299028.jpg
    1.2 MB · Views: 4
  • photo299032.jpg
    photo299032.jpg
    1.2 MB · Views: 5
  • photo299033.jpg
    photo299033.jpg
    1.5 MB · Views: 5
  • photo299036.jpg
    photo299036.jpg
    967.3 KB · Views: 5

GCartwright

Petty Officer 2nd Class
Joined
Jul 1, 2012
Messages
149
Since the deck is in good shape I would like to tab the new deck in with the 8" or so that I have remaining.
The transom and stringers will get replaced and sistered in to the good section of stringers which is right around the helm area,
The false floor in the ski locker , the center stringer and the bulkhead at the forward section of the ski locker all need to be replaced, The cener stringer was one section and the bulkhead was nothched around it,
The storage compartment in front of the helm extends down past the level of the deck which makes the whole ski locker area very difficult to access, I'm not sure how the storage compartment would get removed and if the cap would need to come off or how difficult it would be to replace the bulkhead and cener stringer with just an access hole in the bow section deck.

Any comments are appreciated
 

Attachments

  • photo299018.jpg
    photo299018.jpg
    725.4 KB · Views: 5
  • photo299019.jpg
    photo299019.jpg
    540.3 KB · Views: 5
  • photo299026.jpg
    photo299026.jpg
    845.5 KB · Views: 6

kcassells

Fleet Admiral
Joined
Oct 16, 2012
Messages
8,600
So are you rehabbing all the stringers/bulkheads? I can't tell from your thread.
 

GCartwright

Petty Officer 2nd Class
Joined
Jul 1, 2012
Messages
149
The stringers will be replaced up to the the helm area from that location forward there dry.
The bulkhead in the forward section of the ski locker is wet and has been removed.
Its going to be difficult to replace the bulkhead without pulling the bow deck and storage locker and which is below the deck level.
 

GCartwright

Petty Officer 2nd Class
Joined
Jul 1, 2012
Messages
149
Just to recap, I'm planning on replacing the transom and stringers up to the helm area as well as all bulkheads. From the condition of the forward stringers it appears to me that this is all that's required but I am a first timer at this.

The question I have is with the amount of grinding needed on the old fiberglass. I have read the phrase " take it down to fresh fiberglass" Not exactly sure if this means grind out a layer of tabbing or grind to the original hull?

I have attached some pictures of where I am in the grinding process, there are areas where it seams there's a build up of resin which is tough to grind compared to a tabbed in area,
As far as the transom grinding goes, again theres a layer of resin which does not cover the entire transom area, I don't see any woven on the transom like I have seen in other transom pictures, Is it under there somewhere?
How best to grind out the strakes, and transom to hull area, it seems like a flap disc can dig in on the edge quite easily. Would a die grinder with a sanding drum work better in tight area's and above the transom where access is limited?

Thanks again
 

Attachments

  • photo299267.jpg
    photo299267.jpg
    1.1 MB · Views: 3
  • photo299268.jpg
    photo299268.jpg
    1.1 MB · Views: 4
  • photo299269.jpg
    photo299269.jpg
    1 MB · Views: 4
  • photo299270.jpg
    photo299270.jpg
    1.2 MB · Views: 4
  • photo299271.jpg
    photo299271.jpg
    1.2 MB · Views: 4
  • photo299272.jpg
    photo299272.jpg
    1.4 MB · Views: 3

kcassells

Fleet Admiral
Joined
Oct 16, 2012
Messages
8,600
Yours looks alot like mine. :joyous:
Yup with the cap on it is really hard to get the old out and replaced in the cabin. I ended up doing it.
Was tricky but just did not want to come back to it. Mt woods were rotted.
After removal, I made foam templates of the stringers, glassed them all on a table prior x2.
Inserted and filled with pb. Then tabbed.
 

kcassells

Fleet Admiral
Joined
Oct 16, 2012
Messages
8,600
Kinda like this;
PICT0006_zps6b889771.jpg~c200
stringersfront2_zps7c47c073.png~c200
PICT0010_zpsc0b8d46c.jpg


PICT0009_zps9b4c510c.jpg


PICT0014_zps0c885b37.jpg

PICT0015_zps4e5f4658.jpg

Alot of my thread got blown off by the freaking "photobucket" So I'll have to redo my thread someday.
 

GCartwright

Petty Officer 2nd Class
Joined
Jul 1, 2012
Messages
149
Kcassells thanks for the responses. I'm going to have to read thru your rebuild.

Any comment on the grinding questions above?
 
Top