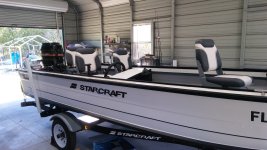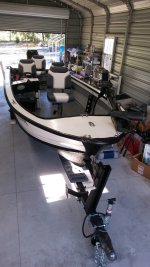
Where do I belong? Alum Goods 1687, SS16 Clone?

ShoestringMariner

Lieutenant Commander
Joined
Apr 18, 2015
Messages
1,602
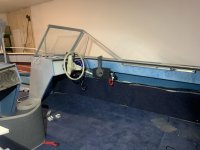
3/8" ply kick panels fabricated to trim out inside of hull in console area. I'm low on Nautolex, or I'd have just wrapped these. They are now getting painted instead. Starboard side will include a pass-through for wiring to the fuse-panel that will be mounted on that panel.

Pics tomorrow!
Looking forward to seeing these especially.
 

renns

Petty Officer 1st Class
Joined
Dec 20, 2017
Messages
316
Looking forward to seeing these especially.
My brief burst of energy on the project is being stalled by other obligations for the next week or so. You might have yours done by then? Here's what I'm in the midst of doing in that area:
Each panel is roughly 16" x 18". A small bevel of the lower leading corner is needed to fit nicely, but other than that, it's basically a flat rectangle. Aft edge pops behind the return leg on the vertical shelf/gunnel support member. A stainless truss-head screw is used to pull tight top and bottom. A curved notch in the aft edge of the panel was needed to clearance around the rivnut used for the top mounting fastener of my side panels.
The foreward edge sits behind the aluminum return that's riveted to the inside of the console. Alignment isn't perfect, but that return leg is 4-5" at the bottom, so it can flex over a bit to meet the plywood.
I've fit them to sit about 1/2" off the deck, to avoid water intrusion into the end grain of the ply. I'm also planning to bond/staple a narrow strip of scrap nautolex on the backside of the panel along the bottom, with the vinyl extending a couple inches past the panel. That will be folded inboard against the deck as the panel is installed, keeping random crud away from the deck/hull joint. Lots of words to describe a simple part. Sorry, no pics yet!
 

ShoestringMariner

Lieutenant Commander
Joined
Apr 18, 2015
Messages
1,602
Sounds like a solid plan. I’m planning on keeping my boards elevated for the same reason. The boards that separated the helms and bow seating were completely rotten on the bottom. Both because the dash was draining on top of them, and because they were double clad, sitting directly on the floor. Any water that got in couldn’t get out easily.
 

ShoestringMariner

Lieutenant Commander
Joined
Apr 18, 2015
Messages
1,602
And I’m having serious doubts that my boat will see water before end of June. It will probably be splashed just before winter storage lol
 

Rivetsmasher

Recruit
Joined
Apr 14, 2022
Messages
4
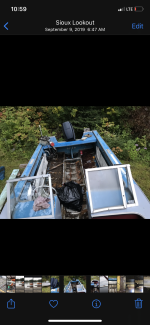
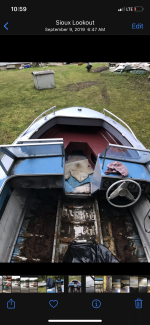
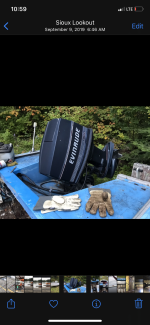
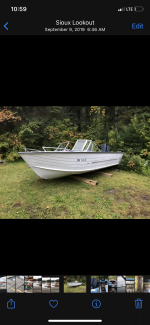
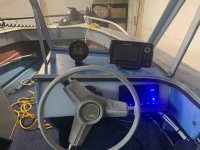
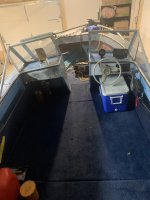
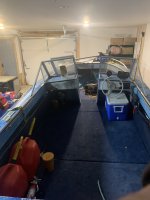
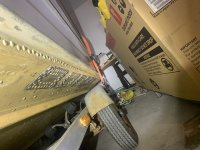
Ha I was just researching my boat looks like we have the same boat! When I bought mine it was a total rebuild! Required a fair amount of patches to be installed on the hull unfortunately! Here’s some pics!
 

Attachments

  • F95DDEFF-7BA2-486E-A9CC-6CEADD3747F4.png
    F95DDEFF-7BA2-486E-A9CC-6CEADD3747F4.png
    2.6 MB · Views: 10

Rivetsmasher

Recruit
Joined
Apr 14, 2022
Messages
4
Ha I was just researching my boat looks like we have the same boat! When I bought mine it was a total rebuild! Required a fair amount of patches to be installed on the hull unfortunately! Here’s some pics!
 

Attachments

  • 1F270ECF-12A1-4519-ADD1-34E816316CAF.png
    1F270ECF-12A1-4519-ADD1-34E816316CAF.png
    3.9 MB · Views: 11
  • A5ED4D3B-655C-4B4F-95DF-F60ED604D50F.png
    A5ED4D3B-655C-4B4F-95DF-F60ED604D50F.png
    2.6 MB · Views: 11
  • 66140762-C94D-4B0D-9EAA-583571557039.png
    66140762-C94D-4B0D-9EAA-583571557039.png
    2.6 MB · Views: 11
  • 8B06695C-C94B-4A3A-A549-4A212CA971AB.jpeg
    8B06695C-C94B-4A3A-A549-4A212CA971AB.jpeg
    1.7 MB · Views: 11
  • E1C3BB0A-6443-4124-88B6-7124E598A808.jpeg
    E1C3BB0A-6443-4124-88B6-7124E598A808.jpeg
    2.3 MB · Views: 11
  • 8FFBC689-DDC1-471A-85F0-E715EFA6594F.jpeg
    8FFBC689-DDC1-471A-85F0-E715EFA6594F.jpeg
    1.5 MB · Views: 10
  • 32D3CD44-9130-45FE-8C72-6C1CC51B9F9B.jpeg
    32D3CD44-9130-45FE-8C72-6C1CC51B9F9B.jpeg
    1.9 MB · Views: 10
  • A916A7C2-F785-4E53-AD58-0F5999D65E4F.jpeg
    A916A7C2-F785-4E53-AD58-0F5999D65E4F.jpeg
    2.9 MB · Views: 11

Rivetsmasher

Recruit
Joined
Apr 14, 2022
Messages
4
Couple more!
 

Attachments

  • 9C4062D0-78F4-4147-B95F-2E0ED321F712.jpeg
    9C4062D0-78F4-4147-B95F-2E0ED321F712.jpeg
    1.9 MB · Views: 7
  • A2822437-6E4A-464B-9E9C-8166B87EE432.jpeg
    A2822437-6E4A-464B-9E9C-8166B87EE432.jpeg
    1.6 MB · Views: 7
  • 80AE4BC5-B7FA-4252-A33A-AE18E104823D.jpeg
    80AE4BC5-B7FA-4252-A33A-AE18E104823D.jpeg
    3 MB · Views: 7

renns

Petty Officer 1st Class
Joined
Dec 20, 2017
Messages
316
That's awesome! Thanks for posting up those pics. You've got the modern Yamaha power as well. I'm hoping to splash this one in the next couple weeks. Need to update with some more pics at some point.
 

Rivetsmasher

Recruit
Joined
Apr 14, 2022
Messages
4
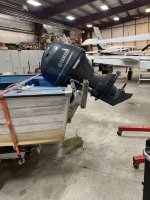
Looks like you went all out! I’ve kept mine pretty low on weight! Didn’t even bother with foam under the floors. Yes I just repowered this spring with a 70 yam. Break in is done and she’s getting 38 miles wot with little weight in the boat! With another person it drops substantially to 34 miles wot. Cruises nice around 27! I’ll say the one thing I don’t care for in this boat is with such a bull nose to it if you hit any kind of serious wave it bites in! The more weight you can keep in the back the better that gets!
 

renns

Petty Officer 1st Class
Joined
Dec 20, 2017
Messages
316
Wiring done.
1.) Twin bilge pumps, both with manual switches, one also auto-switched via fused float circuit.
2.) Bow LED light - new, old extend-a-mast stern light still hanging on for now. Learned that a single contact bulb in the rear mast will short out the two contacts and blow the fuse! Was thinking in automotive mode about the suitable bulb, and figured a single filament was all that was needed!
3.) "Aux" circuit - includes Garmin Striker 4 plus fish finder, USB chargers, voltmeter.
4.) Velex marine radio (reviews aren't great, but picked it up cheap locally...).

That's it for now. The fancy under-gunnel LED's will be a project for another day.

Just about ready to splash. Need to refill lower unit with oil, and do an oil/filter change on the Yamaha.

Also picked up a full top that needs to be tweaked to fit. Not sure if that's going to be a project for 2023 or not. Trouble is, I can't seem to located the nice fitted mooring cover that I stored away prior to this hole restoration process. Getting old sucks. I remember all the useless stuff. Important details not so much.
 

renns

Petty Officer 1st Class
Joined
Dec 20, 2017
Messages
316
Good news! Found the mooring cover! I had it folded up and set on the seat of my son's snowmobile. He put his snowmobile cover overtop, with my boat cover hidden underneath. Glad I found it - thought I was loosing my marbles...
 

ShoestringMariner

Lieutenant Commander
Joined
Apr 18, 2015
Messages
1,602
You must be stoked. Was in my brothers AG tonight on Belwood Lake.
Was a nice nght to be out even if it a reservoir lake.

There’s a small mom and pop outfit in Kitchener that does boat covers, Trent trailer repairs etc. pm me if you want a contact info. I’ll tell you another few to steer clear of too
 

renns

Petty Officer 1st Class
Joined
Dec 20, 2017
Messages
316
SSM - nice to be out on the water for sure! I'm hoping to get out for a shakedown run later this week before hauling the ship north for the season.

As for the canvas work - I have some experience in that area, and a machine that will do a decent job. We'll get something sorted in short order now that the uncovered the cover!
 

renns

Petty Officer 1st Class
Joined
Dec 20, 2017
Messages
316
1654466416028.jpeg
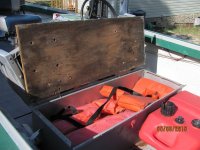
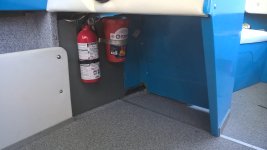
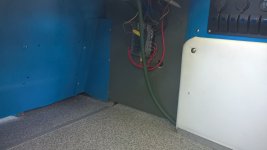
Port console kick panel - seemed like a good place for fire extinguisher and safety kit.
1654466442836.jpeg
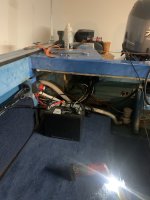
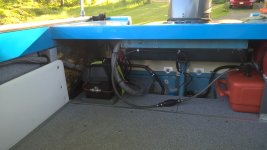
Fuse box - wiring needs a bit of tidying yet. Ran 12V to fuse box, from fuses to the 6-gang switch panel, then back into area above kick panel where the switch outputs are labelled and connected to the various loads: Bilge #1, Bilge #2, Auxilliary (voltmeter, USB charger, fish finder), Radio, Spare, Nav Lights.
1654466695448.jpeg
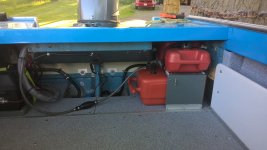
Battery box with integral main fuse and disconnect switch.
1654466742181.jpeg
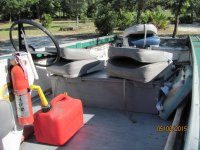
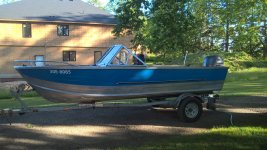
Double-decker fuel tanks. 5-gallon below, 3-gallon spare above. Double-bilge pumps can be seen here too. Starboard discharges out hole in side of hull a few inches below gunnel. Port side discharges into splashwell as per original. One is powered full-time through fused float switch. The other is just manual.
1654466955457.jpeg
Still need final light polish and sharkhide treatment. Motor tested on muffs, and all is well. Had to do a bit of MacGivering to get the tilt gauge to read. Need to do the same for tach, since it's not reading at all at the moment. Mooring cover is in the basement for a few minor tweaks to get it to fit with new windscreen. No splash yet, but it could happen any time.

Oh, and one more project...we need a bench seat of some sort across the back for extra seating. And it needs to allow easy access to the fuel tanks.... Haven't got that sorted out just yet. Ideas welcome!
 

ShoestringMariner

Lieutenant Commander
Joined
Apr 18, 2015
Messages
1,602
That boat is looking so awesome. I like the bench seat idea. If it was mine, I would make it so that both the back and the seat itself folded out into the open floor space if there was room. Leaving a slightly elevated casting deck behind the swivel seats. And I would try to make it so that the area closest to the fuel tanks also hinged forward to give you more room to slide tanks in and out if that makes any sense?
 

renns

Petty Officer 1st Class
Joined
Dec 20, 2017
Messages
316
That boat is looking so awesome. I like the bench seat idea. If it was mine, I would make it so that both the back and the seat itself folded out into the open floor space if there was room. Leaving a slightly elevated casting deck behind the swivel seats. And I would try to make it so that the area closest to the fuel tanks also hinged forward to give you more room to slide tanks in and out if that makes any sense?
You and my son are on the same track. I think both of you are trying to cause me grief. My idea of a cushion on a milk crate is _way_ quicker to implement!
Seriously though, I'm still up in the air on the whole bench idea. I think I prefer the idea of the corner boxes with padded tops that can serve as storage and seating.
I'm not sure if we are limited to 5 or 6 people. The dataplate says 1615 lb maximum load. Assuming 500 lb of motor, fuel, battery, anchor, etc that's still 1100 lb which should be good for 6 'avg' folks.
 

BWR1953

Admiral
Joined
Jan 23, 2009
Messages
6,197
When I first got the Kingfisher, it had a bench seat. And that really suuuucked! :rolleyes:

Having to climb over and around that thing in order to move fore and aft stunk. And with 2 or more people moving at the same time, it was not only annoying, it made the boat more tippy. Retrieving stuff from inside the bench was also a pain. My wife was not a happy boater then!

starcraft10.jpg

starcraft11.jpg

starcraft12.jpg

Later on, I rotated the bench 90 degrees along the port side, which helped a little. But it was still not good. (I had a tiller setup then.)
1.jpg


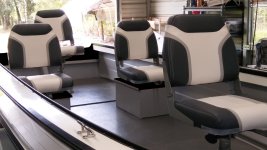
So, when we did the full on restoration, I cut that seat box in half, added a couple of ends and made two smaller seat boxes which works out nicely!
1.jpg

1.jpg

2.jpg
 

renns

Petty Officer 1st Class
Joined
Dec 20, 2017
Messages
316
BWR, thanks for the pics. Very nice work! Those seats look awesome. Maybe I should just buy two more like I have on the pedestals, and mount to small boxes like you did. That way I could forget the custom cushion business.
 

Rasdiir

Petty Officer 2nd Class
Joined
Jul 18, 2011
Messages
167
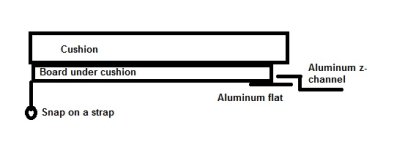
Thanks for checking in guys. Looking for advice on those cushions. Currently they go all the way up under the closed bow area, and are awkward to remove. But, that also means they tend to stay put on their own as well; not likely to leave the boat in choppy windy conditions. If I make two side cushions separate from the 'triangle' up under the bow, will they need to be restrained somehow? Snaps/clips? I'm thinking the underside of the seat would have a wooden 'plug' the same shape as the hole in the aluminum support underneath so the cushion stays in place laterally. It's the vertical movement I'm worrying about - picturing the cushions bouncing up and getting caught by the wind. And @ShoestringMariner claims he overthinks things. We need to have an "OverThinkOff" challenge sometime!
Not sure if you solved this yet, but this is what I'm planning on. Basically install a small z-channel on top of the seat base and against the hull, then a strip of aluminum screwed to the bottom of the cushion board. It should slide in nicely, then put a snap on a vinyl strap to hold down the other side.
Bow cushion attachment.jpg
Not sure if my quick drawing makes sense.
 

Alecapone

Seaman Apprentice
Joined
May 8, 2021
Messages
42
Bouncing around looking for interior finishing inspiration. Looking good!
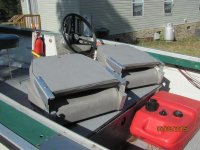
Your boat looks very simular to mine as well(75 ss).
 
Top