


hawkman222
Seaman Apprentice
- Joined
- Feb 20, 2006
- Messages
- 45
Working on an 89 Dominator CS and need an experienced eye to help me understand what I have.
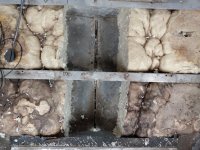
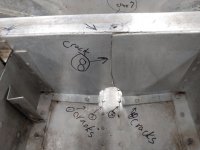
I was taking on more water than I liked last fall so I put some water in the boat to locate leaks. Found a few hull cracks and also had a dribble coming out of drain hole at the back of the keel guard.
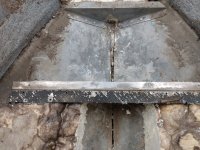
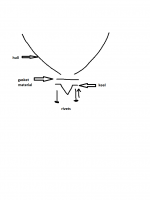
Fast forward, I'm now replacing the deck and tracking down hull cracks and leaks while the hull is open. In the bow, there is a void at the bottom that opens into the V shaped keel piece. If I pour water in this void, water will drip out the keel drain hole. It looks like at one time there was a gasket or seal of some sort separating the bow interior from the keel channel. Not sure.
Can someone tell me what keeps water from coming up the keel from the drain hole and into my boat?
I was taking on more water than I liked last fall so I put some water in the boat to locate leaks. Found a few hull cracks and also had a dribble coming out of drain hole at the back of the keel guard.
Fast forward, I'm now replacing the deck and tracking down hull cracks and leaks while the hull is open. In the bow, there is a void at the bottom that opens into the V shaped keel piece. If I pour water in this void, water will drip out the keel drain hole. It looks like at one time there was a gasket or seal of some sort separating the bow interior from the keel channel. Not sure.
Can someone tell me what keeps water from coming up the keel from the drain hole and into my boat?

")

 (and the bilge is bone-dry.)


