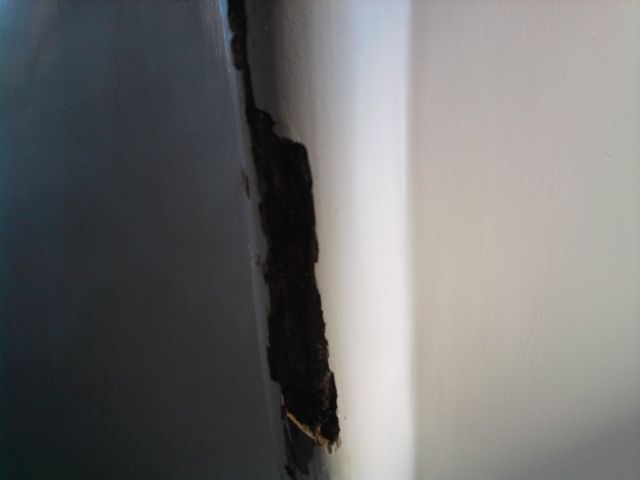
Wet wood - do I have a disaster in my hands?

Joolz

Petty Officer 1st Class
Joined
Aug 13, 2015
Messages
211
Oh, that far down. Ok, now I know where to drill. Thanks.
Guess I'll be adding a nice and thick layer of the 3m filler to ensure water doesn't make its way into the hole.
 

mxcobra

Chief Petty Officer
Joined
Jun 27, 2011
Messages
526
mx, from another mx racer: great job restoring your Bayliner. Followed your whole thread. You made it seem easy, Prior to seeing your thread, I had followed another where the poster was updating every step of the way. It was an awful, scary mess. Like, the difficulty in removing the foam. All that wood cutting, fitting, sanding to no end. Man, this sure is something I hope I won't have to go through. Note that my boat looks nothing like yours as far as visible rot is concerned. IF no other work had been done on it, it looks like the water intrusion to be minimal and hopefully hasn't spread far. But as you said, for all we know someone did replace the deck and reglassed everything and if so, who knows if they even bothered replacing the stringers, foam, etc.

In my case, if the stars are lined up, I suspect the culprit may have been water coming in from the keel, something I plan to address next using 3M filler and a KeelGuard. I say this cause the PO was religious about covering his boat, something that apparently not many do (seen my share of rotting junk when I was shopping for a boat). If that's where the point of entry is, hopefully there will be no more water intrusion once fixed. But still leaves me with rot that needs to be dealt with. Hoping that I can still enjoy summer, my young boys are already bugging me to take them out. Especially since last week I bought them a 2 person tube that got them really excited.

Will try and do the drill tests to get a better idea of how fit this boat is and if I can enjoy this summer without worries. Still not sure where to drill the holes or what size drill bit I'd need. Maybe someone can give me a few pointers of where to start?
wow cool at least some one was looking, I only posted the good stuff. You didnt get to see all the blood sweat and tears. The up at 4 am before work. The late nights in the boat along with all weekend long. watching the summer just pass by. Bringing home my rotten boat when I thoght I had found a prize. I hope your boat turns out well for you it lookks like a sweet boat....
 

Joolz

Petty Officer 1st Class
Joined
Aug 13, 2015
Messages
211
And for this mxman, you deserve commendation: you truly did a fab job on yours. It looks great and I'm sure it'll last for quite some time. And most of all you get to play hero to your kids for giving them this amazing experience. Which is the reason why I decided to get a boat in the first place, to enrich their lives further by introducing them to the beauty of boating, water sports, etc. Basically to further get them outside and enjoy our beautiful world, instead of the fake world they greatly enjoy in their Xbox. I tell you, it's hard to compete with videogames. But between camping and now boating, they sure don't miss the games while we're out there.

It would seem that a lot of folks, new and experienced alike make the mistakes of buying a boat that needs a lot of work without realizing it. This other thread I had followed where the guy literally showed his blood, sweat and tears - made me realize that even experienced boaters can endup with a bad purchase. But his story too had a happy ending. It's the blood/sweat/tears part that I sure hope I can do without.

At least in my case the cost of the boat wasn't high and it would seem the damage to not be widespread. Boat sure is a beauty and has a monster motor that I could sell separately for more than I paid for the entire package. But no way I will, my kids love this boat and it has absolutely everything we could hope for. So it's definitely a keeper. If a bit of elbow grease, blood and tears is what it'll take to restore it, so be it. I'm still going through the emotions but slowly beginning to accept that at some point I will have to tear it apart. At least I don't feel like I'm alone as the great folks in this forum have been so very helpful.

Plan now is to patch up what I can, get a better idea of what the extent of the water intrusion is and enjoy summer. Come fall tears may start rolling down. But for now will keep those to myself and will try to enjoy summer with the family on the many lakes around here.
 

Joolz

Petty Officer 1st Class
Joined
Aug 13, 2015
Messages
211
Here's a bit of a scary update:
As I attempted to repair what I thought to be minor wear to the keel with 3M's Premium filler prior to applying the KeelGuard, I realize that the damage is worse then I realized. The good news is that now I know where water had sipped into the boat and rotted the wood in front of the ski locker. As I cut away on the soft spots with an utility knife I realized the amount of glass to the keel to me minimal, just over 1/8". I could push a pin into the holes a couple of inches into the foam. Ouch.

Looking for advice on how to fix this: can I just use 3M to fill the damaged areas? Please do keep in mind that I already have and plan to apply 3M's KeelGuard, which should provide water tightness to the affected area. Hoping that I won't need to lay down fibreglass to this as I've never done it before and frankly, hoping to keep things simpler, if that's a possibility. If I didn't plan to use KeelGuard I wouldn't just use the filler. But considering the size of the damaged areas, will the filler be enough? Keep in mind that my plan is to apply the filler to 6' length of the keel, 5" wide in order to smooth out the scratches, as seen in the pics. This should allow for the KeelGuard to be applied to a smooth surface without scratches that may allow water to sip in. I could thicken up the area slightly if that'd provide additional strength?

Hoping for a quick reply as tomorrow is the last warm day that I can take advantage of in order to apply the KeelGuard, then rain and cool temps would mean waiting for at least a week before I could install the guard. If you guys think the filler is all I need, I'll do it tonight or tomorrow morning and will apply the keelguard in the hot afternoon. If I must also apply fibreglass, thats fine, although that means no boating for at least another week till things warm up again in order to apply the guard (May long weekend would be a very long one if i couldn't take the boat out)

Please note the 3" wide damage is where the boat rests on the trailer's centre roller. Wonder if I could double up the area with an extra piece of KeelGuard?
 

Attachments

  • keel-damage-01.jpg
    keel-damage-01.jpg
    81.7 KB · Views: 0
  • keel-damage-02.jpg
    keel-damage-02.jpg
    73.6 KB · Views: 0
  • keel-damage-03.jpg
    keel-damage-03.jpg
    75.1 KB · Views: 0
  • keel-damage-04.jpg
    keel-damage-04.jpg
    95.6 KB · Views: 0

Joolz

Petty Officer 1st Class
Joined
Aug 13, 2015
Messages
211
Area sanded, fully cleaned. Ready for either the 3M Marine filler and/or fibreglass. Store open for another hour, only $20 for the fibreglass repair kit. If someone can please try and address the inquiry above, that'd be super. Thx
 

jbcurt00

Moderator
Staff member
Joined
Oct 25, 2011
Messages
25,030
If that beach rash let enough water into the hull to rot a bulkhead, it is likely worse then it appears.....
 

Joolz

Petty Officer 1st Class
Joined
Aug 13, 2015
Messages
211
Hi, I'm no expert in fibreglass but what I can say is this: surprised by how thin the FG is in such a key structure. Removing the non solid FB kinda told me that there wasn't much damage, it would appear the damage by beaching to have been mostly small - as in, not enough to crush the FB enough to cause worry. The FB immediately around the holes appear to be solid. At least that's my take on it.

Anyhow, I figured that even if I was directed by you folks to add a few layers of cloth to the keel that it'd be wise to first fill those holes with the filler, which I just finished doing. In the morning will sand it and apply more if needed. Also please note that it wasn't like there was a hole for the water to sip in, guess it'd mean a sunk ship if that was the case. Instead it would appear the water made its way though tiny cracks in the FB. But clearly enough to rot the wood. Still to drill holes onto the stringers to get an idea of their strength but wanted to first try and repair the keel. Yes, looks like I have a potential disaster in my hands. So not looking forward to a full restoration.

For now my worry is, if I do need to add layers of cloth to the keel that it may not be smooth enough for the keel guard to adhere to. Just a guess, I honestly don't know it the FB would be smooth and offer a proper base for the keel guard. Which is why if I can get away by just filling the holes with the 3m filler, that would be a lot easier. But again, I don't know the answer to this, which is why I ask the opinion of those that have been there/done that. Thanks for the help.
 

Woodonglass

Supreme Mariner
Joined
Dec 29, 2009
Messages
25,927
Sorry, I KNOW it's not what you want to hear but... 3M filler is NOT enough to repair that Keel. It needs Tiger Hair to fill the big gouges and then at a minimum two layers of 1708 Biaxial Fabric BEFORE you put the Keel Guard on. THAT IS some MAJOR damage to the Keel!!!
 
Last edited:

Rick Stephens

Admiral
Joined
Aug 13, 2013
Messages
6,118
Agree with WOG. That needs a lot of gel coat removed and a big strong thick layered patch on it. That location needs structural repair- if you use something like a filler, or count on a keel guard for anything beyond scratch protections, first time it bumps the beach it will be broken and leaking again.
 

Joolz

Petty Officer 1st Class
Joined
Aug 13, 2015
Messages
211
Not surprised to hear that, seeing how thin the FB is on that area. Surprised that a manufacturer wouldn't make the keel stronger, as they know people will beach and/or all the stresses of loading onto the trailer.

K, so here's where I am: filled the holes with 3m filler (did it before seeing the tip on using Tiger Hair, which I'm not even sure can be found easily). If I'm to remove the filler and added Tiger hair, will I really have to remove the gel coat? Was under the impression you could just apply FB to the gel coat, but this could be due to my complete lack of experience and not knowing better. Not sure how I could even do it without causing further damage to the FB already there, I mean the gel coat is there good. And how wide an area would have to be removed? As seen in the pic of the 3" long worn spot where it sits on the trailer's roller, even that "hole" i only half inch wide.

Ideally would like to endup with a smooth surface so the keel guard will sit on it properly, and guard is 5" wide. And... would using 3m's Bondo be OK for this application? It can be found locally easily, where I have no idea if I can even find 1708 fabric in town.

Ouch, and to think at first I thought this was a no biggie. Let this be a lesson to anyone out there that even when you carefully cover your boat, not investing on a keel guard could be as costly as those that don't invest in a rain cover.
 

Rick Stephens

Admiral
Joined
Aug 13, 2013
Messages
6,118
Most common way to build up when the keel is worn off, like yours is, is to glass over it. Anywhere the glass is going on, the gelcoat has to come off. Gelcoat is a resin finish and has no significant structural strength - about the same as bondo. All bondo is is resin with fine solids suspended in it. Has no structural strength. To do a patch you grind a section of gel off, use peanut butter with strands of glass in it to fill the hole and then glass over that with a patch. Sand it smooth, and gelcoat is put on top as a thick finish and sanded/buffed to smooth shiney.

It looks like you have structural damage for at least a foot of the keel. If it is thin along there and you want to limit the amount of gelcoat your take off and replace, then it is common to go from inside and lay cloth patches down over the inside - and then you can get away with filling the hole with PB and 1/4 inch chopped strand or tiger hair and then a small glass patch and over that a gel layer.

I would not put bondo on a wear and structural impact area like the keel.
 

Joolz

Petty Officer 1st Class
Joined
Aug 13, 2015
Messages
211
Most common way to build up when the keel is worn off, like yours is, is to glass over it. Anywhere the glass is going on, the gelcoat has to come off. Gelcoat is a resin finish and has no significant structural strength - about the same as bondo. All bondo is is resin with fine solids suspended in it. Has no structural strength. To do a patch you grind a section of gel off, use peanut butter with strands of glass in it to fill the hole and then glass over that with a patch. Sand it smooth, and gelcoat is put on top as a thick finish and sanded/buffed to smooth shiney.

It looks like you have structural damage for at least a foot of the keel. If it is thin along there and you want to limit the amount of gelcoat your take off and replace, then it is common to go from inside and lay cloth patches down over the inside - and then you can get away with filling the hole with PB and 1/4 inch chopped strand or tiger hair and then a small glass patch and over that a gel layer.

I would not put bondo on a wear and structural impact area like the keel.


That is the exact advice I got today when I went in person to show the damage to someone with extensive fibreglass experience. And that advice makes sense since it looks like I will need to get to the inside anyhow, seeing how there is water damage and already have badly rotten wood (the one in front of the ski locker). This shop won't do the work but has offered to give me free advice. Another shop that specializes in boat repairs quoted me $1,800 to just lay down FB on the outside, plus the gel coating. Ouch.

Also heard back from a tech at 3M that works with the keel guard who also suggested the above.

So this is where I sit at the moment: I concur that structural damage ought to be dealt with properly. I fully intend to do that in due time, that being around October. The boat has performed pretty well as is on our half a dozen or so outings last year, despite the small amount of water that got in. My plan is enjoy summer starting this weekend, no way I am in a position to devote the time to strip it all down (finishing my basement takes priority as baby is due next month). So in order to buy time I did what I'm sure most of you will clinch at: I bonded the whole keel with a layer of 3m's filler. Just a temporary solution that I hope will buy me a few months. I do plan to be extremely careful and there will be no beaching for me.

Of course, removing that bondo later may prove to be a real pain but then again so is removing the gel coat. If I must use a grinder then it should still work well for both the bondo and the gel coat. This 3M filler is supposed to work underwater, so I expect it to prevent water from making its way in - unless of course it gets cracked, which is why I need to be super careful to not hit anything. Will also hold off putting on the keel guard, else it'll be one more item to remove later.

Please don't hate me for going against your advice, as indicated, I fully plan to follow it. Just not willing to throw away the summer and upset the kids. If this tempo solution works, I'll be in a far better position come October to devote the time and energy to this.
 

dezmond

Senior Chief Petty Officer
Joined
Jul 21, 2010
Messages
760
i just got to read this 3 page thread of great advice from the forum members. And now you are saying "bondo" will do me for the summer? Bondo is cosmetic only not structural. You are putting on something that will not last. And to me it seems that you have wasted the members time and help to get you back into a safe boat? Hmmmm. Maybe I'm just in a grumpy mood tonight but that felt like a slap in the face to everyone helping you out :( sorry.
 

Joolz

Petty Officer 1st Class
Joined
Aug 13, 2015
Messages
211
You are absolutely correct, your grumpiness is preventing you from properly reading. If you had understood what I just said you'd realize I fully intend to follow the advice of the members here. What I don't understand is the part where you get upset of my temporary solution when you didn't as much as contribute to this convo. Hmm...
 

dezmond

Senior Chief Petty Officer
Joined
Jul 21, 2010
Messages
760
Sorry dude. I just read all of this tonight. I would love to give you some advice if you need it. At work we build aircraft spinners and use Fiberglass and gelcoat all the time. Shouldn't of lashed out at you like that. My bad.
 

Woodonglass

Supreme Mariner
Joined
Dec 29, 2009
Messages
25,927
Updated Below
 

Attachments

  • Keel Repair.jpg
    Keel Repair.jpg
    8.1 KB · Views: 0
Last edited:

Woodonglass

Supreme Mariner
Joined
Dec 29, 2009
Messages
25,927
OK, I did this exact repair on my Keel a couple of years ago, and a lot of others way back in my youth.
Here's a pic of my keel when I tore it up at the lake on my trailer...

Photo0442.jpg


Here it is after the repair...

IMG00007-20120719-1936.jpg


IMG00006-20120719-1936.jpg


"Tiger Hair"is nothing more than Thickened Polyester Resin with long strands of Fiberglass in it. When it cures and hardens it's darn near BulletProof!!! VERY STONG Stuff!!! You can buy it at Most Auto Body Stores. they Probably call it BondoHair!!! http://www.amazon.com/762-Bondo-Hair-Strand-Fiberglass-Reinforced/dp/B000CINDQ8
This is used to fill the major gouges and bring them up to level. To lay the glass you must remove the gelcoat and get down to good fresh fiberglass with NO contaminates. If you can't find Fiberglassing materials locally at stores try contacting some body shops. You don't need much and they usually have some on hand and might sell you some scraps. You need some CSM and Heavy Cloth Does NOT have to be 1708 If it's 8oz then use 2 or 3 layers. If you use the Bondo Fiberglass resin just make sure to do all your layups Wet on Wet. That means don't let the first layer fully cure -(2-3hours) before you apply the next layer. If you do this it'll be just fine. Make sure and add the correct amount of Hardener and you'll be fine. Here's a drawing of how you should prep the keel to lay the glass and the method I used to repair mine.


The Red indicates the area to be sanded. All of the Keel area once you have it filled and smoothed/faired with the Tiger Hair you will then sand out onto the hull about 3: on each side down to fresh glass removing all the gelcoat. Then coat the sanded area with resin and lay down your first layer of CSM, You can Immediately lay down a layer of Cloth on top the the CSM. Make sure and DAB the resin into the cloth and don't Brush it . This will help alleviate Bubbles forming. Once it starts to Cure (30-45 mins) Brush on more resin and lay down another layer of CSM and Cloth. DONE!!! This Entire repair can be done in about 2 hours. it will take longer to gather up your supplies than it will to do the work!!!:lol:
 

Joolz

Petty Officer 1st Class
Joined
Aug 13, 2015
Messages
211
Sorry dude. I just read all of this tonight. I would love to give you some advice if you need it. At work we build aircraft spinners and use Fiberglass and gelcoat all the time. Shouldn't of lashed out at you like that. My bad.

No harm done. It wasn't my intention to ignore the great advice from the members here, just a question of priorities. Baby due in 5 weeks, basement still to be finished. Older siblings asking to take them boating and school year about to end... so many priorities, so little time!
 

Joolz

Petty Officer 1st Class
Joined
Aug 13, 2015
Messages
211
No Title

Woodon, you have just given me new hope. To better understand what you describe I'm including a pic just taken after I finished sanding the bondo. Should hold up for this weekend (no beaching planned). But your fix is definitely within reach. Just want to get a better idea of how to proceed.

1- I should fully remove the bondo that's there now, correct? Sands off easily, shouldn't be much of a problem (I hope)
2- As I sand off the bondo I should ALSO sand off the gel coat right down to the existing fibreglass, about 3" out from the centre of the keel
3- Clean area of dust with a blower, then wipe clean with alcohol (this removes all the dust and dries fast)
4- Fill the damaged areas with Tiger Hair, contour it to the original shape of the keel and sand it smooth. Is this the product I should use? http://www.princessauto.com/en/detail/long-strand-reinforced-fibreglass-filler-907g-/A-p8205064e
5- Apply 2 or 3 layers of cloth. Will this product be good enough or should I look for something stronger: http://www.princessauto.com/en/detail/fibreglass-resin-repair-kit-857ml-/A-p8205031e
If links above don't work please let me know and I'll post pics of the items instead.

Please confirm if the above is the proper progression. Guess it's safe to use an electric hand sander to remove the gel coat?

Also, do you need to gel coat the newly laid fibreglass afterwards? Do keep in mind that I have a keel guard that I intend to put on once the repairs are done, so it needs a smooth surface to adhere to (your pics look smoother than factory).

The whole area, from the first hole near the front of the boat to where the trailer's roller is causing stress to the keel is about 4.5' long. Do I need to lay cloth cut that size or can I lay it down in smaller pieces? Just in case I can't find a single sheet that's long enough.

Thanks for sharing your repair solution. Since it can be done without having to first mess with the inside of the boat, this is something I could certainly shortly. We have a camping trip planned to the lake in mid July, would love to bring the boat along and your fix means I could get it done by then.
 

Attachments

  • photo244251.jpg
    photo244251.jpg
    74.1 KB · Views: 0

Woodonglass

Supreme Mariner
Joined
Dec 29, 2009
Messages
25,927
Don't use alcohol, use Acetone. Bondo Hair link is correct. Cloth link NO. If you can't find stuff from an AutoBody shop then Go to WalMart and get this...
http://www.walmart.com/ip/Fibreglas...49772791&wl4=&wl5=pla&wl6=83111549231&veh=sem

And This...

http://www.walmart.com/ip/Bondo-Fib...fault&beacon_version=1.0.1&findingMethod=p13n

Cut the Chopped mat into strips wide enuf to cover the sanded area and go over the keel. Prolly about 8-10" Do the same with the Cloth This stuff is NOT quality stuff but it will work if you use 3 layers soooo cut 3 of each. First one is 8-10" 2nd 6-8" and last 4-6". Yes you can use multiple 12" strips. Since you'll be working upside down here's a little trick to make it easier. Make the patch on your work bench by laying the strips down on a piece of plastic thats 12" wide and a bit longer than the patch. Now Put the Widest piece of CSM down first and Widest Cloth on top of it and wet it out with resin now put the next widest CSM and Cloth piece centered on top of these, and wet it out and then finally the skinny ones on last. You only have 25 30 mins so work quickly Get some masking tape ready and carry the patch Plastic and all to the boat and put it in place use the tape to tape it on the boat. use a bond spreader to smooth it out right over the plastic. Clear plastic 3-4 mil thick works best so you can see the resin oozing and spreading. as soon as it tacks up, peel the plastic off and make your next strip. When your're ready for the next section strip just butt it up tight to the previous one. The resin has wax in it so it will be totally water proof and ready for the keel guard once you're done.
Let me know if you need further explanation.
 
Top