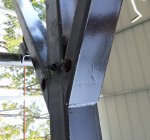
trailer rebuild

MH Hawker

Vice Admiral
Joined
Jul 13, 2011
Messages
5,516
and a bit more from yesterday and today, yesterday i mostly painted the small stuff and put it on the wench tower and today i put on the bunks and wheels, the new lug nuts came in and fit fine and they cover the studs so no more fighting rust to pull a wheel wench 5.JPG
wheels 1.JPG
lights and bunks 1.JPG
 
Last edited:

gm280

Supreme Mariner
Joined
Jun 26, 2011
Messages
14,605
Looking real nice MH Hawker. Maybe you should sell it now and start on another one. Seems you can make them look new. So start a small trailer refurbish business. :thumb: :thumb:
 

MH Hawker

Vice Admiral
Joined
Jul 13, 2011
Messages
5,516
:yo:i appreciate the thought, but its been a long project, and my honey due list is all ready backed up, i hope finish it up tomorrow, next is the rubber on the steps then the pin stripes and i think i will find some reflectors to put on the sides
 
Last edited:

gm280

Supreme Mariner
Joined
Jun 26, 2011
Messages
14,605
:yo:i appreciate the thought, but its been a long project, and my honey due list is all ready backed up, i hope finish it up tomorrow, next is the rubber on the steps then the pin stripes and i think i will find some reflectors to put on the sides

Actually I am in a similar situation. I am trying to finish up my boat project because i have a loonnngggg list to things to do. We want to refurbish the house and are trying to wait until the boat is finished first. It was supposed to be done over a year ago. :facepalm:
 

MH Hawker

Vice Admiral
Joined
Jul 13, 2011
Messages
5,516
i am just finishing up a house, i bought one 2 years ago from a pill head for about hafe market value because it was very ran down, and i have it back in nice condition, but thats all i have had time to do, the trailer is one of the few things i really needed to get done this year
 

MH Hawker

Vice Admiral
Joined
Jul 13, 2011
Messages
5,516
i got the rubber on the steps and the pin strip on and i added some rubble to the frame rail in front of the steps just cause pin s trip 1.JPG
steps 1.JPG
 

MH Hawker

Vice Admiral
Joined
Jul 13, 2011
Messages
5,516
and the last pictures its more or less done, still need to test the lighting and tighten the lugs done 1.JPG done 2.JPG
 

gm280

Supreme Mariner
Joined
Jun 26, 2011
Messages
14,605
Are you sure yo want to put the boat back on it? I mean it would cover the trailer up pretty much. :noidea:

Nice refurb job indeed. :thumb :thumb:
 

MH Hawker

Vice Admiral
Joined
Jul 13, 2011
Messages
5,516
well not till November 15 when i have to pull it for the year and i may pull it out for a little vacation
 

MH Hawker

Vice Admiral
Joined
Jul 13, 2011
Messages
5,516
when i was cleaning up i discovered one important part,,, the spare,,, the road test and shake down went smooth, i stopped and tightened lugs twice spair 1.JPG
 

gm280

Supreme Mariner
Joined
Jun 26, 2011
Messages
14,605
MH, just wondering, did you put some oil or grease on the studs before mounting the lug nuts? I do that on all my studs and lug nuts. One would think that would make them come loose, but it really doesn't. But what it does is allow a better torque AND if you have to change a tire on the road, it make them a lot easier to remove. Rusted up lug nuts on the road are the worst. JMHO
 

MH Hawker

Vice Admiral
Joined
Jul 13, 2011
Messages
5,516
MH, just wondering, did you put some oil or grease on the studs before mounting the lug nuts? I do that on all my studs and lug nuts. One would think that would make them come loose, but it really doesn't. But what it does is allow a better torque AND if you have to change a tire on the road, it make them a lot easier to remove. Rusted up lug nuts on the road are the worst. JMHO

i completely agree yes i do, atlho it may be as disputed as bad as the snake oil thread :lol: and i know they say to put the lugs on dry how ever they arnt there to muscle the lugs off, that will be me while the traffic is whizzing by, thats why i changed lugs to the enclosed type with a touch of the merc teflon grease, it impressed me this last year, i pull my prop and grease the splines in the fall when i pull my boat, it was still on the shaft after being used for 70 hours and sitting under water for 9 mouths, the lugs came from napa at around 45.00 a bit expensive but if i have a flat it will be well worth it

i will stop ever 10 miles or so and tighten the lugs until they stay tight then their good for years, i check ever time i hook up but haven't had any problems
 
Last edited:

MH Hawker

Vice Admiral
Joined
Jul 13, 2011
Messages
5,516
i think i am going to re wire my lights, may as well, ever thing is working fine but i am sure the wiring is original and 29 years old, the last few days i have been searching for a new harness with out much success and today i found the exact thing i need, 30 feet long and split into 2 wire sections with a double brown, my trailer has the wiring inside of the frame and i want to go back the same way, got it on order

Amazon.com: Hopkins 48265 30' 4 Wire Flat Trailer Side Y-Harness Connector: Automotive
 
Last edited:

gm280

Supreme Mariner
Joined
Jun 26, 2011
Messages
14,605
i think i am going to re wire my lights, may as well, ever thing is working fine but i am sure the wiring is original and 29 years old, the last few days i have been searching for a new harness with out much success and today i found the exact thing i need, 30 feet long and split into 2 wire sections with a double brown, my trailer has the wiring inside of the frame and i want to go back the same way, got it on order

Amazon.com: Hopkins 48265 30' 4 Wire Flat Trailer Side Y-Harness Connector: Automotive
Looks like that should do the trick. And if you really want to dress it up, use some split loom over the exposed wires to make it look even more professional.

4562638.jpg


Of course your wires would be for the trailer. I bought some of this type wire loom tubing and it is really cheap. JMHO
 

MH Hawker

Vice Admiral
Joined
Jul 13, 2011
Messages
5,516
i had a ll ready decided to add that for edge protection when i take a few pictures you will see why, the harness runs about 4 feet through the tongue then out a hole in the frame where it splits to each side and back through 2 holes, so it will need a bit of protection and perhaps out on the tail light ends to
 

MH Hawker

Vice Admiral
Joined
Jul 13, 2011
Messages
5,516
the harness made it in today and i went out this evening after it cooled down to take a close look at how the wiring is ran, it looks like it will be a easy job nice sized holes at the tongue and the back of the frame at the tail light is open to and i should be able to pull in the new wire with the old wire rear light 1.JPG tounge 1 .JPG
 

gm280

Supreme Mariner
Joined
Jun 26, 2011
Messages
14,605
I made a few holes like that when I rebuilt my trailer. But I also bought some rubber grommets to keep the wires from chaffing as well. I realize it would take years for the wires to rub through. But I just wanted to be sure with the grommets.

Good idea to use the old wires to pull through the new ones. Sounds like a pan to me. :thumb:
 

MH Hawker

Vice Admiral
Joined
Jul 13, 2011
Messages
5,516
i went out this evening and took off the old side marker lights and the light bar on the back and pulled the new wire through, had both sides done on 10 minutes, i took some yellow but splices and hooked the old and new together and both sides pulled right through i will take a pic tomorrow, i will pick up some of the loom stuff and i think new side markers, one has a cracked lens so may as well
 

MH Hawker

Vice Admiral
Joined
Jul 13, 2011
Messages
5,516
i am having problems finding a LED side marker light my trailer takes the long square style tail light and none of the kits seam to have those. i have found several that are stud mounted, those wont work well with a box frame and several with a twin wire lead, i could make those work but dont really want to, may have to go back with a incandescent, i had planned of picking up some of the wire loom stuff and look around and see whats around in lighting
 
Top