Thought I'd show off my new build

Efini Motorsport

Petty Officer 2nd Class
Joined
Feb 21, 2018
Messages
108
I got rid of the back to back seat and doing a front seat with a lounge seat on the back side on the port side. The starboard side is getting a single helm seat. It wasn't my first choice but was cheap.
 

Attachments

  • photo291517.jpg
    photo291517.jpg
    605.6 KB · Views: 0
  • photo291518.jpg
    photo291518.jpg
    472.6 KB · Views: 0
  • photo291519.jpg
    photo291519.jpg
    506.5 KB · Views: 0

Efini Motorsport

Petty Officer 2nd Class
Joined
Feb 21, 2018
Messages
108
This is the carpet I'm trying to match. I think it's syntec Infinity but I need to get a sample to be sure. The gauge panel is going to have a single DIN radio for now. Once the boat is in and running I'm going to change out the dash for a tach, 4" multi gauge and an 8" touchscreen. The panel is 1/8" aluminum so they're easy to make. Once I round the corners I'm going to wrap it (and the glove box) in black or blue carbon fiber. The switch panel will go where the radio used to be to the right of the steering wheel and also wrapped to match.
 

Attachments

  • photo291520.jpg
    photo291520.jpg
    846.7 KB · Views: 0
  • photo291521.jpg
    photo291521.jpg
    301.6 KB · Views: 0
  • photo291522.jpg
    photo291522.jpg
    427.4 KB · Views: 0

Maclin

Admiral
Joined
May 27, 2007
Messages
6,761
RE: "I got the fuel pump mounted in the tank"

I realize you have mentioned previously that you were not entertaining critique on the engine build regarding fuel injection, etc. Ok. Are you interested in following USCG regulations for the fuel pump placement? If not, ignore the rest of this post.

There are specific regs covering the placement of fuel pumps, ultimately aimed at limiting length of pressurized line. I scooped this out of the Fuel and Emissions Compliance guideline for reference, peruse or not...:

183.566 Fuel pumps: Placement.
Each fuel pump must be on the engine it serves or within 12 inches of the engine, unless it is a fuel pump used to transfer fuel between tanks.

Most engines are equipped by the engine manufacturer with a fuel pump as an installed engine component. For engines that are not so equipped, a remote fuel pump, usually electric, may be used. In order to keep the length of the pressurized portion of the fuel distribution line at a minimum, it is required that a remote fuel pump be installed within 12-inches of the engine. The 12-inches are measured directly to the engine, not along the fuel line. Pumps used to transfer fuel from one tank to another may be installed in other locations, and are not required to be within 12 inches of the engine.

TO COMPLY If the fuel pump is not on the engine, is it within 12 inches of the engine? If the fuel pump is not on the engine or within 12 inches of the engine, is it used only to transfer fuel from tank to tank?


United States Coast Guard and
Environmental Protection Agency
Compliance Guideline
-How to Comply with the Law-
Fuel and Emissions
Prepared by the American Boat & Yacht Council, Inc.
613 Third Street, Suite 10 Annapolis, MD 21403 (410) 990-4460
www.abycinc.org
 

Efini Motorsport

Petty Officer 2nd Class
Joined
Feb 21, 2018
Messages
108
i didn't know about the requirement for the fuel pump to be within 12 inches. It says specifically though that the measurement is as measure in a straight line, not following the fuel lines. My pump is about 8" from the engine on the other side of the bulkhead. the fuel lines themselves will be about 3' long. It's good to know I am in compliance so thanks for letting me know.

I got a little bit more done today. The first picture is the switch I'm using to turn on the cabin lights. I'll be running RGB led strips on the inside of the ledges on both side. There's a wireless remote to change color, flashing, brightness etc. The first and second picture are of the same panel, it's the bump out that covers the back side of the helm. I added a hinge and latch so I can flip it down to access the fuse and LED controllers. The last picture is a "core sample" I took from the stringer. I need to cut an access panel to mount the helm seat. The wood was a little damp on the surface but completely solid all the way though. I could feel around the underside of the flooring and it was all solid too. If I had found rotten stringers or floor I really would have been sunk. Thanks Trailking for the suggestion to check them.
 

Attachments

  • photo291616.jpg
    photo291616.jpg
    1.8 MB · Views: 1
  • photo291617.jpg
    photo291617.jpg
    1,019.5 KB · Views: 1
  • photo291618.jpg
    photo291618.jpg
    417.5 KB · Views: 1

Efini Motorsport

Petty Officer 2nd Class
Joined
Feb 21, 2018
Messages
108
This weekend should be a productive one. I started putting the flooring in today and it looks great. Not having the floor in was holding me up from doing a whole lot of other things. I can get the bulkheads back in, mount the computer and engine surround and put the gauge panel, switch panel, glove box and fuse block back in. Here's the floor so far. It looks awesome with the blue carpet.
 

Attachments

  • photo291951.jpg
    photo291951.jpg
    840.2 KB · Views: 0
  • photo291952.jpg
    photo291952.jpg
    884.2 KB · Views: 0

Efini Motorsport

Petty Officer 2nd Class
Joined
Feb 21, 2018
Messages
108
I got a bunch of small stuff done this weekend, not much picture worthy. I did finally mount the outdrive though. It's actually starting to look like a boat again. Both drives are mostly masked for blasting, which will be next weekend. The cabin bulkheads are back in along with the compartment wall next to the helm seat. That's mostly in but I need a few longer bolts.I got the battery switch wall covered and will be doing the (hopefully) final wiring next weekend. I also made a fold up step on the starboard side to make it easier to get in and out while I'm working on it and once I can actually use it. The actual seat sits on the ledge a few inches above the step. It also protects the computer box a little better.The few problems I've run into so far have had relatively easy solutions. I still can't figure out how I'm going to mount the alternator though. On the original truck setup it mounts on the passenger side. The boat cooling stuff needs to run there though. I need to figure out how to mount an alternator that uses 2 horizontal holes into 4 vertical holes. I've got a few ideas so far but none I'm overly enthusiastic about.
 

Attachments

  • photo292176.jpg
    photo292176.jpg
    697.1 KB · Views: 0
  • photo292177.jpg
    photo292177.jpg
    703.2 KB · Views: 0
  • photo292178.jpg
    photo292178.jpg
    567.2 KB · Views: 0

Efini Motorsport

Petty Officer 2nd Class
Joined
Feb 21, 2018
Messages
108
I would have gotten a whole lot more done last weekend if I didn't have so much help. Had family come down to try and help out and I spent more time dealing with them than actually working. # year olds are not conducive to boat work. I did get the trim tabs mounted and the gauge and switch panels wired. The trim tabs were free off a boat my brother scrapped. I mounted them as wide as I could because of the location of stuff on the inside of the transom. I would have liked to go wider.

Today after work I spent about 2 hours on it and probably got more done than over the weekend. Got the shifter/ throttle bracket (which are now one bracket) installed and hooked up the cables. It fits better than I expected. I only have to make a small not where the fiberglass goes over the back of the engine. I've been meaning to post pics of the new mooring cover I made a few weeks ago. The one that was on there still leaked after 3 treatments.
 

Attachments

  • photo292833.jpg
    photo292833.jpg
    939.6 KB · Views: 0
  • photo292834.jpg
    photo292834.jpg
    1,010.7 KB · Views: 0

Efini Motorsport

Petty Officer 2nd Class
Joined
Feb 21, 2018
Messages
108
Got the outdrive blasted and primed this weekend as well as plumbed the fuel and power steering system plumbed. It was windy as hell Friday when the blaster was there and I ended up getting sand in my eye. I'm actually posting this from the ER on Monday night. Probably should have come in sooner. Sunday my brother came down to prime the drive. I used an epoxy primer form a company called steel-it. It is an industrial coating that has 316 stainless dust in it. They ended up sending me a free sample quart that was more than enough for both outdrives and the props. In keeping with the Went Overboard theme I'm painting the raw water pump cover, lift piston covers prop and center of the hydrofoil god to match the engine and rest of the parts. It should look good and will certainly stand out. While the blaster was there I had him sandblast some rust spots I had on the rockers of my Yukon. I ended up with some large rust holes. Going to have to weld in a patch panel to fix it. I covered it in POR-15 for now until I can get to it.
 

Attachments

  • photo293404.jpg
    photo293404.jpg
    366 KB · Views: 0
  • photo293405.jpg
    photo293405.jpg
    298.1 KB · Views: 0

Efini Motorsport

Petty Officer 2nd Class
Joined
Feb 21, 2018
Messages
108
Here is the outdrive primed. The color actually looks pretty cool as is. It's going to get painted satin black though.
 

Attachments

  • photo293421.jpg
    photo293421.jpg
    1,009.8 KB · Views: 0

Efini Motorsport

Petty Officer 2nd Class
Joined
Feb 21, 2018
Messages
108
I'm a little behind schedule. I was sick as a dog last weekend so didn't get anything done. Yesterday I got the new bellows and gimbal bearing in and got the engine aligned. I need to do some work on the shift dog and in the helmet. There's some corrosion and a broken bolt I need to deal with. To do that I need to get all the stuff for my TIG to work. I did start installing the exhaust but realized the riser I picked up for $50 is too tall. I've got to order the other manifold and a pair of short risers now. I also need to pull out the throttle/shifter bracket I made and rework it. I'm not happy with how tall the shifter side is and where the throttle cable holder sits. What really sucks is these 90+ degree days right now. Some days I can bring the boat in the shop where it's air conditioned but I just can't seem to find more than a few hours to get anything done. I'm out of town this weekend so that's out too. Here's some new pics, most of what I've done lately isn't really photo worthy though.
 

Attachments

  • photo294836.jpg
    photo294836.jpg
    1.4 MB · Views: 0
  • photo294837.jpg
    photo294837.jpg
    1.8 MB · Views: 0
  • photo294838.jpg
    photo294838.jpg
    1.2 MB · Views: 0
  • photo294839.jpg
    photo294839.jpg
    1.6 MB · Views: 0

HT32BSX115

Supreme Mariner
Joined
Dec 8, 2005
Messages
10,083
I called CDI and they said just wire it with a NC microswitch on the ground for the ignition amp so that when I shift it breaks the ground and stumbles. I'm not sure if it's going to work though. A marine mechanic friend of mine said that the dog gears in an OMC don't like to "unlock" if the ignition just gets cut like the Merc's do. I'm going to give it a shot and see what happens. If need be I'll wire in the ESA.
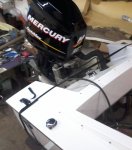
OMC didn't use a simple ignition "interrupt" like the Dog-Clutch Alphas use. I don't know if the dog-undercut angle is the same for a Mercruiser or not.

OMC originally used a 3° "under-cut" angle and later changed to a 5° "dog" because they thought 3° wasn't enough. (The problem turned out to be lower shift cable defects)

If Mercruiser uses 3° it's possible that a simple momentary interrupt will reduce torque on the dogs enough to get them apart. If you have 5° dogs, maybe not.

You will know because it will take a fair amount of force to pull them apart and if it's a "Push" on the (Lower Shift) cable vs "pull", they may not come apart at all!..........And this means that it will come out of the "pull" gear, but NOT come out of gear when you're pushing on the (lower shift) cable etc.

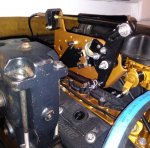
The ESA actually "pulses" the ignition making the engine "lope" and it's during the momentary "torque-low" that the dogs can be easily pulled apart.

If you have regular electronic ignition you should be able to wire in a CDI ESA unit and they will be able to tell you how it should be connected. You want it set up so that it actuates only when coming out of gear.

If it actuates going into gear, linkage, shift actuator, lower shift cable "drag" is causing the thing to actuate (The tension of the shift interrupter spring is what allows the shift interrupter to move far enough to operate the ESA.

When going into gear, the shift interrupter will usually move, but shouldn't move far enough to operate the switches..... If it does, it's usually due to lower shift cable binding (corrosion, bent, damaged cable etc) or the internal shift mechanism in the drive.

Set up properly, a Dog clutch clutch Cobra will shift into gear very nicely, and come right out of gear with only a momentary actuation of the ESA.


And for those of you who say I can't do that for whatever reason I don't need to hear it. I changed the starter to a marine one and things like the head gasket and freeze plug are no different (I checked).

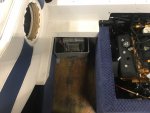
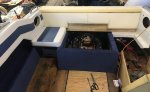
The reason the ABYC (and USCG) says the pump should be within 12" of the engine is that the fuel line from the pump to the carb/EFI unit is usually steel and the pump is mounted on the engine.

The fuel line from the tank to the filter and pump is flexible USCG A1 fuel line because there's an anti-siphon check valve at the tank.

You cannot have a "hard" line from the tank to the engine because the engine moves slightly on the mounts ....possibly enough to cause the line to crack or break.

The (flexible) USCG A1 fuel line from the tank to the engine is under suction (pump at engine) .

So even if a fitting leaks, becomes loose or the line "breaks", the pump will clear the line and eventually "kill" the engine........ and because of the anti-siphon check valve, fuel can't siphon out of the tank into the engine compartment.
(if you have a tank transfer pump it cannot happen either because there's no pressure from any tank TO the engine)

If you have a pump in the tank (and even Mercruiser doesn't do this) you can have a situation where, if the flexible fuel line from the tank to the engine breaks/cracks/leaks, the pump WILL pump fuel into the enclosed bilge below the engine. (BOOM)

This might be what Maclin was trying to illustrate above. Just about all the EFI engines in boats have the (electric) pumps on the engine and have hard (stainless, etc) fuel lines from the pump to the EFI/carb, and if the engine quits, the pump loses power (as yours probably does also)

No one wants to "beat you up" on your project. But you could place yourself at great liability if you have a "boom/fire" and the neighbor kid is sitting in the back and gets hurt or killed. And believe me, the "kids" family "Slip-& Fall" lawyer will have pictures and documentation of everything "illegal" and all the social media info (here and any other place you have documented your project) to prove intentional noncompliance with all those USCG/ABYC guidelines. (they can then call it "Negligence") And if you were to sell that boat to someone else and they killed themselves, you can bet the family would come back looking for whomever set the boat up to "blow"............It isn't all about just starter, alternator, and core plugs......

All most of us want to do is ensure you have all the info on what you're doing and have "Eyes wide open"....then we'll just watch from afar!

Regards,

Rick
 

Efini Motorsport

Petty Officer 2nd Class
Joined
Feb 21, 2018
Messages
108
Great post Rick, Ton's of great info. I'm not worried about people beating me up on anything I do. I've been doing this a long time and just about everything I do, whether boat car or otherwise, is a one of a kind thing. To me the build in something like this is almost as much fun as actually using it. Everyone keeps telling me this will only last a season once I'm done because I'll get bored and want to find a new project.
Unfortunately for me the shift interrupt issue is probably going to be a big pain in the butt. Because I can only try things in the water. I'm going to try wiring it like a merc and see what happens to start. I had a marine mechanic buddy of mine over on Tuesday and we ran down a few ideas. He thinks that because of the fuel injection I might get away it. I'll also be able to idle much lower so that will hopefully help some. Plan B is a CDI ESA. Plan C is a momentary push button switch at the shifter that I can pulse myself. Obviously far from ideal. My other problem is a belt tensioner because I'll be using a serpentine belt instead of v's. When the engine was mounted in the truck the alternator was mounted high on the passenger side and the PS pump was low on the driver side with a tensioner mounted to the alternator bracket. Both brackets are cast aluminum. I need to have the boat cooling hoses running right through where the alternator used to sit. I've figure out how to modify the power steering/AC bracket to be able to bolt the alternator in place of the AC compressor but I still haven't found the right tensioner. They all seem to apply tension in the wrong direction.
I was hoping to get some work done on the boat today but the boss told me this was coming in for a few days. 21' Challenger race boat. Early 70's I think. Originally it had twin outboards but back then probably only made 200hp total. This has a single 300hp Mercury now. Owner says it will do mid 80mph. Got to be a scary ride. We're doing interior carpet and a mooring cover. I'll get some more pics once the carpet's in. It's VERY red.
 

Attachments

  • photo294965.jpg
    photo294965.jpg
    154.9 KB · Views: 0
  • photo294966.jpg
    photo294966.jpg
    132.8 KB · Views: 0

HT32BSX115

Supreme Mariner
Joined
Dec 8, 2005
Messages
10,083
I had a marine mechanic buddy of mine over on Tuesday and we ran down a few ideas. He thinks that because of the fuel injection I might get away it. I'll also be able to idle much lower so that will hopefully help some. Plan B is a CDI ESA. Plan C is a momentary push button switch at the shifter that I can pulse myself.

I think Plan B is your best bet because the ESA "pulses" at a "just-right" rate.

I don't know what the under-cut angle is for an Alpha, but some people have gotten the Cobras to come right out of gear using a momentary interrupt like Mercury uses. (but I would bet that they have the original 3°dogs.

So if your Cobra happens to have a similar dog (to the Alpha) and since you have EFI, you may well be able to come up with an RPM that when "single" pulsed, while applying "Out-Of-Gear" pressure, it may work. You'll just have to experiment.

The CDI ESA, might be the best bet since they've already done the homework. Then all you have to do is experiment with an RPM (below approx 600rpm) that works best.


I was hoping to get some work done on the boat today but the boss told me this was coming in for a few days. 21' Challenger race boat. Early 70's I think. Originally it had twin outboards but back then probably only made 200hp total. This has a single 300hp Mercury now. Owner says it will do mid 80mph. Got to be a scary ride. We're doing interior carpet and a mooring cover. I'll get some more pics once the carpet's in. It's VERY red.
I have gone 500kts at 400ft above the ground all I worried about was that one Canada Goose coming through the windshield.......... 90 on the water in a hot rod boat scared me so much, I never want to do that again!
 
Last edited:

Efini Motorsport

Petty Officer 2nd Class
Joined
Feb 21, 2018
Messages
108
Couldn't get a good picture of just how red the interior of this boat is. I spent two days pretty much folded in half carpeting the bow and under the dash. Got tons of fiberglass in my skin too. Fun times.
 

Attachments

  • photo295308.jpg
    photo295308.jpg
    358 KB · Views: 0

Efini Motorsport

Petty Officer 2nd Class
Joined
Feb 21, 2018
Messages
108
It can be real annoying when life gets in the way of projects. I've been progressing on the boat slowly but it doesn't look like I'll be in the water this year. Ran into a few problems. What really sucks is most are not even related to the swap.First problem is the bolt that holds the shift linkage inside the helmet was broken off, something I didn't realize until I went to replace the gimbal bearing and bellows. I did manage to weld enough onto the broken part to back it out. If not I would have had to pull the whole helmet and bring it to a machine shop. My next problem is the exhaust. Originally I had the bat wing manifolds. 4 pairs of them, at least half of which were no good. I'm trying to figure out how to get a set of 2 piece merc style manifolds to fit. The first riser I got was too tall so I've got another one coming Monday. I need to find the most compact system possible to clear the steering components.
To keep things progressing I ordered the boat name and new Four Winns stickers for the boat. Below is the rendering. I enlisted the help of my nephew and a rubber wheel to take all the old stickers off the transom. I'm going to buff it out this week so I can lay everything on. The Four Winns stickers on the sides are going to be done in metallic gold to match the boat name. I'm also thinking about redoing the stripes above the rub rail in blue and gold.
The biggest reason the boat may not be done is a new addition to the household. Got a new pup a week and a half ago. He's awesome and I've been spending a lot of my free time with him. He doesn't mind hanging out at the shop for a few hours but it's hard to keep an eye on him and get work done. His name is Bimmer.
 

Attachments

  • photo296598.jpg
    photo296598.jpg
    47.1 KB · Views: 0
  • photo296599.jpg
    photo296599.jpg
    508.3 KB · Views: 0
  • photo296600.jpg
    photo296600.jpg
    913.2 KB · Views: 0
  • photo296601.jpg
    photo296601.jpg
    520.7 KB · Views: 0

strokendiesel002

Petty Officer 1st Class
Joined
May 15, 2012
Messages
283
That's a pretty good "life got in the way"! Looks like a nice pup!

Glad you were able to get the bolt backed out and looking forward to the next update! Remember, progress is progress!
 

Lou C

Supreme Mariner
Joined
Nov 10, 2002
Messages
12,961
The Volvo style center riser exhaust will most likely fit because OMC switched to this style in ‘91 or so; I have then on my 88 H-200 and they fit with plenty of clearance....I did have to find a pair of the Volvo 90* adapters that adapt the 4” riser hose to the 3.5 Y pipe. I used Barr Marine for the exhaust and wound up using Volvo OE stuff for the hoses and adapters. Expensive but fit perfect. See the pic in post # 30....
 
Top