StarCraft 1988 MR 220 V restoring

De strong head

Recruit
Joined
Mar 20, 2024
Messages
5
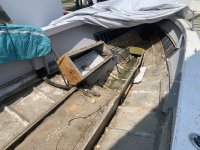
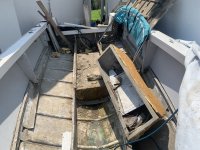
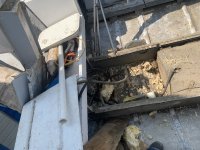
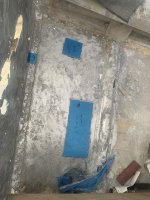
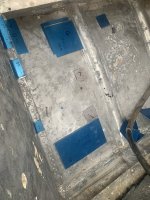
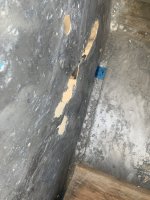
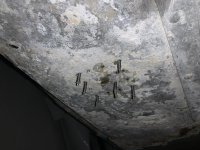
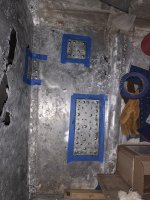
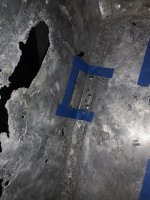
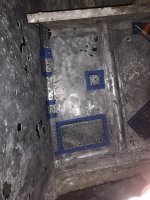
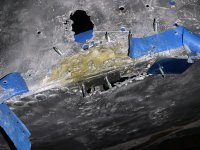
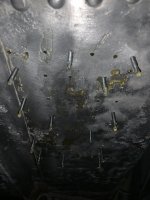
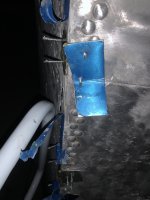
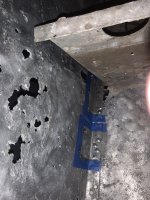
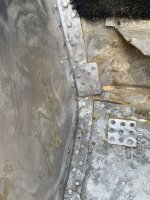
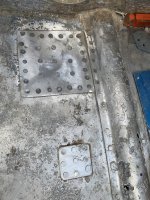
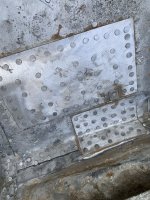
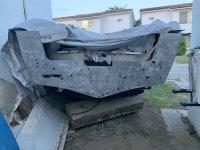
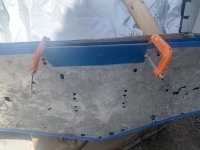
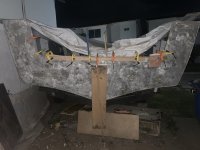
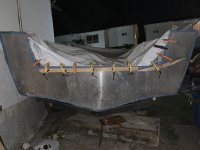
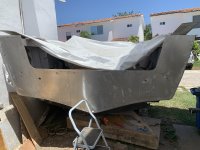
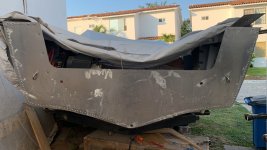
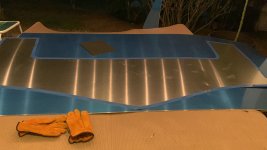
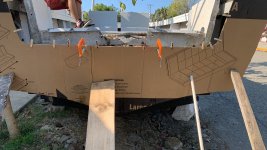
Hello everybody, I’m new in the forum, Im from Mexico ( so sorry if my typing has some mistakes). I have a MR 220 that have been resorting for the last months, was my dreamed boat, so didn’t hesitate with the deal, everything was nice looking and aparently in good shape . Once that I start assessing meticulously found obviously rotten transom and too many shi@“$ repairs(like putting a fiberglass skin all over the bottom of the hull) that cause a lot of corrosion by electrolysis… of course, is a 1988 model so what can I spect? Since few years ago, I had the idea of rebuild my dream boat, and here we go…IMG_2233.png
 

De strong head

Recruit
Joined
Mar 20, 2024
Messages
5
After tons of DIY videos on youtube( many amazing rebuilds and big ideas ), studying a lot about epoxy, aluminum, wood and fiberglass, put my hands to work…
Start dismantling the boat, remove the T-top, the console, the floor, the transom and of course the fiberglass form the hull. At this point decide to remove all the flotation foam too, was moisturized and in some spots full of water.
Every day finding more issues, and thinking what have I done?… at the end the answer is: I already bought it, so lets fix it, will make it happen
 

Attachments

  • IMG_2090.jpeg
    IMG_2090.jpeg
    3.1 MB · Views: 4
  • IMG_2092.jpeg
    IMG_2092.jpeg
    3 MB · Views: 4
  • IMG_2091.jpeg
    IMG_2091.jpeg
    3.2 MB · Views: 4
  • IMG_2224.jpeg
    IMG_2224.jpeg
    2.4 MB · Views: 4

De strong head

Recruit
Joined
Mar 20, 2024
Messages
5
After dismantling, the first step was fix all the holes on the bottom and transom skin. I did this based on a video, bought some aluminum plates, solid rivets and gflex epoxy 655. Start cleaning the hull with a brush and sandpaper. Took all the measurements of the damaged areas . With the aluminium plates made templates( 2 of each size) and put some patches all over the corrosion holes. Hope get some of your opinionsIMG_2376.jpeg can give opinions
 

Attachments

  • IMG_2378.jpeg
    IMG_2378.jpeg
    1.8 MB · Views: 1
  • IMG_2377.jpeg
    IMG_2377.jpeg
    1.9 MB · Views: 1
  • IMG_2375.jpeg
    IMG_2375.jpeg
    1.4 MB · Views: 1
  • IMG_2448.jpeg
    IMG_2448.jpeg
    2.7 MB · Views: 1
  • IMG_2445.jpeg
    IMG_2445.jpeg
    2.3 MB · Views: 2
  • IMG_2446.jpeg
    IMG_2446.jpeg
    2.5 MB · Views: 2
  • IMG_2444.jpeg
    IMG_2444.jpeg
    2 MB · Views: 2
  • IMG_2443.jpeg
    IMG_2443.jpeg
    2 MB · Views: 2

De strong head

Recruit
Joined
Mar 20, 2024
Messages
5
The plates were attached by pair, one inside and the other outside, with a thin coat of g flex 655 between each surface and once cured put some solid rivets. The first step: once side and put some screws to hold the plate, after 24 hrs did the same with the second plate. The rivets were done once the epoxy was totally cured. The total is 13 patches
 

Attachments

  • IMG_2451.jpeg
    IMG_2451.jpeg
    3 MB · Views: 1
  • IMG_2449.jpeg
    IMG_2449.jpeg
    1.6 MB · Views: 1
  • IMG_2450.jpeg
    IMG_2450.jpeg
    1.6 MB · Views: 1
  • IMG_2446.jpeg
    IMG_2446.jpeg
    2.5 MB · Views: 1
  • IMG_2445.jpeg
    IMG_2445.jpeg
    2.3 MB · Views: 1
  • IMG_2444.jpeg
    IMG_2444.jpeg
    2 MB · Views: 1
  • IMG_2640.jpeg
    IMG_2640.jpeg
    2.9 MB · Views: 2
  • IMG_2639.jpeg
    IMG_2639.jpeg
    3 MB · Views: 2
  • IMG_2641.jpeg
    IMG_2641.jpeg
    2.2 MB · Views: 2
  • IMG_2634.jpeg
    IMG_2634.jpeg
    3.1 MB · Views: 1
  • IMG_2633.jpeg
    IMG_2633.jpeg
    2.9 MB · Views: 1

De strong head

Recruit
Joined
Mar 20, 2024
Messages
5
With the transom skin, I made a template with the transom skin( the one for the inside is 1/4 inch smaller than the original template, so it fit inside of the boat) and did the same process with the epoxy and screws, once the epoxy was cured, drill the factory holes( drains and screws) and attached the outside template. You can see before/after appearance.
The plate that I used is 2mm thick, so the result seems to be pretty solid, and now the transom skin is 7mm thick, just like this is too solid.
The next stage will be the wood transom, I’ll post some pictures
 

Attachments

  • IMG_2224.jpeg
    IMG_2224.jpeg
    2.4 MB · Views: 3
  • IMG_2239.jpeg
    IMG_2239.jpeg
    2.4 MB · Views: 3
  • IMG_2605.jpeg
    IMG_2605.jpeg
    2.1 MB · Views: 3
  • IMG_2616.jpeg
    IMG_2616.jpeg
    2.1 MB · Views: 3
  • IMG_2621.jpeg
    IMG_2621.jpeg
    2.5 MB · Views: 2
  • 91310B4F-F3DD-49A0-B0DA-8D68DB22F81B.jpeg
    91310B4F-F3DD-49A0-B0DA-8D68DB22F81B.jpeg
    2 MB · Views: 3
  • 837F8F64-B003-49B7-9452-10C2ABA4FE29.jpeg
    837F8F64-B003-49B7-9452-10C2ABA4FE29.jpeg
    1.9 MB · Views: 3
  • 900719D5-C158-43B5-8E22-344692030468.jpeg
    900719D5-C158-43B5-8E22-344692030468.jpeg
    2.2 MB · Views: 3
Last edited:
Top