Some good stuff happening

BWR1953

Admiral
Joined
Jan 23, 2009
Messages
6,195
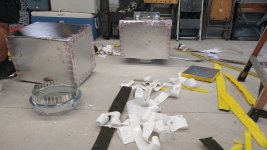
This afternoon we did a little garage work. I had to decide what to do with my old RC airplane stuff and ended up choosing to keep it for awhile longer. Who knows, I might actually finish that AU-23 Peacemaker that's hanging from the ceiling someday! :sneaky:

So we removed everything from these two old storage boxes and put the contents away, clearly marked as RC Stuff. We'll use the boxes to store nuts, bolts and whatnot. That'll actually take quite awhile to sort everything. :rolleyes:
1.jpg

And here's the sub at its final location. :cool:
2.jpg
 

BWR1953

Admiral
Joined
Jan 23, 2009
Messages
6,195
We went to HD this afternoon and picked up a generic air filter, some foam pipe insulation and a couple of 3/4" PVC elbows as well as a 24" section of 3/4" PVC pipe.

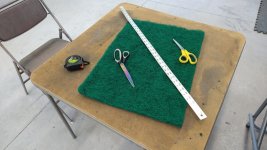
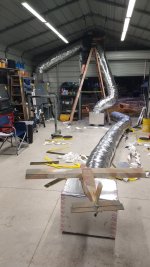
Got everything lined up, ready to go to work.
4.jpg

Foam insulation installed.
5.jpg

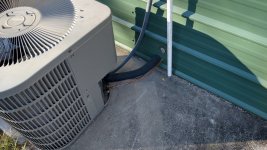
Foam insulation installed on the outside section.
3.jpg

PVC drain pipe installed.
6.jpg

Air filter getting cut to size.
2.jpg

And the air filter is installed! 😁 (View from underneath)
1.jpg


We also cut 60 pieces of the foam insulation about an inch wide. They'll be used to plug the metal siding ridges at the end caps. Installing those will get on the activity schedule in a couple days.
 

strokendiesel002

Petty Officer 1st Class
Joined
May 15, 2012
Messages
283
Nice! Did you by chance get a thermostat that will allow you to run the fan by itself? A little modification to the ducting and you could fashion that up to help clean the air when painting/ grinding, no?
 

BWR1953

Admiral
Joined
Jan 23, 2009
Messages
6,195
Nice! Did you by chance get a thermostat that will allow you to run the fan by itself? A little modification to the ducting and you could fashion that up to help clean the air when painting/ grinding, no?
Yep, it's a multi-type thermostat. Dunno about the painting/grinding thing but I do know this...

The AC is done! 😁
 

BWR1953

Admiral
Joined
Jan 23, 2009
Messages
6,195
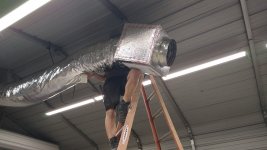
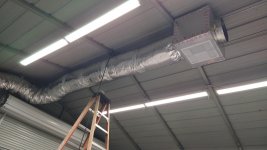
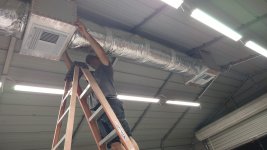
My buddy showed up this afternoon and got right to work. And the AC is now fully installed and functional! :cool:


20.jpg

19.jpg

18.jpg

The boy and I had cut up a couple of the foam insulation sticks into little donut shapes (by the door) and used them to plug the holes in the sheet metal end sections where they join the walls and ceiling.
17.jpg

Insulation plugs.
16.jpg

15.jpg

14.jpg

13.jpg


12.jpg


11.jpg
 
Last edited:

BWR1953

Admiral
Joined
Jan 23, 2009
Messages
6,195
10.jpg


9.jpg

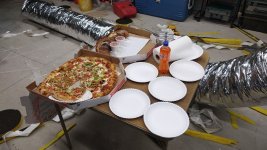
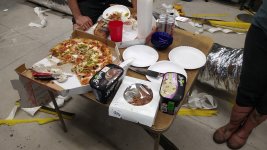
Dinner break!
8.jpg

My buddy's wife and little boy came over, so naturally we had to add dessert too! 😋
7.jpg


6.jpg


5.jpg


4.jpg

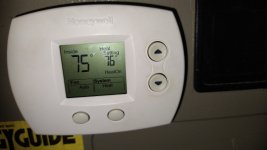
Initial setup and testing the heating... worked great!
3.jpg

Here we started testing the cooling and it was rapidly dropping the inside temperature.
2.jpg

Just 5 minutes later it had dropped the temp 2 more degrees and was falling fast. I was very pleased at this point , so I shut it down and we came back into the house.

Mission accomplished! 🤓😎
1.jpg
 

BWR1953

Admiral
Joined
Jan 23, 2009
Messages
6,195
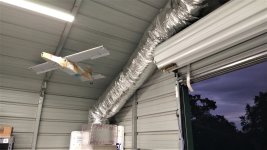
Today the boy finished up plugging the sheet metal joint holes and my buddy came over to pick up the leftover ducting. While here, he rehung the AU-23 Peacemaker back up into the heights of the garage, marking final completion of the AC project. :cool:
1a.jpg
 

Watermann

Starmada Splash of the Year 2014
Joined
Jan 12, 2013
Messages
13,794
Wow that is a great AC set up, here all I worry about is heating my garage especially this time of year.
 

BWR1953

Admiral
Joined
Jan 23, 2009
Messages
6,195
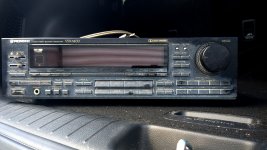
I bought a new stereo receiver for the garage a couple days ago. Tested it out this afternoon and will be returning it tomorrow. The thing just didn't meet our expectations. :cautious:

Here's the old one... a Pioneer VSX-5400 which is about 34 years old. And the sound quality was MUCH better than the new Yamaha. Surprised me.
VSX-5400.jpg

Yamaha R-S202.jpg
 

BWR1953

Admiral
Joined
Jan 23, 2009
Messages
6,195
The old v new fits well with our boat choices too :)
Indeed! 😁

The old Pioneer still produces great sound, but the display no longer works. We can still use it as is, but it'd sure be nice to be able to tweak things a bit. I'd taken it to the local UbreakIFix place but no joy there. I think those younguns don't know how to deal with stuff other than laptops and cell phones. :rolleyes:

I'll post an ad on craigslist to see if I can find someone to fix it up.
 

BWR1953

Admiral
Joined
Jan 23, 2009
Messages
6,195
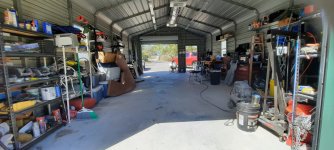
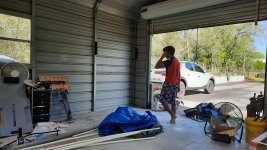
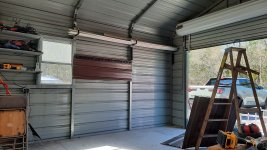
It's been a while, but I'm now getting more garage work done in preparation for our next project. The goal is to organize the shop better and to provide more room.

The first step was to clean a bit and make some more room.
empty.jpg

And the next thing was to finally install the plastic pegboards my wife bought me for Xmas 2020. Time flies, I guess... 😏

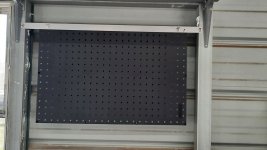
A couple days ago I got started. I had some scrap aluminum laying around and decided to use that to span the gap between the uprights in the garage and attach the pegboard to those sections. And I'd rivet everything, natch. ;)
2.jpg

I mocked up the top rail with the pegboard attached.
1.jpg


I wanted to attach the rivets by just using the plastic panels, but that wasn't happening in a non-destructive fashion. Crunch! 🤪
3.jpg

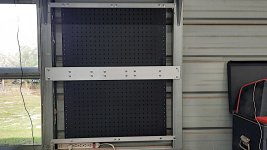
So I used 3/16" large flange rivets with backup washers and aluminum sections to attach the two panels to each other and to the wall uprights.
5.jpg

Just like connecting deck sections. 😜
4.jpg

The backing washers really helped!
7.jpg

It took me 3.5 hours to fabricate and install the thing, but it's up there!
8.jpg


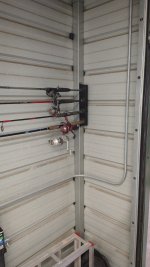
And this afternoon we started figuring out what we wanted where, then got stuff pegged! 😆
8.jpg

9.jpg

I still have 2 more panels to mount, but wall spacing for those will be different. And I'm not sure how much aluminum stock I still have which will fit. But, I'll give it a go! 🙃
 

Attachments

  • 6.jpg
    6.jpg
    265.6 KB · Views: 0

BWR1953

Admiral
Joined
Jan 23, 2009
Messages
6,195
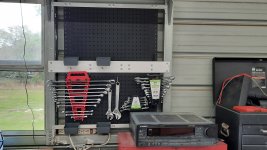
We got the second set of pegboard panels installed today. It was a simpler job because we didn't have to span empty air. We just riveted them directly to the galvanized steel uprights.

I ordered some more pegs and we'll figure out what stuff we want to mount on the boards.

But in the meantime, we put a few metric wrenches up there as placeholders.

1.jpg

2.jpg

3.jpg
 

BWR1953

Admiral
Joined
Jan 23, 2009
Messages
6,195
Today we got started on the cleanup and organizing for real. And made good progress! :cool:

I spent a tidy little pile a couple days ago, getting the stuff we needed.
4-1-22.jpg

We started by clearing all the carp out of the NW corner section.
1.jpg

I installed some L-brackets and we got the PVC pipes and other stuff off the floor and out of the corner.
2.jpg

3.jpg

I had some metal roof panels leftovers and cut one of those to fit the gap between the building uprights. Then I mounted a Harbor Freight wall mount tool organizer to the metal roof panel. The tool organizer comes in multiple interlocking sections and is designed to work with sheetrock walls.
4.jpg

This section is finished. Only 5 more to go! :LOL:
5.jpg
 
Top