Here is the install of the 60lb smart tabs on my Q6.
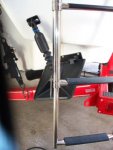
I started by doing a rough fit. I assembled the tabs and then located the best spot for them, making sure they would clear the swim ladder and the location of the top piston mount was adequate. Here is the measurements I came up with.
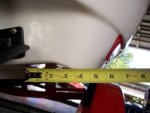
I located the tab mount 2 inches in from the apex of the outer chine. This resulted in a 5 inch total from the outside edge of the boat. The bottom of the mount was measured 1/2 inch up from the bottom of the hull. I used a carpenters square to double check all of the measurements.

After securing the mount using blue masking tape. I drilled the holes using a 7/32 drill bit. I left the mount taped to the transom and used it as a guide. The holes do go all the way through the transom. These holes will be filled with the 3M 4200 or 3M 5200 sealant adhesive (not supplied with the tabs)

After drilling the holes and filling them with the sealant, I secured the bracket with the supplied screws.

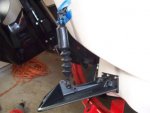
I then attached the tab using the long plastic bolts and nuts provided. You will have to hold the nut on the inside before inserting the bolt all the way through, otherwise you will have to back the bolt out slightly to get the nut onto the end. Just let the tab hang freely, this will be the correct angle for the tabs.

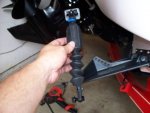
Here is the gas shock with the special fitting for the Tahoe. The same day I ordered the tabs, I called Nauticus and told them the make and model of the boat. They sent the fittings out that day (no charge) and they arrived a day before the smart tabs. The special fitting is the one on the bottom of the shock. The standard fitting will bind and break if not replaced. This picture shows the bottom fitting with the bolt and nut inserted and the top standard fitting with the top bracket attached. I used the supplied bolt and nut instead of the supplied pin for the top bracket. You can use either one but the bolt and nut looked to be stronger to me.

Continued on next post.....
I started by doing a rough fit. I assembled the tabs and then located the best spot for them, making sure they would clear the swim ladder and the location of the top piston mount was adequate. Here is the measurements I came up with.
I located the tab mount 2 inches in from the apex of the outer chine. This resulted in a 5 inch total from the outside edge of the boat. The bottom of the mount was measured 1/2 inch up from the bottom of the hull. I used a carpenters square to double check all of the measurements.
After securing the mount using blue masking tape. I drilled the holes using a 7/32 drill bit. I left the mount taped to the transom and used it as a guide. The holes do go all the way through the transom. These holes will be filled with the 3M 4200 or 3M 5200 sealant adhesive (not supplied with the tabs)
After drilling the holes and filling them with the sealant, I secured the bracket with the supplied screws.
I then attached the tab using the long plastic bolts and nuts provided. You will have to hold the nut on the inside before inserting the bolt all the way through, otherwise you will have to back the bolt out slightly to get the nut onto the end. Just let the tab hang freely, this will be the correct angle for the tabs.
Here is the gas shock with the special fitting for the Tahoe. The same day I ordered the tabs, I called Nauticus and told them the make and model of the boat. They sent the fittings out that day (no charge) and they arrived a day before the smart tabs. The special fitting is the one on the bottom of the shock. The standard fitting will bind and break if not replaced. This picture shows the bottom fitting with the bolt and nut inserted and the top standard fitting with the top bracket attached. I used the supplied bolt and nut instead of the supplied pin for the top bracket. You can use either one but the bolt and nut looked to be stronger to me.
Continued on next post.....


