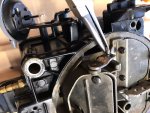
Rochester Quadrajet Rebuild and Adjustments

Baylinerchuck

Commander
Joined
Jul 29, 2016
Messages
2,726
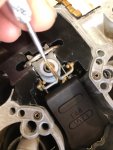
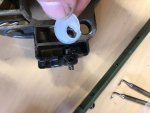
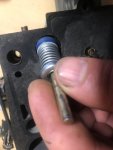
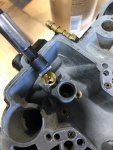
Install the float valve, (fuel inlet valve) seat next. Make sure the old seat gasket was removed during the tear down. Install the new seat gasket, then install the seat. Tighten firmly with a screw driver that will not damage the brass.

As a note, the rebuild kit from Cliff’s Performance contains the proper high flow seat and valve. The more generic kits have a seat that is slotted near the threads which can allow the fuel to drain completely out of the bowl if the check valve in the fuel pump or anti siphon valve get weak. This would certainly make for extra cranking to fill the bowl after the engine has been stopped.
880E6B45-FA2E-4529-8EBB-CD827E373F0E.jpeg

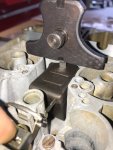
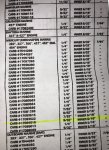
Install the valve and the float. Be sure that the clip which is the floats fulcrum is properly seated. Do not use the wire clip that attaches the needle to the float. It can be discarded. Most kits will come with a chart that specs the proper float height. This adjustment is extremely critical as fuel level affects all circuits of the carburetor.
4ED4E720-AB64-4D70-8BA3-63263B9EF180.jpeg

Press lightly on the back of float until the valve seats, and measure as shown. This little square make a perfect float height gauge as the measurement can be locked down. The float height for this carburetor is set at 9/32”.
CA0A2953-821D-4D6E-8ABA-427AD6872C77.jpeg
 

Baylinerchuck

Commander
Joined
Jul 29, 2016
Messages
2,726
Install a new plastic retainer on the power piston. A rebuild kit should come with this seal. Check the rod hangers on the top of the power piston to ensure they are straight, and carefully bend if necessary. The hanger arms should be even.
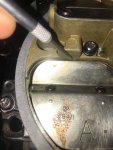
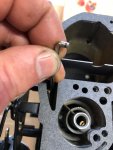
Place the primary metering rods on the hanger. Insert the Power valve spring in the bore, then the piston. Ensure the rods go into the jets. Slightly press down on the power piston and carefully press the plastic seal into the bore.

Push the piston down several times to ensure it’s free, then install the plastic splash guard. Check for clearance around the float.

04A7E904-953B-4D0A-9DE2-47CC152919FC.jpeg

Install the top gasket. The gasket is slotted to allow it to fit around the power piston and rods.

Set the main body aside.
 

Lou C

Supreme Mariner
Joined
Nov 10, 2002
Messages
12,681
You're doing a super job on this, when you're done, I vote making it a sticky!
PS just bought a Cliff's kit for mine, I rebuilt mine 2 years ago but did not do as thorough job as you are doing here. So next time I will! Love the Quadrajet, it brings back great memories of high school and riding in my friend's 1970 Chevelle SS 396. The howl of the Quadrajet, once you hear it you never forget!
 

Baylinerchuck

Commander
Joined
Jul 29, 2016
Messages
2,726
You're doing a super job on this, when you're done, I vote making it a sticky!
PS just bought a Cliff's kit for mine, I rebuilt mine 2 years ago but did not do as thorough job as you are doing here. So next time I will! Love the Quadrajet, it brings back great memories of high school and riding in my friend's 1970 Chevelle SS 396. The howl of the Quadrajet, once you hear it you never forget!

Thanks for the compliment. Reading some of the history on these carbs really opened my eyes to them to be honest. They really are a well build carburetor that is fairly easily modified for major performance. Growing up, I was around people that hated them. Most everyone I know threw them out in favor of an edelbrock or Holley. They just didn’t understand what they had. These Quadrajets really are beasts.

And you were right: Cliff’s Performance is the go to place for parts and advice. They put together some great rebuild kits, and their prices aren’t too far off the cheapies on the web.
 

Baylinerchuck

Commander
Joined
Jul 29, 2016
Messages
2,726
Now that the main body or base is built, we can put the air horn back together.

It is highly recommended to install a new secondary cam during a rebuild. These plastic cams can be worn from years of use causing poor performance. The cam raises the secondary rods as the secondary air doors open.

4989BB10-1E7B-47EF-A6AC-CAC2C767B58E.jpeg

Install the secondary air flap shaft into the first bore, and slide it through the new cam in the center of the air horn and into the bushing on the other side of the casting. Install the air flaps onto the shaft and secure with the proper screws. Use a drop of red loctite on the threads. Ensure that the flaps are centered in the bore and operate smoothly.

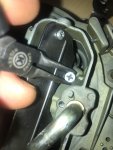
Loosen the air door spring shaft with a small torx driver. Pull the shaft out and replace the worn spring with a new one. Again, I highly recommend Cliff’s Performance rebuild kits as they come with the cam and the new air door spring. Most cheaper kits do not include these parts. Install the spring so that the slot on the shaft goes through the spring. Connect the hook around secondary shaft pin.

957BE290-930B-4761-9842-941A5095CD05.jpeg

Fully rotate the secondary air door linkage to ensure there is no binding. The air horn is ready to install.
 

Attachments

  • 2109AC39-52AC-44FA-A484-99B99ACA91F0.jpeg
    2109AC39-52AC-44FA-A484-99B99ACA91F0.jpeg
    363.9 KB · Views: 3

Lou C

Supreme Mariner
Joined
Nov 10, 2002
Messages
12,681
PS
we had 2 GM cars back in the day with Rochester carbs...a '72 Chev Impala 350 with a Rochester 2bbl that my parents bought new, and a '75 Olds Delta 88 350 with a Quadrajet that they bought used in '78
The Chevy never really ran that well the idle mix was set lean as was the choke, cold start driveability was pretty bad, it was OK once it warmed up though...the Olds ran much better, maybe because by then they had electronic ignition and a cat converter so the carb didn't have to be set so lean, but we had that car from 1978 to 1989 and we never had to rebuild the Quadrajet, even once. And when you floored it that QJet made the Olds 350 fly...
Yes my friends with their GM muscle cars always wanted a Holley but honestly their quality wasn't always great. They are easier to modify maybe, but I think a good Quad is more reliable.
 

Baylinerchuck

Commander
Joined
Jul 29, 2016
Messages
2,726
Yep, I found it pretty interesting that these carbs can be slightly modified to get up to 850 CFM out of them, yet the primaries will make them pretty fuel efficient. With those secondary fuel nozzles being 1/4” diameter X2, once the secondary air doors open its like sitting a 5 gallon gas can on the Manifold. I have a new found respect for these q-Jets.
 

Baylinerchuck

Commander
Joined
Jul 29, 2016
Messages
2,726
Next step we prepare to install the air horn onto the main body.

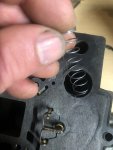
Insert the accelerator pump return spring into the pump bore.

1C09CD35-A2AF-437D-97E1-BD6FD87CBB08.jpeg

Connect the air door linkage to the arm in the main body. It’s usually necessary to rotate the arm to its highest position, then slide the linkage into the hole.

FAFE6FA3-D7FD-4607-9487-51E8C429CEBA.jpeg

Install the air horn onto the main body, ensuring the brass tubes go into the proper wells, and the accelerator shaft goes through its hole, while ensuring the air door linkage doesn’t bind. DO NOT force the air horn onto the body. If it doesn’t fit properly, figure out why and try again.

Once seated properly, install the two screws inside the choke housing and snug. Push down on the accelerator pump ensuring it’s not binding.

397C9785-5369-4AB3-A442-38B8D0466034.jpeg

Install all air horn screws finger tight. Fully tighten the screws in the choke housing first. Tighten the front screw next, then the two behind the choke housing. Tighten the rear screws next, and the long screws last.
 

Attachments

  • 888A11EC-32C0-4EAB-9CF9-92E775C91155.jpeg
    888A11EC-32C0-4EAB-9CF9-92E775C91155.jpeg
    363.6 KB · Views: 2

Baylinerchuck

Commander
Joined
Jul 29, 2016
Messages
2,726
Now that we’ve gotten the three main parts of the carburetor bolted back together we are at a point where it’s a good idea to ensure the needle and seat in the fuel valve are working properly. This was a step I learned in the Cliff Ruggles book, and honestly never have performed, even though in the past not testing before installing bit me in the butt.

The most recent example of this was rebuilding the carb on my 82’ shovel head. The rebuilt carb was installed, the motor started great and idled fine. Once I shut it off, fuel began to drip out the accelerator pump, and all over the garage floor. The needle and seat failed right out of the kit. Numerous attempts to reseat it failed. I ultimately replaced that part and had success.

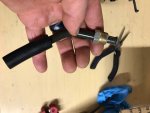
To test the needle and seat, install the fuel filter and the new gasket and spring from the kit and tighten with a 1” wrench. I made an adapter from 3/8” tube and a rubber hose.

8F7699A4-14B0-4640-89E9-6F23A3B82D01.jpeg

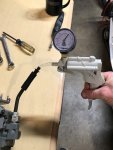
Flip the carb upside down so the weight of the floats seat the needle. Use a vacuum pump to put a vacuum on the needle and seat assembly. If you don’t have one of these pumps or brake bleeders, you can simply suck on the inlet tube to determine if vacuum will hold.

AC4CD84F-B46E-44F5-B09D-82FAE42F9BF5.jpeg

“At least one in ten do not pass a vacuum test”, if it won’t hold back vacuum, then it will not hold back fuel under pressure. A leaky fuel valve will flood the carburetor and spill out the vent and top gasket.
 

Baylinerchuck

Commander
Joined
Jul 29, 2016
Messages
2,726
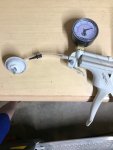
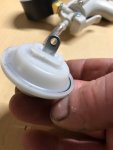
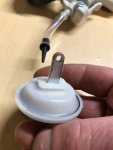
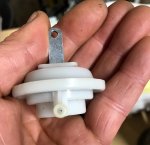
Since the vacuum pump is already out, the choke pull-off should also be tested.

Click image for larger version  Name:	5AE34570-C1F6-4A23-8EF8-EDAB8B19B4CA.jpeg Views:	1 Size:	363.4 KB ID:	10937864

Click image for larger version  Name:	F67F36CA-C457-4871-A0F1-221CC66296FB.jpeg Views:	1 Size:	250.4 KB ID:	10937862

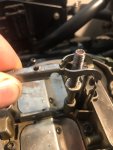
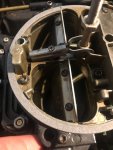
Click image for larger version  Name:	DC1345D2-BDD1-4B06-A031-380DF98284D8.jpeg Views:	1 Size:	255.5 KB ID:	10937863

If you find the choke pull-off to be defective, it’s imperative you get the right one to replace it. Don’t just buy a generic pull-off. Find a reputable company that will match the pull-off to your application with the serial number of the carb. Cliff’s Performance is where I recommend to buy any of these parts.
 

Attachments

  • 5AE34570-C1F6-4A23-8EF8-EDAB8B19B4CA.jpeg
    5AE34570-C1F6-4A23-8EF8-EDAB8B19B4CA.jpeg
    363.4 KB · Views: 3
  • 367BE1F8-8CE4-4CCA-BA5D-258DF27B0D79.jpeg
    367BE1F8-8CE4-4CCA-BA5D-258DF27B0D79.jpeg
    284.3 KB · Views: 4
Last edited:

Baylinerchuck

Commander
Joined
Jul 29, 2016
Messages
2,726
Place the secondary rods onto the hanger and install the hanger onto the steel cam. Secure with the single screw in the center of the hanger.

67E1D6D2-B77F-4E25-8EB1-0A746F581D56.jpeg

Once attached, turn the air door linkage a few times to ensure there’s no binding. The doors should open and return smoothly.

903DE2F6-282F-4676-8A6F-F071B18A3600.jpeg

There are numerous secondary rod and hanger configurations, in fact hundreds. The hanger and rods will have a letter, or combination of letters stamped on them which is an indication of their size, including diameter, taper, and tip length. It’s always best to use the exact parts that came out of the carburetor your rebuilding to ensure the right ingredients are baked into the right recipe for the engine. Trust me, I learned the hard way.

The rods are designed so that as the air doors are open the rods are raised in the pressed in secondary orifices in the bowl. As the rods are raised the taper in the rods allows more fuel to flow through the 1/4” secondary nozzles. There is also a very small hole just above the air door. This is the secondary pull-over discharge and acts like an accelerator pump enriching the mixture as the air doors just begin to open.

6429C985-02B4-4CEF-BDD9-599C8501618A.jpeg

The holes feeding this system are extremely small, hence the reason for very thorough cleaning, and fine fuel filtration.
 

Lou C

Supreme Mariner
Joined
Nov 10, 2002
Messages
12,681
PS while I also thought of slotting the idle mixture screws, the special tool needed for the D shaped ends actually makes it a lot easier because it comes with a flex cable and screwdriver handle. So I left mine as they were, using the tool is easier with the thermostat housing half in your way!

https://www.lislecorp.com/specialty-tools/carburetor-adjusting-tool
I have this one.

It reminds me of the tool I still have in my old tool box for adjusting the points on the Delco window distributor (allen key adjustment so you can set dwell with the engine running). This made doing tune ups back in the '70s easy and friends with Fords and Mopars were jealous, lol!
 

Baylinerchuck

Commander
Joined
Jul 29, 2016
Messages
2,726
I agree. I’m certain I can get that tool from NAPA, but posted another option. The slot still allows you to use the proper adjusting tool, but also makes things a bit more universal. You are correct though, getting to that adjustment Screw is a PITA. Thankfully it should be set and forget. :lol:
 

Lou C

Supreme Mariner
Joined
Nov 10, 2002
Messages
12,681
The tool also has a small Torx which on mine fits the idle speed adjustment. I like to set mine at 600 in gear in the water, that makes the Cobra shift really smooth, it will shift out of gear with one finger on the control.
 

Baylinerchuck

Commander
Joined
Jul 29, 2016
Messages
2,726
The idle speed on this QJ is also a small torx. Same size as the air door spring adjustment lock down screw.
 

Baylinerchuck

Commander
Joined
Jul 29, 2016
Messages
2,726
Install all the linkages previously disconnected. Attach the choke rod to the choke door linkage and install the clip.

3DBF193B-DE80-4F5B-9874-F94CAE2BAD88.jpeg

Install the rod connecting the pull-off valve to the secondary air door. Put the rod through the stem of the pull-off first, then into the air door linkage by slowly rotating the rod while slightly opening the air door. Press on the retainer clip on the pull-off side of the rod.

17D1B2C9-16AD-4576-9A5F-F51B8B89FB9A.jpeg

Install the accelerator pump arm onto the rod, then position it so that a new roll pin can be pressed into the fulcrum hole. If the old roll pin was not removed and you’re installing a new roll pin, remove the old pin first. I use a small seal puller to push the roll pin out, away from the choke housing. Operate the throttle linkage a few times to be sure nothing is binding.

3A5F32C2-A377-4E30-8E7E-B8B774E5C5C4.jpeg

All that’s left to do is to bolt this puppy back on the intake manifold and see how she acts.
 

oldboat1

Fleet Admiral
Joined
Apr 3, 2002
Messages
9,612
Place the secondary rods onto the hanger and install the hanger onto the steel cam. Secure with the single screw in the center of the hanger.


Once attached, turn the air door linkage a few times to ensure there’s no binding. The doors should open and return smoothly.


There are numerous secondary rod and hanger configurations, in fact hundreds. The hanger and rods will have a letter, or combination of letters stamped on them which is an indication of their size, including diameter, taper, and tip length. It’s always best to use the exact parts that came out of the carburetor your rebuilding to ensure the right ingredients are baked into the right recipe for the engine. Trust me, I learned the hard way.

The rods are designed so that as the air doors are open the rods are raised in the pressed in secondary orifices in the bowl. As the rods are raised the taper in the rods allows more fuel to flow through the 1/4” secondary nozzles. There is also a very small hole just above the air door. This is the secondary pull-over discharge and acts like an accelerator pump enriching the mixture as the air doors just begin to open.


The holes feeding this system are extremely small, hence the reason for very thorough cleaning, and fine fuel filtration.

Does Ruggles discuss bending the hanger to adjust secondary rod height? Based on the raw gas smell when approaching WOT, I'm thinking my hanger could be bent down for a slightly leaner mix.
 

Baylinerchuck

Commander
Joined
Jul 29, 2016
Messages
2,726
No he doesn’t mention that. He only mentions that they need to be the same height on both sides. I would just make sure they don’t look like they were bent. At or near WOT you’re dumping a lot of gas, those two 2-1/4” holes in the carb are thirsty. If you’re not seeing performance issues as far as hesitation or stumbling, I’d say it’s running perfect.

Have you read your plugs to determine if you are rich?
 

oldboat1

Fleet Admiral
Joined
Apr 3, 2002
Messages
9,612
Thanks for the come back. Getting stumbling -- better luck if I ease the throttle, but stumbling if I push it too far. Plugs were checked a couple of months ago, and nothing remarkable then -- but probably have been fooling around with it more since then. Looking for a sweet spot (idles great). 26' Trojan hardtop, '80. 305 .
 

Baylinerchuck

Commander
Joined
Jul 29, 2016
Messages
2,726
Is it a stumble as you throttle up, or more prevalent when the throttle is steady near WOT? How long has it been since the carb was rebuilt?
 
Top