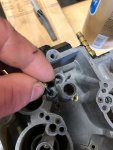
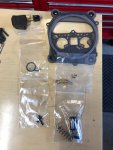
Rochester Quadrajet Rebuild and Adjustments

Baylinerchuck

Commander
Joined
Jul 29, 2016
Messages
2,726
As an update I joined the forum of Cliff’s High Performance. I asked about the primary opening measurement when the secondaries kick in. After explaining where I was in this whole process I got a response from Cliff who is also the author of the book I purchased.

He basically said to stop fooling around with the remanufactured carb and certainly don’t put money into it. They have never seen a Carb from the company I bought mine that worked properly.

Cliffs makes custom rebuild kits for each carb based on the serial number of that carb. It is ALWAYS best to rebuild the carb you have instead of buying a remanufactured Quadrajet. I have ordered my kit and will be proceeding with the original carb.

I’ll continue updating this thread as I’m sure the rebuilding process will be of interest and value. We’ll get back to the tuning once the oem carb is rebuilt.

thanks to Lou C for the information. This is indeed a great resource.
 

Lou C

Supreme Mariner
Joined
Nov 10, 2002
Messages
12,681
Yes it is! I was lucky because this boat had the original un-molested Quadrajet which I rebuilt with just a standard marine rebuild kit and it works great. If I didn't have this original core then I would have had to go to the Holley which was used after they stopped building Quadrajets. As it turns out I actually tried one, I was able to find the OMC spec metal fuel line, throttle bracket etc and adapter for the square bore Holley. However, this particular carb had a problem that took me a while to figure out that caused rich and rough running. I tried it because I mistakenly thought my old QJet was too old to rebuild. Well I took it apart, cleaned it and in 2 hrs it was back on the boat running fine. I do still have the Holley in case I ever need it but I suspect the QJet will be fine as long as I have this boat. So the nearly new Holley 4160 is collecting dust on a shelf in my garage lol....
 

Attachments

  • photo284104.jpg
    photo284104.jpg
    104.9 KB · Views: 2

Lou C

Supreme Mariner
Joined
Nov 10, 2002
Messages
12,681
Put a holley on it

ahh tried that...read my response above...their quality control ain't all that great! It never worked right, I would up cleaning out and rebuilding my 30 year old QJet and its still working fine. The brand new Holley I bought had a problem it took me a while to figure out...its probably fine now but the QJet is the superior carb.
 

Lou C

Supreme Mariner
Joined
Nov 10, 2002
Messages
12,681
So Chuck should chuck both his carbs and Q-Jet book? Did you read his thread or just throwing out your preference?

see my response above...been there and tried that...and went back to the QJet!
 

Baylinerchuck

Commander
Joined
Jul 29, 2016
Messages
2,726
Are there similar books about Mercarbs too?

I’m not sure. I’m sure there are rebuild kits for them and folks who are familiar with them. The Quadrajet has so many different applications and from what I’m reading VERY misunderstood.

I think for all intents and purposes, a quality rebuild kit, and a thorough cleaning of all passages will make an oem carb run like new. Float height is probably one of the most critical things to pay attention to in any carb you rebuild.

I will go through that entire process in future posts. These methods are universal for any carb ever built.
 

Lou C

Supreme Mariner
Joined
Nov 10, 2002
Messages
12,681
I think the Mercarb is a slightly modified Rochester 2bbl. Sure looks just like the one on our '72 Chevy 350!
 

Scott06

Admiral
Joined
Apr 20, 2014
Messages
6,443
I think the Mercarb is a slightly modified Rochester 2bbl. Sure looks just like the one on our '72 Chevy 350!
That’s correct main difference is one idle mixture screw on the mercarb vs two on the Rochester, but definitely a common lineage. Mercarbs were made By mercruiser when GM Quit making carbs in late 80s or 1990 ish. Mikes carburator shop has parts and good kits.

chuck- cliff is the man for Q jets, he’s right I can only imagine these rebuild shops putting together carbs pieced together from a bunch of cores, no idea what you’d be getting. Correctly tuned the q jet is probably the best carb ever built. When you look at the number of different applications it was used on stock let alone what racers do with it it’s pretty amazing
 

Baylinerchuck

Commander
Joined
Jul 29, 2016
Messages
2,726
I agree with you 100% Scott. Reading through Cliff’s book, it does amaze me all the applications. I’m glad Lou recommended that QJ forum.


I just received the Cliff’s Performance marine rebuild kit in the mail today. I’ll be posting soon as I rebuild the oem carb.
 

Baylinerchuck

Commander
Joined
Jul 29, 2016
Messages
2,726
So I’m continuing with the year down. As posted before, I have abandoned the idea of tuning an inferior remanufactured carb in favor of rebuilding the oem Quadrajet.

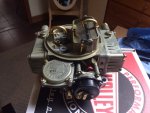
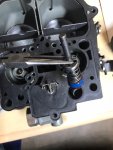
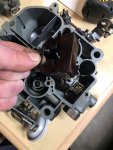
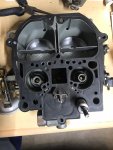
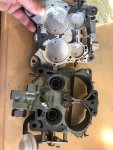
So for the year down, I already covered removing the air horn. Below is the base with the gasket still in place.
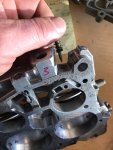
54ADC719-BBE5-4205-9651-211230B1BC85.jpeg

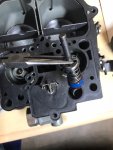
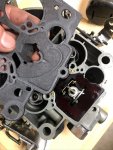
Remove the base gasket. There is a slot cut in the gasket so that it can be slipped over the power valve and primary rod hanger.

03282DAD-48D8-4C18-A0A7-A36417DDDED9.jpeg

continued on next post.
 

Attachments

  • 54ADC719-BBE5-4205-9651-211230B1BC85.jpeg
    54ADC719-BBE5-4205-9651-211230B1BC85.jpeg
    342.5 KB · Views: 3
  • EFA597A1-E974-42FC-8D11-41880E10F335.jpeg
    EFA597A1-E974-42FC-8D11-41880E10F335.jpeg
    385.9 KB · Views: 3
  • C28E54A6-0BDB-42D1-A957-C73BFB3843C8.jpeg
    C28E54A6-0BDB-42D1-A957-C73BFB3843C8.jpeg
    479.6 KB · Views: 3
  • 0F169872-49B6-4D59-81E5-5CB1BC7EAB30.jpeg
    0F169872-49B6-4D59-81E5-5CB1BC7EAB30.jpeg
    494.7 KB · Views: 3

Baylinerchuck

Commander
Joined
Jul 29, 2016
Messages
2,726
To continue the year down, slowly lift out the float hanger and fuel valve float assembly.

A758C404-29F2-4220-97EF-F4869AFC4C01.jpeg

Remove the accelerator pump ball check retainer and ball. I use a magnetic screwdriver so the ball sticks to the retainer.

CCAD323A-54C9-414C-BDE4-DC7C50711C3D.jpeg

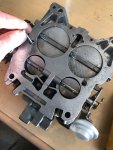
Remove the gasket if not already removed on the bottom of the throttle plate. This exposes the remaining screws securing the throttle plate to the base. Remove the throttle plate.
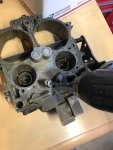
3DBF82C7-D346-4520-B529-9F37D5D92257.jpeg
 

Attachments

  • AB3D283B-7A78-438D-9809-CFE067CC2222.jpeg
    AB3D283B-7A78-438D-9809-CFE067CC2222.jpeg
    283.8 KB · Views: 6
  • 1BE9548D-61D1-4EC1-89F5-6EC0932118F8.jpeg
    1BE9548D-61D1-4EC1-89F5-6EC0932118F8.jpeg
    379.8 KB · Views: 6
  • 8B064B3E-3F25-4683-8CCB-AC3B5A8D5E0D.jpeg
    8B064B3E-3F25-4683-8CCB-AC3B5A8D5E0D.jpeg
    452.1 KB · Views: 5
  • C0A5101C-5146-49B9-99B9-8BB639A593AE.jpeg
    C0A5101C-5146-49B9-99B9-8BB639A593AE.jpeg
    506.2 KB · Views: 5

Baylinerchuck

Commander
Joined
Jul 29, 2016
Messages
2,726
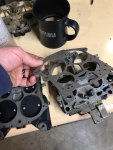
Remove the two idle mixture screws from the throttle plate. It a good practice to count the number of turns it takes to lightly seat the screws. This is where we would want to set the screws on reassembly.

Click image for larger version  Name:	143EEBBB-00DB-4E9B-A18F-919E2E4030D9.jpeg Views:	1 Size:	428.1 KB ID:	10933619

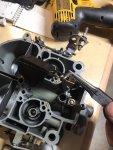
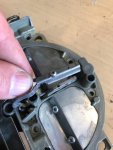
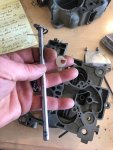
Remove the 4 screws securing the large air door flaps. Unhook the air door tension spring. You can release the pressure on the spring by loosening the Torx screw that secures it. Push the air door rod through the air horn body and remove it as well as the plastic cam that raises the secondary rods. This cam will be replaced during the rebuild.

Click image for larger version  Name:	A4442E87-8440-4200-A209-D41BFD2559BA.jpeg Views:	1 Size:	397.0 KB ID:	10933620

now it’s time for a thorough cleaning.
 

Attachments

  • 143EEBBB-00DB-4E9B-A18F-919E2E4030D9.jpeg
    143EEBBB-00DB-4E9B-A18F-919E2E4030D9.jpeg
    428.1 KB · Views: 2

Baylinerchuck

Commander
Joined
Jul 29, 2016
Messages
2,726
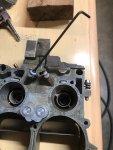
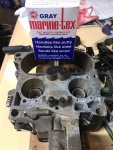
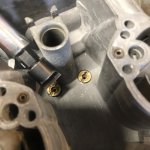
I bought the bottom plug kit from Cliff’s Performance specifically because I couldn’t clear a blockage in one of the idle tubes. The kit comes with set screws to use as plugs and MarineTex.

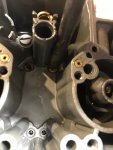
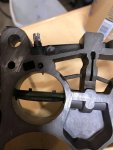
in order to clear the blockage I needed to drill the smaller front plugs in the main body. This well feeds the idle and idle off and primary circuits through the jets.

2D0B542D-331D-4E57-AAB5-FCBDB82918CF.jpeg

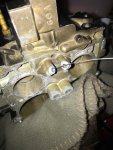
Once drilled I cleaned all passages with acoustic guitar strings. They work as well as spring wire and come in numerous different gauges or thicknesses.

D4EF9068-675B-4877-9043-CD5E8AB8966D.jpeg

The set screws were installed to ensure there were no clearance issues.

A1E8C030-C132-4BB1-A665-0EB6BBE3AAFC.jpeg

The screws were then removed and Marine-Tex was applied to the threads, then the entire plug was coated. The rear larger factory plugs were also coated for good measure.

24EF1B49-E221-4ED1-9972-6C808F22E6C2.jpeg

Onto the rebuild.....
 

Attachments

  • AD7C8B92-9E93-47E2-90B1-7682C2838251.jpeg
    AD7C8B92-9E93-47E2-90B1-7682C2838251.jpeg
    505.8 KB · Views: 4
  • 46D1C151-7B11-4DB7-AEB5-079CFC606A8F.jpeg
    46D1C151-7B11-4DB7-AEB5-079CFC606A8F.jpeg
    511.3 KB · Views: 4

Baylinerchuck

Commander
Joined
Jul 29, 2016
Messages
2,726
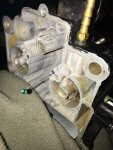
One of the other problems with my oem carb was that following some bad advice I received from a National Carburetor tech, I went on a search for an Adjustable Part Throttle valve or APT screw. This sent me on a wild goose chase and eventually led me to open a knockout in the air horn casting. APT according to Cliff Ruggles was used in later QJs to fine tune part throttle air/fuel ratios. This system does not exist on marine QJs.

The hole that was left behind needed to be filled prior to putting this carb back in service.

I cut a small piece of aluminum and cleaned up the area for the patch.

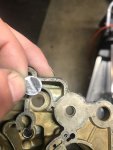
CB8AC496-9A4E-497E-B1A8-30A1F641C036.jpeg

41D5844C-0A19-43BA-9763-3C358F0229D3.jpeg

More to come.
 

Attachments

  • 5678CDEC-5155-48E9-8B28-C5B150F17F4D.jpeg
    5678CDEC-5155-48E9-8B28-C5B150F17F4D.jpeg
    379.1 KB · Views: 4
  • 2EFFA4D2-F989-4224-958C-973F99272C2C.jpeg
    2EFFA4D2-F989-4224-958C-973F99272C2C.jpeg
    403 KB · Views: 4

Baylinerchuck

Commander
Joined
Jul 29, 2016
Messages
2,726
Rebuild the throttle plate first as you’ll want to secure the base to it when installing all the other parts, holding everything securely.

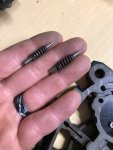
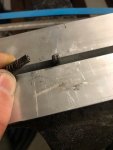
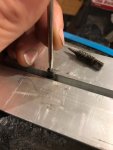
A suggestion from Cliff Ruggles was to slot the idle mixture screws so they can be adjusted easily with a flat blade screw driver. Late model QJs required a special tool to resist tampering due to emissions standards in cars.

The slots were formed by lightly filing a starter slit with a file. The slot was deepened with a fine tooth hack saw blade. It’s relevant to note that I use aluminum angle in the jaws of my vice so as not to mar or otherwise damage delicate parts.

88371180-EEAC-45E5-B692-C2EB75F017DD.jpeg
 

Attachments

  • 1A3B74D8-8194-46EC-A8FA-E9D0EC795F68.jpeg
    1A3B74D8-8194-46EC-A8FA-E9D0EC795F68.jpeg
    341.3 KB · Views: 5
  • DD2A314F-120F-4CD3-B734-5BE168B5002A.jpeg
    DD2A314F-120F-4CD3-B734-5BE168B5002A.jpeg
    311.5 KB · Views: 5

Baylinerchuck

Commander
Joined
Jul 29, 2016
Messages
2,726
Check the side play and clearance of the primary throttle plate shaft. Cliff’s Performance offers a special drill and bushing kit to repair a worn casting. I didn’t need to do that as mine is pretty tight.

Make sure the idle discharge holes and off idle ports are clear. Again, I used the G string of an acoustic guitar to ensure there are no blockages and cleaned with carb cleaner and compressed air.

Click image for larger version  Name:	ED1B38C0-176E-47C9-B9CC-8B7232073A2D.jpeg Views:	1 Size:	297.5 KB ID:	10934865

Install the idle mixture screws. I lightly seated them, then turned them out 2-1/4 turns. This is my starting point, but will require further adjustments once the engine is running. Be careful not to force these screws as the casting or needles can be damaged. Lightly seated is the key.

Click image for larger version  Name:	9C895834-C3FE-410B-B0FA-40AC3F1B990C.jpeg Views:	1 Size:	332.7 KB ID:	10934866

Install the proper gasket, and install and tighten the two screws securing the throttle plate to the main body, or base.

Click image for larger version  Name:	AB1DF92F-B940-48D0-A9FB-2A2622DDEF79.jpeg Views:	1 Size:	446.9 KB ID:	10934869

Click image for larger version  Name:	0781C370-E56B-43C6-9DB4-20FC5C79501B.jpeg Views:	1 Size:	329.5 KB ID:	10934868

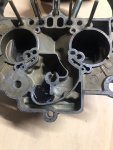
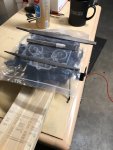
Next is to populate the main body with all those new shiny parts. Until then, now that the carb is spotless and clean, make sure you keep it that way by covering it up when not working on it.

Click image for larger version  Name:	D2B5663B-EA54-4D80-97F2-DDC3B470B1D9.jpeg Views:	2 Size:	395.8 KB ID:	10934871
 

Attachments

  • AB1DF92F-B940-48D0-A9FB-2A2622DDEF79.jpeg
    AB1DF92F-B940-48D0-A9FB-2A2622DDEF79.jpeg
    446.9 KB · Views: 3
  • D2B5663B-EA54-4D80-97F2-DDC3B470B1D9.jpeg
    D2B5663B-EA54-4D80-97F2-DDC3B470B1D9.jpeg
    395.8 KB · Views: 2

Baylinerchuck

Commander
Joined
Jul 29, 2016
Messages
2,726
jbcurt00 GA_Boater southkogs can one of the mods change the title of this thread since it has definitely taken on a different direction. Rochester Quadrajet Rebuild and Adjustments probably more aptly suits what the thread contains. Thanks for your consideration.
 

GA_Boater

Honorary Moderator Emeritus
Joined
May 24, 2011
Messages
49,038
As you requested, Chuck. I thought the title became different than what you are doing to the victim(s). LOL
 

Baylinerchuck

Commander
Joined
Jul 29, 2016
Messages
2,726
Below is a picture of the rebuild kit. This one came from Cliff’s Performance and contains some parts not included with some of the more cheap kits.

57F8BA21-DA67-49C5-AD1F-2DCD76BA7BEF.jpeg

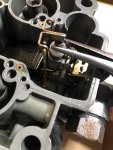
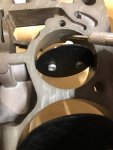
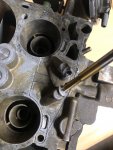
In the rebuild section of the book, Cliff reseats the check ball into the casting for the accelerator pump. This was not something I’ve ever done, but a really nice tip. If the check ball leaks, fuel will drain out of the circuits fed by the accelerator pump and will cause a nasty stumble during throttle changes.

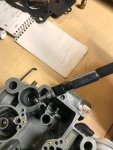
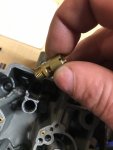
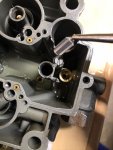
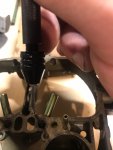
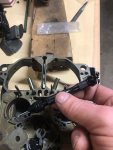
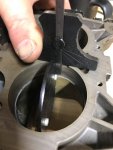
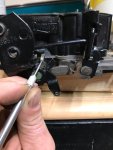
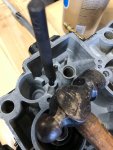
Use the old ball retained from the tear down and drop it in the body. Use a pin punch and smack it with a small hammer to form the seat. Remove the old ball, insert the new ball and install and tighten the retainer.

67B8E9FB-3CBC-4BEE-94AF-F03F677B9F7F.jpeg

B9C45B36-1EBE-47CA-B265-EB27072EF5C0.jpeg
 

Attachments

  • EDA4FD3D-AE13-4D5C-8907-0CF3E84DB02F.jpeg
    EDA4FD3D-AE13-4D5C-8907-0CF3E84DB02F.jpeg
    391.3 KB · Views: 4
Top