Restoring 1986 Sea Nymph SS155 (pics)

Piece715

Senior Chief Petty Officer
Joined
Jan 26, 2009
Messages
757
Re: Restoring 1986 Sea Nymph SS155 (pics)

Did you say splash Piece??

Thought I heard the word splash....

Congrats bud!

Not splashed yet... but very very soon! As soon as I get the motor serviced its to the water she goes! Can't wait for the day!!
 

Todd4

Petty Officer 2nd Class
Joined
Feb 11, 2012
Messages
111
Re: Restoring 1986 Sea Nymph SS155 (pics)

Hey! Congrats!

I just got back into town (emrgency response) and saw you lit 'er up! Carpedium is giving good advice on fuse sizes - your fuse should be used to protect your wiring, not your end devices. Did the switch lever colors work for you (I couldn't tell in the video)?
Let's see her float!

Todd
 

Piece715

Senior Chief Petty Officer
Joined
Jan 26, 2009
Messages
757
Re: Restoring 1986 Sea Nymph SS155 (pics)

Hey! Congrats!

I just got back into town (emrgency response) and saw you lit 'er up! Carpedium is giving good advice on fuse sizes - your fuse should be used to protect your wiring, not your end devices. Did the switch lever colors work for you (I couldn't tell in the video)?
Let's see her float!

Todd

The switches all worked like a charm. Very much appreciate the help Todd!!! I do have one that is not lighting up and I'm pretty sure we wired everything so its ready to just add a load. The switch is empty but still its not lighting; could just be a bad butt connection or something of that nature. I need to trouble shoot it but its down on the list since its an empty switch. Next electrical add will be interior LEDs.
 

bouttime007

Chief Petty Officer
Joined
Apr 21, 2007
Messages
546
Re: Restoring 1986 Sea Nymph SS155 (pics)

Not splashed yet... but very very soon! As soon as I get the motor serviced its to the water she goes! Can't wait for the day!!

Yeah I know, just surprised you are almost there so soon! Its only been, what...3 years? LOL

Just bustin ya bud.
 

Piece715

Senior Chief Petty Officer
Joined
Jan 26, 2009
Messages
757
Re: Restoring 1986 Sea Nymph SS155 (pics)

Ok need help... How easy is it to change impeller and do a carb kit? also adjusting throttle cables and tune up.... Art's Marine here in town is 4 weeks backed up and another place is one week but charging $95 an hour, quoted hour for impeller, and then their tech thinks the carbs need to be rebuilt again since its been sitting for so long and that quote was for 1hr to 1.25hr depending on how bad the carbs are. So thats a $350 dollar bill right there. Not to mention the kill switch on the throttle controls has been epoxied so it doesn't work and i have a switch mounted in the dash but have to by pass the one on the throttle so that may take external wiring and not exactly sure how to do that.... If anyone can point me in the right direction i feel confident enough to do all the work. I have the clymer manual for my motor Evinrude 50hp model E50BELCO; I am unable to locate the OMC manual for the motor so clymer will have to work.

Impeller looks straight forward. Remove three ish screws on lower unit, drop lower unit, turn shaft by hand to determine proper orientation of impeller, open water pump housing, clean any rubber in housing, replace impeller, and reassemble. Have watch a couple of videos on how to replace a mercury outboard impeller but i figured its all the same... am i correct in my thinking? How bout the carbs... I do really well with step by step guides :rolleyes:
 

Piece715

Senior Chief Petty Officer
Joined
Jan 26, 2009
Messages
757
Re: Restoring 1986 Sea Nymph SS155 (pics)

Well from what i watched on the impellers from youtube it looks straight forward but still hesitant about the carbs... Anybody have helpful hints, suggestions, how to threads etc.?
 

Todd4

Petty Officer 2nd Class
Joined
Feb 11, 2012
Messages
111
Re: Restoring 1986 Sea Nymph SS155 (pics)

Sounds like you have the water pump impeller figured out. The carbs will be more difficult (metering screws are set X number of turns, etc). Does your Clymer have any description for rebuilding the carbs (wondering about diagrams so you know what your getting into)? You could just remove the carbs from the engine, take the float bowls off (don't bend the floats out of position - they move by floating in gasoline to slide a needle valve - make sure all are free to move - the needle valve may be stuck), clean the bottom of the bowls, and spray carb cleaner (not gasoline) through all the orfices you can find (some may be pretty small). My rationale behind this is, 1) you're not experienced in carb rebuilds, and 2) the engine wasn't run so you shouldn't have gum/varnish throughout. This would minmize your risk of misadjusting the carbs. I know it's not what you are looking for, but that's the best I can suggest. Good luck. Keep us posted.

Todd
 

Piece715

Senior Chief Petty Officer
Joined
Jan 26, 2009
Messages
757
Re: Restoring 1986 Sea Nymph SS155 (pics)

Sounds like you have the water pump impeller figured out. The carbs will be more difficult (metering screws are set X number of turns, etc). Does your Clymer have any description for rebuilding the carbs (wondering about diagrams so you know what your getting into)? You could just remove the carbs from the engine, take the float bowls off (don't bend the floats out of position - they move by floating in gasoline to slide a needle valve - make sure all are free to move - the needle valve may be stuck), clean the bottom of the bowls, and spray carb cleaner (not gasoline) through all the orfices you can find (some may be pretty small). My rationale behind this is, 1) you're not experienced in carb rebuilds, and 2) the engine wasn't run so you shouldn't have gum/varnish throughout. This would minmize your risk of misadjusting the carbs. I know it's not what you are looking for, but that's the best I can suggest. Good luck. Keep us posted.

Todd

Thats along the lines of what I was thinking too seeing that the carbs were just rebuilt. Just minor disassemble and clean any gummed up areas. Been watching a lot of youtube videos to help me out. Once question when it comes to this. Everyone uses air hose to blow through the jets at about 120 psi to clean out. I don't have an air compressor. Would air duster work, or have enough psi to do any good? Haven't busted into my Clymer manual yet as it sitting near the boat and haven't been over there this week. Ill post what i find

Here are the videos i think im gonna base my impeller change on.... Can someone watch and tell me what they think? are all impeller changes about the same? These videos aren't mine... just found them on youtube


GT1000000

Rear Admiral
Joined
Jul 13, 2011
Messages
4,916
Re: Restoring 1986 Sea Nymph SS155 (pics)

Yep, pretty much right on the money...only difference is on the different makes/models...might have more or less bolts to remove/install...might have somewhat different ways of hooking/un-hooking the shifter...etc... some might require a torque sequence on the impeller housing or even some type of sealant...but the basics all seem to be about the same...

Then again, if you have the exact same engine, then it is 100%...;)...

If not, either check with the gurus on the engine forum or refer to a repair manual for your specific engine...
 

Todd4

Petty Officer 2nd Class
Joined
Feb 11, 2012
Messages
111
Re: Restoring 1986 Sea Nymph SS155 (pics)

That about covers it. Everything to watch out for was mentioned. Outboard water pumps are all about the same. My shiftrod is internal and I have a few more thrust washers, seals and caps, but its still the same basic process. One thing came to mind - your keyway may be stuck in the shaft. If so, leave the old keyway in place (since you will not be replacing the bottom wear plate, the keyway doesn't have to be removed). They can be a real bear to get out sometimes. Don't forget to use waterproof grease on all splines, etc., including the bolt threads, so they'll come out next time, too (and there will be a next time).

As for the air duster - well......... better than nothing. The main objective is to make sure your carb cleaner blows through each orfice (no gum/varnish left to clog the opening). Your can(s) of carb cleaner should come with a straw that'll help blow it through. Compresed air is used to blow out any stuck debri (which you shouldn't have) and evaporate the carb cleaner. The condition of the bottom of the float bowls will give you a good idea of what you need to clean out of the rest of the carb (sand/dust, varnish/gum, or just staining = no problem) Remember your floats are fragile - the little sheet metal adjusting tabs are easily bent, so be carefull not to bend them out of adjustment (don't lay the carb down on the floats). Make sure the (rubber tipped) 'needle' (operated by the float assembly) is not stuck in its housing (it should move up and down with the float). If it's stuck then either 1) no gas will get into the carb, or 2) gas will continuously overflow out of the carb vent hole. Don't trun the adjustment screws (idle and mixture) - let's assume they are clean (or the Techron will clean them up quickly) - for simplicity sakes. Since these are old outboard motor carbs, they'll be pretty simple in design (fewer parts).

FLOAT THAT THING! :)

Todd
 

Piece715

Senior Chief Petty Officer
Joined
Jan 26, 2009
Messages
757
Re: Restoring 1986 Sea Nymph SS155 (pics)

Gonna try to tackle he impeller and carbs tonight; Wish me luck and throw help hints, suggestions, diagrams, and step by step instructions my way :rolleyes:.

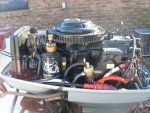
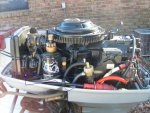
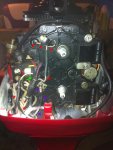
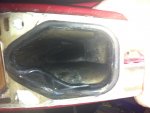
Now.... There is a wire coming from the back of the motor near the spark plugs that is not attached to anything; well attached to the motor but the other end is just hanging there. By the looks of the wire and the way the ends are stripped I'm thinking its a ground. I don't have a pic per say of this wire... will get one this evening... but im posting one of the general area. I vaguely remember this wire from the demo days 3 years ago but for some reason its not labeled :facepalm:.... if any one can help it would be greatly appreciated. Again I will prob post a thread on it this evening but throw out some ideas if ya got any. The pic shows the area in which the wire originates

Motor.jpg
 

Piece715

Senior Chief Petty Officer
Joined
Jan 26, 2009
Messages
757
Re: Restoring 1986 Sea Nymph SS155 (pics)

Here is a revised pic... the area in blue is the wire... the area in red is where it originates

Motor.jpg
 

Piece715

Senior Chief Petty Officer
Joined
Jan 26, 2009
Messages
757
Re: Restoring 1986 Sea Nymph SS155 (pics)

Ok well got the impeller changed out last night and to say the least I am not happy! First to unhook the shift shaft the electric starter had to be removed. After the starter was out the bolt that held the shaft in place was in a really awkward position; but this was the least of my troubles. Followed the Clymer manual and put the motor in reverse before removing. Then went to loosen all the lower unit bolts. I made reference marks on my trim tab and started to remove that bolt. photo(4).jpg Apparently the J.A. who did the last maintenance work didn't put any anti seize or grease on the bolts and well literally 1.5 turns and CLANG... the bolt hit the floor... and my heart sank! YEP YOU GUESSED IT!!! The trim tab bolt sheared right off!... AHHHHHHHHHHHH!!!! photo(13).jpg So need to go buy a tap set and see if i can get that sucker out, any suggestions that could help the process?!

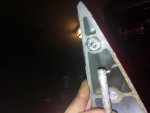
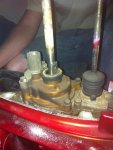
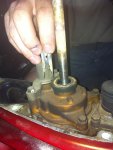
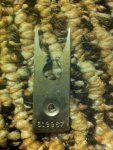
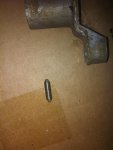
Well what was done was done so we just continued with the work. Lower unit came out with ease... more heft than originally thought btw. Once off and on initial inspection I notice a silver tab in the top of the water pump housing next to the water pump shaft. I touch it and it moves easily. photo(12).jpg I pick it up and this is what it looks like.... photo(11).jpg ..... The tab is super sharp and looks like it has been sitting in there forever, its extremely worn... photo(2)a.jpg ... I'm guessing that shouldn't be there?! Also seeing how warn it is and how the last time the motor ran was for a limited amount of time while being tested at the shop... sooo did the J.A. even get into the water pump... possibly but hard to believe at this point... unless that tab is normal.
 

Piece715

Senior Chief Petty Officer
Joined
Jan 26, 2009
Messages
757
Re: Restoring 1986 Sea Nymph SS155 (pics)

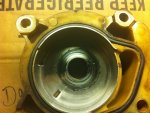
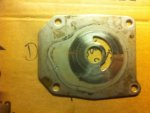
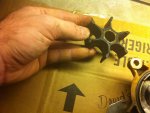
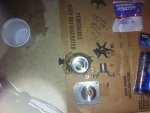
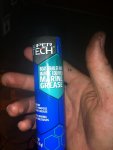
The bolts for the water pump housing came off with ease and the housing looked fairly clean ish. photo(9).jpg photo(10).jpgThere was some rubber rub on the inside of the housing and all the rubber grommets were covered in crud. Again another reason I don't think the pump was serviced. On inspection of the impeller it was pretty dry rotted, which was expected, with one spline almost completely torn. photo(8).jpg Good thing I didn't start the motor, I would have been pulling rubber bits from every tube in that outboard. Cleaned the housing with some fine steel wool and rinsed thoroughly. photo(6).jpg Then thin layer of Marine all purpose grease was applied and everything was reassembled. photo(3).jpg All the bolts were slightly greased before re installation for easy removal next season So its back together but still have to get that sheared bolt out of there.
 

Piece715

Senior Chief Petty Officer
Joined
Jan 26, 2009
Messages
757
Re: Restoring 1986 Sea Nymph SS155 (pics)

Here is the keyway that was in the impeller... not really what I was expecting to see. When it fell out I thought something else had broke. photo(7).jpg

One thing that was noticed as we work on the water pump was the exhaust gasket. Apparently a while back someone installed the lower unit incorrectly and the gasket was pinched. It looks as if it has been this way for a while as the gasket is very warped and slightly melted. Do I need to replace this so it seats correctly?! photo(5).jpg
 

jbcurt00

Moderator
Staff member
Joined
Oct 25, 2011
Messages
24,873
Re: Restoring 1986 Sea Nymph SS155 (pics)

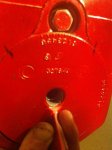
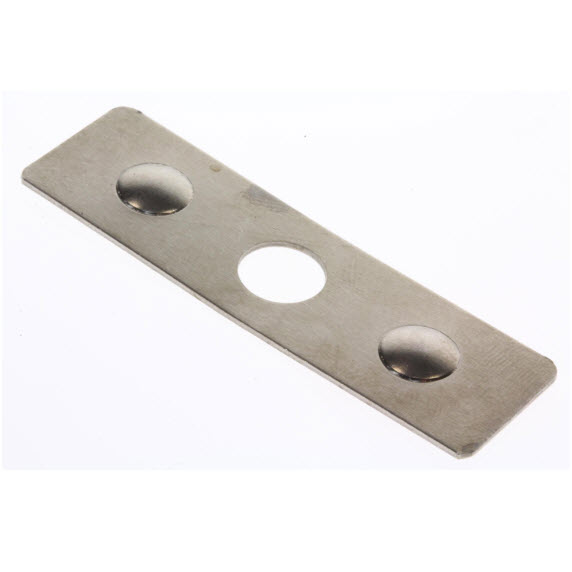
W/ part #319967 for Evinrude OB, this is what came up:
0319967.jpg


[h=1]0319967 - RETAINER TRUNNION[/h]
List Price
$XXXX

Part Number
319967
Your Price
$XXXX

Manufacturer
Evinrude Johnson OMC
CURRENT

.

So, yeah, seems worn...... You'll have to dig to find out what it retains, but your's clearly isn't...

Sorry I don't know what it is on your engine....
 

Piece715

Senior Chief Petty Officer
Joined
Jan 26, 2009
Messages
757
Re: Restoring 1986 Sea Nymph SS155 (pics)

W/ part #319967 for Evinrude OB, this is what came up:
0319967.jpg

0319967 - RETAINER TRUNNION

List Price
$XXXX

Part Number
319967
Your Price
$XXXX

Manufacturer
Evinrude Johnson OMC
CURRENT

.
So, yeah, seems worn...... You'll have to dig to find out what it retains, but your's clearly isn't...

Sorry I don't know what it is on your engine....

Thanks jb!! Ill dig through some diagrams and do that digging and see what it is suppose to retain.
 

Piece715

Senior Chief Petty Officer
Joined
Jan 26, 2009
Messages
757
Re: Restoring 1986 Sea Nymph SS155 (pics)

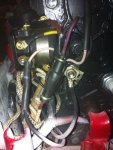
Ok here is the better picture of the wire that has no connection... photoA.jpg ... Here is a closer one... photo(1).jpg ...The RED arrows point to one half of the wire that enters a bundle. The bundle seems to come together and enters the plug for the throttle control. The GREEN arrow points to the bundle. Its not the rubber looking one in front but behind that is another bundle with some electrical tape. Now a wire of the same color comes out of the bundle and heads up past the plugs also indicated in RED. I'm thinking that the cream colored wire was tucked into that bundle to take up the slack but I could be wrong, it could be spliced in there. The PURPLE arrows indicate the other half of that wire, which appears to be a ground. The wires are just split off one wire and this wire runs with the throttle plug cable down the side of the motor and out the back where it remains unattached at the moment. This wire is indicated in BLUE. (picture on next post; sorry about the separate pages but it is the same picture from post #494)

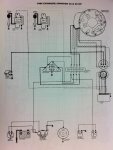
Here is the only wiring diagram for my motor from my Clymer Manual photo(3).jpg; 1985 Evinrude/Johnson 40 & 50 HP photo(4)a.jpg photo(2).jpg
 
Top