Replacing lower seal kit 1968 evinrude fastwin 18 hp

james__12345

Petty Officer 2nd Class
Joined
Jun 26, 2012
Messages
196
****EDIT****
After reading a few very informative posts by oldcatamount, F_R_, and kfa4303 I found out that this is not a 1968 lower unit. It appears to be a 1971 from what I can tell. The main difference being that the 68 does not have the detent spring and balls I mentioned under the clutch dog. I will do some more research and find out what other differences there may be and update the thread accordingly. Sorry for the mix up.


Here are some pictures and a walk through of replacing the lower seal kit in a 1971? 18 hp fastwin. I'm waiting on a shift rod bushing tool from Frank and some scotchgrip 847 from the local omc dealer. I'll finish the walk through when I get the rest of the stuff I need. If anyone has any questions, or suggestions for any other pictures or anything along the way, feel free to comment.
To replace the lower seal kit, first the lower unit has to be removed from the motor.

To remove the lower unit, first drain the oil out of it, by removing the two slotted screws in the lower unit. Do not remove the philips head screw at this point, only the two slotted ones.
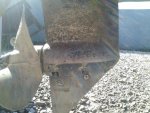
0429131635.jpg

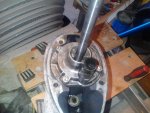
To remove the lower unit the shift linkage must be disconnected. On this particular motor, the shift linkage is under this plate. To get to it remove the two screws holding it on. On other motors you either remove the power head, or remove the bolts holding the lower unit on, and access the linkage through the gap between the lower and the leg.
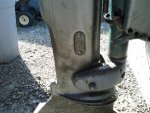
0429131629.jpg

Once its open, remove the lower screw on the bracket. You may have to move the shift lever to get the bracket into position to access it. The screw has a slot in it for a screw driver, but I had much better luck with a socket. The bracket is shown in this picture.
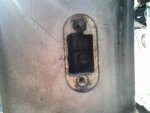
0429131630.jpg

After that, the five bolts holding the lower unit on need to be removed. Four of them come up from the bottom, and one comes down in from the top. (I'll get pictures of that once i get it back together, I forgot to take them to begin with)


After the bolts holding the lower unit are removed it should drop free. You may need to use a rubber hammer to knock it loose by hitting the cavitation plate. I also had to soak the shift linkage with penetrating oil to get it to come loose, because there was so much carbon built up on it.

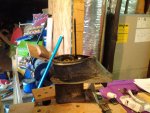
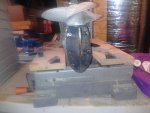
After removing the lower from the motor, I used a workmate bench to hold the lower up to to the rest of the work on it.
0429131642.jpg
 
Last edited:
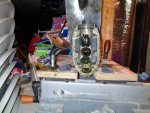
james__12345

Petty Officer 2nd Class
Joined
Jun 26, 2012
Messages
196
Re: Replacing lower seal kit 1968 evinrude fastwin 18 hp
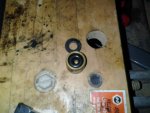
The next step is removing the water pump housing. There are three screws holding the housing on.
0430131507.jpg

After removing those screws, the housing and drive shaft can be removed from the lower unit, along with the wear plate for the impeller
0429131644.jpg

After removing those, the lower needs to be turned so that the the prop can be removed and the screws on the bottom of the skeg can be accessed
0429131645.jpg

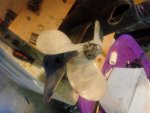
To remove the prop, straighten the legs of the pin holding the prop nut on, pull the pin out, then turn take the nut off.
0429131648.jpg
(picture showing prop removed coming)
 

james__12345

Petty Officer 2nd Class
Joined
Jun 26, 2012
Messages
196
Re: Replacing lower seal kit 1968 evinrude fastwin 18 hp

After removing the prop, the screws holding the skeg on need to be removed. Before fully removing all of those stand the lower unit back up before removing the skeg, so that nothing falls out when you separate the skeg from the rest of the lower. Most of the gears will come out with the skeg. You may have to clean up the shift rod before it will pull through the seal if it has alot of carbon built up on it
0430131504.jpg

Be careful not to drop the drive gear from the upper part of the lower after the skeg is taken off, it will just slide out.
0430131503a.jpg

After separating the skeg from the rest of the lower, lift the prop shaft and drive gears out of the skeg. The shift rod will have to tilt out of the way before they can be removed. Lay the prop shaft and gears aside for now.


Remove the screw holding the shift rod to the skeg (the philips head screw I said not to take out earlier). Remove the old spaghetti seal, and clean up the groove and contact surface around it to prepare for the new seal. Replace the O ring on the philips head screw, then reassemble it.

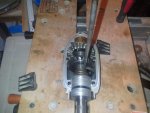
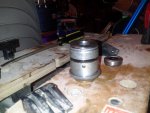
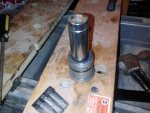
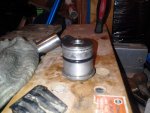
To replace the prop shaft seal, remove the prop shear pin the slide the gear case head assembly (the part on the shaft closest to the prop) from the shaft. After removing it from the shaft, there is a cap on the end nearest the prop that has to be removed. I removed it by gently tapping a straight screw driver into the crack between the cap and the main body of the assembly, and working my way around the cap doing that. After removing that cap, use a seal puller to pull that seal out.

this picture shows the gear case head assembly removed from the shaft, with the new seal laying behind it.
0430130855.jpg
This picture shows the assembly with the cap removed to access the seal.
0430130855a.jpg
 

james__12345

Petty Officer 2nd Class
Joined
Jun 26, 2012
Messages
196
Re: Replacing lower seal kit 1968 evinrude fastwin 18 hp

I clamped the assembly in the workmate to hold it while I pulled the seal. If anyone has a better way of doing that feel free to comment, because it was a little bit awkward doing it that way.

This picture shows the old seal removed.
0430130900.jpg

To put the new seal in, push it in as far as you can by hand, being sure it stays level with the rest of the housing. After that, I found a socket that fit into the groove in the middle of the new seal, and gently pecked it in with a hammer.

This picture shows the socket on top of the seal to drive it in.
0430130904.jpg

After getting the seal seated, replace the cap, and push it back into place, then replace the o ring on the assembly, then its done.
0430130907.jpg

After finishing with that, put the main body of the lower back in the workmate, and pull the drive shaft seal with the seal puller, and install the new one the same way as on the gear case head assembly

Old seal pulled out.
0430130822.jpg
New seal installed.
0430130828.jpg
 

HighTrim

Supreme Mariner
Joined
Jun 21, 2007
Messages
10,486
Re: Replacing lower seal kit 1968 evinrude fastwin 18 hp

Looking good so far. Acetone works well at cleaning up the old 847. Also, I add new sealer around the circumference of the new seals, in case there is imperfections in the housings. I also add it to the grooves for the orings before installing the oring.

When prying on the prop shaft seal, use something other than the housing to pry against, they are very brittle and break quite easily, ask me how I know. Some model have 2 holes in the backside which allow you to use a punch to drive the seal out, rather than using a seal puller.

Looking good though, should be able to help others in the same boat.
 

james__12345

Petty Officer 2nd Class
Joined
Jun 26, 2012
Messages
196
Re: Replacing lower seal kit 1968 evinrude fastwin 18 hp

When prying on the prop shaft seal, use something other than the housing to pry against, they are very brittle and break quite easily, ask me how I know. Some model have 2 holes in the backside which allow you to use a punch to drive the seal out, rather than using a seal puller.

Any suggestions on how exactly to go about not prying against the housing? It was stuck pretty bad in mine, and all I could come up with was maybe laying a small board across it top of the housing, but that still puts the pressure on the housing, and would probably slide out due to the angle. If you have a trick for that I'd love to hear it. And thanks for the suggestion about the acetone. I was using xylene, because its what I had around, but acetone tends to be good for cleaning just about anything. I wasn't sure about putting the 847 around the seals I figured it probably couldn't hurt, but I was going to look into it a little more before I did it just in case, and I sure wasn't going to mention it here unless I knew it was ok to do.
 

HighTrim

Supreme Mariner
Joined
Jun 21, 2007
Messages
10,486
Re: Replacing lower seal kit 1968 evinrude fastwin 18 hp

I made a sort of jig up out of wood for the ones that need prying.

Start with a lenth of say fence board a foot long or so. Drilll a hole in it the size of the seal. Then countersink a hole in the same spot bigger to fit the gearcase head in. That will hold the head, but not allow it to pass through.

Now put the head in from the bottom, so on top of the board you just have the seal showing. You now have something to pry against without damaging the brittle metal of the housing.

Its a little hillbilly, but it works. It sucks breaking them.
 

HighTrim

Supreme Mariner
Joined
Jun 21, 2007
Messages
10,486
Re: Replacing lower seal kit 1968 evinrude fastwin 18 hp

You can use the same jig for removing the ones with the 2 small holes.

Use it the other way so now the housing is on top of the wood facing down. Use a suitable punch, and drice the seal down. It will fall into that voil dril out for the width of the seal, and the housing is protected.
 

james__12345

Petty Officer 2nd Class
Joined
Jun 26, 2012
Messages
196
Re: Replacing lower seal kit 1968 evinrude fastwin 18 hp

That seems so obvious now that you've explained it. I'll make that piece and include it in the pictures as long as I've got drill bits the right size. Thanks.
 

kfa4303

Banned
Joined
Sep 17, 2010
Messages
6,094
Re: Replacing lower seal kit 1968 evinrude fastwin 18 hp

Looking good James. This one is going in my bookmarks. In addition to a wood block to leverage against, a folded rag can also offer a bit of protection when leveraging out old seals.
 

HighTrim

Supreme Mariner
Joined
Jun 21, 2007
Messages
10,486
Re: Replacing lower seal kit 1968 evinrude fastwin 18 hp

You will likely need a hole saw for the outer hole.

If you dont have anything capable of countersinking a hole, just drill 2 seperate holes in 2 pieces of wood, then "marry" them together.

You now have a custom jig.

It only took me 3 or 400 gearcases to figure that one out, and 5 or 6 broken heads, lol.

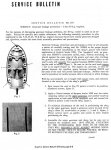
Have you read this?

Asm_LU.jpg
Service_Bullitin_197_Gearcase_Leak_Prevention_5.jpg
Service_Bullitin_197_Gearcase_Leak_Prevention_5b.jpg
 

james__12345

Petty Officer 2nd Class
Joined
Jun 26, 2012
Messages
196
Re: Replacing lower seal kit 1968 evinrude fastwin 18 hp

You will likely need a hole saw for the outer hole.

If you dont have anything capable of countersinking a hole, just drill 2 seperate holes in 2 pieces of wood, then "marry" them together.

You now have a custom jig.

It only took me 3 or 400 gearcases to figure that one out, and 5 or 6 broken heads, lol.

Have you read this?

View attachment 191920
View attachment 191921
View attachment 191922

I had already thought about using two pieces of wood for it. My family owns a cabinet shop, so I should have the hole saws, and if not, I'm sure I can figure something out. May resort to drawing the circle, drilling a bunch of small holes around the edge, then filing the nubs down. Detailing how to do that would make a better option for people without access to the hole saws and all that.

I had read the service bulletin about cutting the seal, but to be honest, I had missed the part about the perfect seal 4. Thankfully for some reason my kit came with an extra of both of the seals, so if I run into any leaks because of not having it, I'll be able to replace them. It sounds like you use the scotch grip 847 in the seal bores. Are you using it or actually using the perfect seal #4 they suggest? I would also like to know if I am supposed to put any sealer in the gasket under the shift rod bushing. Thanks for the suggestions.
 

HighTrim

Supreme Mariner
Joined
Jun 21, 2007
Messages
10,486
Re: Replacing lower seal kit 1968 evinrude fastwin 18 hp

Alot of the products listed in the old manuals and service bulletins in NLA. Scotchgrip 3M 847 is the current reccomended product. It works better than anything Ive tried.
 

james__12345

Petty Officer 2nd Class
Joined
Jun 26, 2012
Messages
196
Re: Replacing lower seal kit 1968 evinrude fastwin 18 hp

Looks like you may have posted while I was making the edit to ask about the gasket under the shift rod bushing. Does it get any sealer on it, or is it ok just like it is?
 

HighTrim

Supreme Mariner
Joined
Jun 21, 2007
Messages
10,486
Re: Replacing lower seal kit 1968 evinrude fastwin 18 hp

If the casting around the bushing is poor, I put some sealer around the edge of the bushing. The o ring gets some grease where the shift rod goes through. The only trick with that is to ensure you do not over drive the bushing. Just until it is flush with the casting. Too much, and it will be too tight to shift, and the o ring will be over flattened, and she will leak.
 

james__12345

Petty Officer 2nd Class
Joined
Jun 26, 2012
Messages
196
Re: Replacing lower seal kit 1968 evinrude fastwin 18 hp

If the casting around the bushing is poor, I put some sealer around the edge of the bushing. The o ring gets some grease where the shift rod goes through. The only trick with that is to ensure you do not over drive the bushing. Just until it is flush with the casting. Too much, and it will be too tight to shift, and the o ring will be over flattened, and she will leak.

On this motor, the o ring fits up into a recessed area in the bushing, and there is a gasket that goes on the bottom. According to the instructions that came with the tool from Frank, that design is meant to be driven down till it bottoms out on the gasket. The o ring cant be flattened because the bushing sticks down below it.
 

HighTrim

Supreme Mariner
Joined
Jun 21, 2007
Messages
10,486
Re: Replacing lower seal kit 1968 evinrude fastwin 18 hp

My mistake, you are correct. I dont do many of the recessed bushings, except for my Javelins. Still though, dont drive it too hard, just the same.
 

james__12345

Petty Officer 2nd Class
Joined
Jun 26, 2012
Messages
196
Re: Replacing lower seal kit 1968 evinrude fastwin 18 hp

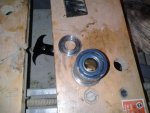
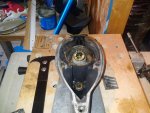
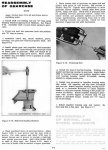
To remove the shift rod bushing, flip the lower over, put the removal tool into the hole, and drive it out.

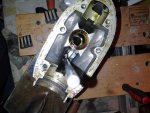
Here is a picture showing the location of the shift rod bushing, and the tool from Frank in it for removal.
0501131808a.jpg

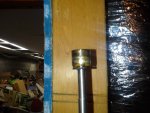
Picture of the bushing and gasket on the end of the removal tool
0501131809.jpg

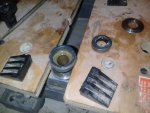
After driving it out, remove the old o ring, and press the new one into the hole.

Picture of new o ring installed in bushing.
0501131842.jpg

After installing the new o ring, flip the lower back over, put the gasket in the bottom of the hole, then drive the bushing back in with the removal tool. To determine when the bushing was seated in the bottom of the hole, I used a trick I learned from hunting with muzzle loaders to be sure the bullet is seated tight against the powder. When driving the bushing in, listen carefully to the sound it makes when you hit the tool. When the bushing is seated in the bottom of the hole, the sound will change. Its very hard to explain how it changes, but its very obvious once you hear it.
 

Milemaker13

Petty Officer 2nd Class
Joined
Dec 24, 2006
Messages
120
Re: Replacing lower seal kit 1968 evinrude fastwin 18 hp

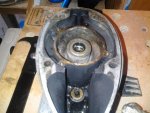
The pictures of the open gear case are going to help me. I need to open my 1958 10hp Evinrude in order to put the pinion gear key back in. What does the end of your drive shaft look like? Splined or a key? I wish mine was splined!
 
Top