Re-coring Deck

jkimball

Petty Officer 1st Class
Joined
May 14, 2013
Messages
220
So, I?m looking for a little advice on re-coring a section of my deck.
I had about ? of my deck replaced before Thanksgiving on my boat. The deck had some pretty significant soft spot from hardware that wasn?t properly sealed and a T-Top that wasn?t sealed at all and used lag bolts to install it (previous owner) and the deck is the only problem area. The surveyor when I bought the boat said stringers & transom were solid and not to worry about them. So I knew what I was getting into.
So, back to the replacement. As I said, I had ? of it done earlier, and only have a very small 2? x 3? section up front between the seats where the table mounts left to replace.
I originally hired a guy to do it, and he gave me a fantastic price, and did excellent work ? the only catch is he isn?t reliable. He said he?d have the whole thing done in 2 weeks, and I ended up having to take it to him twice to piecemeal it together for 3 weeks at a time.
So after the last one, since the section is so small ? I decided to cut my losses and repair it myself.

I?m no stranger to fiberglass work as I?ve laid glass for other things in the past, and I?m a pretty handy DIYer so I can handle the work myself, but I just need some direction on what products, epoxies, resins etc. to use.
My plan is to cut the outer skin off with my oscillating tool, dig out the old rotten balsa core, lay epoxy or whatever is called for, put in new ?? Marine Grade Ply (sealed on both sides with epoxy), sand/grind a 12:1 bevel on the cut area and replace the skin on the new core. Then I would I suppose use strips of glass to seal the cut area, sand smooth and roll on my new kiwi grip. Does this process sound accurate? And am I correct in assuming I could just bed the current skin to the new core using epoxy & weight it down overnight or until cured, or would I need to use some sort of fasteners? Ideally I don?t want to put anymore holes in the core than I have to.
So, if someone could please help me to know what I need of the following that would be great:
Epoxy/Resin: what type or brand do you suggest
Glass Mat: What type, brand, weight etc.
Do I need anything else?

Thanks in advance for the help!
 

Woodonglass

Supreme Mariner
Joined
Dec 29, 2009
Messages
25,927
coat both sides of the Patch with Epoxy and let cure overnight. You can use screws IF you predrill the holes and put epoxy in the holes and on the screws so ensure everything is coated. If seats are mounted you should double patch thickness to ensure stability. What Yr and MFG is your boat. WE LOVE PICS!!!
 

jkimball

Petty Officer 1st Class
Joined
May 14, 2013
Messages
220
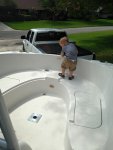
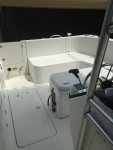
The boat is a '97 Regal Destiny 200 (center console deck boat) and the seats are typical bow rider/deck boat style that are the storage bin/ molded glass type that are part of the gunwale. The boat is the one in my signature, I've attached a few pics of the cockpit/deck. The area in front of the console where the table mount is, is the area in need of replacement. The rest of the deck is new marine ply and is solid.
What kind of glass/epoxies should I use?
 

Attachments

  • Front Deck.jpg
    Front Deck.jpg
    49 KB · Views: 1
  • Rear of Console.jpg
    Rear of Console.jpg
    44.3 KB · Views: 1
  • Console.jpg
    Console.jpg
    62.1 KB · Views: 1

Woodonglass

Supreme Mariner
Joined
Dec 29, 2009
Messages
25,927
I'd recommend US Composites out of Florida for your materials. You could save a few bucks and use VE Poly resin. Very Strong and easier to work with IMHO. You MUST use CSM and Fabric with VE to provide adequate strength.
 

jkimball

Petty Officer 1st Class
Joined
May 14, 2013
Messages
220
I'd recommend US Composites out of Florida for your materials. You could save a few bucks and use VE Poly resin. Very Strong and easier to work with IMHO. You MUST use CSM and Fabric with VE to provide adequate strength.


Perfect, thanks! did my pics come through as I posted them? Also, does the rest of my plan sound pretty accurate?
 

garbageguy

Lieutenant Commander
Joined
May 8, 2012
Messages
1,574
Yep, I can see the pics..Looks like your crew is on the job. How do you like that cooler?
 

DeepBlue2010

Lieutenant
Joined
Aug 19, 2010
Messages
1,305
..................

My plan is to cut the outer skin off with my oscillating tool, dig out the old rotten balsa core, lay epoxy or whatever is called for, put in new ?? Marine Grade Ply (sealed on both sides with epoxy), sand/grind a 12:1 bevel on the cut area and replace the skin on the new core. Then I would I suppose use strips of glass to seal the cut area, sand smooth and roll on my new kiwi grip. Does this process sound accurate? And am I correct in assuming I could just bed the current skin to the new core using epoxy & weight it down overnight or until cured, or would I need to use some sort of fasteners? Ideally I don?t want to put anymore holes in the core than I have to.

So, if someone could please help me to know what I need of the following that would be great:
Epoxy/Resin: what type or brand do you suggest
Glass Mat: What type, brand, weight etc.
Do I need anything else?

Thanks in advance for the help!

My very first concern would be to determine how the deck is attached to the cap. I found this picture on the Internet and I think it can demonstrate my point ( even though it is a funny pic, I did not mean for it to be a joke )
chainSawWhaler585x389.jpg


is the deck resting on a bed of foam as in the picture? How thick the bottom glass layer under the balsa?

These questions will be answered as you start digging and you might need to modify your plans slightly to accommodate.
You don't need to worry about using screws to glue the outer skin back and you don't have to choose between vinyl ester resin and epoxy as mutually exclusive options. Resins are just tools, use them to your advantage as the job calls for.

If the bed the new wood will rest on is strong enough, you can use epoxy to glue the new core to the bottom skin and to glue the outer skin back even if you are going to finish the deck with vinyl ester. Sand bags on top will provide you with the clamping force you need until the epoxy cures.

You need to grind all surfaces that will receive resin whether epoxy or VE. The inner skin must be ground down to fresh glass before gluing the new core to it; same goes for the bottom side of the deck skin otherwise you will not have a good mechanical bond.

Also, when you cut the deck, leave about 6 or so inches all around. You can clean the core underneath with a pray bar or whatever tool and you still can get a grinder or a sanding desk to clean the surface. You can use this "lip" to attach the new skin to. usually the corners are beefed up and enforced with glass and core. You don't want to cut through that unless you have to.

Post pictures of your progress as you go so we can follow along.

best of luck to you M8
 
Last edited:

jkimball

Petty Officer 1st Class
Joined
May 14, 2013
Messages
220
My very first concern would be to determine how the deck is attached to the cap. I found this picture on the Internet and I think it can demonstrate my point ( even though it is a funny pic, I did not mean for it to be a joke )


is the deck resting on a bed of foam as in the picture? How thick the bottom glass layer under the balsa?

These questions will be answered as you start digging and you might need to modify your plans slightly to accommodate.
You don't need to worry about using screws to glue the outer skin back and you don't have to choose between vinyl ester resin and epoxy as mutually exclusive options. Resins are just tools, use them to your advantage as the job calls for.

If the bed the new wood will rest on is strong enough, you can use epoxy to glue the new core to the bottom skin and to glue the outer skin back even if you are going to finish the deck with vinyl ester. Sand bags on top will provide you with the clamping force you need until the epoxy cures.

You need to grind all surfaces that will receive resin whether epoxy or VE. The inner skin must be ground down to fresh glass before gluing the new core to it; same goes for the bottom side of the deck skin otherwise you will not have a good mechanical bond.

Also, when you cut the deck, leave about 6 or so inches all around. You can clean the core underneath with a pray bar or whatever tool and you still can get a grinder or a sanding desk to clean the surface. You can use this "lip" to attach the new skin to. usually the corners are beefed up and enforced with glass and core. You don't want to cut through that unless you have to.

Post pictures of your progress as you go so we can follow along.

best of luck to you M8


Thanks for the feedback! The core in that area is actually just "free-floating" for a lack of better terms. No foam, stringers etc. under it. How I know is that I have a head in my console, and from inside the head, you can access under that part of the deck as that's where the table and table post stows away. So the core is literally just molded into the cap (if that makes sense).

My thought was to cut it like you said, just shy of the full cored size, and scrape out the old core from under that "lip", grind it all down, pack the inner most parts of the "lip" with glass material, to seal it, seating as much core under the lip as I can, then go through epoxying both the inner skin, the core (both sides) and the outer skin, weight it down and fill in where I cut/ground the bevel. then redo non-skid and call it a day
 

jkimball

Petty Officer 1st Class
Joined
May 14, 2013
Messages
220
Yep, I can see the pics..Looks like your crew is on the job. How do you like that cooler?


I love it! other than how heavy it is loading it on/off the boat. Wouldn't be so bad if the boat sat a little lower. But it's the Tundra 85 which unfortunately, they don't make anymore. Great part is though, all of it is now covered under warranty for life! I've already replaced the lid gasket and T latches free of charge. So, once the investment is made it's good to go. I got this one with the boat, and it functions not only as my cooler, but as my seat as well. Which most of the time, I just slide it over the ski locker and have the entire back part of the cockpit open since I stand when I drive anyway.
 

DeepBlue2010

Lieutenant
Joined
Aug 19, 2010
Messages
1,305
Yes, it does make sense. Some boats are built this way. You don't need to pack under the lip with glass material, you can but you don't have to. and only if glass material means actual layers of glass. The thickened resin mix known as peanut butter is not sufficient in my opinion.

If you get 1/4 inch marine ply instead of 1/2, you will be able to get the wood under the lip. You can also cut the first layer into two - or more - sections; glue them to the bottom and then use Titebond 3 or epoxy to glue the second layer also in section so that the seems are staggered and over lapped.

After removing all the old balsa, you will get a sense of how stable the bottom glass layer is. If you don't like how it feels, add a layer or two of 1708 to it. This will make the section much more structurally sound than it was out of the factory. The only reason the factory did not do it is cost.

Be patient when you pry out the deck skin so it comes out one piece. Also, buy Acetone and use it to clean specially after grinding and before glassing or gluing.
 

jkimball

Petty Officer 1st Class
Joined
May 14, 2013
Messages
220
Yes, it does make sense. Some boats are built this way. You don't need to pack under the lip with glass material, you can but you don't have to. and only if glass material means actual layers of glass. The thickened resin mix known as peanut butter is not sufficient in my opinion.

If you get 1/4 inch marine ply instead of 1/2, you will be able to get the wood under the lip. You can also cut the first layer into two - or more - sections; glue them to the bottom and then use Titebond 3 or epoxy to glue the second layer also in section so that the seems are staggered and over lapped.

After removing all the old balsa, you will get a sense of how stable the bottom glass layer is. If you don't like how it feels, add a layer or two of 1708 to it. This will make the section much more structurally sound than it was out of the factory. The only reason the factory did not do it is cost.

Be patient when you pry out the deck skin so it comes out one piece. Also, buy Acetone and use it to clean specially after grinding and before glassing or gluing.


When you say use 1/4" vs 1/2", are you saying you'd lay two layers of 1/4" material, to stack up to 1/2" total thickness? I'm just trying to envision it. When I was suggesting I would pack it with glass, that's what I was referring to was some resin soaked CSM, shoved into the cavity. But it sounds as if this may not even be necessary? I just want as structurally sound and thorough of a job as possible. I'm thinking the job material wise will probably set me back ~$200 depending on how much CSM I'd need to Pack the cavity (unless I stagger the 1/4" like you're suggesting if I understood right) and fill in the cut line from removing the old skin
 

DeepBlue2010

Lieutenant
Joined
Aug 19, 2010
Messages
1,305
Yes, this was what I meant. The problem is with a thick material such as 1/2 inch ply, you can't maneuver the wood to fit under those lips. And if you cut to sections, the thickness of the wood might make alignment a bit of a problem. In situations like these, I find a 1/4 inch to be much more flexible and forgiving and allows me to get the job done the way I want it.

CSM is not structural glass at all. It is mostly used to promote adhesion and build thickness. Filling underneath the lips with layers of CSM will not give this pivotal area the structural integrity it needs.
 

jkimball

Petty Officer 1st Class
Joined
May 14, 2013
Messages
220
Yes, this was what I meant. The problem is with a thick material such as 1/2 inch ply, you can't maneuver the wood to fit under those lips. And if you cut to sections, the thickness of the wood might make alignment a bit of a problem. In situations like these, I find a 1/4 inch to be much more flexible and forgiving and allows me to get the job done the way I want it.

CSM is not structural glass at all. It is mostly used to promote adhesion and build thickness. Filling underneath the lips with layers of CSM will not give this pivotal area the structural integrity it needs.


Got it, I think. I understand Completely about the CSM not being structural now that you say something. I've attached a picture of (to the best of my understanding) what I think you're talking about with staggering the 1/4" ply. Can you check it out and let me know if this is what you're thinking?
 

Attachments

  • Deck Re Core.png
    Deck Re Core.png
    39.7 KB · Views: 0

DeepBlue2010

Lieutenant
Joined
Aug 19, 2010
Messages
1,305
You can do that if the area is sloped. What I meant was to align the seams between layers in such a way that they are not coincided. For example, if you lay the pieces of the first layer so that the seams are horizontal, the seams of the second layer would be vertical. Like this ..

Untitled.png
 
Top