Plating, not the eating type

gm280

Supreme Mariner
Joined
Jun 26, 2011
Messages
14,585
I am mingling with electrical plating of metal hardware and was wondering if any other iboaters have tried it? I am gathering the materials to do nickel plating for some hardware I have laying around for a couple small refurbishing projects.

I am first going for nickel plating since I have basically everything needed already. But there are zinc, copper (which I have done before) and most any type electro plating you can imagine. I would love to be able to chrome plate, but that really involves an iffy setup with some really serious hazard chemicals.

I'll take some before and after pictures of the nickel efforts. Not sure anyone really wants to know or even how to do it. But I will post my first attempts anyways...

Nickel plating doesn't involve anything toxic to get going. I mean I wouldn't want to drink the solution, but it isn't harmful to handle it either. So we will see.

The small projects are a typical floor 2 ton trolley jack hardware that I totally disassembled because it wasn't working anymore. I already powder coated all the large parts. And the other refurbishing project is a corroded working model steam engine that was in the same cabinet with Ferric Chloride (I use that chemical to make PC circuit boards) and the fumes/vapors attacked the metal of the steam engine. So time to refurbish it too.

Let me know if you ever done any electro plating. I am curious...
 

gm280

Supreme Mariner
Joined
Jun 26, 2011
Messages
14,585
I finally got everything together to make the Nickel Acetate solution and will start that process tomorrow. I would allow it to make over night, but I really want to monitor it for safety reasons.

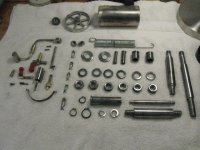
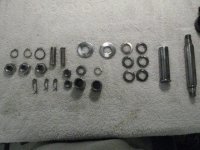
Well these are the part to be plated. There are a little of the 2 ton floor trolley jack parts, but also some of the steam engine as well. Other videos on YouTube makes it look pretty easy. I only hope so...
Before Plating.JPG
Parts on the left side are basically the steam engine parts. The right side floor trolley jack parts. The few parts at the top are the steam engine boiler and flywheel.
IMG_0002.JPG
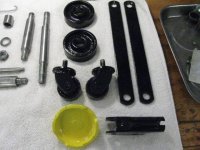
Here are a few floor jack parts that were powder coated already.
IMG_0003.JPG
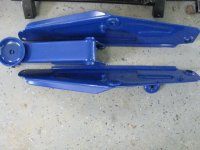
These are the floor trolley jack sides and such powder coated.

Hope the plating goes well. I will post them as well.
 

racerone

Supreme Mariner
Joined
Dec 28, 2013
Messages
36,033
I have done some plating.----Copper and hard chrome.,-----Have you studied / looked up the term ---" throwing power "-----There is more to good plating than dipping the parts in a solution and throwing the switch.
 

gm280

Supreme Mariner
Joined
Jun 26, 2011
Messages
14,585
I have done some plating.----Copper and hard chrome.,-----Have you studied / looked up the term ---" throwing power "-----There is more to good plating than dipping the parts in a solution and throwing the switch.
Yes, I have read and viewed tons of material about all types plating. I have successfully plated copper before. But I want to plate nickel for the luster and corrosion resistance properties. I have the nickel strips to make the Nickel Acetate and then the capable power sources to make that solution and plate the hardware. We will see what happens. However, if for some reason it doesn't come out to suit me, I will hang with this until success is achieved. I very very rarely give up on most anything I tackle. A huge learning curve usually fills in until I have a successful finish.
 

Scott Danforth

Grumpy Vintage Moderator still playing with boats
Staff member
Joined
Jul 23, 2011
Messages
47,296
any process where you learn something is a valuable experience, no mater what the outcome. remember, Edison did not fail 10,000 times building a light bulb. he simply learned 10,000 ways to not make a light bulb.

rock on GM......rock on

if successful, will you take donations to plate parts?
 

gm280

Supreme Mariner
Joined
Jun 26, 2011
Messages
14,585
Even with all the other things going on today, I did manage to get the Nickel Acetate going. I used CLEAN containers washed beyond washed, to remove any contaminates and set up one with about a half gallon of distilled white vinegar. Then I added a good amount of typical table salt to make the vinegar more conductive. Then I used four nickel strips, two for each alligator clip. Two for the positive side and the other two for the negative side. Then I connected a 12 volt 1 amp wall-wart to it and plugged it in. Instantly bubbles started on the negative side. And in little time a nice shade of green started to take over. I allowed that to work for about a couple hours checking on it occasionally while I was making four Carpenter Bee Traps. Seems we have a lot of Carpenter Bee already and they love my adirondack chairs I built. If I don't stop them, the chairs will look more like Swiss Cheese chairs.

Well after finishing those bee traps, and deploying them around, I went to the Nickel Acetate solution and it wasn't bubbling anymore. I thought the wall-wart was burned up and toast. But it was the nickel stripes totally dissolved on the positive side. So there was no longer any circuit connections for it to bubble. The solution was a very nice emerald green color. I may start it back up again tomorrow...not sure yet.

More to come...
 

gm280

Supreme Mariner
Joined
Jun 26, 2011
Messages
14,585
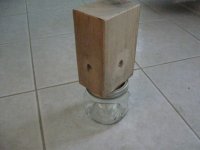
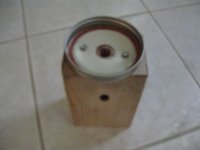
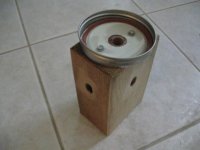
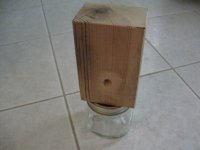
Those carpenter bee traps are nothing more then a mason jar attached to a 4" x 4" x ~6" block of wood. You measure up from the bottom of the wood (where you will attach the jar) about ~2" up from that end and drill a 1/2" hole at ~45 degrees (there about) upwards roughly in the center of the side. You drill that same type hole on all four sides. Then you drill a 1/2" hole up in the end to intersect those four holes you just drilled in the sides. If you do all that right, you now have five 1/2" holes that intersect inside the wood. Then drill a hole in the lid of the mason jar so it will be centered inline with the hole up the center of the wood block. That allows the bees to crawl into, but they are too stupid to get back out. The reason for angling the side holes up at the angle is so they don't see daylight as they crawl in. And once they get to the intersection of all the holes, they merely crawl out seeing the light from the mason jar and are stuck there forever. Basically any type jar will work that has a lid you can drill through and attach. It could be a clear plastic peanut butter jar, or mayonnaise or even a pickle jar. The 1/2" holes are the size carpenter bee cut out of the wood. So they love that the hole is already made for them.
IMG_0001.JPG

IMG_0002.JPG
IMG_0003.JPG
IMG_0004.JPG

These are what I made. And I can tell you, there really work too... We had a problem with them a year or so ago, and I made these traps and amazing how many we trapped. If you are seeing wood powder or dust below any wood surface, you have carpenter bees.
 

gm280

Supreme Mariner
Joined
Jun 26, 2011
Messages
14,585
Well Here are the plated parts and the setup I used to do them.
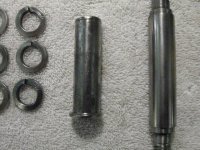
Nickel Plated (1).JPG
This is the parts I plated for a cheap little trolley jack I was working on. Hard to see but the plating came out pretty nice. Actually better then I expected.
Nickel Plated (2).JPG
Even the rust pitted parts plated after removing the rust and cleaning.
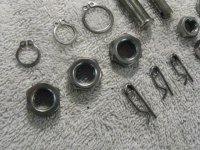
Nickel Plated (3).JPG
Yes I even plated the "C" clips.
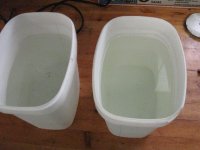
IMG_0005.JPG
Here are the two tubs of solution for this plating project. I used Muriatic Acid for the chemical cleaning part. And I learned instantly that Muriatic Acid isn't anything to take lightly. I started to use it straight out of the bottle. That is a big NO NO! The instant I opened up the factory sealed plastic bottle, visible fumes poured out and I could tell this isn't going to work. But I did pour the right hand container full strength of it anyways. I had to instantly turn on a fan to even be able to be there. So I sealed that container and regrouped. I ended up taking it out the shop and pouring it all back into the factory bottle. Then I filled that container about two thirds or a little less with distilled water, and then poured about a third with the Muriatic Acid. That seems to settle things down a lot. The container on the left is distilled water with nothing else in it.
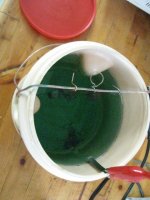
IMG_0007.JPG
In this container is the Nickel Acetate. You can see the items hooked on the copper wire across the top. And the nickel strips are on the side. The positive terminal attaches to the nickel strips while the plating parts attach to the negative terminal. I had a lot of parts I wanted to plate, and actually did plate a lot as well with just a few left to do.

First you clean the part you want to plate. I did this with all types of cleaning products and I even sand blaster some of them. Then you have to chemically clean the parts prior to plating. This is more important then you may think. Even your hands can deposit oils on the part to mess up the plating process. So rubber gloves are a must. So are safety glasses. Don't want any of the chemicals getting into you eyes at all. Once you initially clean the parts, you attach it to a copper wire so you can hang it on the negative buss bar on top of the Nickel Acetate container. So you dip the part with the copper wire attached into the Muriatic Acid bath to chemically clean the part. Then into the distilled water to rinse off the Acid bath. Then into the Nickel Acetate for the plating operation. You will see a lot of bubbles coming off the part to be plated. That is how you know the plating is working and the voltage is attached correctly as well. No bubbles, no plating. I used a 12 volt 1.5 amp wall wart. But I must add this. If you are plating large items, you may need a more powerful power supply. The more area, the more current and volt you will need. I did only four parts at a time and it worked out okay for my situation. Check the part(s) and once you like the plating on the part, you take it out of the Nickel Acetate and again. Wash it in the distilled water container and then dry it off. Some of the plating comes out nice and shiny, but some come out a dull gray coating. You can take the dull gray coating and make it shine with just a little polishing effort. The shine will come out.

Hope this helps anyone thinking of doing this. Not a professional setup, but works perfectly for a hobby shop setup...
 

poconojoe

Lieutenant Commander
Joined
Sep 10, 2010
Messages
1,966
Very interesting!
I remember back in school, not sure if was middle school or high school, doing some electroplating in science class. That was many moons ago. (I'm in my 60's now)

I doubt anything like this is still taught nowadays. Too much of a safety issue. Funny thing is. It might have been a little bit dangerous, but a good way to learn how to work safely.

We also had woodworking, metal, auto mechanics and auto body shops.
Today's kids are too pampered to engage in things like this.

Powder coating always impressed me. I have zero experience with that, but it sure looks nice!
 
Top