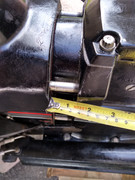
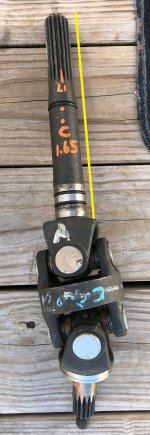
Outdrive does not want to re -install in boat

MyLord

Cadet
Joined
May 27, 2020
Messages
26
I have a 1995 bayliner 1952 model cuddy with a 4 cylinder 3 liter .Alpha 1 Gen 2
Gear In forward, outer shoe ball finger in shift mechanizmem on right. drive shaft locked to left and the shifter foot is aligned in the straight forward position.

I have rebuilt with new oem parts the bellows etc at the back end of the boat. I am now trying to install the outdrive .. as I do so it "stalls" at the 1 and 1/2 inch mark and does not seem to want to go in any further. ( Fat new O Ring?) I have searched and read you need more persuasion to get the outdrive in but before that, is there any other trick I can use to make it go inside? While looking down , the u joint closest to the outdrive as u look back to front is in the [_] position with the next u joint vertical ||.

failing all else What is a good persuasive tool that won't break the outdrive ? MMMany thanks
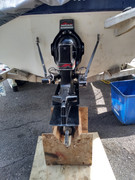
 
Last edited:

JASinIL2006

Vice Admiral
Joined
Feb 10, 2012
Messages
5,673
Did you slather a lot of grease on the end of the drive shaft? Sometimes, if you put the grease on thick, it causes the driveshaft to hang up on the o-rings near the splines. A really thin coat is all that's needed and it helps avoid that problem.

I also know that there have been times when I've struggled for quite a while trying to get the darn drive on, and I just leave it until then next day. Then, when I try again, even when I haven't changed anything, it slides right it.

In this case, I'm guessing the o-rings are too heavily greased.
 

zellerj

Petty Officer 2nd Class
Joined
Dec 13, 2017
Messages
136
I would pull it back out and make sure the drive is in forward (tang on outdrive facing forward, not off to the side), and check to be sure the remote control is in forward (acceptor of the tang is facing straight back). The tang in the outdrive has a tendancy to move on you, that is why some advise using a bungy or something to hold the prop counterclockwise. Also now is a good time to check that the gaskets are in place (some permatex helps) and the o ring for the water passageway is in place (again some permatex helps). Now check to be sure the outdrive and the bell housing are on ther same plane so you don't have to lift it too much (lower or raise the trailer at the front). Now you are ready to mate the two halves. If it is stuck with an inch or so to go, you need to rotate the prop shaft slightly counterclockwise to move the splines a little so that the drive shaft can slip inside of the coupler on the back of the engine. Once the splines are lined up, it should slide right in.

I know it is a head scratcher the first few times you try it, but it will go in if all is lined up, the shift tang and receiver are lined up, and the splines on the drive shaft are lined up. Believe, and it will work. May the force be with you.
 

Scott06

Admiral
Joined
Apr 20, 2014
Messages
6,440
The drive and shifter are in forward and the shift mechanism is aligned full forward (in front of drive just below bellhousing)?

If its in drive turn the prop CCW to ensure driveshaft is engaged with the Coupler, its shouldnt turn if it is. You might not be in the coupler yet and truning the propshaft and thus the driveshaft (if its in gear) is generally neccessary to line up the splines.

If the splines are aligned and you are in the coupler yes grease can be a deterrant to landing it home, especially if you were tweaking alignment with a greased up alignment bar. If you are 100% sure the driveshaft splines are aligned and the shift mechanism is aligned , you can give it a good shove with a deadblow or block of wood and hammer. You have to be careful doing this, dont break it ...
 

Bondo

Moderator
Staff member
Joined
Apr 17, 2002
Messages
70,957
I have rebuilt with new oem parts the bellows etc at the back end of the boat.

Ayuh,..... Welcome Aboard,..?? Did you check the gimbel bearin' to coupler alignment,..??
 

Campfire

Seaman
Joined
Apr 22, 2020
Messages
64
I just went through this. Do everything these guys told you. Once mine got that close, I used a size 12 specialty tool. Just enough to get some threads showing and then I used my ratchet to snug it up the rest of the way.

I think you need to rotate your prop counterclockwise to engage the splines. Both times I have reinstalled my drive successfully, I have had to rotate the prop more than I expected. The other 30 times I failed at reinstalling the drive was because I did not do what the guys here told me to do.

Is there a rubber O-ring close to the end on the splines shaft of the sterndrive? That was what was causing me to have to persuade it with my boot.
 

Lou C

Supreme Mariner
Joined
Nov 10, 2002
Messages
12,672
I have a Cobra not an Alpha, so I just R+R it in neutral, but what I have found that helps may apply to the Alpha as well:
1)get a drive jack this helps you get the drive at exactly the right height to get the driveshaft to line up with the coupler...it also REALLY saves your lower back, probably the best money I ever spent on tools for working on an I/O power set up.
2)use an alignment tool to center the gimble bearing, slide it in all the way then give it a bump top, bottom left and right, this centers the bearing
3) don't use grease on the O rings that go on the driveshaft it can get in the groove on the driveshaft under the O ring and cause trouble because the O ring now sticks up just a hair, use motor oil only. I use OMC triple guard grease on the driveshaft splines only. I put a bit of motor oil on the part of the driveshaft that winds up in the gimble bearing as well.
On the Cobra since its R+R'd in neutral, I use a long thin screwdriver in the ujoint cross to turn the driveshaft just enough to make the splines line up. This also really makes a difference. Kind of like installing a manual trans on a rear drive vehicle, if the splines don't line up it will fight you for hours.
doing it this way it just slides right on, no pushing, banging, kicking etc.
 
Last edited:

crazy charlie

Vice Admiral
Joined
May 22, 2003
Messages
5,501
Its a 50/50 proposition all the time.Goes right on sometimes and sometimes not.Just loosen up everything ,pull the drive back several inches until you can turn the prop ccw.Turn the prop 1/2 turn which will change the position of the shaft and then try installing again.It should go on with a slightly different approach.Charlie
 

flashback

Captain
Joined
Jun 28, 2002
Messages
3,963
I had one like that once and had my wife bump the starter while I pushed on the drive and it slid right up. Be sure to remove prop and pull the coil wire..
 

MyLord

Cadet
Joined
May 27, 2020
Messages
26
Many thanks guys , I'm compiling a list to double check against anything that I need to do or redo. Usually since It takes me about 150 tries with many tiny adjustments to get these mechanical things right in place. I feel that it is hanging up on the o rings on the drive shaft. I have oiled them with synthetic automatic tran fluid... so it does not rot the rubber ... there are 3 o rings on this shaft with the 2 main ones at the 1 1/2 inch mark
 

achris

More fish than mountain goat
Joined
May 19, 2004
Messages
27,468
Watch my video. It deals specifically with that hang up point.
 

MyLord

Cadet
Joined
May 27, 2020
Messages
26
Got it in !!!!!!
Thanks Achris I watched it and quite a few more , including this one that actually used the kick to get the outdrive in...https://www.youtube.com/watch?v=4jG36Yj76vM&t=957s

I used a 2x4 and a 10lbs hammer gently nudging in the outdrive .. it worked my advise don't change out your o rings unless they really need it !!


Bt Doctur

Supreme Mariner
Joined
Aug 29, 2004
Messages
19,291
If you changed the gimbal bearing you did not center it in the coupler with the alignment bar. So the way you installed the drive MIGHT WORK.
If the alignment is actually off you will be removing the motor to replace the coupler in under 50 hours
 

MyLord

Cadet
Joined
May 27, 2020
Messages
26
Actually I did use an alignment bar and the process for adjusting the gimbal bearing. The process seems to be kinda inaccurate due to the eyeball process though so who knows? I thought about using small levels on the boat and alignment bar but no one has ever mentioned that ....
 

Bt Doctur

Supreme Mariner
Joined
Aug 29, 2004
Messages
19,291
When done correctly the alignment tool will slide all the way in with no resistance into the coupler . It"gimbals" means its like an eyeball, moves in all direction.When you hit the bar up,down,left, right, etc to align the bearing with the coupler . If you cannot install the tool all the way by hand, you need to adjust the front of the motor .
If you bearing alignment was corrected by forcing the drive on ,it should now almost fall off it you tried to remove it.
If yes, your forcing it on aligned the bearing, inputshaft and coupler.
If you choose to remove it and it is very difficult to remove, your alignment is way off and will cost you a new coupler, if it slide right off it only costs you a new gasket
 

MyLord

Cadet
Joined
May 27, 2020
Messages
26
Thank you , I will reread that carefully , and decide what to do..

One thing that bothers me is that when I took the outdrive off initially , it was hard to do.... and when I greased the alignment tool then pulled it out ... there were no spline marks on the end of the grease coated alignment tool , is that a concern?
 
Last edited:
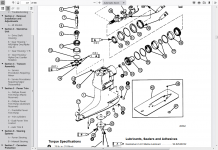
Bt Doctur

Supreme Mariner
Joined
Aug 29, 2004
Messages
19,291
One thing that bothers me is that when I took the outdrive off initially , it was hard to do

may be very dry grease or poor engine alignment. Alignment tool will slide in all the way till it bottoms out without any real force and pull out the same way.
 

Bt Doctur

Supreme Mariner
Joined
Aug 29, 2004
Messages
19,291
measure from the end of the inputshaft to to the flange where the U joint goes and put tape on the alignment bar to check your depth
 

Attachments

  • 1622385374691.png
    1622385374691.png
    221.9 KB · Views: 3
Top