New Silverline owner/refurbisher

MTJames

Seaman
Joined
Jun 24, 2017
Messages
51
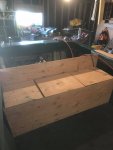
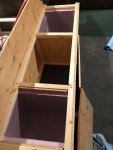
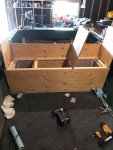
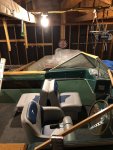
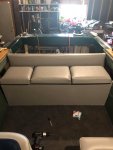
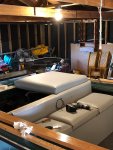
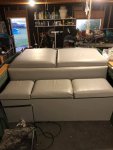
rear bench near completion. Have a lot of left over 4" memory foam gonna try out for the seats and back rest. Waiting on vinyl then it's finish work on that. After that's finished, gotta the motor actually running (waiting for carbs to get done for rebuild), then it'll be onward for the engine cover. Still working out ideas on that.....I.E. going one piece with a front lift, or frame it up so it was like original and lift on the sides and middle. Leaning more towards full frontal lift type. Will have that set up so it'll be out of the way completely when working on the motor.
 

Attachments

  • photo297948.jpg
    photo297948.jpg
    221.1 KB · Views: 0
  • photo297949.jpg
    photo297949.jpg
    253.6 KB · Views: 0
  • photo297950.jpg
    photo297950.jpg
    376.8 KB · Views: 0
  • photo297952.jpg
    photo297952.jpg
    247.8 KB · Views: 0

MTJames

Seaman
Joined
Jun 24, 2017
Messages
51
Seats are in and installed. Rear bench project complete. First time giving upholstery a go. Not perfect by any means, but not too bad. Next up are the fluids/plugs change, then on to the engine cover. Gonna miss my original splash date for next weekend, but won't be long after that, I hope. Been trying to motivate my bro to get the carbs done (rebuild). LMAO

Gonna give an idea a try for draining out the oil from the motor. Have a paint pan (it's new) gonna punch a hole in to install a drain tube. Idea is to drain the oil into the paint pan and out the drain tube into my used oil tub. Dunno how it will go, but worth a try. Better than just draining the oil into the transom and letting it drain out the drain hole.
 

Attachments

  • photo298484.jpg
    photo298484.jpg
    278.3 KB · Views: 0
  • photo298485.jpg
    photo298485.jpg
    223 KB · Views: 0

MTJames

Seaman
Joined
Jun 24, 2017
Messages
51
Well it's been quite the journey....another long cold winter (garage not heated), and another year flew by. It's been a minute since my last update. lol Carbs finally got rebuilt, cleaned out and reinstalled. Took a bit but she now runs. albeit for a short period. I have to clean out the cooling system and most likely replace the thermostat. I've been more concerned with getting her to run, now that it does, I need to get that cooling system cleaned out and operating. I did notice that the idle was way too high.....1500 rpm high. I need to get that down to a more comfortable 500-600 before I even think about shifting it into gear. lol once those bugs are worked out it'll be water ready. Thinking this weekend I'll have the bugs worked out and the engine cover complete. The Mrs. already has the tubes and ropes ordered up, so gotta get this ole girl set. LOL
 

Bayou Dave

Lieutenant Commander
Joined
Dec 13, 2012
Messages
1,780
Glad to see that you are back at it. With the tubes already purchased you have no choice but get her on the water! lol
 

MTJames

Seaman
Joined
Jun 24, 2017
Messages
51
lmao yeah no kidding, DRS.


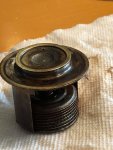
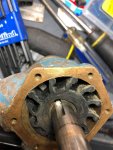
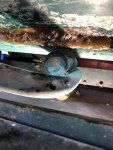
Well got the water lines pulled from the tube off the stern (motor compartment side) to the oil cooler which included the impeller. Pulled the impeller housing off the water lines and checked out the impeller. Low and behold it was "froze" from sitting. The solid pin that goes between the shaft and impeller was somehow inbetween the impeller "blades" completely out of its slot. Not exactly sure how that happened but it did. LOL anyways the fins looked pretty good. Only a spot where the fins contacts the brass insert is where there was a" bad spot", but I don't think it will affect the cooling process. About three or four fins were bent from resting on that brass insert for 15 years. The rest of the fins made contact with the housing just fine. I think once the heated water hits those bent fins, they will come back to shape like the rest of the impeller. Wire brushed inside of the impeller housing, put a very thin layer of grease around the contact areas of the impeller inside the housing. And put a thin layer of grease on the impeller shaft. Now the line assembly is all attached to the impeller housing waiting to be installed back on the motor.

Next issue is to check out the thermostat, which I am positive is frozen up as well from sitting for all that time. Have the bolts from what I think is the thermostat housing.....makes sense to where that is. Front of the motor, on top where the volt regulator is installed on. Has two water lines (short) going in to it on the one side and one line coming from it on the other side. Trick is that the two lines are bent at a 90 degree angle to the side and the one line is straight down on the other. have the two bolts removed on top of the housing and one on the front removed. It does move a little bit when using a screwdriver to "pry" it around. Going to be a challenge for sure. But that is going to be saved for tomorrow after gym time. LOL
 

MTJames

Seaman
Joined
Jun 24, 2017
Messages
51
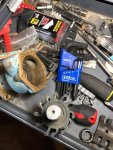
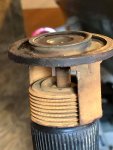
Cooling system complete. Might (actually will) need a new impeller, but will see how it performs before I get a new one. Trying to make it last through this season. Thermostat taken out, just had to pull 4 more bolts where the two water lines go into the side. Looked around for a new one, but the one I got, the top was too tall, so I cleaned up the old one, sprayed WD-40 on it and tested it. Nice thing even though it is old, it popped open well before the water even got hot to the touch. I was able to pull it out of the pan of water without even a hint of pain. Water felt like a hot shower so I am guessing around 110-120 degrees it opened up, which is pretty close to what it is rated at (54 degrees C or ~ 120 F). That rating is coming off the thermostat itself. Will post some pics here in a few when I find them.

I also found a couple more grease points I missed, one for the steering bushing and one that looks like for the tilt screw (a cap on top of the trim area). Will find out for sure tomorrow.
 

MTJames

Seaman
Joined
Jun 24, 2017
Messages
51
[No message]
 

Attachments

  • photo317157.jpg
    photo317157.jpg
    194 KB · Views: 0
  • photo317158.jpg
    photo317158.jpg
    248.7 KB · Views: 0
  • photo317159.jpg
    photo317159.jpg
    335.8 KB · Views: 0
  • photo317160.jpg
    photo317160.jpg
    187.2 KB · Views: 0

MTJames

Seaman
Joined
Jun 24, 2017
Messages
51
Ran the motor for a little bit, had a couple water leaks from the motor, those got fixed. no water leaking from motor, now. One did spring up that'll require fiberglass patch. had a spot on the bottom of the boat that leaked some water, not bad, but enough that caught my attention from the water leaks from the motor. Easy fix, I have messed with fiberglass for over 20 years on aircraft in the Air Force so that a piece of cake. There was a bad spot on the bottom of the boat about 3" long and and about 1/4" wide. East fix with 4 layers of glass and that should take care of that small issue.

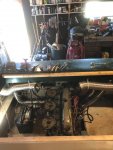
Went to start on the engine cover and low and behold i damn near forgot about the ventilation. Soooo took basically all day to take care of that. Will post a pic later. most of the time it took running for parts. LOL

Have the engine cover "frame" laid out. Have the braces cut up, just need to cut the plywood to size, install the hinges, gonna put two layers of foam on that vs. the one on the bench seat I made. Reasoning is to further reduce the engine noise and to help in weight disbursement when people lay or sit on it. I'll get a pic of that right before i start with the foam and cover.
 

MTJames

Seaman
Joined
Jun 24, 2017
Messages
51
Well the engine cover is complete. Just need to adjust the floats in the carbs a little bit and do a fiberglass repair (minor to me) 3" cut in the bottom of the boat most likely from me when I was redoing the floor.
 

Attachments

  • photo317623.jpg
    photo317623.jpg
    258.5 KB · Views: 0
  • photo317624.jpg
    photo317624.jpg
    55.5 KB · Views: 0

MTJames

Seaman
Joined
Jun 24, 2017
Messages
51
The bad spot on the bottom of the boat cleaned up and first stage of the fiberglass on. Just waiting for the cure sand down and add a couple overlays on.
 

Attachments

  • photo317663.jpg
    photo317663.jpg
    282.9 KB · Views: 0
  • photo317664.jpg
    photo317664.jpg
    304.1 KB · Views: 0

MTJames

Seaman
Joined
Jun 24, 2017
Messages
51
Sooo it's been little over a year since my last post so here's an update:

Everything as far as upgrading is done. Seats, stringers, floor, wiring, fuse block, ground block, fuel issues pretty much cleared up with some adjustments made, cooling system cleared out and new impeller put in (used old one to run dry in garage for seconds at a time), replaced the exhaust hose (found out there was a hole in the exhaust pipe temp fixed that). Splash date went from 2019 to this weekend (was working out the fuel/carb issues) now it's been extended, again, to next June (2021).

Did a final run with muffs on in the driveway before I WAS gonna take her to some water for load testing. Got the cold blooded girl cranked up and ran for a short time. Heard a rattling sound pop up, shut it down right off. Went to turn it back over and motor didn't turn. Hand turned the motor and was definitely not free as it should be. I have a feeling that a rod let loose. Soooo now back to the drawing board.

Gonna pull the head and see if I can see any damage in side. Pretty sure that the motor will need to be pulled, which I didn't expect to do when I built the rear bench. I left room for standard maintenance (impeller, etc), but not so much to pull the motor. With that being said I should be able to pull it enough to where I can turn the motor sideways to get it out of the hole.

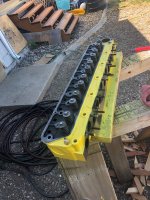
I initially planned on dressing her (the motor) up this off season. Put in new gaskets, have the head flat checked, paint and chrome the valve cover and flame reducer (intake cover). Also in this off season was gonna build a swim platform (using oak) little short of full width of the boat and install it as well. Guess will be doing that after i finish with the motor now. LOL
 

MTJames

Seaman
Joined
Jun 24, 2017
Messages
51
Good Lord......another year gone and still no splash. Naturally things kept popping up (more like life) that kept me from getting to the updates more often. So with that being said here is the latest and greatest, yet another year later.

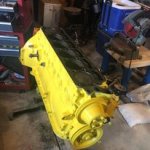
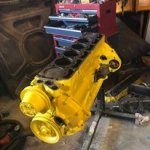
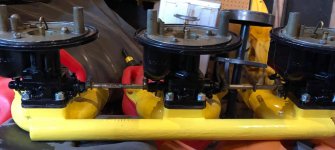
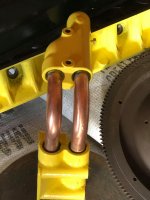
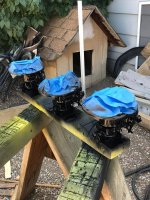
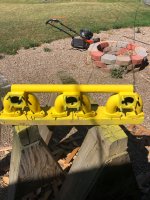
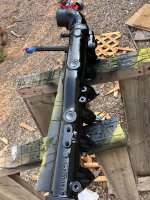
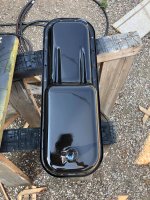
Had an issue with the "clutch" springs all over inside the bell housing early last fall. Still within boating season, yet. Was on my final driveway run with the muffs before I took her to the water to see how it ran with a load.......still on trailer in the water...when after I ran it, I let it cool down, went to restart the motor froze up. I was HOT and disappointed at the same time. Another reason I haven't done much with since the last update, I was just that frustrated with it. I finally had it ready and this happened. It ran soo good over the few driveway runs that I felt good about the motor having a load on it. I fixed a couple kinks in her which were mostly carb related (getting them synced). Sooo I took the motor out (which is when I found out the "clutch" blew up) to make sure it wasn't froze up. Great news it wasn't. It was just that "clutch". I decided to go ahead and take it down to the block (with guts still in it that is) and prepped/painted everything. Just finished with painting the block. Have the gasket set ordered and on the way to get it put back together. I will have to get the pictures and download them to the laptop then post them here. Definitely a huge difference from the way it was to the way it looks now.
 

MTJames

Seaman
Joined
Jun 24, 2017
Messages
51
ok soo here are all the pics. hopefully all of them
 

Attachments

  • block left paint.jpg
    block left paint.jpg
    11.2 KB · Views: 4
  • block right paint.jpg
    block right paint.jpg
    11.9 KB · Views: 4
  • hulk full intake mock up.jpg
    hulk full intake mock up.jpg
    82.5 KB · Views: 4
  • hulk cooling pain.jpg
    hulk cooling pain.jpg
    229.9 KB · Views: 4
  • hulk carbs paint.jpg
    hulk carbs paint.jpg
    479.2 KB · Views: 3
  • hulk intake paint.jpg
    hulk intake paint.jpg
    517.4 KB · Views: 3
  • hulk exhaust paint.jpg
    hulk exhaust paint.jpg
    586.3 KB · Views: 3
  • hulk oil pan paint.jpg
    hulk oil pan paint.jpg
    499.3 KB · Views: 3
  • hulk valve cover and head combo.jpg
    hulk valve cover and head combo.jpg
    348 KB · Views: 2
  • Hulk Valve cover paint.jpg
    Hulk Valve cover paint.jpg
    510.6 KB · Views: 1
  • Hulk Head paint.jpg
    Hulk Head paint.jpg
    431.3 KB · Views: 3
  • hulk flame arrestor.jpg
    hulk flame arrestor.jpg
    277.1 KB · Views: 4
Joined
Jul 3, 2021
Messages
25
Well it's been nearly a year later now......almost done (minus the seats engine cover). Been too bloody cold this past winter to work on the boat. Wiring done (with new blade style fuse block and new grounding block). Ended up getting new oil light, ignition switch, and spot light switch. Minor adjustments to the dash to make them work. Completely redid the wiring under the dash. The previous owner had a bird's nest of wires connected to each other and random power/ground wires connected together. I am surprised it actually had all things working without it burning up. Picked up carb rebuild kits. Since it has the trip carbs (AQ170), had to obviously get 3 of them. LOL
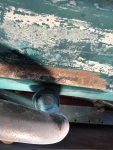
Only issue I have now is for some reason the hot wire going into the ignition switch is "hot" when key "off" but not when key "on". When key "on" the power is coming from starter wire, but nothing from the 'hot" wire. The "ignition" has no power coming from nor going to when the key is "on". Something that has to be on the motor side going into the ignition switch that is goofy. Just need to look into that more. The ignition switch is new so that can't be the problem. Had same issue with the old ignition switch which is why I though it was the switch.

Still need to somehow lube up the screw for the trim, I have a feeling that it will be needed to be taken apart to do that. Didn't see any zerk fittings to grease it up.
Kill switch Problem?
 
Top