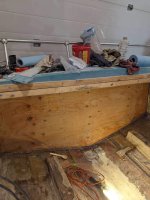
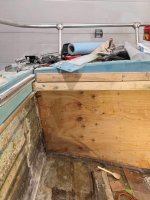
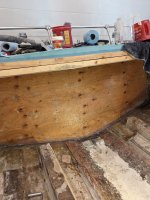
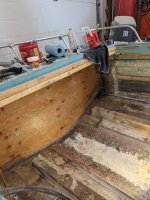
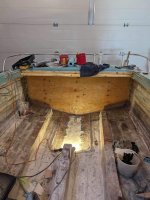
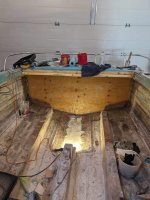
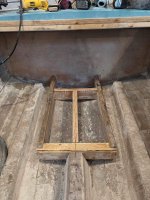
New project.

kcassells

Fleet Admiral
Joined
Oct 16, 2012
Messages
8,715
A copy/paste. You should be fine.
The thickness of a boat transom depends on the type of boat and the engine it uses. According to a boat repair forum, the standard thickness of a transom for an outboard motor is between 2 and 2.25 inches1. Another source suggests that the coring alone may be 1 to 2 inches thick, with two sheets of 3/4” material for a total thickness of 1-1/2” being the most common2.

More;

Mercruiser Sterndrive;
The recommended transom thickness for a Mercruiser Sterndrive is between 2 to 2.25 inches 123. However, it is important to note that the driveshaft length is a critical factor in determining the minimum thickness of the transom 1.


Look for specs for the engine on the internet. I think they also have a template you can download to use.
 
Last edited:

Rranger

Chief Petty Officer
Joined
May 18, 2009
Messages
449
I’ve decided on 2 sheets of 3/4” with a two piece sheet of 1/2” in between and glued together with titebond 111 glue, then fiberglassed to outer skin and then two sheets of cloth and corners on the inside. I have the 1/2” in two pieces to make up the middle sheet and don’t see the problem using 2 separate pieces between the 2 sheets of 3/4” sheets. Going to have to buy longer stainless bolts for the pod but oh well kaching kaching. Anyone got a good source for stainless bolts .
 

Rranger

Chief Petty Officer
Joined
May 18, 2009
Messages
449
Been busy with other things. Will be back at it tomorrow. changed mind and using 2 sheets of 3/4” plywood which is what it had on before, and even with rot on the bottom of the transom, u could reef on the outdrive and motor and no flex anywhere, everything was tight as a rock. I should be 2 and 1/8 thick glass and wood, plus pod and inside 3/8” plate bolted thru the hull to the pod.
My clock is ticking to get all this glassing done before Dec 31 holiday departure.
 

airshot

Vice Admiral
Joined
Jul 22, 2008
Messages
5,080
Awesome job....sure makes me glad I have an aluminum boat though !! I am way to old for all that work....
 

Rranger

Chief Petty Officer
Joined
May 18, 2009
Messages
449
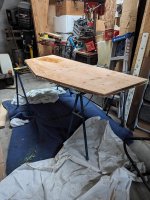
Got the two sheets laminated together. Need to trim it up a bit was awkward with no help. Next up paint with straight resin before install and glassing. . In the meanwhile building my floor brace at rear for deck support and drainage around old I/O engine compartment, plus floor joists at the 8’ mark fro rear for plywood floor sheet joint support. Get it all ready then start going on the glassing.
 

Attachments

  • IMG_1667.jpeg
    IMG_1667.jpeg
    636.5 KB · Views: 5

Rranger

Chief Petty Officer
Joined
May 18, 2009
Messages
449
Last of my grinding gelcoat today, and built floor braces, and the rear support for floor although after thinking on it tonight may need to tweak it a bit. Hope to install transom tomorrow and get it glassed in, and get some glass on the bracing. Pics tomorrow.
 

Rranger

Chief Petty Officer
Joined
May 18, 2009
Messages
449
New improved rear support for floor fabbed up its in pieces til I glass it together, along with the forward floor supports. Had to do some more grinding on the transom outer skin had to many high spots of previous glass and the new transom wasn’t as flush as I wanted. Got that done and tomorrow can install the transom and hopefully get the two layers of glass and cloth with a couple more corner strips. And hopefully get some glass on the supports mentioned. Will be bedding them with pl construction adhesive and then tabbing them in. Progress pics tomorrow.
 

Rranger

Chief Petty Officer
Joined
May 18, 2009
Messages
449
Upon further review I will not be using PL I’m pressed for time and can’t wait 5hree days for it to cure, so will use peanut butter.
 

Rranger

Chief Petty Officer
Joined
May 18, 2009
Messages
449
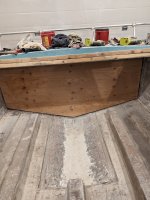
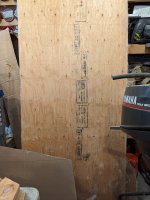
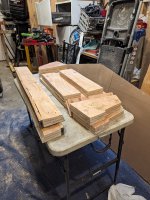
A pic of dry transom fit and pieces of future floor supports an fiberglassed deck sheets.
 

Attachments

  • PXL_20231222_161837005.jpg
    PXL_20231222_161837005.jpg
    3.3 MB · Views: 18
  • PXL_20231222_161309472.MP.jpg
    PXL_20231222_161309472.MP.jpg
    6.5 MB · Views: 18
  • PXL_20231222_161301898.MP.jpg
    PXL_20231222_161301898.MP.jpg
    8.1 MB · Views: 18

Drivewayboater2

Petty Officer 1st Class
Joined
Aug 21, 2019
Messages
334
Consider rounding the edges on the top of stringers with a 3/4” router bit. Glass will wrap over much easier when you get to that point.
 

Rranger

Chief Petty Officer
Joined
May 18, 2009
Messages
449
Consider rounding the edges on the top of stringers with a 3/4” router bit. Glass will wrap over much easier when you get to that point.
I got most of my supports rostered for easier glassing thanks for the heads up.
 

Rranger

Chief Petty Officer
Joined
May 18, 2009
Messages
449
As mentioned rostering supports today got some left. They are plywood three sheets tabbed together, and I like to put a piece of plywood on the flat on top for holding the floor sheet screws better than trying to screw into the plywood sheets when they are side by side, screws don’t holid as well. Need to cut a few more top strips and router edges then ready to glass the bottom and up the sides before bedding them, then can glass the tops and tab them in. I like to use a few ceramic tile spacers to keep the supports a bit off the deck.
And got my transom installed and got the edges PB’d in and tomorrow two sheets of cloth with 3” and 5” overlap and done that part.
 

Attachments

  • IMG_1682.jpeg
    IMG_1682.jpeg
    447.1 KB · Views: 14
  • IMG_1674.jpeg
    IMG_1674.jpeg
    504.2 KB · Views: 14

Rranger

Chief Petty Officer
Joined
May 18, 2009
Messages
449
Well first sheet of cloth went real well. Give it a bit and do the second then done til boxing day.
 

Attachments

  • PXL_20231224_191956186.jpg
    PXL_20231224_191956186.jpg
    3.2 MB · Views: 10
  • PXL_20231224_191954215.jpg
    PXL_20231224_191954215.jpg
    3.8 MB · Views: 10
  • PXL_20231224_191945619.jpg
    PXL_20231224_191945619.jpg
    3.8 MB · Views: 10

Rranger

Chief Petty Officer
Joined
May 18, 2009
Messages
449
Second layer of cloth on the transom finished. So it’s basically done. Wondering can I paint it with some of the 10 cans of tremclad paint I inherited. There is a set of doors that encloses the transom and had the batteries and fuel tank behind it. Starting Tuesday get the deck supports in so I can install the deck sheets pre glassed and ready to go.
 

Attachments

  • IMG_1689.jpeg
    IMG_1689.jpeg
    579 KB · Views: 26
  • IMG_1688.jpeg
    IMG_1688.jpeg
    556.1 KB · Views: 25

Rranger

Chief Petty Officer
Joined
May 18, 2009
Messages
449
Got some lower back spasms going on and leaving Sunday for three weeks in Mexico so shutting things down til we get back. Would have liked getting a little more done but it’s tough being anal about it and lazy 😎
 

Rranger

Chief Petty Officer
Joined
May 18, 2009
Messages
449
Well lazy after return from Mexico it was real hard to get motivated. Took a pic of today’s install basically a floor support that adds some transom support. Get this in and a couple floor supports where my two length wise sheets of plywood meet in middle of the floor and should be ready to do floor. I have the sheets already glassed two layers top one bottom so should go quick. I am planning on extending the two fiberglass stringers to the transom, and tie them in. For whatever reason, probably lazy, the previous Reno guy left the stringers like they are when he filled the i/o hole and installed the engine pod.
 

Attachments

  • IMG_0071.jpeg
    IMG_0071.jpeg
    705.4 KB · Views: 5
Last edited:
Top