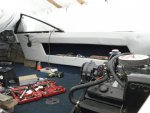
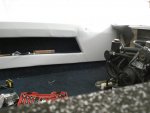
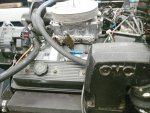
my new old 1988 ss20v

ab59

Ensign
Joined
May 10, 2017
Messages
979
Coostv- I just finished downloading your recommendation and boy did I need that ! Could have used it a couple of months ago as well , been doing this all without a manual of any kind for the most part. I found an old manual a week or two ago for an up to 1986 model at the used book store here but there is of course no information on a 1988.
Thanks again
a.b.
 

coostv

Petty Officer 1st Class
Joined
Mar 21, 2010
Messages
230
Yeah it is a big help. Glad to hear it was the correct one for you!

I just remembered this page I had bookmarked, http://www.hastings.org/~stuart/cobra/ some helpful info there too.

There are many posts I remember reading here at Iboats as well. If you do an internet search for how to adjust cobra drive you will probably be led right back to Iboats forums and many past discussions. I didn't have many issues with mine ('89 4.3L Cobra), bought it in '10 and sold it to my brother in law in '15, it is still going strong.
 

ab59

Ensign
Joined
May 10, 2017
Messages
979
I like the way the Cobra is set up , easy to service . Funny how those who took care of their Cobra setups were happy with their outdrive and the ones that did not go the extra mile have NOTHING good to say about them.
I keep loosing ground on this mild restore somehow. I have the Holley 4010 carburetor off of the engine and have the power valve out of it . I'm looking for the reason that it is dumping gas and I mean a lot of gas , the smell chokes you from 50 ft. away. I bought a rebuilt carburetor so that I did not have to do all this but looks like I'm in the middle of it anyway. Hope I can figure this out today , starting to get brain cramps lol.
Well it's a cool morning for a welcome change so I better get out to the boat.

thanks for your help------a.b.
 

ab59

Ensign
Joined
May 10, 2017
Messages
979
Now that I have the carburetor somewhat under control and the drivers side panel is finished enough to mount and so then permanently mount the controller where I have things screwed into place , I can get back to the task at hand of the outdrive and shifting . Hope these nice cool days at 100* hold up and we have seen the end of 110* plus. Maybe tonight I can get everything mounted for testing tomorrow . I may be able to mount the seats by next week if I don't have to go back and re-do half of the stuff I thought was done. I guess as long as I can get out of bed in the morning I've got most the battle won, lord willing.
 

ab59

Ensign
Joined
May 10, 2017
Messages
979
With the carburetor seemingly fixed I then mounted the drivers side panel today and then the controller . I found a couple of problems in the shifting and throttle pretty quickly . First I tried to shift into forward gear but it felt funny , easy to shift but no mechanical feel like nothing was on the other end. I checked the shift cable mount and found that the shift cable dog knot had popped out of the bracket so I stuck it back in started the engine and suck her in forward gear . There was a short grunt and I ran to the back of the boat to see my prop spinning . I thought , Hot Damn , I may be in business I hit neutral and then into reverse , again a short grunt I ran to the transom and the prop was spinning the other way , I may be closer than I thought to putting this little girl back into the water.
The throttle is another problem and needs attention badly. I had to disconnect it from the carburetor to test the outdrive because it would throttle up way to high and not return with the stick.
Looks like tomorrow will bring a new experience in adjusting the throttle cable and then I need to tweek my upholstery job so It dose not look like I made it myself. I did make it myself but not exactly a professional looking job. I have an old Teak swim step and I may tear it apart to use the slats for trim on the side panels.
Will see . DSC02078.JPG DSC02079.JPG DSC02081.JPG
 

Watermann

Starmada Splash of the Year 2014
Joined
Jan 12, 2013
Messages
13,791
Nice work, it's always a good thing to learn and expand. I had to do the same thing with my Mercruiser, studied and watched videos all the time. Oh and bought specialty tools and 3 grease guns. :lol:
 

ab59

Ensign
Joined
May 10, 2017
Messages
979
Thanks Watermann my upholstery work is a little on the simple side but I plan to go back and add some red white and blue stripes at the inside corners, should perc it up some. I have added a few new tools myself on this project that I may never need again but I guess if I continue to fix these boats up for resale I will use them in the future. I must have surfed the net for ten hours yesterday and could not find any useful information on the throttle cable adjustment at the carb but somehow I got things straightened out today and I hope it stays that way. Looks like I'm about ready to check my under dash connections and clean same then install the bottoms of the consoles . Then the rest of the side panel work and new seats.
Well I'm getting plagued by weird popups and some one screwing with this page so Im gone.
Hope to make good progress now, will see.
 

ab59

Ensign
Joined
May 10, 2017
Messages
979
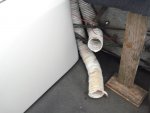
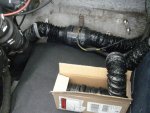
Anyone have a picture of how their blower hoses are run in there Starcraft ? I have a 1988 20 ' open bow . Can't seem to find a complete diagram of how this should be set up . The original hoses were still there but not really connected to anything but the blower . I have at least two on each side of the engine but I am missing some of the other vents on top of the gunnels so I'm not sure where anything belongs.
 

Watermann

Starmada Splash of the Year 2014
Joined
Jan 12, 2013
Messages
13,791
It's a pretty simple set up. One vent is for the blower outlet and it faces aft, the other vent faces fore and shouldn't have a hose on it. The blower hose intake is put in the lowest point in bilge as gas fumes are heavier than air, connect hose to the inline bower and then hose to the outlet vent. Have as few bends as possible in the hose. I have only one clam shell vent for the blower outlet and 2 intake louvered type vents for intake.
 

ab59

Ensign
Joined
May 10, 2017
Messages
979
I think that I get the blower hose in the bilge area but this thing has a second hose coming from the same vent on the rear gunnel as the blower and goes to nowhere. I also have at least two missing vents ( holes are cut but no vents ) in the center top aft. There are also two more vent hoses coming from the other side just like the blower set up but there is no blower there. If that isn't enough it looks like there were also two ( one on each side of the gunnels ) more vents just in back of the windshield area as the holes are cut in there also. Kinda got me scratchin my head a little. I keep searching the net hoping to find a 1988 about the same size that has some good pictures so that I might be able to see where all this stuff is supposed to go but have not had any luck yet.
Will post some pics tomorrow.
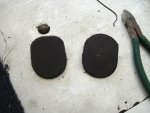
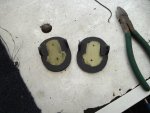
I got my second pair of exhaust shutters in the mail last week and a second dealer sent the same flappers that the last guy did and they do not fit this engine. This has now been nearly 7 weeks of trying to just buy the shutters and dealers claiming that they sent the rite parts for my year model and charge me 25% restocking fee for sending me the wrong part so I'm out the money and they have 25% and their part back. What a scam. I'm not sending these last ones back , I took the grinder out and am custom fitting them . After the grind I will shoot them with some of that crap on TV that is suppose to glue a small aluminum boat back together . I was seriously considering making a pair out of aluminum and that coating and using some stainless washers for the holes. At least I am finding out what parts dealers I can trust on this one, Not too many.
 

ab59

Ensign
Joined
May 10, 2017
Messages
979
This is what I had to do to make the flappers fit

DSC02092.JPG DSC02093.JPG

Would have liked to put the ones in that fit from the factory but since no one seems to have a clue as to what does fit this was about my only choice.
 

Watermann

Starmada Splash of the Year 2014
Joined
Jan 12, 2013
Messages
13,791
That's nuts you can't get someone to sell you the right parts :mad:
 

ab59

Ensign
Joined
May 10, 2017
Messages
979
I was surfin around today looking for some good pictures of a 1988 Starcraft sterndrive and I came across your short Chieftain restore post . I have been getting comments about being a marine Fred Sanford around here because I always have a boat in some stage of repair out back. When I was reading you posts I called the little woman into have a look at what a REAL restore takes and it seems the smart comments have backed way down, .lol. Then I told her that when I found the rite Islander or Chieftain for myself that WE would be tackling the restore together ! LOL I bet she don't say anything when I do find one and hopes I forget about her helping . Through the years , her love for the outdoors has, shall we say , diminished to the point of no interest.
At least I get to hunt and fish in peace..........
 

Watermann

Starmada Splash of the Year 2014
Joined
Jan 12, 2013
Messages
13,791
Thanks for taking a look at my Chief and the compliment. It's a ton of work and takes drive to get across the finish line on one of these old boats not too mention some outlay of money.

Glad I added my pics back into the threads for reasons like this. It's too bad we've had some popular and really active members get all bent out of shape recently (because of PB dumping pics) and stomp off to their corner of the internet.
 

ab59

Ensign
Joined
May 10, 2017
Messages
979
I am glad that you restored most to the pics as well, you have documented great restore pieces and many many people have and will get a great deal out or reading the threads . Your work ethic and dedication to your restores is impeccable and second to know one.
I guess that PB thought that hey would try and blackmail everyone with loosing their pics or paying a large amount of money but whoever it was that decided to use this tactic really shot the company in the foot. Myself I would like to see so many people pull their membership that the company shuts down, I just don't like bully's and hard nosed tactics .
I know what you mean about the costs of restoring one of these boats, I've already got 4250.00 into this mild restore and I never had to replace the foam or any rivets and I'm not done yet ! I may try to stay with outboard restores in the future , I'm pretty sure I would have spent a lot less on the re-power end.
 

Watermann

Starmada Splash of the Year 2014
Joined
Jan 12, 2013
Messages
13,791
Yeah I deleted my account with PB and told them off in the process. All my pics were moved to OneDrive and any future print jobs will be done by someone besides PB. I really like the metal prints I got from PB but they aren't getting one thin dime from me in the future.

My Chief's re-power and new trailer donor boat cost me 2k and a great road trip to get it in Sandpoint ID.

Sandpoint-Idaho-home-Image_large.jpg
 

ab59

Ensign
Joined
May 10, 2017
Messages
979
Dang that is a beautiful place , I can see why you had no qualms about driving over there . Would have been worth it just to go there and fish a few days.
I guess that I don't understand the PB thing and not to sure I really understand how the picture thing works. I just take a picture upload it into my pictures in my computer then when I want to post a picture I simply attach it to whatever post I need it for. Don't know why anyone would need a third party to host their pictures.
The best thing about the way I have always done it is that I am not beholding to anyone for any service so the pics stay until the hosting site removes them.
I have noticed the same blanked out PB pics in other threads on different sites so looks like they tried this crap on a lot of people and they did not bend over either. I think that PB may have committed suicide with their little blackmail scheme , would serve them rite to have to shut down because of this action and the amount of people refusing to be held hostage for ransom .
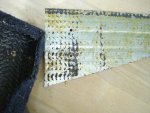
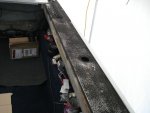
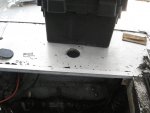
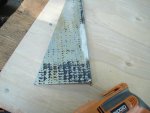
On a lighter note that black crap all over the top of the gunnels has got to be carpet glue and backing and not the bed liner stuff. I was kinda going along with the bed liner thought until I just pulled the carpet off of some smaller braces in the transom or aft area only to find that same thick black crud under the carpet ! No reason for any bed liner in these places , just glue and carpet DSC02099.JPG DSC02103.JPG . I don't know if some one used two different kinds of glue , or it is just the rubber carpet backing melting into the glue but what a friggin mess it made and a lot of extra elbow grease to get it off .
 

ab59

Ensign
Joined
May 10, 2017
Messages
979
Dang, earthquakes , floods , Hurricanes , whats next frogs and red rivers ? Glad I have this boat far enough along to use it , sure looks like we may all need one . Hard to believe that it was 114 degrees here last week .
consoles going in tomorrow.
 
Top