my new old 1988 ss20v

ab59

Ensign
Joined
May 10, 2017
Messages
979
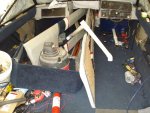
A lesson that just I keep learning over and over again and one that anyone that restores a boat should head. From the first time I started tracing wires looking for an answer to the gas level gauge I have seen that I should have done these things while I HAD the DECK and ENGINE OUT of the boat ! Now while trying to check my trim sender I find that the STEERING IS FROZEN as well and I have already cased the transom in with paneling that I believe has got to come out to get to the linkage so that I can trace down the problem of steering. I hope that it is no more than a bad cable but access is extremely difficult .
A word to the wise , once you get your deck out ( and engine if it is a sterndrive ) check your instruments as available and wiring below deck for damage and or functionality because it's one huge pain in the whole lower region if you don't for access to them later.
The fun of restoration is beginning to dwain but I shall persevere these last few hurdles. Wiser next time I guess.
 

ab59

Ensign
Joined
May 10, 2017
Messages
979
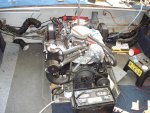
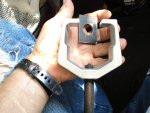
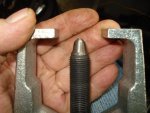
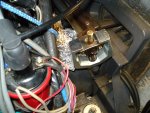
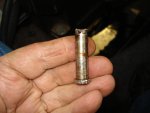
Well after two days of fighting I finally got the pin out of the power steering yoke at the end of the cable. What a bugger bear that was. Used an air hammer gun , a pitman arm puller, a hammer, then a bigger hammer and a torch and it finally came loose . That after pulling all the panels back out so I could access the transom area ,whew . All this just to find out if it is the cable , man, I almost hope it is just to justify all the work but in the back of my mind I don't want to spend another 150.00 on another rack system.
Hard to remember that I was looking for how to remove the trim sender so I could test it with an ohm meter when all this other stuff showed up. Or should I say was waiting to be discovered.

Click image for larger version  Name:	DSC02435.JPG Views:	1 Size:	756.3 KB ID:	10638084Click image for larger version  Name:	DSC02436.JPG Views:	1 Size:	767.2 KB ID:	10638085Click image for larger version  Name:	DSC02437.JPG Views:	1 Size:	752.0 KB ID:	10638086Click image for larger version  Name:	DSC02438.JPG Views:	1 Size:	729.6 KB ID:	10638087
 
Last edited:

ab59

Ensign
Joined
May 10, 2017
Messages
979
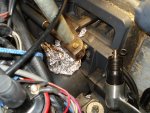
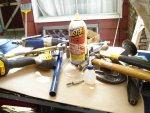
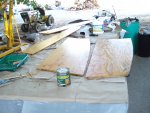
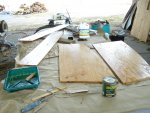
DSC02441.JPGDSC02448.JPGDSC02443.JPGDSC02447.JPG The pitman arm puller was the most effective tool that I used but I did have to grind it down to fit up inside the the pin shaft and made a little bridge for the puller to bite since it was nearly as wide as the steering arm . Worked good with a good soaking of PB and some torch work now and then.
 

Watermann

Starmada Splash of the Year 2014
Joined
Jan 12, 2013
Messages
13,794
What a PITA that was to get that steering arm pin out, Mercruiser just uses a SS bolt and nyloc to connect the ram to the arm.
 

ab59

Ensign
Joined
May 10, 2017
Messages
979
Wonder if the Mercruiser pin would fit this Omc setup . I was thinking about using a stainless bolt with a long shoulder and cutting it to the right length and drilling the cotter pin hole but if the Mercruiser pin would work I may use that.
Is the Merc. the same steering arm and pin assembly ?
 

Watermann

Starmada Splash of the Year 2014
Joined
Jan 12, 2013
Messages
13,794
The SS bolt for the MC is shouldered and rather than a pin you can use a nyloc that won't need to be super tight and won't back off. I really don't know if they are interchangeable between MC and OMC.
 

ab59

Ensign
Joined
May 10, 2017
Messages
979
I got the steering cable out now and it is froze up without a doubt and has 1987 stamped on it next to the 17' length . Do you know if a new pin comes with the cable ? . Seems like it would but everyone is cutting corners for bigger profit these days. Since this old one lasted 27 years I don't think I have to worry about what the pin is made of if it is the same material as the original and comes with the new cable. Did not see a pin in the ads for new cables. I will look again and maye call some one I guess.
 

DLNorth

Chief Petty Officer
Joined
May 26, 2016
Messages
432
If you can't find something local, check MMC, McMaster Carr, they have a good selection of items. Easy to order and it gets to your doorstep fast.
 

ab59

Ensign
Joined
May 10, 2017
Messages
979
screw it , seems like I should be able to find a SS bolt to fit it good enough . A lock nut sounds easier than drilling a hole for a cotter pin anyway so think I'll go with that. Good enough for a Mercruiser then good enough for an OMC I would think.
Tested the trim gauge sender and it's bad as well. tests at 199.99 ohms no matter what position it's in so I think that is the problem with the gauge being pegged out all the time.
These little gadgets are getting expensive , will be glad to finish this one.
 

Watermann

Starmada Splash of the Year 2014
Joined
Jan 12, 2013
Messages
13,794
No a pin wouldn't come with the cable, too many variants for connections to the steering ram since the cables are for multiple different set ups.
 

ab59

Ensign
Joined
May 10, 2017
Messages
979
Ya , guess you're right about that . Wishful thinking again on my part. Would be nice to buy everything in one place at one time though for a change.
I think a SS bolt with a long shoulder will work just fine anyway . I haven't measured the size yet but it may just be a standard 3/8 pin.
 

ab59

Ensign
Joined
May 10, 2017
Messages
979
Anyone know of a way to fix a bad sending unit for a trim gauge ?
 

Watermann

Starmada Splash of the Year 2014
Joined
Jan 12, 2013
Messages
13,794
Pull it apart, clean the contact plate and brushes might do it.
 

ab59

Ensign
Joined
May 10, 2017
Messages
979
Well I don't guess that i could do it any harm, it's already screwed up , right ? I've started making the front cushions but when that's finished I will take the sender apart and see what I can do. Maybe I can find an exploded view of the sender somewhere on the internet.
 

ab59

Ensign
Joined
May 10, 2017
Messages
979
Steering cable got here already and I just got finished installing it. Works good now.
while tightening up the cable I noticed that the trim sender wires looked tight , and at further investigation I found that they were nearly severed with rubber jacket broken and wires touching ! Thought I had saved a hundred thirty bucks but after the repair the gauge still does the same thing so I guess I won't get out that cheap .
Tomorrow I will put the side panels and rear panel back in place along with the instrument cluster panel and continue on making the front cushions . Now that I know there is no danger of fire from the wiring I think that I can launch the boat without a trim gauge . For now anyway. Will get the sender apart to look at it after that .
 

ab59

Ensign
Joined
May 10, 2017
Messages
979
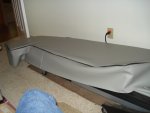
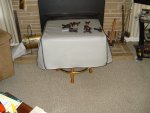
Panels are finally back in, had to recut and vinyl the rear panel . For some reason it sat too low and was hitting the top of the bottom half of the doghouse. Speaking of which the wife and her mother finished the skin for the top turtle shell for it and tomorrow I will staple it and one of the front cushions together and install the top to the doghouse , finally .
The end is Nigh .
 

ab59

Ensign
Joined
May 10, 2017
Messages
979
Watermann you must be physic ! All but two of the skins are finished. Have two small ones to make that go on the front of the consoles . I went ahead and sparred the cushion base boards today but won't finish them to the extent that I can staple it all together until tomorrow.
Looks like a mess but I'm feelin better about this all the time.

DSC02449.JPGDSC02451.JPGDSC02450.JPG
 

Watermann

Starmada Splash of the Year 2014
Joined
Jan 12, 2013
Messages
13,794
Nice work on the vinyl, that stuff is not the easiest to work with, my hats off to the seamstress!
 
Top