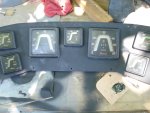
my new old 1988 ss20v

ab59

Ensign
Joined
May 10, 2017
Messages
979
Funny how one thing stops another when trying to reassemble things. Finally finished the vinyl on the console after taking it back apart to do so. Went to place the windshield in place but realised that I need the dash hood in place before I can do that so once again ass backwards I go again .
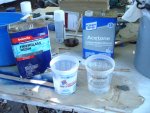
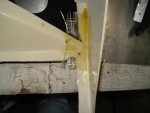
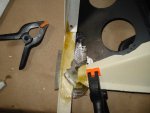
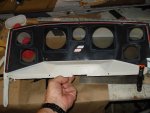
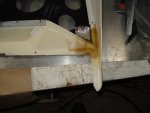
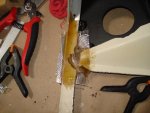
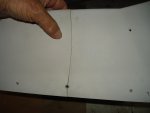
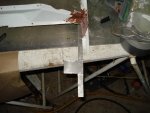
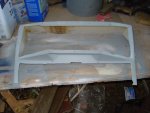
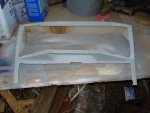
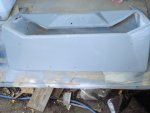
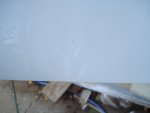
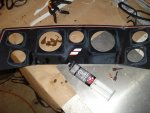
Here are some pics of my attempt to reconstruct the dash hood , a little rough right now but nothing a couple of days of sanding and re applying more filler won't fix . A little more cloth and resin in a couple more spots and if it sands out fairly smooth I will put the vinyl to it and see what it looks like.
fingers and toes crossed------
 

Attachments

  • DSC02271.JPG
    DSC02271.JPG
    763.9 KB · Views: 1
  • DSC02266.JPG
    DSC02266.JPG
    758.3 KB · Views: 1
  • DSC02267.JPG
    DSC02267.JPG
    732.1 KB · Views: 1
  • DSC02268.JPG
    DSC02268.JPG
    733.7 KB · Views: 1

ab59

Ensign
Joined
May 10, 2017
Messages
979
sure would have liked to have found another dash in better shape for this but it is what it is .
 

Watermann

Starmada Splash of the Year 2014
Joined
Jan 12, 2013
Messages
13,791
Working on broken fiberglass and plastic is a real pain, just keep working at it, you'll get it right.
 

ab59

Ensign
Joined
May 10, 2017
Messages
979
Anyone have any idea of how big the fuel tank is on this SS 201 v ? Forgot to look for tags on the tank when I had the deck out. ( too easy I guess ) . I could not get the fuel gauge to work and need to figure a few things out like if I need a sending unit , how big the tank is and what it's measurements are and lastly do i have a bad gauge or sending unit or both. Could even be the wiring i guess. No fuses on this one to worry about as it's go breakers instead.
 

ab59

Ensign
Joined
May 10, 2017
Messages
979
great video . I'm not sure that I am not missing a wire somewhere at the tank. Will pull the inspection hatch and see .
thanks for the info, I had found a written piece but it was not nearly as well explained as the video.
 

ab59

Ensign
Joined
May 10, 2017
Messages
979
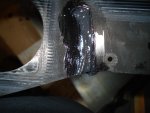
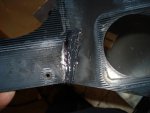
Well I certainly suck at fiberglass repair , I must have sanded and re applied the filler on these cracks 5 times and have not gotten it right yet. If I sand it down nice and smooth the cracks show up and if I try to leave a little meat on there It shows up as a glob . I'm going to hit the biggest one once more and good or bad that is going to be the way it gets mounted.
These black composite panels for the dash need a little repair as well but not sure what to do about it . Not sure fiberglass body filler will stick to that material but I would think some JB weld would, will see I guess. Could just put some vinyl over it but then I would be covering up all the Starcraft stuff.


DSC02288.JPG
 

Attachments

  • DSC02288.JPG
    DSC02288.JPG
    715.7 KB · Views: 1
  • DSC02285.JPG
    DSC02285.JPG
    771.7 KB · Views: 1
  • DSC02286.JPG
    DSC02286.JPG
    729.4 KB · Views: 1
  • DSC02287.JPG
    DSC02287.JPG
    711.4 KB · Views: 1

Watermann

Starmada Splash of the Year 2014
Joined
Jan 12, 2013
Messages
13,791
You could always try 2 part epoxy to fill the cracks and sand smooth once cured, that's what I did on my Johnny outboard motor cover and it seemed to work out.
 

Decker83

Commander
Joined
Apr 5, 2011
Messages
2,593
I would take a rotary file and make a grove were the cracks are. Then go back and fill the grove in. If I'm not mistaken
there is gel coat on this piece. Do a google on gel coat repair. You should find some good information on repairing the cracks..
It does look 100 percent better than it did.
 

ab59

Ensign
Joined
May 10, 2017
Messages
979
Decker83- it was just some vinyl paint over plastic and not gel coat so that's what I sprayed back onto it. I sanded the clumpy spots down one last time last night , re shot the paint and called it good. Not perfect but it's on there after a year of screwing around.

classiccat--That is a good trick that I will put in my bag of tricks for further use but a little too messy for what I'm working on right now. I've already been making a big mess out of this thing without making more to clean up.

Watermann-- I went down to HD and found the only dark colored epoxy that they had, lock tight brand I think, and that't what I just poured to it. will see in a little bit if I did any good.
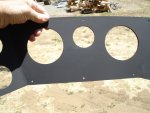
I have an old plastic welder from HF that I bought 20 plus years ago and thought I'g give that a try but when I turned it on the barrel began to get hot and melt the handle so guess 20 yrs is too long to wait to use one .
so the Epoxy approach sounded like a good thing to try.

True to course when I crawled under my console to install the shroud , I reached up and pulled myself up under the console only to crack the living dog crap out to the center of the *(%$$$^$#$ shroud . I'm gluing it where it sits and calling it good It is mostly covered where the crack is anyway.
 

Watermann

Starmada Splash of the Year 2014
Joined
Jan 12, 2013
Messages
13,791
Oh man talk about a battle royal going on! :popcorn:
 

ab59

Ensign
Joined
May 10, 2017
Messages
979
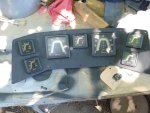
well here's where this little chore is rite now , sure could have been worse . will install back into the dash after dinner


DSC02289.JPGDSC02290.JPGDSC02291.JPGDSC02298.JPG
 

Watermann

Starmada Splash of the Year 2014
Joined
Jan 12, 2013
Messages
13,791
Looks like you were able to fix up the cracks, did the epoxy work out?

Also after fixing the plastic dash panel in my SS I used Krylon Max to paint it, the blue was faded bad and seems to be adhering well still after a year.
 

ab59

Ensign
Joined
May 10, 2017
Messages
979
The Epoxy worked great , thanks for the recommendation . Much easier to mix and apply than the fiberglass resin and a world easier to sand and shape. Don't know what to expect for strength though as I used it on a corner that was broken as well that has a screw hole in it . Hope it can take being screwed down, not going to tighten down too much .
I used some flat black high heat paint that I had left over from the engine valve covers that I put on the 5.7 . It was already the composite black so I stayed with that color . Funny how the new paint seems to show my fingerprints so much but I will be sure and wipe it down good after I get it installed tomorrow. Was going to get it done today but kinda wussed out and rested instead.
After this I can get back to side panels and cushions and i'm gettin close to done . Well that is if I don't start on the trailer before I get her wet.
 

Watermann

Starmada Splash of the Year 2014
Joined
Jan 12, 2013
Messages
13,791
I found that if I don't just tear into the trailer first off then chances are it won't get done or it'll be half :censored:
 

classiccat

"Captain" + Starmada Splash Of The Year 2020
Joined
Dec 20, 2010
Messages
3,412
nice recovery on the dash! :thumb:

this is what the wheel horse guys use to restore their plastic dashes.
[h=1]VHT SP941 Vinyl Dye Gloss Jet Black Can - 11 oz.[/h]
61FSYA8kGzL._SL1500_.jpg
 

ab59

Ensign
Joined
May 10, 2017
Messages
979
Where would one find this said paint ? The vinyl paint that I used cost me 19.00 bucks a can plus hazzard fee + tax. Was hoping to find a cheaper alternative for future projects.
 
Top