Mercruiser 470 - Cam Seals Repair Questions

PutterJC316

Cadet
Joined
Aug 30, 2023
Messages
9
View attachment 388462

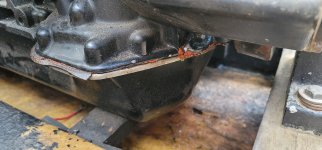
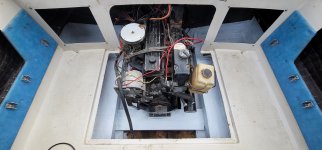
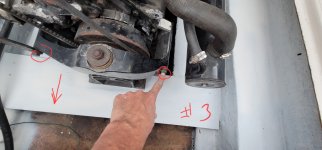
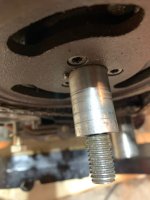
Hi Everyone, my name is Chris, new to this forum and new to boating. I recently acquired a 1977 Mercruiser 470 3.7. After settling in over the last few weeks looking over the boat and assessing it's condition, reading the service manual and numerous posts from this forum I have decided to undertake my first problem project with this boat, the "Leeky Cam Seals" issue. Wile cleaning under the oil pan I noticing coolant slowly dripping near the front left of the mounting bracket under the timing cover where the oil pan sits. "Photo 1" showes the coolant drip. No sooner had I discovered this drip I did some reading and came to find out this is very common with this engine. So being that this would be my first boat engin I've ever worked on I have come to this forum seeking assistance to the endeavor from you seasoned boaters.

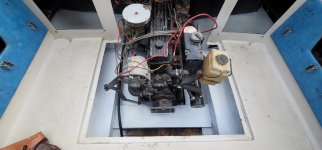
My first question is, after reading this article from Sterndrive.com regarding the seal repair I wanted more information on a few things about the in boat repair scenario, specifically the lift procedure step on of the front engine. It appears the puller I will be using will have adequate room once the mounting bracket is removed. What I'm unsure of is how to properly lift the engine from the front with out without damaging the outdrive. I will be using a chain fall and Gantry system to lift the engine up from the front lifting loop. From what it looks like to me on my mounting bracket, please correct me if I'm wrong.

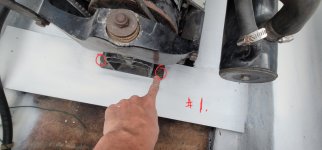
1st. I will unbolt the feet of the mounting bracket from the floor board.

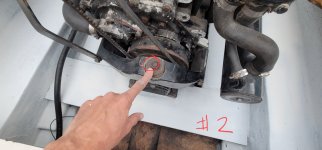
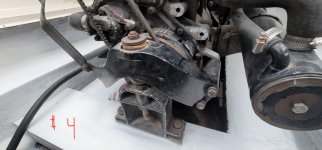
2nd. I will remove the top screw, not sure I need to do this.

3rd. I will then use the chain fall to slightly lift the front of the engin just enough to remove tension from the mounting bracket and then remove the bolts from the bracket to the engine.

4. And finally, from what it seems to me I should be able to pull the entire mounting bracket away from the engine.

1st. Important question I have, before any lifting of the engine is done. Following the removal of the first two bolts of the mounting bracket, do I need to detach the back of the engine from the transom or the outdrive? I wasn't going to lift the engine but a few millimeters and the how to procedure from Sterndrive.com doesn't mention it but I wanted to make sure I didn't need to do anything else before lifting.

2nd. Question does is the rest of my plan of attack sound or am I miss something?

Thanks everyone in advance for your help, and please let me know if any more information from me is required.
 

Attachments

  • 20230722_184438.jpg
    20230722_184438.jpg
    2.2 MB · Views: 11
  • 20230829_164903.jpg
    20230829_164903.jpg
    2.1 MB · Views: 12
  • 20230830_185424.jpg
    20230830_185424.jpg
    1.4 MB · Views: 11
  • 20230830_185427.jpg
    20230830_185427.jpg
    1.5 MB · Views: 11
  • 20230830_185430.jpg
    20230830_185430.jpg
    1.6 MB · Views: 11
  • 20230830_185356.jpg
    20230830_185356.jpg
    2.1 MB · Views: 11
  • 20230830_185328.jpg
    20230830_185328.jpg
    1.6 MB · Views: 10

Bondo

Moderator
Staff member
Joined
Apr 17, 2002
Messages
70,970
What I'm unsure of is how to properly lift the engine from the front with out without damaging the outdrive.
Ayuh,..... Welcome Aboard,..... Pull the outdrive 1st,..... it's only 8 nults,....
 

Grub54891

Admiral
Joined
Jun 17, 2012
Messages
6,090
I haven't done this paticular job yet, but will follow along and watch the progress. Bondo is right, pull the drive so you do not damage anything, and at that point you can service/inspect the bellows and gimbal along with alignment before lifting and after.
 

brian3127

Chief Petty Officer
Joined
Jun 10, 2007
Messages
507
the picture with the 2 on it. leave that bolt alone. just do pic 1 and 3.
but between 1 and 3 lift the engine before 3. then just take the mounting assemble out as one piece.
 

PutterJC316

Cadet
Joined
Aug 30, 2023
Messages
9
I haven't done this paticular job yet, but will follow along and watch the progress. Bondo is right, pull the drive so you do not damage anything, and at that point you can service/inspect the bellows and gimbal along with alignment before lifting and after.
Thx Grub54891, I will try and document as best I can for others to learn by my trial and error. If anyone is interested hear is the link to the complete procedure from Sterndrive.com.

Seal Repair Procedure / Sterndrive.com
the picture with the 2 on it. leave that bolt alone. just do pic 1 and 3.
but between 1 and 3 lift the engine before 3. then just take the mounting assemble out as one piece.
Thank you Brian3127,
Appreciate your feedback.
 

kenny nunez

Captain
Joined
Jun 20, 2017
Messages
3,305
From the looks of the oil pan gasket it also should be replaced. Removing the engine will be easy since you have the equipment. After the drive is removed. Disconnect the electrical harness plug, the throttle cable, water supply hose, exhaust hose and the battery cable. The 2 bolts at the rear unscrew and the engine comes straight up.
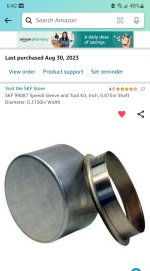
There is a very good chance that the seal area on the camshaft will be pitted, you will have to get a Speedy sleeve to repair the surface.
 

ROY WILLIAMS

Chief Petty Officer
Joined
Aug 8, 2022
Messages
402
View attachment 388462

Hi Everyone, my name is Chris, new to this forum and new to boating. I recently acquired a 1977 Mercruiser 470 3.7. After settling in over the last few weeks looking over the boat and assessing it's condition, reading the service manual and numerous posts from this forum I have decided to undertake my first problem project with this boat, the "Leeky Cam Seals" issue. Wile cleaning under the oil pan I noticing coolant slowly dripping near the front left of the mounting bracket under the timing cover where the oil pan sits. "Photo 1" showes the coolant drip. No sooner had I discovered this drip I did some reading and came to find out this is very common with this engine. So being that this would be my first boat engin I've ever worked on I have come to this forum seeking assistance to the endeavor from you seasoned boaters.

My first question is, after reading this article from Sterndrive.com regarding the seal repair I wanted more information on a few things about the in boat repair scenario, specifically the lift procedure step on of the front engine. It appears the puller I will be using will have adequate room once the mounting bracket is removed. What I'm unsure of is how to properly lift the engine from the front with out without damaging the outdrive. I will be using a chain fall and Gantry system to lift the engine up from the front lifting loop. From what it looks like to me on my mounting bracket, please correct me if I'm wrong.

1st. I will unbolt the feet of the mounting bracket from the floor board.

2nd. I will remove the top screw, not sure I need to do this.

3rd. I will then use the chain fall to slightly lift the front of the engin just enough to remove tension from the mounting bracket and then remove the bolts from the bracket to the engine.

4. And finally, from what it seems to me I should be able to pull the entire mounting bracket away from the engine.

1st. Important question I have, before any lifting of the engine is done. Following the removal of the first two bolts of the mounting bracket, do I need to detach the back of the engine from the transom or the outdrive? I wasn't going to lift the engine but a few millimeters and the how to procedure from Sterndrive.com doesn't mention it but I wanted to make sure I didn't need to do anything else before lifting.

2nd. Question does is the rest of my plan of attack sound or am I miss something?

Thanks everyone in advance for your help, and please let me know if any more information from me is required.
my MCM470 year 1978.. I was the water pump of that flywheel cover .
also that cam shaft of that water cam is rusted on the flywheel sealer water pump... I was 20 yrs ago and the cam shaft is the s/steel metal tube and heating it up and the cam shaft of the rusted cam of the water pump sealer ..
my 470 engine is coolant 60% and the distilled water 40%.. the owner of my bought it , 1984 is the coolant the water corrosion ......
 

Grub54891

Admiral
Joined
Jun 17, 2012
Messages
6,090
my MCM470 year 1978.. I was the water pump of that flywheel cover .
also that cam shaft of that water cam is rusted on the flywheel sealer water pump... I was 20 yrs ago and the cam shaft is the s/steel metal tube and heating it up and the cam shaft of the rusted cam of the water pump sealer ..
my 470 engine is coolant 60% and the distilled water 40%.. the owner of my bought it , 1984 is the coolant the water corrosion ......
What?
 

ROY WILLIAMS

Chief Petty Officer
Joined
Aug 8, 2022
Messages
402
Wile cleaning under the oil pan I noticing coolant slowly dripping near the front left of the mounting bracket under the timing cover where the oil pan sits. "Photo 1" showes the coolant drip !!!!!!!!!!!!!!!!!!!!!!!!!
MY 470 ENGINE IS THE COOLANT OF THE FLYWHEEL COOLANT WATER PUMP .
 
Last edited:

PutterJC316

Cadet
Joined
Aug 30, 2023
Messages
9
From the looks of the oil pan gasket it also should be replaced. Removing the engine will be easy since you have the equipment. After the drive is removed. Disconnect the electrical harness plug, the throttle cable, water supply hose, exhaust hose and the battery cable. The 2 bolts at the rear unscrew and the engine comes straight up.
There is a very good chance that the seal area on the camshaft will be pitted, you will have to get a Speedy sleeve to repair the surface.
I couldn't agree more Kenny, unfortunately it's getting close to fall and being that I'm very new to this hobby I just wanted to get this leek addressed so I could read up on and learn how to winterize the boat before winter. Between work and family obligations I'm very limited to weekend projects. So I don't think I would be able to get it done in time without risking the cold weather and freezing season setting in.

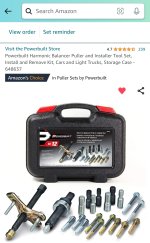
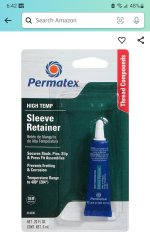
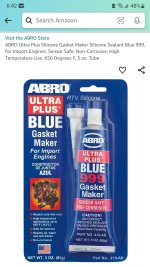
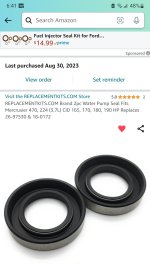
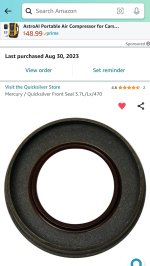
Thank you for the reminder regarding the Speedy Sleeves, already purchased two of theme from Amazon along with the gasket kit , front oil seal and sealants. I also picked up a harmonic balancer puller / installer kit from Amazon to pull the stator. The price wasn't bad for the complete kit I just hope it will fit for the reinstall portion of the project. The Mercruiser OEM installer I found on ebay was way to much money.

Anyone who is interested in what I bought on Amazon for this repair I have posted all the info pictures of these products. And any of the products I used as far as gasket sealants or tools, if someone has something better that they would recommend please feel free to comment.
 

Attachments

  • Screenshot_20230831_184017_Amazon Shopping.jpg
    Screenshot_20230831_184017_Amazon Shopping.jpg
    675.7 KB · Views: 1
  • Screenshot_20230831_184257_Amazon Shopping.jpg
    Screenshot_20230831_184257_Amazon Shopping.jpg
    284.8 KB · Views: 1
  • Screenshot_20230831_184239_Amazon Shopping.jpg
    Screenshot_20230831_184239_Amazon Shopping.jpg
    469.5 KB · Views: 2
  • Screenshot_20230831_184225_Amazon Shopping.jpg
    Screenshot_20230831_184225_Amazon Shopping.jpg
    277.5 KB · Views: 2
  • Screenshot_20230831_184201_Amazon Shopping.jpg
    Screenshot_20230831_184201_Amazon Shopping.jpg
    416.1 KB · Views: 2
  • Screenshot_20230831_184109_Amazon Shopping.jpg
    Screenshot_20230831_184109_Amazon Shopping.jpg
    285 KB · Views: 1
  • Screenshot_20230831_184137_Amazon Shopping.jpg
    Screenshot_20230831_184137_Amazon Shopping.jpg
    544.3 KB · Views: 1

PutterJC316

Cadet
Joined
Aug 30, 2023
Messages
9
my MCM470 year 1978.. I was the water pump of that flywheel cover .
also that cam shaft of that water cam is rusted on the flywheel sealer water pump... I was 20 yrs ago and the cam shaft is the s/steel metal tube and heating it up and the cam shaft of the rusted cam of the water pump sealer ..
my 470 engine is coolant 60% and the distilled water 40%.. the owner of my bought it , 1984 is the coolant the water corrosion ......
Thx Roy, I was expecting the shaft to be a little rusted and or gaulded. I bought Speedy sleeve to address that if it comes up. Appreciate the response.
 

kenny nunez

Captain
Joined
Jun 20, 2017
Messages
3,305
As long as there is the proper ratio of coolant in the engine just remove the end caps on the heat exchanger and the plug on the exhaust riser. That will drain the raw water. Store it with the drive down.
Put a thin film of silicone on the shaft before pressing the sleeves on, it acts as a lubricant and seals the sleeve. Before you tear the installing flange off the sleeve wrap the sleeve with some tape to protect from scratching it.
 

ROY WILLIAMS

Chief Petty Officer
Joined
Aug 8, 2022
Messages
402
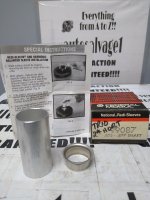
SKF STORE 99087 IS NOT WORKING ................

THE FEDERAL MOGUL 99087
s-l1600.jpg
 
Last edited:

PutterJC316

Cadet
Joined
Aug 30, 2023
Messages
9
As long as there is the proper ratio of coolant in the engine just remove the end caps on the heat exchanger and the plug on the exhaust riser. That will drain the raw water. Store it with the drive down.
Put a thin film of silicone on the shaft before pressing the sleeves on, it acts as a lubricant and seals the sleeve. Before you tear the installing flange off the sleeve wrap the sleeve with some tape to protect from scratching it.
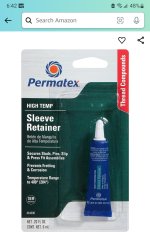
Thanks for the tips Kenny, I bought the Permatex Sleeve Retainer for the shaft application you mentioned. Is this sealant appropriate for what you suggested? I also like the tip with the tape, I have yet to see anyone cut the flange away from the sleeves, however I knew it needed to be done and I wonder how that was going to go. I bought a nice pair of micro dykes from Harbour Freight to take care of that part of the job.

Question,
I've read that most shaft repairs for this application will need two Speedy Sleeves because one in not long enough to cover the shaft by itself. Will I need to cut both flange rings off , or can I leave the inner Sleeve flange alone and just cut the second Sleeve Flange, the outer one?

All of you guys are very helpful, I'm glad I posted to this forum. Thanks for help.
 

Attachments

  • Screenshot_20230831_184239_Amazon Shopping.jpg
    Screenshot_20230831_184239_Amazon Shopping.jpg
    469.5 KB · Views: 1

kenny nunez

Captain
Joined
Jun 20, 2017
Messages
3,305
The sealant should work. With some research you might be able to locate a sleeve that is long enough to cover the whole area to be repaired.
 

PutterJC316

Cadet
Joined
Aug 30, 2023
Messages
9
Check your manual before installing the new seals. They need to be oriented correctly. Lips on both seals should face the coolant.
Yes I've read that Dubed, Now when you say face the coolant I assume you mean the Lips of the seal will be facing me correct? And since we're on the subject anyone have a good solution on how to press these seals on to the shaft. I have only seen one video on this and the guy pushed them onto the shaftvwith his hands. Thanks for the response Dubed.
 

PutterJC316

Cadet
Joined
Aug 30, 2023
Messages
9
The sealant should work. With some research you might be able to locate a sleeve that is long enough to cover the whole area to be repaired.
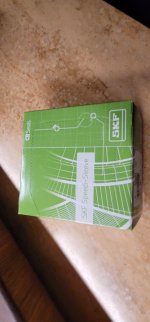
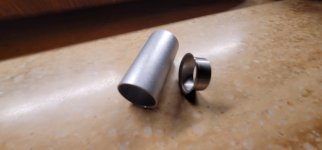
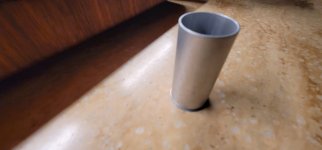
Seals arrived today, the installer piece was diffrent than the round piece I have seen in previous videos. I wonder if this is an improvement to the other installer part or just diffrent mfg design.
 

Attachments

  • 20230901_204838.jpg
    20230901_204838.jpg
    925.5 KB · Views: 2
  • 20230901_204925.jpg
    20230901_204925.jpg
    1.5 MB · Views: 2
  • 20230901_204940.jpg
    20230901_204940.jpg
    1.7 MB · Views: 2
Top