Jupiter in Dry Dock

skyfisher

Seaman Apprentice
Joined
Feb 13, 2013
Messages
45
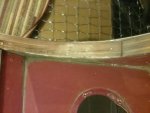
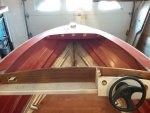
Well it's done front is removed went really well. The only thing is originally it was only supposed to go back as far as the dash cap but some measuring and test sitting proved I need a little more space so yep as Anderson the muskie guy did I will be pushing the dash back 10 inches. So that the back of the dash is where the dash brace currently is. Should work out great keeping the existing dash bracket, adding a brace under the floor to the rails that I can then tie in to the sides with the new consoles to keep a nice solid structure. 20170213_100702.jpg
 
Last edited:
Watermann

Starmada Splash of the Year 2014
Joined
Jan 12, 2013
Messages
13,786
:lol: I see you hung onto that flip top ashtray, my SS had a big ole hole in the nav side console with one of those all rusty. Yeah I repaired the hole and tossed the ashtray in the garbage.

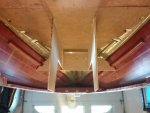
Bowectomy looks like it went pretty well from what I can see :thumb:
 

No-AH

Petty Officer 1st Class
Joined
Oct 20, 2016
Messages
234
Good job....I had a similar pic of when I was at this stage of my holi's redo of the 'bowectomy' [thank Watermann for that handle of this procedure :thumb:] but unfortunately the media card from my 35mm got misplaced in the demo with 20 or so pics of such demo....anywhoooo.....love the awesome use of that space for a casting deck and storage eh. The only thing I would have done before decking it would have been to fit this baby up there for extra weight....
http://www.iboats.com/19-Gallon-Per...1010553--session_id.445499629--view_id.366915
 

skyfisher

Seaman Apprentice
Joined
Feb 13, 2013
Messages
45
:lol: I see you hung onto that flip top ashtray, my SS had a big ole hole in the nav side console with one of those all rusty. Yeah I repaired the hole and tossed the ashtray in the garbage.

Bowectomy looks like it went pretty well from what I can see :thumb:

Yes it went really well happy with how it turned out. Currently leaving the old dash just until Im ready for my consoles want to make sure there is no movement in the top of hull and until I have all the measurements. I still have to build my consoles I know a guy with a 8ft CNC machine Im thinking of doing them out aluminum he could probably lay it out and cut in less then an hour for for the right price would be nice to have a one piece formed console.
 

skyfisher

Seaman Apprentice
Joined
Feb 13, 2013
Messages
45
Well been awhile since posting was pulled away from the boat for a bit want to get back on it for my July deadline. Been doing a lot of planning and measuring ordering of parts. Issue I have come up with is when you install a casting deck on the back how do you get to the rear plug location. I certainly do not want to have to remove the rear casting deck or slid it forward. Plan is to have a rear bench using a tempest or wise bench that can then flip for a casting deck. That being said it will be a long reach to the back.
 

Watermann

Starmada Splash of the Year 2014
Joined
Jan 12, 2013
Messages
13,786
Well been awhile since posting was pulled away from the boat for a bit want to get back on it for my July deadline. Been doing a lot of planning and measuring ordering of parts. Issue I have come up with is when you install a casting deck on the back how do you get to the rear plug location. I certainly do not want to have to remove the rear casting deck or slid it forward. Plan is to have a rear bench using a tempest or wise bench that can then flip for a casting deck. That being said it will be a long reach to the back.

Getting out to others threads and commenting will help you see how these problems have been solved also helps to get guys to come around to your thread to show you ideas.

8" deck plate installed in my SW over the pumps and that's where my fuel filter is installed too.

IMAG2582.jpg
 

Candutch

Chief Petty Officer
Joined
May 8, 2015
Messages
637
I installed a deck in my 18 foot ss. I have a door on the front of the deck that swings out and it is wide enough for me to get my shoulders into so I can reach back and install the plug. I considered the deck plate, which is a good option, but I only had one and needed it elsewhere.

By the way, nice work on the bowectomy. I admire those of you with the kahuanas to do that. I almost bought a holiday with plans on doing that but it scares the crap outta me so I spent a bit more and bought the ss instead.
 

skyfisher

Seaman Apprentice
Joined
Feb 13, 2013
Messages
45
Getting out to others threads and commenting will help you see how these problems have been solved also helps to get guys to come around to your thread to show you ideas.

8" deck plate installed in my SW over the pumps and that's where my fuel filter is installed too.

IMAG2582.jpg


I guess the check plate is the best idea I will have to order one of those. It still a reach to the plug but not as bad as from the front of the splashwell. Did a couple test measure would not be able to make the stretch from the front of the splashwell it was about 32". Thanks Waterman for the info seen a few remodelis with those never really thought about it for that use assumed as like you did was access to fuel lines and filters.
 

skyfisher

Seaman Apprentice
Joined
Feb 13, 2013
Messages
45
I installed a deck in my 18 foot ss. I have a door on the front of the deck that swings out and it is wide enough for me to get my shoulders into so I can reach back and install the plug. I considered the deck plate, which is a good option, but I only had one and needed it elsewhere.

By the way, nice work on the bowectomy. I admire those of you with the kahuanas to do that. I almost bought a holiday with plans on doing that but it scares the crap outta me so I spent a bit more and bought the ss instead.

Thanks Candutch yes the bowectomy went really well but your are right it's not a good feeling when you first start cutting. I have learned a few things since doing it where I would make a couple changes. Going to add some aluminum bracing under rail for support do not want to add wood to a location that may hold water and moisture. Was really strong and rigid too until I removed the rest of the dash. Removing the dash shows how much lateral support and strength it adds. My plan is to tie the new dash and the front seating all together to replace that structure.
 

Dabbler_E

Petty Officer 1st Class
Joined
Apr 20, 2009
Messages
338
Keep posting pics of what you do. I'm getting ready to bow-ectomize my Jupiter as well.
 

skyfisher

Seaman Apprentice
Joined
Feb 13, 2013
Messages
45
image_265652.jpg
Time post some updates. This is after I bent down the tabs so that I have something to attach the inside rail skin too. I will be welding each one of these slits to limit cracking before attaching skin and trim. Not sure I would use this method again. Sorry for the upside down pictures they all seem to be coming in this way.
 

skyfisher

Seaman Apprentice
Joined
Feb 13, 2013
Messages
45
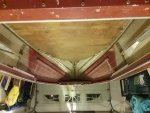
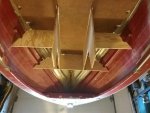
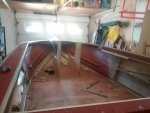
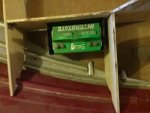
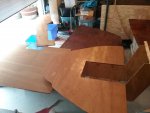
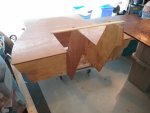
20170522_202315.jpg 20170522_194006.jpg 20170522_174822.jpg 20170522_203053.jpg Started building front deck and console. Mostly rough fitting but as you can see by the time I add two group 27 batteries to the front there will not be much room. From the bottom slope to the front should be just over 4FT. I have moved the console back 10 inches. This layout also provides plenty of leg room. Once everything is fitted I will start working on aluminum frame to add structural support.I have not decided how I'm opening up the front bottom of the dash yet so it is just straight for now.
 

skyfisher

Seaman Apprentice
Joined
Feb 13, 2013
Messages
45
No Title

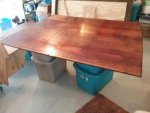
Spent the day spar varnishing was doing well until rain came in quickly and added some nice water marks before I hastily pulled it in to the garage. Oh well was the second coat and it's all going to be covered so no one will see.
 

Attachments

  • photo267347.jpg
    photo267347.jpg
    56.8 KB · Views: 2
  • photo267348.jpg
    photo267348.jpg
    55 KB · Views: 2
  • photo267349.jpg
    photo267349.jpg
    47 KB · Views: 2

skyfisher

Seaman Apprentice
Joined
Feb 13, 2013
Messages
45
No Title

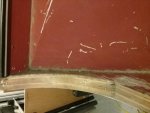
Well I was not going to pull the transom because it was in good shape however I was unable ascertain the reason for this seam or if this was a crack on both sides of the plywood for the transom. But what I found was that they put in the plywood and then added the curves to the top of the gunnels with a different piece of plywood on both sides. I have not really noticed that on any other builds of Jupiter's. Maybe not a factory job and transom has been replaced before doing it that way prevents having to cut or bend the gunnels. Well I have gone this far might as well pull it now.
 

Attachments

  • photo267375.jpg
    photo267375.jpg
    46.2 KB · Views: 2
  • photo267376.jpg
    photo267376.jpg
    45.4 KB · Views: 2

Watermann

Starmada Splash of the Year 2014
Joined
Jan 12, 2013
Messages
13,786
SC factory 3 piece transoms are common, we refer to the side pieces as wings and most will replace the transom in one solid piece rather than duplicate that.
 
Top