Jupiter in Dry Dock

skyfisher

Seaman Apprentice
Joined
Feb 13, 2013
Messages
45
My bodyshop guy says red is expesive

Yeah red is one of those colors that requires a good base most will put a black coat or another color under to increase deepness or richness in the color. Im hoping that keeping the original will allow me to for go a dark base add a little clear in the paint will add depth and keep the finish throughout as well as make the paint more scratch resistant. Planing a red top silver bottom.
 

skyfisher

Seaman Apprentice
Joined
Feb 13, 2013
Messages
45
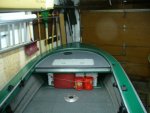
Well a few hours of water testing has revealed a good solid almost 100% leak free hull. Took over a hour but noticed some minor weeping on stearn seam. Barely enough to even notice three hours and only a few drips. A little bit of gulivit and should be all good.
 

Watermann

Starmada Splash of the Year 2014
Joined
Jan 12, 2013
Messages
13,786
Nice to not have a bunch of hull repairs to wade through. I've never been lucky like that. :thumb:
 

Tnstratofam

Commander
Joined
Aug 18, 2013
Messages
2,679
That will make the rebuild a lot less tedious. Waterman has had more than his share of hull repair between his Chieftain and the V5 he's working on now.
 

skyfisher

Seaman Apprentice
Joined
Feb 13, 2013
Messages
45
That will make the rebuild a lot less tedious. Waterman has had more than his share of hull repair between his Chieftain and the V5 he's working on now.

yes I'm very happy to not have to do whole bunch of hull re-bucking. Going to keep the project moving forward. My worry was so many projects on here turn in to major rebuilds with re-bucking and rib / haul repairs I passed on several hulls before this one for that reason. I just know I would not have that much time to dedicate to a rebuild before having to go live in it. Those of you that can spend years working on your projects shows great dedication and patience from the family I just need to get this done quickly before mine realize I'm never around.
 

skyfisher

Seaman Apprentice
Joined
Feb 13, 2013
Messages
45
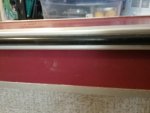
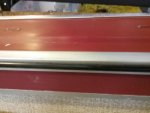
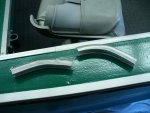
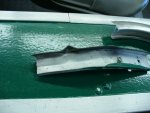
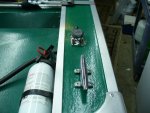
Does anyone know if you can find this same inside trim profile somewhere. If I'm going to open the bow I would like to keep the same profile. 20170212_112258.jpg 20170212_112302.jpg
 

Watermann

Starmada Splash of the Year 2014
Joined
Jan 12, 2013
Messages
13,786
I don't about that inner rubrail profile and the channel to hold it. You can take a look at Wefco rubber and see if they have it. If you needed the outer rubrail well that's a different story, it's profile 0101G. I just ordered 42 feet of it for $2.50 a foot and $20 shipping. You have to call them too, no online ordering.

Here's a link to the insert profiles. http://www.wefcorubber.com/PDF/marin...%20Inserts.pdf
 

skyfisher

Seaman Apprentice
Joined
Feb 13, 2013
Messages
45
Nice to not have a bunch of hull repairs to wade through. I've never been lucky like that. :thumb:
Yes I have read through both your rebuilds Dude you must like the punishment. However nothing vintage looks exceptional with out a lot of sweat and beers. (Tears are for the ones that don't finish)
 

bunnymoney

Seaman
Joined
Oct 5, 2016
Messages
68
Does anyone know if you can find this same inside trim profile somewhere. If I'm going to open the bow I would like to keep the same profile.

I feel your pain. I opened up the front of my 65 jetstar and was unable to find any scrap extrusions to match. Currently, I bent by hand the existing inner rails and ended up short on both sides by about 3 feet at the rear. My opening is rounded and not like an SS or Mariner. I have 37' of WEFCO rubber( Starcraft parts post 356) I'm not going to use that doesn't look bad but is a little floppy if riveted and way too messy for me to glue. This is the only item i found at WEFCO that "might" have had a chance of working. After I get over my disappointment, I plan to have a length of 3/4 X 3/4 angle bent at a body shop to fit my curve. Then I'll have two 6' lengths of original starcraft inner rub rail extrusion in the scrap pile for others to rummage.
 

Watermann

Starmada Splash of the Year 2014
Joined
Jan 12, 2013
Messages
13,786
I deleted the inner rubrail from my the back section of my Chief build and used the curved section up front in the cabin. But I did save the 2 8' sections of channel in the rafters of my garage, no insert though it was ruined. It could be formed to a bow curve I would imagine.
 

skyfisher

Seaman Apprentice
Joined
Feb 13, 2013
Messages
45
I deleted the inner rubrail from my the back section of my Chief build and used the curved section up front in the cabin. But I did save the 2 8' sections of channel in the rafters of my garage, no insert though it was ruined. It could be formed to a bow curve I would imagine.
I might take you up on that offer if it is the same. I have found a similar enough rubber that would work most likely. My two sides are a bit short 6 to 8 inches I believe been told things shrink with age personally I've never heard that before :) . I did find a very similar profile but it is 1/2 wider on one side more like a small rub rail. I belive you are only 2 hours south of me might have to make the drive one day.
 

skyfisher

Seaman Apprentice
Joined
Feb 13, 2013
Messages
45
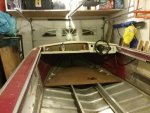
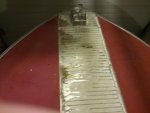
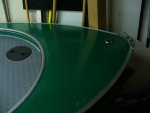
Well windshield is off ribs under the front removed. I have layed out the cut lines drilled the pilot holes to late to make the cut tonight though. Made sure I put the holes in so I can not change my mind in the morning.
20170212_214816.jpg


image_258744.jpg
 

skyfisher

Seaman Apprentice
Joined
Feb 13, 2013
Messages
45
Anyone know how tight a curve can be done on the inner rail I was thinking an 8 inch radius would work. Made the line about 1 inch wider then end result will be to allow for tabs to be cut out and bent downward to attach side rail and inner rail.
 

Watermann

Starmada Splash of the Year 2014
Joined
Jan 12, 2013
Messages
13,786
I might take you up on that offer if it is the same. I have found a similar enough rubber that would work most likely. My two sides are a bit short 6 to 8 inches I believe been told things shrink with age personally I've never heard that before :) . I did find a very similar profile but it is 1/2 wider on one side more like a small rub rail. I belive you are only 2 hours south of me might have to make the drive one day.

You can send me a PM about the channel, yeah it's the same. I saved it for just such an occasion.
 

nrf414

Chief Petty Officer
Joined
Feb 16, 2008
Messages
573
I'm coming in a little late but welcome aboard. That is a sharp Jupiter for the age. Will definitely make the reno a lot easier
 

bunnymoney

Seaman
Joined
Oct 5, 2016
Messages
68
Anyone know how tight a curve can be done on the inner rail I was thinking an 8 inch radius would work. Made the line about 1 inch wider then end result will be to allow for tabs to be cut out and bent downward to attach side rail and inner rail.

Good luck doing an 8" radius bend at home.

My radius works out to about 26" with a rounded front.

Your biggest challenge is that you only get one try. (because there isn't any more readily available)

The JetStar inner rub rail went from the gunnels over the dash and had "legs" about 3 feet long on both sides going toward the transom.
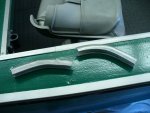
I tried to "un-bend" the compound curve at the edges of the dash and that was a complete no-go. Ended up cutting the curves off and using the 3 straight pieces to make the bend.

I'll put up some pics later today so you can decide for yourself.
 

bunnymoney

Seaman
Joined
Oct 5, 2016
Messages
68
My deck is not a casting deck it is for entrance and egress to a very high floating dock.


I do not have Jason's metal working skills so you may notice my inner gunnels are 1x3x1/8 angle that I kerfed every 1/2 inch on the 1 inch leg. The 3 inch leg was almost as flexible as a rip saw blade and went right around the big bend with no effort at all.

Here are the pics I promised:

P1040135.JPG P1040136.JPG P1040138.JPG P1040141.JPG P1040139.JPG P1040143.JPG P1040144.JPG P1040142.JPG P1040145.JPG

As I said earlier, I like the look of the 3/4 x 3/4 angle that I used to fill the gap at the rear. Even though the exterior measurements are similar to the original rail, the underside measurements will allow me to cover the rivets that show now.
 

Attachments

  • P1040140.JPG
    P1040140.JPG
    98.2 KB · Views: 2
  • P1040139.JPG
    P1040139.JPG
    374.7 KB · Views: 2
  • P1040139.JPG
    P1040139.JPG
    374.7 KB · Views: 2
  • P1040137.JPG
    P1040137.JPG
    71.8 KB · Views: 2
  • P1040143.JPG
    P1040143.JPG
    380.4 KB · Views: 3

skyfisher

Seaman Apprentice
Joined
Feb 13, 2013
Messages
45
I'm coming in a little late but welcome aboard. That is a sharp Jupiter for the age. Will definitely make the reno a lot easier

Thanks for the welcome. Yes things have been moving along very nicely the biggest surprise is that there has been none. Everything is in good shape removal of the top of the dash was the only place I hit a bit of dry rot. Inside and out it has been a very clean boat.
 

skyfisher

Seaman Apprentice
Joined
Feb 13, 2013
Messages
45
Good luck doing an 8" radius bend at home.

My radius works out to about 26" with a rounded front.

Your biggest challenge is that you only get one try. (because there isn't any more readily available)

The JetStar inner rub rail went from the gunnels over the dash and had "legs" about 3 feet long on both sides going toward the transom.
I tried to "un-bend" the compound curve at the edges of the dash and that was a complete no-go. Ended up cutting the curves off and using the 3 straight pieces to make the bend.

I'll put up some pics later today so you can decide for yourself.
Well my brother works with aluminum trailers alot that require all sorts of welding molding and trim repair be believes that we can make the bend on his press has a moulding attachment works like an English wheel should be able to stretch the trim on the outside vs compressing on the inside time will tell. He seems to be quite talented in working with aluminum I will have to drop a picture of the welded aluminum boat he built from just a welded hull.
 

skyfisher

Seaman Apprentice
Joined
Feb 13, 2013
Messages
45
My deck is not a casting deck it is for entrance and egress to a very high floating dock.


I do not have Jason's metal working skills so you may notice my inner gunnels are 1x3x1/8 angle that I kerfed every 1/2 inch on the 1 inch leg. The 3 inch leg was almost as flexible as a rip saw blade and went right around the big bend with no effort at all.


As I said earlier, I like the look of the 3/4 x 3/4 angle that I used to fill the gap at the rear. Even though the exterior measurements are similar to the original rail, the underside measurements will allow me to cover the rivets that show now.


That's a pretty good job there bunnyM makes for a nice casting deck but yes looking to have seating mostly to accommodate the little ones that will grow. And when it is my fishing day then out goes the cushions and a fishing I go. Going try and get some storage room also as I have learned you can never have enough storage and I already do not have enough.
 
Top