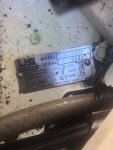
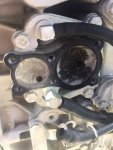
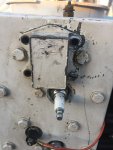
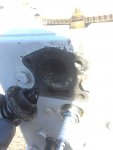
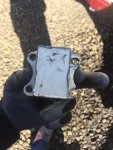
Horrible day out fishing....Problem Force 125

ErvCam

Seaman
Joined
Nov 30, 2010
Messages
74
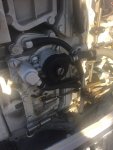
Thermostat housing bolt loctite??
80B1FADA-83D9-4BE8-B091-F2EDF2B0CDF5.jpeg
 

Attachments

  • A492BE29-BDB6-4D69-B55B-B4310B9221E2.jpeg
    A492BE29-BDB6-4D69-B55B-B4310B9221E2.jpeg
    1.9 MB · Views: 0
  • 07926928-EC27-4C78-BA77-EF83DAA252DB.jpeg
    07926928-EC27-4C78-BA77-EF83DAA252DB.jpeg
    1.9 MB · Views: 0
  • 240AB67E-300C-4B1A-84E5-A35BB3A34D64.jpeg
    240AB67E-300C-4B1A-84E5-A35BB3A34D64.jpeg
    2 MB · Views: 0
  • 8CF87C6A-96C8-4D1E-95CA-C35078E35462.jpeg
    8CF87C6A-96C8-4D1E-95CA-C35078E35462.jpeg
    1.8 MB · Views: 0
  • 87779B08-38C4-460C-AC5F-AD1F63F9998A.jpeg
    87779B08-38C4-460C-AC5F-AD1F63F9998A.jpeg
    1.8 MB · Views: 0
  • 436C420F-D7B3-4840-B85C-1DF76C5948A2.jpeg
    436C420F-D7B3-4840-B85C-1DF76C5948A2.jpeg
    1.8 MB · Views: 0

ErvCam

Seaman
Joined
Nov 30, 2010
Messages
74
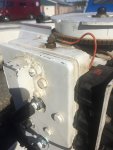
Sorry I’m doing this off of my phone so the order is a bit out of whack. I’ll post pics of fuel lines when I get on my computer due to needing to be resized
 

ErvCam

Seaman
Joined
Nov 30, 2010
Messages
74
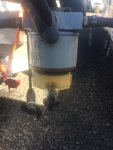
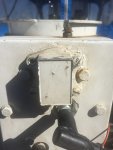
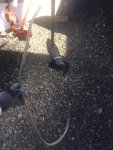
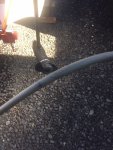
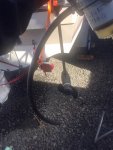
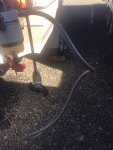
Here is pics of the fuel lines, the two grey ones are from motor to prime bulb and from tank to water separator, the black one is from water separator to prime bulb. I also took the fuel pump off, the gasket and diaphragm didn't seem damaged until i peeled it off. Its stuck on there and very brittle. Still no luck removing the thermostat housing they're a PITA ill give it a try tomorrow with some penetrating oil.

image13.jpeg
image14.jpegimage15.jpegimage16.jpegimage17.jpegimage18.jpegimage19.jpeg
 

catfishcarl99

Senior Chief Petty Officer
Joined
Apr 25, 2012
Messages
723
yep I have a 1989 us marine force on my boat and restoring almost done as a matter of fact a 1976 Chrysler 75 hp. both fuel pumps are identical. and gaskets and diaphragm fit hundreds of force Chrysler motors.
 

jerryjerry05

Supreme Mariner
Joined
May 7, 2008
Messages
17,927
The grey fuel lines are CRAP
They have a plastic liner that breaks free and can collapse and clog.

The water sep filter looks like it has water in it??
Drain it when ever you think about it.
Check after every trip.
Mine didn't have a drain s I had to remove it when I wanted to check it.
All the years I had that system I never found more than 1 tablespoon of water.
Condensation with a tank that isn't full and sets for long periods causes a lot of water.
Try to keep it full or use additives. Sta-bil and Ethanol treatment.
Seafoam is a waste of $$ (my opinion)

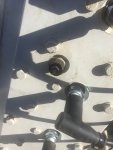
The sending unit on the face of the head is for the regular system.
Key on, ground the lead(might be orange) that should make the buzzer go off?
The buzzer can be under the dash or in the shifter housing.
If it's bad? replace with a motorcycle or car horn.
It powers an alarm, no gauge.

The sender on the top is for a gauge, Key on ground the wire, the gauge should go all the way.

The diaphragm is BAD!!!

Make sure the fuel recirc system (looks like 2 big dog bones, it has screens that get clogged with carbon) is clear

Make sure the props the right one.
Tach or buy a Tiny Tach and make sure the rpms at wide open are in the right area. 52-5500
 

ErvCam

Seaman
Joined
Nov 30, 2010
Messages
74
Ok so the sender when I ground it pegs the gauge but its the orange wire. The alarm was removed at one point because I don't see it but my gauge never moves even when idling. I am assuming the thermostat is stuck open?

The tach is original and ill verify RPM's next time out.

Besides that I have ordered:
New Fuel Lines 3/8" ID
110 thermostat with gasket and grommet
Fuel pump diaphragm and gasket
Fram G12 filter (in my possession)
Quicksilver marine Male & Female quick disconnects
Impeller kit with housing

I will check and verify the prop today, I was debating on installing a water pressure gauge. Once I have sorted this out and she's running tip top ill probably tackle that next.
 

jerryjerry05

Supreme Mariner
Joined
May 7, 2008
Messages
17,927
Check the fuel line size on the motor.
Most came with 1/4" on the motor.

The pressure gauge sender goes in the same hole that the other sender fits in.
I've fond that nobody watches the dash long enough to monitor the gauges.'
I'd get sea sick in about 3 min.:)

The horn, louder the better would get your attention.
A pee tube installed is a visual that's easier to monitor.
 

ErvCam

Seaman
Joined
Nov 30, 2010
Messages
74
Check the fuel line size on the motor.
Most came with 1/4" on the motor.

The pressure gauge sender goes in the same hole that the other sender fits in.
I've fond that nobody watches the dash long enough to monitor the gauges.'
I'd get sea sick in about 3 min.:)

The horn, louder the better would get your attention.
A pee tube installed is a visual that's easier to monitor.

The primer bulb that I purchased was a 3/8" and the fuel lines I pulled out fit on that.

Im not sure I understand what you mean by which hole the sender goes? Im assuming you're saying the pressure sender goes into the same hole as the current temp sensor? Is it possible to do a pressure gauge and alarm off of the same hole?
 

ErvCam

Seaman
Joined
Nov 30, 2010
Messages
74
Any tips on removing the thermostat housing flathead bolts? I’ve managed to get one out and it looks like whoever did it last put loctite on it
 

jerryjerry05

Supreme Mariner
Joined
May 7, 2008
Messages
17,927
The alarm gets hooked to the temp sensor on the face of the head.
That sender is for the alarm only.
The one you have on the top is an aftermarket sender and gauge.
The pressure goes on the top of the head.
You can run a pressure and a temp gauge from the same hole, but the reading probably won't be right.
Some have drilled a hole in the thermo housing and mounted the sender there.

ME?? I'd make sure the buzzer/horn worked if nothing else worked.
Get a car horn as a buzzer is hard to hear under way.

To remove the 3 other screws.

PB blaster and a small torch and a hammer, fire extinguisher and a big screwdriver that fits the slots.
Spray with PB heat with the torch and install the screwdriver and tap the screw.
Repeat this and after 5-6 heat cycles try to torn the screws.
A set of Vice-Grips might be needed??

It took me 3 hours to remove 1 of these screws, the others came easy.
 

Redbarron%%

Chief Petty Officer
Joined
Dec 7, 2017
Messages
479
Harbor Freight has a $10 hammer impact screwdriver that might be handy along with the PBblaster and heat.
I used one on the screws on the ride plate on my Sport Jet.
Nice big tips come with it.
 

ErvCam

Seaman
Joined
Nov 30, 2010
Messages
74
The alarm gets hooked to the temp sensor on the face of the head.
That sender is for the alarm only.
The one you have on the top is an aftermarket sender and gauge.
The pressure goes on the top of the head.
You can run a pressure and a temp gauge from the same hole, but the reading probably won't be right.
Some have drilled a hole in the thermo housing and mounted the sender there.

ME?? I'd make sure the buzzer/horn worked if nothing else worked.
Get a car horn as a buzzer is hard to hear under way.

To remove the 3 other screws.

PB blaster and a small torch and a hammer, fire extinguisher and a big screwdriver that fits the slots.
Spray with PB heat with the torch and install the screwdriver and tap the screw.
Repeat this and after 5-6 heat cycles try to torn the screws.
A set of Vice-Grips might be needed??

It took me 3 hours to remove 1 of these screws, the others came easy.

Damn I hope I can get it off quicker than that. All of the ordered items are coming in today and I'd like to get out on the lake tomorrow to try it out. Ill report back with everything.
 

ErvCam

Seaman
Joined
Nov 30, 2010
Messages
74
Harbor Freight has a $10 hammer impact screwdriver that might be handy along with the PBblaster and heat.
I used one on the screws on the ride plate on my Sport Jet.
Nice big tips come with it.

Ill give it a go, yesterday I tried with my impact gun and it snapped the flat head off lol
 

ErvCam

Seaman
Joined
Nov 30, 2010
Messages
74
Click image for larger version  Name:	29A0CCAD-4217-40F4-9D4E-FED6B1E592AF.jpeg Views:	1 Size:	1.90 MB ID:	10669982

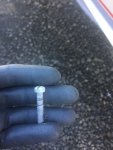
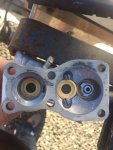
Well I managed to get three out. I think one might have snapped inside or maybe the lower left was just a shorter bolt can’t tell exactly. I sprayed a lot of pb blast so hopefully I’ll get the last one out tomorrow. I did spray pb blast inside the holes. The two top ones pb blaster shot back out but the bottom left never did it’s like there a passage that’s taking in all of the blaster is this normal?
 

jerryjerry05

Supreme Mariner
Joined
May 7, 2008
Messages
17,927
Impact gun??? Fastest way to mess up the seized bolts.
NEVER on anything marine. :( But I think you found that out.
It's ok to use if the bolt/screw has already been loosened. and the nut on the flywheel.

Small vice grip on the screw head.
Yes there can be 2 different screw sizes.
When you replace don't use a slotted screw.
It's a tight fit but a hex head bolt will go in there.
Use grease, not anti-seize. If anti-seize is used around salt water it becomes Perma-seize.

The lower hole goes straight into the space behind the head and the PB is going into the cooling passages.

If you can't get the rest f the studs out???
You can just reinstall using 3 bolts and silicone.
But let the silicone set up over night.
 

Redbarron%%

Chief Petty Officer
Joined
Dec 7, 2017
Messages
479
After the thermostat the water pressure is fairly low so the three screws ans sealer will hold.
HEAT helps along with the impact screwdriver.
Make sure the screwdriver impact is going the right way around.
Did I say HEAT?
 

ErvCam

Seaman
Joined
Nov 30, 2010
Messages
74
I’m going to give it a good ol try again today. The impact gun I tried using but the screw flat head broke. So I removed the three bolts using a flathead and vice grips. But the bottom right one won’t budge. Hopefully the pb blast will have penetrated overnight.

Will the pb blast due any damage with it being in the coolant passage?
 

ErvCam

Seaman
Joined
Nov 30, 2010
Messages
74
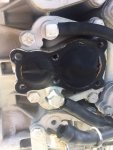
Got it off but in the process broke the housing. Lucked out and the local store here had 1 in stock. I’ll update this weekend when I get a chance to go out to the lake.
FC3596D5-6E8C-4630-B9C5-11E5A65F8C83.jpeg5C24C784-8991-46E4-B9E6-CEED8325181B.jpeg
 

jerryjerry05

Supreme Mariner
Joined
May 7, 2008
Messages
17,927
Like I said before, using an impact on anything on an outboard is just asking for trouble.
The years of heating up and cooling down added to cheap screws and bolts, make
for broken slots and twisted heads.

One guy comes to me with a 125 that 6 of the head bolts wouldn't tighten.
Turns out he used an impact to loosen them, when he did he stripped the threads out of the block.

Using heat won't hurt anything(unless it's an acetylene torch) but the rubber on the thermo.
PB blaster won't hurt anything.
 

ErvCam

Seaman
Joined
Nov 30, 2010
Messages
74
Sorry Jerry I didn’t mean the bolt broke the actual drill attachment flat head broke lol. Everything is in tact except for the thermo housing but I bought a new one yesterday. Today I’m taking the boat out to see if the issue is resolved. Will update when I get back.
 
Top