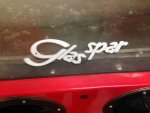
Glasspar G-3 Finally getting finished!

Willyclay

Captain
Joined
Sep 8, 2006
Messages
3,254
It is called Fare?cla G3.

How could you go wrong with something labeled G3. Great work as usual but I a worried about your love of spray painting with 2 part stuff. Maybe the fumes are getting to you. LOL Thanks again for all the tips and product info you provide!
 

andgott

Master Chief Petty Officer
Joined
Sep 2, 2009
Messages
801
Great work as usual but I a worried about your love of spray painting with 2 part stuff. Maybe the fumes are getting to you.

Naw, I just hold my breath!!

On a serious note, when playing with this stuff it is very important that you wear the correct safety gear... It is nasty stuff and it'll kill you! A good fitting respirator is a important. I wear a full tyvek suit as well, it keeps the overspray off me, but more importantly it keeps me from dripping sweat on my fresh paint job! No, it's no fun on a 90 degree day..
 

andgott

Master Chief Petty Officer
Joined
Sep 2, 2009
Messages
801
No Title

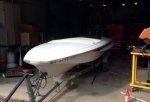
To say progress on this project has been slow is an understatement! I've been VERY busy lately, and haven't had a lot of time for the projects... And I've got (as usual) a TON of them going on- I built a new 'ultimate' chicken coop, we have a new Llama and I had to build and enclosure for him, and as always I've been upgrading and expanding my shop... But, I have had some time to work on the G-3.

I FINALLY got the deck back on. I forgot how much fun that was:D- Especially after having them apart for several years. They don't like to hold their shape, and take a little persuasion to get them back together. It took a few hours, but they are together again. Now I have to figure out how all the trim in the motorwell area goes back together- It had already been disassembled by the previous owner when I got the boat. Luckily, he labeled almost everything so I know where most of it goes- Hopefully it's all there!
 

Attachments

  • photo234324.jpg
    photo234324.jpg
    253.2 KB · Views: 0

jbcurt00

Moderator
Staff member
Joined
Oct 25, 2011
Messages
25,019
Looks great

Hopefully being busy keeps you outta trouble ;)

Or at least not acquiring new projects.... llama? Making your own seat fabric?
 

sphelps

Supreme Mariner
Joined
Nov 16, 2011
Messages
11,461
There's always stuff that keeps ya away from boat work .. But this :llama:is a new one ! :lol: Really need pics of the new family member ...
 

andgott

Master Chief Petty Officer
Joined
Sep 2, 2009
Messages
801
No Title

There's always stuff that keeps ya away from boat work .. But this :llama:is a new one ! :lol: Really need pics of the new family member ...


Here is Salvador Dali-


fetch


He's a 9 month old male. Big guy- He stands eye to eye with me, But not even CLOSE to full grown yet! He's probably about 150-175 lbs, but his daddy is 350 plus. He's a companion/guard for the goats, plus a really fun pet. VERY smart, VERY gentle despite their size.


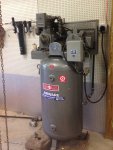
This is the OTHER addition to the 'family'- I decided that it was time for a GOOD air system. My old compressor did it's job admirably considering that it cost me $40 at a garage sale, but it's nothing like this beast-

fetch


Right around 18 CFM @ 175 PSI. Moves some SERIOUS air. I bought it with all the 'toys' in a great package deal- Blasting cabinet, pressure blaster, sanders, grinders, impacts- EVERYTHING I could possibly need, all from a guy downsizing. The compressor only has about 300 hours on it, so it's barely broken in- And had maintenance records from the day it was installed.

Coupled with the desiccant drier system that you can see installed on the wall behind it, it is PERFECT for painting and blasting- Nice dry air. I love this- My favorite shop toy for sure!
 

Attachments

  • photo234326.jpg
    photo234326.jpg
    114.1 KB · Views: 0

Woodonglass

Supreme Mariner
Joined
Dec 29, 2009
Messages
25,927
Good to see you back at it, Andrew!!! I think you need to do an Artistic rendering of your new Family Member and post it here so eveyone can see what a FANTASTIC ARTIST you truly are!!!!
 

andgott

Master Chief Petty Officer
Joined
Sep 2, 2009
Messages
801
No Title

Between long hours at work and a long list of other projects on the 'farm', I have had little time for the boats. But, I have had a little time here and there to get things done, so progress is SLOW but steady!

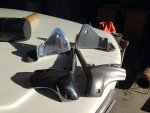
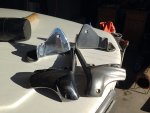
I got most of the trim polished. I have a nice buffing machine from Caswell Plating that makes quick work of it. The cast aluminum that Glasspar used polishes up nicely!

fetch


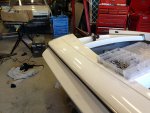
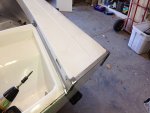
The hull and deck have been joined and riveted together (that is a LOT of rivets!). I am reinstalling the trim and rubrails now-

fetch


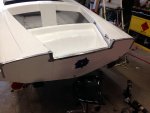
And, the splashwell and related trim-

fetch


It is always a relief when all the parts fit back together again!

I was VERY careful to tag and bag things when I removed them. I never intended to take this long on this project, but you never know what might happen! It has been more than four years since I took this boat apart- And I have moved all the parts from my old house to a storage unit, then to my new house, and again to my new shop- And managed to not loose a thing! That is quite a feat for me, since I spend more time looking for the tool that I just put down than I do actually working on the average day!

Next, the windshield and seats, then It's time to get the motor checked out and ready... This thing is starting to look like a boat again!
 

Attachments

  • attach10085833.jpg
    attach10085833.jpg
    226.6 KB · Views: 0
  • photo235159.jpg
    photo235159.jpg
    226.6 KB · Views: 0
  • photo235160.jpg
    photo235160.jpg
    275.3 KB · Views: 0
  • photo235161.jpg
    photo235161.jpg
    253.6 KB · Views: 0
Last edited:

andgott

Master Chief Petty Officer
Joined
Sep 2, 2009
Messages
801
No Title

Work continues, SLOWLY. I have finished more in the past few days than I have all month!! I now have a "deadline"- The owner would like to take delivery in time for the sunnyland ACBS show in mid- march. I think I might be able to meet that.

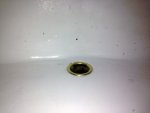
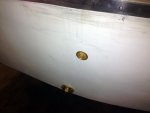
In addition to getting most of the trim reinstalled, I got the new hole drilled for the motor well drain-

fetch


I epoxied the inside, so water should never be able to get to the new plywood transom... I will install the tube next, hopefully tomorrow, If I can find the tube of caulk that I bought for the job. That is one of the drawbacks of having a shop the size of mine, it is so easy to loose things in there!

The seats, which are original, are ready to go- And I have the motor pulled out so I can prep it. I will test fit it tomorrow, then make sure that i've got all the controls and electrical ready to go.
 

Attachments

  • photo238555.jpg
    photo238555.jpg
    147.6 KB · Views: 1

andgott

Master Chief Petty Officer
Joined
Sep 2, 2009
Messages
801
No Title

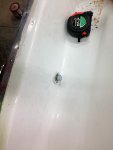
The transom drains and the motor well drain tube are installed. Before putting the tube in, I epoxied the inside of the hole so it wouldn't absorb water if there was ever a leak.

fetch


There is NO substitute for the 'proper' tool here... It does a perfect job of crimping the brass tube with little effort...

fetch


And, still looks nice on the inside-

fetch


I've tried other methods, trying to avoid spending that much money on what is pretty much a single-job tool, but to do a good job of it there is nothing that works quite right. So, I broke down and bought it.

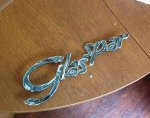
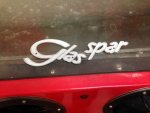
The old Glasspar emblem had been repainted by the previous owner, with some thick glitter paint. It almost looked like fingernail polish-

fetch


I tried several chemical strippers, but nothing seemed to do much. Then I put it in the blast cabinet, and in a few minutes it was clean and bare-

fetch


I just made sure I used lower pressure AND a light duty abrasive, since it's just pot metal... I didn't want it to disappear!
 

Attachments

  • photo238588.jpg
    photo238588.jpg
    69.3 KB · Views: 0
  • photo238589.jpg
    photo238589.jpg
    78.8 KB · Views: 0
  • photo238590.jpg
    photo238590.jpg
    90.7 KB · Views: 0
  • photo238591.jpg
    photo238591.jpg
    110.5 KB · Views: 0
  • photo238592.jpg
    photo238592.jpg
    115 KB · Views: 0
  • attach10123733.jpg
    attach10123733.jpg
    115 KB · Views: 0
Last edited:

kcassells

Fleet Admiral
Joined
Oct 16, 2012
Messages
8,715
Looks Great A,
Nothing like a good ole' plumber flare tool. Emblem came out nice and clean.
 
Top