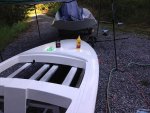
Glasspar G-3 Finally getting finished!

andgott

Master Chief Petty Officer
Joined
Sep 2, 2009
Messages
801
So I've been gone for a while... Some of you may recall my various projects on here, but it's been a few years since I have posted. I wish I had a really cool story to go with my absence- About how the CIA sent me on yet another classified mission, I was kidnapped, held hostage for years, and finally managed to escape and find my way to freedom. But, the reality isn't QUITE that exciting.

The past few years have seen a LOT of changes in my life, and working on boats was kind of low priority. First, I made a pretty major career change. I was a Merchant Marine officer and ship pilot, but have now come ashore. Currently I work in a management position with a large chemical company. Making this switch required me to return to school and get (yet another!) degree. The main motivation for this career change was another major change in my life, the arrival of our first child... In addition to that, I bought a new house and moved, so I would be a little closer to work. Oh- I should also add that in the middle of all of this, I found out that I had heart disease and went through triple bypass surgery, something I never expected at 34 years old. Other than all that, I really haven't been TOO busy, so I can't imagine why I have been slacking on the boat projects.

Back to the boat. This particular boat is a Glasspar G-3 Ski boat. If you have an excellent memory, you might recall that I started this project back in 2011, which was detailed in this thread-

[url]http://forums.iboats.com/forum/boat-repair-and-restoration/boat-restoration-building-and-hull-repair/531087-1961-glasspar-g-3-gets-a-new-transom [/URL]

I did the repairs and structural work, and was ready to start on the cosmetic work when life started to get busy, and I packed it all up. It has been in storage ever since.

The plan is to refinish the deck, which has already been painted at some time in the past. The hull is going to be a challenge- It is still the original gelcoat, though there is a lot of spider cracking in it. I hope to salvage it, as the owner is aware that the cracking will be hard, if not impossible, to get rid of even if I paint it all.

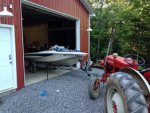
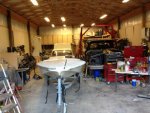
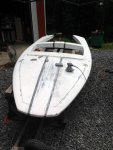
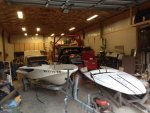
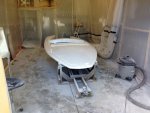
Here is a shot of her moving in to the shop today... One of the best things about relocating is I had room to build this shop- it is a 24' x 48' with just over 12' of overhead clearance, PERFECT for working on all my various projects. Certainly much better than that two car attached garage that I used to work out of!
 

Attachments

  • photo223150.jpg
    photo223150.jpg
    20.3 KB · Views: 0
  • photo223152.jpg
    photo223152.jpg
    24.6 KB · Views: 0

sphelps

Supreme Mariner
Joined
Nov 16, 2011
Messages
11,461
andgott ! Glad your back man ! Sorry about the ticker problems hopefully all is well with that .. I would expect that your little rug rat is growing like a weed ! :)
Do you still have the L&S ?
Great new garage ! Looking forward to watching this project get finished up ! :cool:
 

Woodonglass

Supreme Mariner
Joined
Dec 29, 2009
Messages
25,927
Andrew, Sorry to hear about the HD, but I'm Sooooooo happy to have you back on the forum an soooooo happy to hear about all the positive things in your life. I look forward to following along with the G-3 build.


jbcurt00

Moderator
Staff member
Joined
Oct 25, 2011
Messages
25,019
Great to see you back Andrew

Congrats on the new 1st mate, career changes and the move!

TripBypass at 34, yikes. Take care of yourself
 

GA_Boater

Honorary Moderator Emeritus
Joined
May 24, 2011
Messages
49,038
A secret CIA mission, including the kidnapping and being held captive for years sound tame to the real life stuff. Glad we'll be seeing andgott posts again. Take care and bounce the kiddo on your knee - A lot! Welcome back!
 

Willyclay

Captain
Joined
Sep 8, 2006
Messages
3,254
Welcome back Andrew! You have been missed. Glad to hear you met all the personal challenges encountered along the way. Good luck with the G3, Bill
 

andgott

Master Chief Petty Officer
Joined
Sep 2, 2009
Messages
801
No Title

Thanks! I'm glad that I finally have time to start working on my projects again...

Yes, I still have the Lake N Sea, in fact I just moved her yesterday to get the G-3 out of storage. I've also still got the Glasspar Citation that I restored as well. Neither of them has been wet for over three years, though! No time to fix 'em OR use 'em.

I absolutely love my shop- It is a dream come true. I have space to work on my various projects, and store those items that I already have completed. I will have to post a few pics of it soon. I just added a 16' x 24' extension on the side to store more toys in, too- But filled that fast. My wife says that I have too much stuff- However I think that I just don't have enough SPACE... I'd love another building or two.

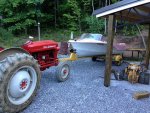
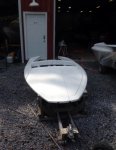
Got some pressure washing done today... Time to get the sander out and start at it. It's been a long time since I've been covered in Gel-Coat dust- I can't wait :)

-Andrew
 

Attachments

  • photo223190.jpg
    photo223190.jpg
    31.5 KB · Views: 0
Last edited:

andgott

Master Chief Petty Officer
Joined
Sep 2, 2009
Messages
801
No Title

Still making progress! My work schedule and other commitments have slowed me down a bit, as has the weather. I get about 14 days off a month, though, including a 7 day off stretch, which I am in the middle of now... If the weather would just cooperate, things would be GREAT. At this messy stage of the project, I prefer to work outside to keep the dust down!

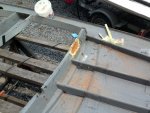
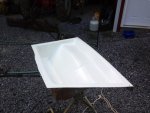
I got the deck/topsides sanded down, all the old paint is gone now and the gelcoat smoothed out and ready to prime. I've still got a few areas to do the final fairing on.

I was using my Dura-Block sanding pads on this project. I wish I would have bought those YEARS ago- They are great. I bought them for doing body work on my cars/trucks, but they work wonders on the boat projects, too. Everyone needs some- Trust me, once you've used them you'll never want another type of sanding block again!

I also patched up the dash. It had a gaping, and rather crudely cut, hole in the dash were a stereo once lived. I patched it up with a piece of plywood and some thickened epoxy. I've still got to do the final fairing.

In addition, I have been working on rebuilding the vintage Mercury Ride-Guide steering that I had waiting around. It is a much better, and safer, option than the cable steering that the boat had when I got it. It was not in the best shape, but I've got it almost done now...

I HOPE to have the boat primed before I go back to work on Friday night.
 

Attachments

  • photo224774.jpg
    photo224774.jpg
    45.1 KB · Views: 0
  • photo224775.jpg
    photo224775.jpg
    50.3 KB · Views: 0
  • photo224776.jpg
    photo224776.jpg
    38.9 KB · Views: 0

andgott

Master Chief Petty Officer
Joined
Sep 2, 2009
Messages
801
Dura-Block sanding pads, thanks! What motor are you planning for the G-3?


I have a couple to choose from- I'm leaning towards a Merc 650 that's sitting in the shop waiting for a transom... I bought it a few years ago knowing that I might need it sometime. It's not QUITE as old as the boat, but close enough.
 

Willyclay

Captain
Joined
Sep 8, 2006
Messages
3,254
- I'm leaning towards a Merc 650 that's sitting in the shop waiting for a transom...

That should be a good combo. I never owned a G-3 but had experience with one that had a Merc 500 and it went pretty well. Good luck!
 

andgott

Master Chief Petty Officer
Joined
Sep 2, 2009
Messages
801
No Title

The first layer of primer is on. 2 coats of House of Kolor KD3000 Modified epoxy.

I've got a few areas to touch up- This deck had some VERY bad stress cracking in some areas, the Gel-Coat was pretty bad. Ideally, I would have sanded it all off- However, there are a lot of details that are molded in to the deck, and if I took the gelcoat off, they would be lost. So- I have to try to salvage it as best I can. Most of the shallower cracks will get filled by the primer (it is high build surfacing primer), But others that are a little deeper I'll fill with some slightly thickened epoxy.

You might ask why I'm doing this AFTER I sprayed primer (or, you might not- but I'll still answer!). In the past, I'd have probably done all the final fairing and smoothing before any primer went on, But since I've started working with this type of primer, I've found it easier to do some of that finish work after the initial priming. I started doing it this way when I do auto body work- A DTS etching primer directly on the metal, to seal and protect it, then the body work is done over the top of that... While the primary purpose of doing it that way on steel is to protect the metal, I found that it was a lot easier to pick out imperfections after a nice uniform coat of color went on. Of course, I will have to prime again after doing all the final prep work, but it's worth it. It makes things a LOT easier.
 

Attachments

  • photo224893.jpg
    photo224893.jpg
    169 KB · Views: 0
  • photo224894.jpg
    photo224894.jpg
    48.1 KB · Views: 0

sphelps

Supreme Mariner
Joined
Nov 16, 2011
Messages
11,461
I wasn't gunna ask but I was wondering ! :lol:
Primer looks good !
 

andgott

Master Chief Petty Officer
Joined
Sep 2, 2009
Messages
801
No Title

Progress is slow, But it's coming along... Life seems to get in the way!

The primer is sanded. I've been working on it here and there where time allows, but just got the majority of it done tonight. It is 1:30 am, and I've been at it all night... I am intentionally staying awake until about 5am, as I am 'transitioning' from day shift to night shift and need to sleep all day. Having projects like this helps!

Once I get some final touchup done on the primer, I'll spray the top coat on. Hopefully this week.
 

Attachments

  • photo227532.jpg
    photo227532.jpg
    198.5 KB · Views: 0

andgott

Master Chief Petty Officer
Joined
Sep 2, 2009
Messages
801
No Title

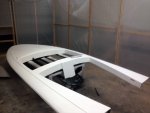
Paint time!

I've got three good coats of Acrylic Urethane on there- And it's looking pretty good! Having a 'paint booth' to work in is SO nice- There were ZERO bugs in this paint job... After a little cure time, I will do a little wet sanding, then the final buffing... Then it's time to put it all back together again.

I also painted the transom and top of the sponsons, and the motor well... Didn't get pics of those though.

Today was NOT an ideal day to be wearing a Tyvek suit- I taped the sleeves to my nitrile gloves to keep sweat from dripping on to the new paint- So all the sweat just pooled in the sleeves- I think I lost about 10 lbs!
 

Attachments

  • photo227993.jpg
    photo227993.jpg
    192.2 KB · Views: 0

andgott

Master Chief Petty Officer
Joined
Sep 2, 2009
Messages
801
Are you still using the SuperMarine Paint??

Not this time... The town I moved to has a GREAT automotive paint store, and I tried out their paint. It is a two-part urethane intended for industrial applications. Glossy, tough as nails, and a LOT less. It runs $109.00 a gallon out the door- Where supermarine 'marine grade' urethane is $225 plus shipping. So far, I like it as well- We'll see in a few days once I start the cutting/buffing how it stacks up
 

Woodonglass

Supreme Mariner
Joined
Dec 29, 2009
Messages
25,927
Sounds interesting. Keep us posted!! The 2 part urethanes are nice but I'm still to much of a C.O.B. to pay for em. I guess I might break down and do it one of these days!!!:rolleyes:
 

andgott

Master Chief Petty Officer
Joined
Sep 2, 2009
Messages
801
No Title

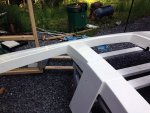
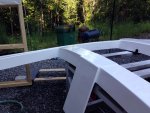
Started the cutting and buffing today... This paint shines up VERY well. There was a little orange peel, caused by 'operator error', not laying the first coat down wet enough. Due to the temps, it dried before it could flow out completely in some areas, and left things a little rough. So, I hit those areas with 600 grit wet/dry paper backed with a DuraBlock until they were smooth. Then, I hit it all with 1000 grit, then 2000 grit.

After that, I hit it with compound, and MAN does it shine! I love painting, it is probably the most rewarding part of the whole process of restoring a boat- Especially when things go right.

The first pic shows an area before sanding and polishing, the second shows it after... It's a huge difference- It doesn't show as well in the photos as it does in real life, especially since I am just using my iPhone... I need to get my 'real' camera out.

I am using a different compound on this project, and I REALLY like it. In the past, I have used 3-M Finesse-it, but they have changed their whole product line around and I haven't heard good things about it. I have also used Meguiars ultimate, which I DO like. But- The guy at the paint store convinced me to try something different. It is called Fare?cla G3. When is a compound worth $49.95 a liter?? When it works as well as this does. It is pretty amazing stuff! It may seem expensive, but it saves a lot of work. I could PROBABLY skip the 2000 grit step if I wanted to- But I can skip the polishing step. Before, I would use the compound, then use a polish to get the last of the swirls out. With this stuff, and a grey foam pad, I can skip the polish stage all together. It's also a LOT easier to work with than the 3-m.
 

Attachments

  • photo228068.jpg
    photo228068.jpg
    60.4 KB · Views: 0
  • photo228069.jpg
    photo228069.jpg
    67.8 KB · Views: 0
  • photo228070.jpg
    photo228070.jpg
    63.3 KB · Views: 0
Top