Force 125 tilt/trim pump bypass valve

Jiggz

Captain
Joined
Oct 23, 2009
Messages
3,909
Re: Force 125 tilt/trim pump bypass valve

Referencing the first pics you posted (note the wear or scratched section of the cap) on your original post, it seems the cap is already fully seated and has that gap as indicated by the "wear" shown. However, just to make sure you can always give it a tap to ensure it is seated properly. Since you already have the unit disassembled, can you post pics of both spool valves showing 3/4 views with the cap up front?
 
Last edited:

dancewithme951

Petty Officer 3rd Class
Joined
Jan 27, 2014
Messages
75
Re: Force 125 tilt/trim pump bypass valve

I've not been able to make any progress since my last post; had to sell a boat yesterday and going into town to look at a boat today..back at it this afternoon. And Jiggz IF I fully disassemble the currently installed spool/shuttle assembly (I hoped to be able to remove all components through one end since the transom end is inaccessible without removing the entire motor/pump but the other end did not come out) I will send pictures. And IF I ever get the Prestolite caps loose I'll have even more things to photograph. I'll be back...!
 

Jiggz

Captain
Joined
Oct 23, 2009
Messages
3,909
Re: Force 125 tilt/trim pump bypass valve

I've not been able to make any progress since my last post; had to sell a boat yesterday and going into town to look at a boat today..back at it this afternoon. And Jiggz IF I fully disassemble the currently installed spool/shuttle assembly (I hoped to be able to remove all components through one end since the transom end is inaccessible without removing the entire motor/pump but the other end did not come out) I will send pictures. And IF I ever get the Prestolite caps loose I'll have even more things to photograph. I'll be back...!

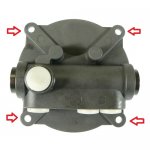
Actually, you do not need to dismount the whole motor-pump assembly but you will need to drain the oil and disconnect tubings (you might have to loosen the motor/pump housing unit to do this and avoid cross threading the fittings). And then dismount just the valve body (see pics and red arrows) by removing the four mounting screws. Of course, the unit being new it is all up to you if want to do this. If you decide to, always mark mating components to ensure they are re-installed properly.

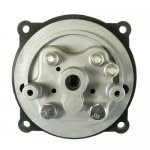
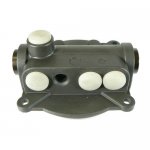
As for the old prestolite pump unit, worse comes to worst, just replace the valve body unit which you can buy from *bay for less than $75, brand new after market. I attached a pic of the valve body, just make sure it is identical especially the center shaft slot.

Valve Body with arrows.jpg Valve Body 2.jpg Valve Body1.jpg
 
Last edited:

dancewithme951

Petty Officer 3rd Class
Joined
Jan 27, 2014
Messages
75
Re: Force 125 tilt/trim pump bypass valve

I've been unsuccessful by any means so far to free the two end caps on my original Prestolite pump body. It's the Mercedes of the two I have (the other Chinese even though new) so I would really like to get past this one issue so I can run it through its paces. I'm thinking of using one of the hydraulic lines from the currently installed Chinese trim pump and attach it to the Prestolite pump with all the other ports on the Prestolite plugged with the hope this might pop loose the end caps (yes, I'll have a suitable container to catch the projectile parts). This will be enormous pressure exerted in a direction it was not meant to move so please share with me any thoughts on: 1. Should I even do this and 2. To which port on the Prestolite pump should I apply the pressure to free the shuttle valve and 3. Is there a preferential line - tilt cylinder out or in, trim out or in - that I should use for this technique?
 

Jiggz

Captain
Joined
Oct 23, 2009
Messages
3,909
Re: Force 125 tilt/trim pump bypass valve

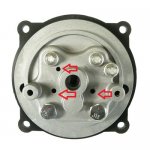
Have you tried using compressED air with a blow gun nozzle to blow into the valve body to push the spool valves? Here's a pic of the valve body where you will direct the high pressure air. I marked three holes but only two actually works but I cannot remember which holes. Remember a short quick blast only and the spool valves should fly out. Just make sure you only do one side by keeping the C clip on the other side. Oh if I remember right, you might also need to cover the other hole with your finger while shooting it with air. If still wouldn't work, try plugging all the port connections and do it again.

Valve Body 2 with arrows.jpg
 
Last edited:

dancewithme951

Petty Officer 3rd Class
Joined
Jan 27, 2014
Messages
75
Re: Force 125 tilt/trim pump bypass valve

OK it's finally time to close out this thread and with SUCCESS!! The tireless advice given over the past 2 weeks was invaluable along the way. The solution? That likely 25 year-old Prestolite pump was the answer!!! The new Chinese pump turned out to just not have enough poop. You'll recall my recent frustration at trying to get the shuttle valve out of the Prestolite valve body (C-clips removed and end caps frozen) so I gave up on that because with a blast of compressed air in the tiny holes in the valve upper body I could hear the shuttle valve move back and forth. So I removed the Chinese pump (left new motor in place), installed the Prestolite and WOW...WOW what a difference. What has been said about the Prestolite being the Mercedes of tilt/trim pump engineering is right!! Suddenly my tilt/trim worked just as it should - tilt cylinder was just fine. So I have a new motor that works (that piece of $#@*& Chinese pump is going back to Amazon) and I had rehabilitated the original Prestolite motor so I'll keep it as a spare.

Again thanks to all!
 

pnwboat

Rear Admiral
Joined
Oct 8, 2007
Messages
4,251
Re: Force 125 tilt/trim pump bypass valve

Great job! Glad it worked out for you and way to stick with it.
 

Jiggz

Captain
Joined
Oct 23, 2009
Messages
3,909
Re: Force 125 tilt/trim pump bypass valve

Persistence do pay! Congrats and enjoy.
 

Haz4rd

Cadet
Joined
Oct 3, 2013
Messages
6
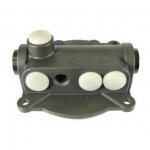
Hi there, sorry for bringing up an old post. But I also have one of those Pump Units. I'm using it for a tilt and trim on my Evinrude. But I can't for the life of me find a diagram showing which outlet does what? I know I need to block 2. But not sure where to start. Anyone have any ideas? Thanks for your time Mike
 

Attachments

  • 41bGNaRilHL._SY355_.jpg
    41bGNaRilHL._SY355_.jpg
    12.1 KB · Views: 1
Top