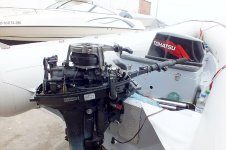
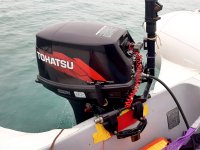
Cylinder Compression Incongruences.-

Sea Rider

Supreme Mariner
Joined
Sep 20, 2008
Messages
12,345
Is the ring locating pin for the broken ring still in the piston?
The piston's ring locating pin sits in place. It's impossible for a ring to break while running, never have seen such scenario in more than 13 years working with Tohatsu motors. Can seize a piston and piston ring ring but not break it due to poor lubrication, forgot to add oil to the fuel which will enevitably screw the entire motor to Kaputland.

OTOH, the motor will recover from an extreme overheat due to a bad thermostat or an impeller failure specially when the lower legs has collected seaweed, plastic bags even a banana peel once it has cooled down completely. Been there 3 times so to speak with reason.

The motor it's severely damaged already, why cry over spilled milk trying to find a culprit, the entire powerhead needs a semi overhaull. Tomarrow will know the cost of the machine shop work to install 2 new cylinder sleeves and bore them to match the new piston's diameter...

Happy Boating
 

MattFL

Master Chief Petty Officer
Joined
Oct 20, 2010
Messages
865
A ring can most definitely break while running, both 4-stroke and 2-stroke, and on a 2-stroke getting hung on a port is one common way for it to happen. Touching the power valve is another common way, on motors with power valves. Not only has it happened to me personally on an old worn 4-stroke motorcycle (rings were broken into dozens of pieces), but I've seen it multiple times on other 2-stroke motors.

If the ring end gap is too small and the motor gets hot, that can push the ring out into a port on a 2-stroke (usually chips a piece off the piston crown on a 4-stroke as the ring expands and has no where else to go). Also if the ring groove is too tight and the ring binds (from carbon, heat and/or lack of lubrication) that can also push the ring out into a port. If the piston ring groove is too worn and the ring gets bounced around in the groove the shock can make the ring crack and break. If the cylinder is just too worn, too much clearance, the banging around can break the rings. My motorcycle piston and cylinder were extremely worn and things got banging around and the rings broke (it was a $75 motorcycle that burned a ton of oil, the top end was extremely worn). It's definitely possible the guy putting your motor together weakened the ring by mishandling it, but I really don't think it was broken at the time of assembly or you would have had a failure much sooner.
 

Sea Rider

Supreme Mariner
Joined
Sep 20, 2008
Messages
12,345
It's useless trying to find 4 feet to the cat when only has 3. As stated before never have had issues with 2 stroke Tohatsu motors. This highly illustrated thread is all about bringing to life a motor that was on its way to become a large anchor, your posted comparisons and associated speculation are unnecessary as won't bring the motor back to life, what's kaput remains kaput. Looking forward to have it fully operational in some weeks....

Happy Boating
 

Sea Rider

Supreme Mariner
Joined
Sep 20, 2008
Messages
12,345
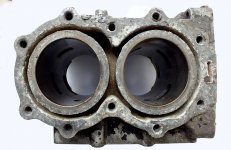
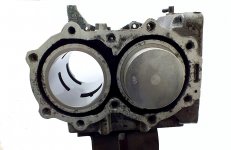
Some hidden surprises were found inside : The powerhead needs urgently a cylinder head, combustion chamber, exhaust covers decarbon, along an extensive water passages full clean up.
Upper Cylinder View.JPG

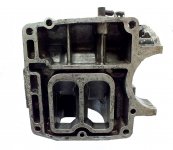
The exhaust chamber was found severely salt clogged, no water refrigeration was going on whatsoever in this area (*) this issue could and will blue the upper piston if not detected on time, it's because there's a an anode that sits too low on that water passages gets salted over time and clogs the water passage. To remedy that for once and all must install a tall SS washer under the anode to raise it more to achieve a better water flow circulation throughout the whole water passage.

Exhaust  View.JPG
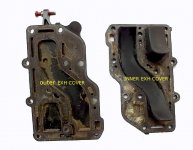
Exhaust Covers.JPG
No gaskets were found on any of both exhaust covers, the pseudo mechanic sealed both with Mega Gray Silicone, what a jerk !!

Internal Crankshaft View.JPG

Both crankshaft's matting surfaces and the crankshaft's cuffs were also sealed with Mega Gray.
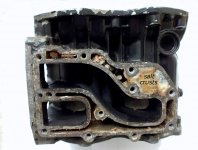
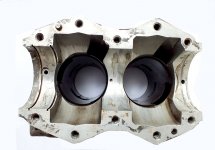
Lower Crankcase.JPG

The local made base gasket was found severely burnt, shot, the jerk didn't know that the OEM one is made with a thick alum sheet with self adhesive on both sides that will melt and seal once the motor is running. As it's too much manual work to clean all water passages and remove all the carbon build ups on the entire powerhead will take it to a shop that does such type of work. My hands will definitely thank me.

The machine shop witch doctor will charge $ 100 to install 2 new cylinder sleeves and bore them to fit 2 standard pistons with rings and as a courtesy resurface both cylinder head's mating surfaces to install a new cylinder head gasket. Cheaper than that not even in dreams...

Happy Boating
 
Last edited:

Sea Rider

Supreme Mariner
Joined
Sep 20, 2008
Messages
12,345
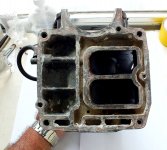
The Jurassic salted crust took 2 full hours to scrape and be fully removed, never have seen such scenario with the motors I'm currently selling and servicing.

Exhaust Chamber 1.JPG

Salted water long time ago ate the whole anode located inside that cavity and replaced it by a salt clone, this complement shot of grace ended up overheating the exhaust chamber and pistons as well.

Exhaust Chamber 2.JPG

Brake fluid did a great job softening the high tech salt crust and be able to remove it by layers at a time...

Exhaust Chamber 3.JPG

Now the complete water passage remains immaculate clean ready to install a new anode.

That's why always advise that when tearing a cylinder head to decarbon or remove salt layers or crust on the entire water passages must remove the exhaust covers and perform same task or risk overheating the powerhead and needlessly spending money for not having taken the corresponding measures in a timely manner. Did you know that Tohatsu recommends performing such task at min 300 and max 500 run hours...

Happy Boating
 

Faztbullet

Supreme Mariner
Joined
Mar 2, 2008
Messages
15,920
There must have been some cooling going on as the pistons show no signs of fore mentioned overheat.
 

Sea Rider

Supreme Mariner
Joined
Sep 20, 2008
Messages
12,345
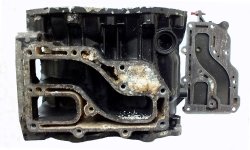
Been some cooling it's a very generous adjective, there was 0 cooling going on that exhaust chamber to the point that needed to take your palm out fast from the exhaust cover when monitoring the current working temp under load. There wasn't even a single water drop passing through under the anode's location, the external crankcase's peeled paint confirms so.

Have seen such scenario before, that same issue goes on on any powerhead that counts with an internal anode wherever they are located, the issue is that nobofy removes exhaust covers to desalt the internal chamber/s from time to time as all assumes that's cooling fine, each one with it's own particular theme...

Happy Boating
 

Sea Rider

Supreme Mariner
Joined
Sep 20, 2008
Messages
12,345
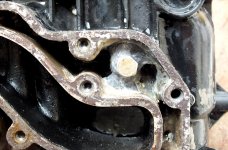
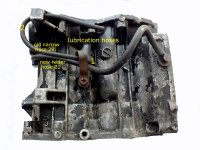
Plan to replace the old narrow lubrication hose for a new wider hose to better the fuel/oil flow passing in between 1 and 2. Both current hoses are bit dried and hardened...
Lubrication Hoses.JPG
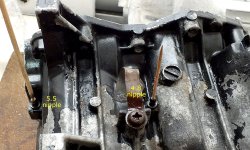
As the nipples are fully pressed in and don't want to screw them as will be a nightmare to have them removed will be using the old ones which are 100% operational.

Nipple Diam Differences.JPG

Happy Boating
 

Sea Rider

Supreme Mariner
Joined
Sep 20, 2008
Messages
12,345
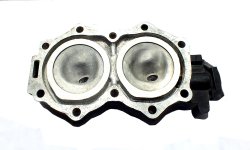
Keeping Up with the Restoration.-
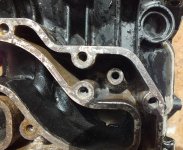
The dirtiest things you have to deal with when performing a full crankcase restoration is to remove all the carboned and salted scenarios you will find inside any 2 stroke crankcase. Was experiencing different cleaning methods in which harsh cleaning solvents as thinner was not ideal to use due to the strong penetrating odor and being non friendly with hands.

To soften different carboned crankcase's parts ended soaking them individually in boiled water for half an hour each, while remained hot squirted shots of CRC marine carbon remover to penetrate for some minutes, then worked removing carbon layers one at a time brushing them off with a hard bristle brush and scrubbing with Scotch green pads repeating the carbon removal procedure several times in a row, patience priest and a long time spent was mandatory for success.

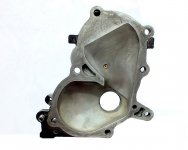
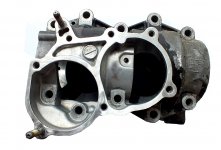
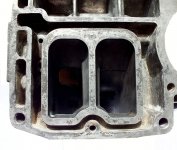
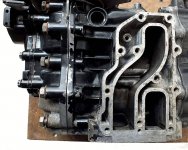
Salted water passages were much easier to clean, vinegar was squirted on all passages, let soak for some minutes for a final scrape off with different diam wooden sticks to mechanically smooth out all water passages. Took advantage to micro polish the inlet manifold, exhaust and lower crankcase internals to a smooth finger rub condition, should retain less carbon build ups over time. Although all parts were cleaned to perfection some will remain darkened as it's impossible to be restored to when out of the box condition without scrapping, polishing hard their walls off. Pics speaks for themselves....

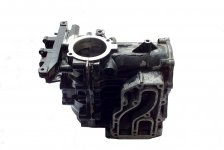
The restored crankcase awaits for the needed parts to arrive in a few more days to begin with the overall fun assembly...

Happy Boating
 

Attachments

  • Restored Inlet Manifold.JPG
    Restored Inlet Manifold.JPG
    167.9 KB · Views: 2
  • Restored Upper Crankcase.JPG
    Restored Upper Crankcase.JPG
    190 KB · Views: 3
  • Restored Cylinder Head.JPG
    Restored Cylinder Head.JPG
    188.7 KB · Views: 3
  • Restored Lower Crankcase.JPG
    Restored Lower Crankcase.JPG
    221.7 KB · Views: 4
  • Restored Exhaust Chamber.JPG
    Restored Exhaust Chamber.JPG
    205 KB · Views: 4
  • Restored Crankcase.JPG
    Restored Crankcase.JPG
    163.5 KB · Views: 2

Faztbullet

Supreme Mariner
Joined
Mar 2, 2008
Messages
15,920
As previously stated ..pistons show no signs of extreme overheating and the peeling paint is NOT from overheating. Where is pic of bored cylinders?
 

Sea Rider

Supreme Mariner
Joined
Sep 20, 2008
Messages
12,345
As previously stated ..pistons show no signs of extreme overheating and the peeling paint is NOT from overheating. Where is pic of bored cylinders?
What's the point in crying over spilled milk, that crankcase had many issues that contributed to its full detereoration such as, partial clogged lower leg's water intakes, clogged water passage in exhaust chamber, stolen check valve from lubrication pipe and cheap 2 stroke oil use and abuse....

Isn't known if all these issues contributed to have a broken ring or it was the last mechanic that assembled the entire crankcase that did a lousy job ? Be that as it may, that nice motor it's going to recover like the phoenix...

Happy Boating
 

Sea Rider

Supreme Mariner
Joined
Sep 20, 2008
Messages
12,345
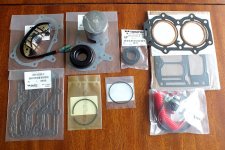
Hurrah, the needed spare pare for the full restoration arrived yesterday, thanks UPS.

Spare Parts.JPG

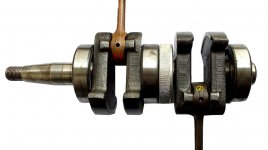
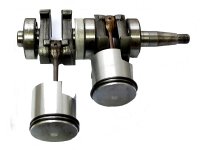
After a close crankshaft inspection the connecting rods (1) was found with a strange yellowish color compared to the second one (2) seems there's been a slight overheating going on not to the point to screw the rod or adjacent wheel bearing.
Crankshaft.JPG

The premix oil check valve located between the lower and upper crankshaft's lubrication pipe was missing, seems the lube pressure on the upper port was extremely poor. Just waiting for the machine shop to finish installing both new cylinder sleeves to begin the fun restoration work...

Happy Boating
 

Sea Rider

Supreme Mariner
Joined
Sep 20, 2008
Messages
12,345
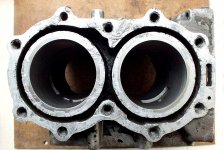
Just returning from the machine shop, the techie has done an excellent job installing new German cylinder sleeves, were bore to match tight the new pistons. Although the crankcase's front was shaved even still shows sign of pitting, corrosion, this nice motor has never ever been flushed with fresh water since new while powering 7 x 30 x 12 my Club's tender dinghy for the past 6 years.
New Sleeves & Pistons.JPG

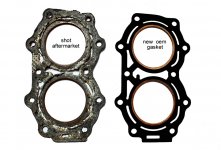
Head Gaskets Comparisson.JPG
The lower crankcase which shows signs of more pitting, erosion on the left side was not shaved even at the machine shop, before tearing apart the powerhead showed no signs of water draining onto the pan while using a very lousy gasket made from a cheap crappy material, should go this route when installing a new OEM gasket well torqued.
Lower Crankcase Surface.JPG

As all bolt's threads are in excellent shape, plan torquing the head, exhaust covers and pan bolts slight higher than what the factory suggests to avoid re torquing them back soon after finishing the second break in period as plan sealing all with Permatex Aviation. Next week will start the full motor restoration...

Happy Boating
 

Faztbullet

Supreme Mariner
Joined
Mar 2, 2008
Messages
15,920
How about a pic of #2 with piston removed as sleeve doesnt look tight to aluminum
 

Sea Rider

Supreme Mariner
Joined
Sep 20, 2008
Messages
12,345
How about a pic of #2 with piston removed as sleeve doesn't look tight to aluminum

The micro circular line formed between the body and sleeve you're referring to was removed slightly shaving the entire crankcase for a second time as the exterior mating surface was extremely pitted, corroded. Both sleeves were pressed tight before the second shave...

Double Sleeve.JPG

Have put a layer of alum putty sealer to fill the deep pitting, when stone hard will shave the whole surface to be flat even with the cylinder head's mating surface for gasket to sit well and avoid water intrusion specially around head bolts.

Happy Boating
 

Sea Rider

Supreme Mariner
Joined
Sep 20, 2008
Messages
12,345
Updates :

Guess what, when removing both old pistons from the upper connecting rod to install new ones in, one of the lower piston's circular clip was missing, definitely fell off the piston's side and screwed the lower piston, piston ring and cylinder...

The immaculate clean internal crankcase was finally assembled with 2 new cylinder sleeves, 2 new standard pistons and rings, piston's clips, upper and lower oil seals, general gaskets, 2 lubrication pipes and replace the missing oil check valve in one of them.

New Pistons & Rings.JPG

The head gasket was sealed with Permatex Aviation due to too much saltwater pitting, corrosion found in one of the mating surfaces. Have decided not to install the internal anode located on the large water passage inside the exhaust cover, it's a natural salt collector that will end clogging such water passage and overheating that area.

Restored Crankcase.JPG

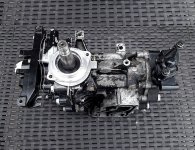
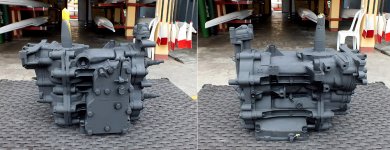
As the entire crankcase looked awful, paint peeling everywhere, decided to repaint the entire crankcase with a special paint, now looks eye catching.


Paint Restoration.JPG

Will dress all the electrical and mechanical parts, take the crankcase to the marina and install it on the pan and if with sufficient time start the motor up...

Happy Boating
 
Last edited:

Sea Rider

Supreme Mariner
Joined
Sep 20, 2008
Messages
12,345
The motor has finally been electrical dressed up, the ignition coil and the CDI which rested close to the crankcase now rests 4 mm away, will receive less heat from the motor and should last longer working flawlessly. All crankcase's grounds, ignition coil, CDI grounds, all electrical bullet connectors and the internal spark plug's contacts have been shinned as when out of the box. Cleaning just the electrical grounds will not guarantee a trouble free electrical operation.

Did not installed the internal anode in the main water passage located under the exhaust cover, it's a huge collector of salt that will end clogging and overheating that water passage. Tried to install a check valve at the lower vertical lubrication pipe with no success, it's near impossible to introduce a 2.8 mm round check valve into a 1.3 mm internal diam rubber hose. Tried oil, grease, love lube, heating the hose's extreme, finally gave up. The motor didn't count with a factory installed one, so will work ok without one.

Tomorrow will undergo a 5 hour break in period before powering a 340 Mtr dingly tender. As my club's seamen were natural born savages screwing motors have decided to remove my Tohatsu 18 from the pan to undergo a 1 K run hour half restoration and install this restored 18 HP for the break in period. I'm confident that will start second pull as the first one will be used to prime motor while its choked....

Happy Boating
 

Sea Rider

Supreme Mariner
Joined
Sep 20, 2008
Messages
12,345
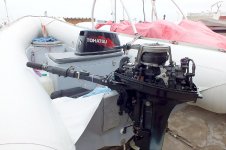
After priming the fuel bulb till firm, the motor started second hard pull and with 25:1 fuel/oil mixture run it on modified muffs to achieve full water pressure with minimum water loss through both ears for one full hour at min idle.

Restored 18-1.JPG
Restored 18-2.JPG

Today early in the morning made a cold Compression test and holly guacamole, the sucker shows 130 PSI on both cylinders, that's why was bit hard to rope start. The spark intensity test lighted the translucent bulb with an intense bluish spark at both sides. New NGK B7HS spark plugs gaped 1.0 tight were installed, should light as firecrackers.

The motor runs strong and extremely cold due to impeccable clean water passages and 0 carbon buildups on the entire combustion and exhaust chambers that ended installing a new thermostat which planned not to install as wasn't counting with one when came into my hands. Made a 2 hour slow break in period at open water at no more than half throttle, but the thing wanted to run and I prevented it. Still 2 more hours to go to run it on plane at reduced throttle.

Restored 18-3.JPG

This powerhead installed on my middle and lower leg's motor who's water pump and impeller has clocked 1K run hours from new peed at idle as a teenager, it's a day night difference peeing strong with all the water passages clean than doing so with clogged water passages no matter if have installed a new thermo and a complete water pump kit which in most cases have made 0 improvement...

Happy Boating
 

Sea Rider

Supreme Mariner
Joined
Sep 20, 2008
Messages
12,345
It might cold seize without a t-stat
Sea water temp around here in July is only 17C , the issue is that without a thermo the motor exits so much water at the rear of the middle leg that looks as a mini Niagara Falls from a distance...LOL!!

Happy Boating
 
Top