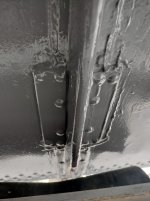
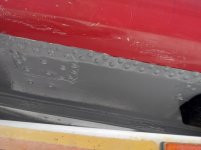
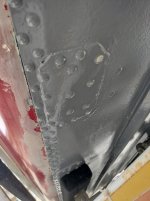
Thanks for the response, I've ordered all the materials to apply some patches. It's only been towed properly strapped down at the transom and winched up at the bow eye. Looking at the cracks, the one sitting on the bunks is old as a previous owner patched it with some kind of epoxy, and the newer one is only a few inches in front of it.
I'd say they're from operating in rough water because it didn't leak for the entirety of last summer with heavy use on mostly calm lakes, this year I've been running it in rougher water. I don't know anything about boat construction but the middle of the hull is pretty thin aluminum with no wood framing or foam, really only reinforced by the ribs and the ridges (strakes?) running down the bottom. I use a carpeted piece of plywood as a floor that just sits in there screwed to some brackets, I'm thinking of adding some framing in there with 2x3s for reinforcement.


") ).
).