Century Coronado restore

89 resorter

Petty Officer 1st Class
Joined
Oct 3, 2013
Messages
287
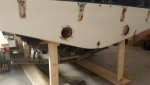
Now that the weather had (kinda) improved here in South Western PA I have begun digging into the restoration of a 89 Century Coronado that I purchased in late fall. I have been following you guys on this dry dock forum for quite some time so I pretty much knew what I was getting myself into when I bought her. I was not aware that our winter was going to be so brutal so I am nowhere near where I thought I would be by this time of year ..... I have an un-insulated building that is normally quite comfortable to work in when temps are upper 20's or so. I found out quickly that it is not comfortable to work in when the temps are more like 15 or less! Anyway, I got started and wanted to share some pics because the only thing I know about the boat refurbishing process is that I am going to need a lot of help and will be asking a lot of questions. What I know so far is that the motor has 500 hours and runs very good and has good compression (at least it did on the test drive) and all I plan to do with it is to have the carb, starter, waterpump, fuel pump, etc. rebuild/replaced. The whole rest of the boat is another story as it lists to the starboard side which I have already confirmed is due to wet foam. After I had confirmed that the foam was wet, I found the culprit when I removed the swim platform and saw that the bracket on that same side had been bent and pulled the lower lag screw out of the transom. The PO tried to fix it using what looked to be a lead plug and installing a smaller diameter (steel) lag screw. I plan on pulling up the floor this coming weekend with the expectations being that the stringers will have rot and likely the transom in that area as well. I will warn you that this will not be the quickest project you ever see on this site. I only have the weekends to work on this project and that will be when I don't have a forced shore pass from the Admiral wanting me to do other missions. My goal is to have it ready to launch by Summer 2015 which is fine since I have lots of friends that owe me boat rides until then.
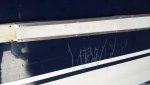
 20130929_123415_zps5c155b29.jpg20131102_145306_zps06d53bcc.jpg20131006_094425_zps1cb31295.jpg
 

Attachments

  • 20131020_100802_zps387d761d.jpg
    20131020_100802_zps387d761d.jpg
    45.1 KB · Views: 5
  • 20140309_090610_zps05cc6cb9.jpg
    20140309_090610_zps05cc6cb9.jpg
    42.7 KB · Views: 8

Woodonglass

Supreme Mariner
Joined
Dec 29, 2009
Messages
25,924
Re: Century Coronado restore

welcometoiBoats-1.jpg


A classic Beauty!!!
Since the Mechanicals are all "Ship Shape" this should be fairly Straight forward. From what I could see the interior looks to be in fairly decent shape as well. Gelcoat appears to need some work. Will you be re-Gel'ing or Painting? Don't forget to inspect the Propellor shaft support sleeves and bearings.

WelcomeAboard.jpg
 

89 resorter

Petty Officer 1st Class
Joined
Oct 3, 2013
Messages
287
Re: Century Coronado restore

At this point I am not sure if I want to tackle the interior or not but honestly, I feel like that decision is pretty far away right now. The PO said that it was replaced about 6 years earlier. I plan on focusing on the structure first and once I pull up the floor that will tell me how much work I have to do there. My gut feeling tells me that I am going to need to replace some of the stringers and I have decided that if one or two of them need replaced that I might as well bite the bullet and do them all (since it looks like so much fun in the other threads I have been following :joyous:). Same with the transom. The wood around the exhaust and drain plug openings, while not rotted, is pretty moist and I have a feeling that I will actually find rot when I get down to the area where the lag screw pulled out and flooded the foam. As far as the gel / paint question, I think that the dark blue color is actually paint so I am not sure which way to go. I saw traces of dark blue on some of the trim pieces I removed and when I removed the decorative panels on the side, it appears that it is a lighter blue. If it is paint, it looks like it held up pretty darn good so I do think I would be afraid to re-paint if need be. If it is actually Gel then I would prefer to stay what that..... I will likely look for the opinions from the guys on this site to help me confirm which it is and which way to proceed. Good point about the running gear. I have the prop shaft being checked right now by a buddy that has a machine shop and the propeller is out for refurbishment. I did not think about the bearing in the strut so I think I will pull that out and get a new one on order this weekend.

20140309_090528_zpse61381c3.jpg20140309_090414_zps190c5da4.jpg
 

greenbush future

Lieutenant Commander
Joined
Aug 28, 2009
Messages
1,814
Re: Century Coronado restore

I thought the dark blue looked painted too, but you boat sure has nice lines. I owned a Century 23 footer, it served me well but I never had to open it up like yours needs. Same dark blue paint on mine too. Looks like you are doing her up right.
 

89 resorter

Petty Officer 1st Class
Joined
Oct 3, 2013
Messages
287
Re: Century Coronado restore

The blue color is what convinced me to drive 6 hours to NJ to look at the boat .... I have always like the looks of an older boat in flag blue. The other thing that got me to thinking it was paint and not gel was that the PO did not appear to be very meticulous yet the color (while dented, scratched, nicked, etc.) shined like new with no hint of the oxidation that would have shown up on a dark color after 25 years.
 

89 resorter

Petty Officer 1st Class
Joined
Oct 3, 2013
Messages
287
Re: Century Coronado restore

I got the floor and all of the foam removed this weekend. I thought I would have got the old stringers removed too but the foam chipping took a lot longer than I thought. I was able to pull a section of stinger out in front of the forward bulkhead and it came out intact so I will be able to use it as a template. I doubt that I will have such luck with all of the stringers since the foam was pretty waterlogged toward the back half of the boat between the outer stingers. That and the poor quality of glass work from the factory will likely be a bad combination for the wood. The only glass work I know is from what I have seen on this forum which apparently is much, much higher that what I found this weekend on my boat. It does not appear that much attempt was made to protect any of the bulkheads which look like they are bare wood (and all are rotted). I was also surprised to find that there was no glass wrapped around the butt end of the stringers which left exposed wood in those areas. I found that only the main, center stringers are tabbed to the transom where the outer two sets stop about an inch from the transom. I would like to get your opinions whether this is normal and if I should run the new stringers in this same manner or if I should tab them to the transom???


20140330_113001_zpsbdde67c0.jpg20140329_102350_zpsb9f88378.jpg20140323_100048_zpsa88b2c23.jpg20140330_114515_zps82ffc6dc.jpg
 

greenbush future

Lieutenant Commander
Joined
Aug 28, 2009
Messages
1,814
Re: Century Coronado restore

I would tab and glass all of it, heck it's opened up, you wont have a chance to re-open so it makes sense to build it right. But that's me, I'd document it well with pictures as a selling point if it ever get's to that. Still love that color on the outside.
 

89 resorter

Petty Officer 1st Class
Joined
Oct 3, 2013
Messages
287
Re: Century Coronado restore

Our boat club started getting our docks ready on Saturday morning which would have been a great sign of spring except for the snow flurries that were falling on us the first part of the day. Anyway, still managed to squeeze some quality time with the boat and got all but one stringer removed. This gave me open access to drill into the lower part of the transom where no surprise, I found wet dark wood. Next weekend I plan on removing the last stringer and getting started on removing the transom which is where I could use some help with figuring out the best way to do so (all suggestions welcome). It looks like I have clear access to the top of the transom plywood although I am not too sure why the ledge between the shell and the plywood is not straight across .... guess I will find out :confused: I'm also curious of how much work I am getting into since this is a curved transom and if anyone knows of any links to someone who has replaced a similar transom.

As always, your help is greatly appreciated.


89 resorter

Petty Officer 1st Class
Joined
Oct 3, 2013
Messages
287
Re: Century Coronado restore

Does anyone know how to go about removing the rudder box (I think that's what its called) from the hull? I think I have it stripped of all connecting and mounting hardware but I want to check before I just begin hammering on it.


Here is a pic from the bottom of the boat. My assumption is that the square flange is fitted into the hull and keeps the whole thing from spinning and then the large nut on the inside of the boat draws the whole thing together.


Appreciate the help ..... Dave
 

89 resorter

Petty Officer 1st Class
Joined
Oct 3, 2013
Messages
287
Re: Century Coronado restore

Turns out that the key to removing the rudder box was a BFH after all ..... just dug out as much caulking as possible and beat it out with a hammer. Once that was out of the way I had clear access to all of the tabbing holding in the transom and let the grinding begin. Was not too long till the Admiral got a look at the grinding dust so I had to shift gears a little and erect a tent.


Got back to grinding and it took no time at all to expose the transom wood but it turned out much different looking that anything I have seen yet in the dry dock posts. The transom looks like it was made up of a bunch of rectangular pieces of plywood individually glued to the transom.


Is it possible that this is the way the manufacturer accomplished shoring up the curved transom?
 

89 resorter

Petty Officer 1st Class
Joined
Oct 3, 2013
Messages
287
Re: Century Coronado restore

We had a storm knock out our power Saturday right in the middle of grinding on the inside of the hull so I figured I could get started figuring out why the motor box felt so flimsy....... did not take too long to find that the box was pretty much rotted about 6" up from the base.


I plan to use a good exterior plywood and stainless hardware on the new box but I am not sure of the best way to protect the wood, especially the edges that will eventually sit on the carpeted floor.

As always, your ideas are greatly appreciated...... Dave
 

Woodonglass

Supreme Mariner
Joined
Dec 29, 2009
Messages
25,924
Re: Century Coronado restore

Got back to grinding and it took no time at all to expose the transom wood but it turned out much different looking that anything I have seen yet in the dry dock posts. The transom looks like it was made up of a bunch of rectangular pieces of plywood individually glued to the transom.


Is it possible that this is the way the manufacturer accomplished shoring up the curved transom?

This is one of many methods used by manufacturer's to fabricate curved transoms. It does yield a very strong structure and you can use the exact same method to build it back if you so desire. You can also use thin 3/8" sheets of ext. Grade plywood and clamp them individually to follow the curve. Is the transom a compound curve. I mean, does it curve from side to side and also from top to bottom? If this is the case then doing it the way the MFG did it will prolly be your best bet. Kinda tedious but, as previously stated, will yield a strong and structurally sound transom. Epoxy will be your resin of choice when building it in this manner. That's my just my personal opinion of course.;):D


Don't forget to "PIN" yourself on the iBoats Members Map...https://www.zeemaps.com/map?group=935424
 
Last edited:

89 resorter

Petty Officer 1st Class
Joined
Oct 3, 2013
Messages
287
Re: Century Coronado restore

Thanks WOG....it makes me feel better that someone has seen this type of transom before. I would prefer to go with the buildup of 3/8" ply sheets but I will have to lay a straight edge up & down the transom this weekend to make sure it is not a compound curve. If it is a compound curve and I have to go with the puzzle pieces and use epoxy, will that dictate that my entire build will then have to be epoxy considering that I will be tabbing the new stringers to the transom?

BTY your members map is a great idea ...... I pinned myself a couple weeks ago and have been checking the map only to find that it is pretty sparse here in the western PA area. I guess I can hang with the West Virginia guys.
 

Woodonglass

Supreme Mariner
Joined
Dec 29, 2009
Messages
25,924
Re: Century Coronado restore

You can still use Poly. You will need to tab the stringers to the transom using Epoxy, but after that everything can be poly Epoxy will stick to anything but poly doesn't stick to epoxy. You will have to Paint the inside of the transom instead of gelcoat it but that's OK too. Use some Rustoleum with Hardener in it or some Rustoleum Rattle can Epoxy Paint and it will last for decades. Same thing for your bilge.
 

Dishman28

Recruit
Joined
Mar 4, 2014
Messages
2
More pics please... Looking to do the same thing to an 1985. Just wanted to see how pretty she turned out. Thanks!
 

89 resorter

Petty Officer 1st Class
Joined
Oct 3, 2013
Messages
287
The grinding has taken a lot longer than I anticipated. I only have the weekends to work on her and a lot of those days the wife has other plans for me (and believe me, grinding is a job that I can be talked out of very, very easily). At the pace I am going, if you start now I will probably be following your thread for ideas lol. Anyway, I should finish up the grinding this weekend or the next and will post pictures.

Dave.
 

jones01m

Petty Officer 1st Class
Joined
May 23, 2011
Messages
252
Brotha I feel your pain with making the boat priority. Look at the date mine started. It seems to go in waves. As I progress I am alway thankful that I love the hull and can see the final product.
 

89 resorter

Petty Officer 1st Class
Joined
Oct 3, 2013
Messages
287
I finally finished the grinding and now I'm itching to get starting putting the old girl back together (pun totally intended :D). I cemented by noobie status by managing to grind through the hull in a couple of places. Realizing that I am running out of glassing weather, my plan is to install the transom and fix the grind scars and some bad dock rash on the bow before the cold settles in.

When I was grinding the transom I found a raised section of glass that I did not feel comfortable grinding flat because I have no idea why it would be there (all opinions welcome). What I do know is that the factory went through a great deal of effort to work around this section as you can see by how the puzzle pieces making up the transom were carefully tailored around the raise. The raised section runs vertically just to the left of the transom center.

You can see that the factory took great care to install the wood pieces around the raised section

I had originally planned on making the new transom from solid sheets of 3/8 ply where I could bend them to match the curve in the transom but now I am leaning to go with the original puzzle piece design and work around the raised area like they did at the factory. I like WOG's suggestion of using epoxy for this type of transom design due to added strength that it would provide. I am having some problems getting pictures off of my phone but will post pics of the grind scars and dock rash as soon as I can.
 

Woodonglass

Supreme Mariner
Joined
Dec 29, 2009
Messages
25,924
You're getting there!! Once the Grinding is done, It's all downhill!!! Epoxy is the ONLY resin to use for a transom of this type. You should thicken it a bit, so it will be mayonaise consistency and apply it to the skin and to each individual plywood piece. It'll be much like laying Shower Tile in a Bathroom. It would be much better if you could vacuum bag it into place.
 
Top