Buehler Restoration Questions

zdeyonker

Seaman Apprentice
Joined
Jun 7, 2016
Messages
33
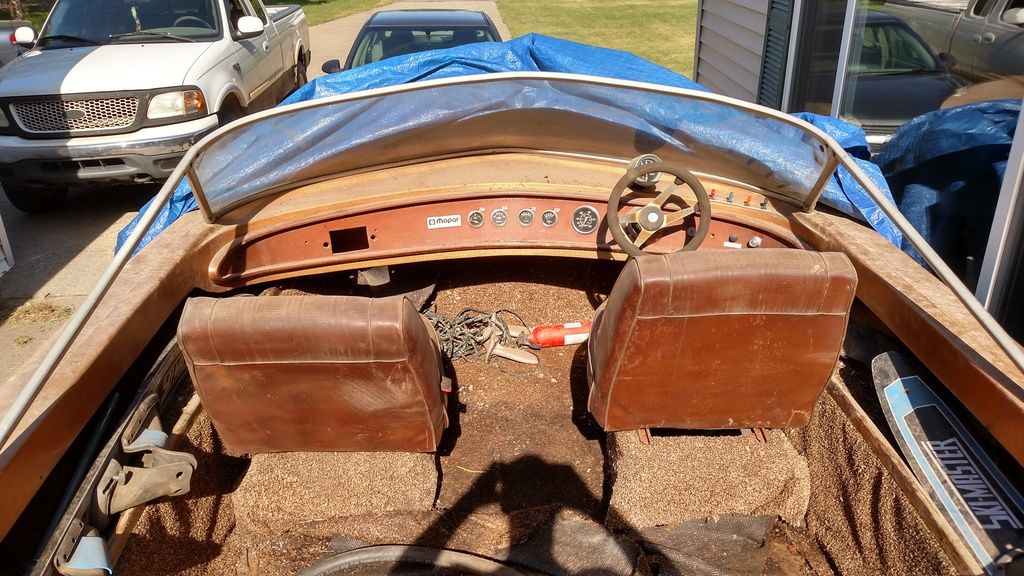
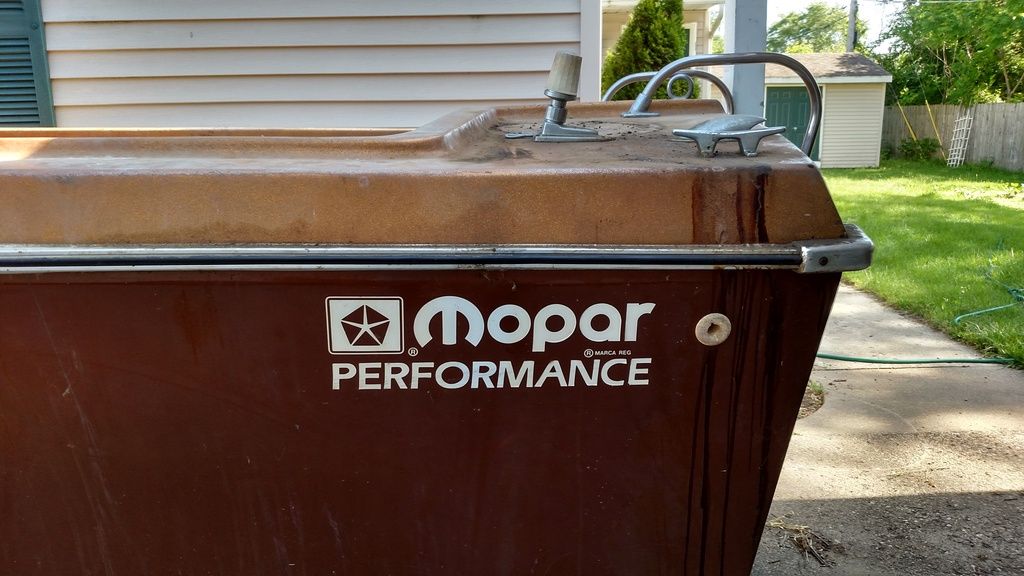
Hi guys, I have recently discovered what I believe the boat I have to be, a Buehler Jet Boat! I think late 60's, maybe someone can correct me? Anyway, this boat is in rough condition and needs new stringers and deck. What is everyone's recommendations as far as wood to use for the stringers and deck, what type of resin, and fiberglass to lay. I was thinking about using 3 or 4 layers of 1708 on the stringers to tab into the hull and cover them with. Is PL glue sufficient for gluing in stringers on these, or is something else recommended? I want to waterproof all wood that goes into the boat before it goes in, stringers and deck included, so resin and a layer of 1.5 oz. CSM to wrap everything before installing and glassing in with the 1708. What method is best for screwing them together and foam installation? I will definitely want to seal all screw holes during installation, including those made while replacing the wood on the bottom side of the cap. Mine is also missing the supports for the side of the cap in the middle by the wood step is where I believe they should be. Does this sound right? Also, my stringers are completely rotted, so if anyone has measurements for height and width, that would be awesome! I would hate to build it all and then have the 440 drop in and be sitting on the hull. Any info on these boats would be appreciated!
 

ondarvr

Supreme Mariner
Joined
Apr 6, 2005
Messages
11,527
First suggestion would be to start reading other threads here on the same subject, there are hundreds, most of your questions will be answered and you will see exaclty what worked and didn't for each person.
 
Last edited:

Woodonglass

Supreme Mariner
Joined
Dec 29, 2009
Messages
25,927
Welcome to iBoats. Pics always help us to help you. The second link in my signature below will help you with your Stringer and deck questions.
 

zdeyonker

Seaman Apprentice
Joined
Jun 7, 2016
Messages
33
I've read a LOT of the posts in the last two weeks before posting and watched a lot of videos, but found some information where it was stated that if your boat was assembled with poly resin, then you had to use poly, and conflicting information on layering 1708, as well as the validity of 3M 5200 as a sealer. Watched the entire series on the SeaRay 220 build. Also, as you can see from the condition of these stringers, my measurements will be nowhere near exact. So that's why I was wondering if some one here knew about these boats and could help me out a bit.
 

ondarvr

Supreme Mariner
Joined
Apr 6, 2005
Messages
11,527
I'll answer a few.

You can use either type of resin, it won't make much of a difference. The only real difference is you won't be using any CSM with epoxy.

There is no controversy about 5200

The stringers were nowhere near exact when the boat was first built, and whatever you do will most likely be better.

Knowing how a particular brand or model is built doesn't help much, you will be doing it a bit different and far better than they did it the first time.

There is little to no value in pre wrapping the stringers with glass, it just makes for a lot more work and takes much more time.

You aren't really glueing the stringers to the hull, the objective is to just not have the plywood resting on the hull itself, this can create a hard spot that may flex differently than the rest of the hull and potentially cause cracking. In fact very few small boat manufacturers do it, they just drop the stringers in and glass them in place. You can use PL, putty, foam, spacers, or nothing.

Exterior grade fir plywood works well, but you can upgrade from there.

A layer CSM and a couple of layers of 1708 over the stringers should be fine, but you can use more if you want.

What is your budget for this project?
 

zdeyonker

Seaman Apprentice
Joined
Jun 7, 2016
Messages
33
Okay, thank you!

Would it still make sense to at least coat them in resin to add water resistance to the bottom side?

Okay, I've seen using putty(resin, hardener, chopped strands, and cabosil) to glue them in and little pieces of foam to create the spacing. Then use the putty that squeezes out and more if necessary to create the fillets. Is this a good way to do it? I want to make sure that big 440 has plenty of support. CSM under the 1708, correct?

Sounds good! My budget isn't really restricted, but I'd like to do it all for under $4k if possible.

Would this be a good resin? http://fiberglasssupplydepot.com/Premium-Polyester-Resin.html

I'm having trouble finding fiberglass supplies in Michigan and found this website. They have everything I need, decent prices I think, and great shipping deals. Just need to know if that is a decent resin so I can order it up. I'll probably order tons of extra fiberglass for any future jobs I'm sure I'll end up doing. Still have a few jet skis that could use some hull repairs, lol.

Thanks for your help!
 

zdeyonker

Seaman Apprentice
Joined
Jun 7, 2016
Messages
33
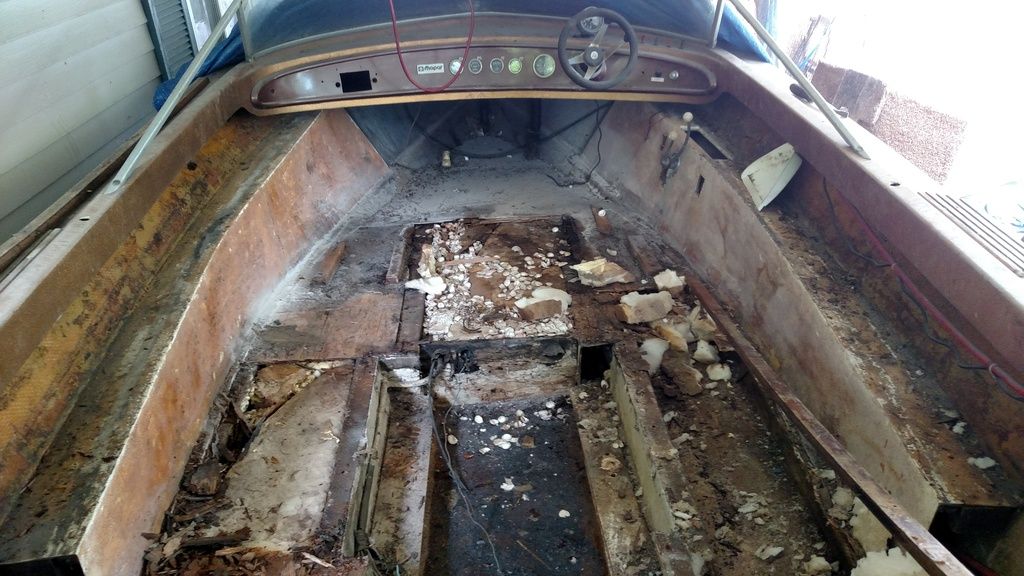
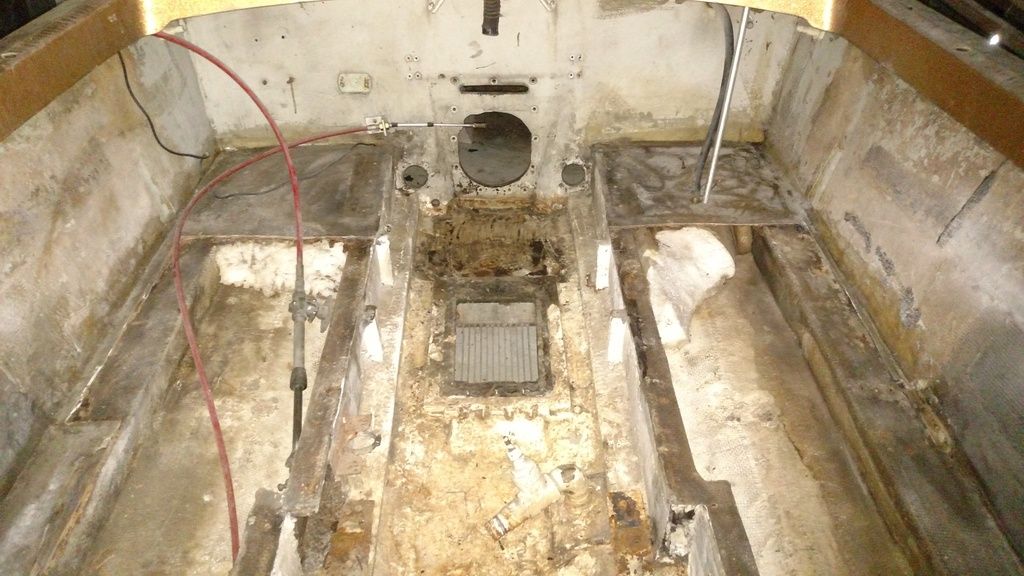
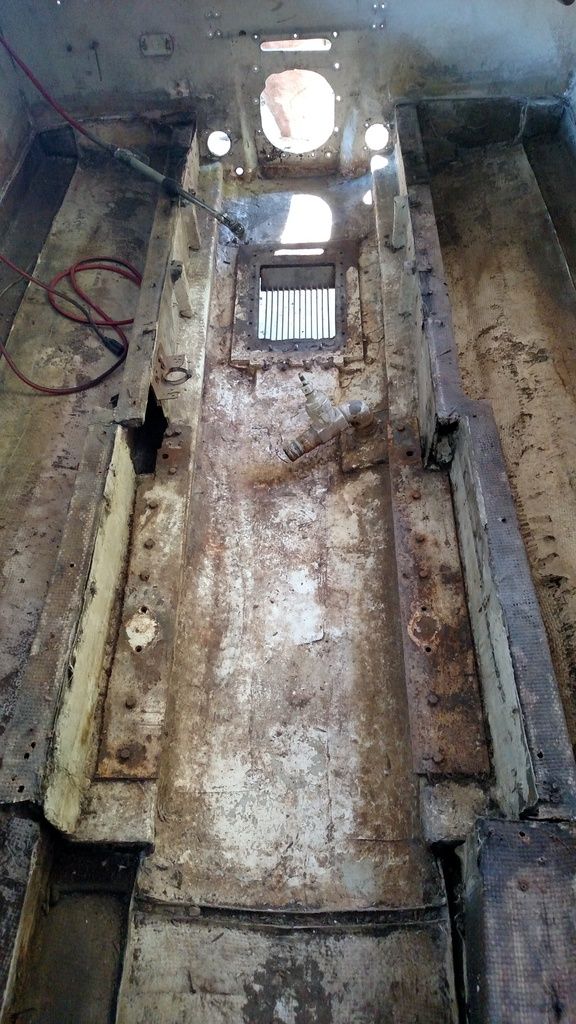
Been a while, but I finally started some tear down this last weekend. Here is what I got done, not much, but it's a start.


I do have a question though, under that shelf on either side, there appears to be fiberglass over what I would assume to be a stringer. I would need to remove this shelf to get to and replace that. What is the best method to do this? I would like to be able to reinstall them afterwards, there is no wood behind them that I can see, they are just made of fiberglass.
 

zdeyonker

Seaman Apprentice
Joined
Jun 7, 2016
Messages
33
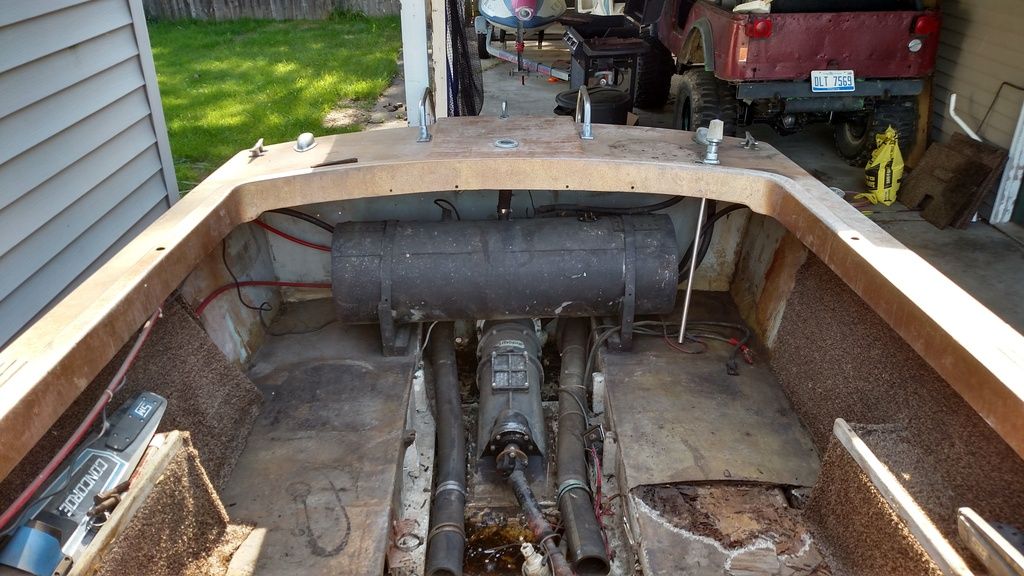
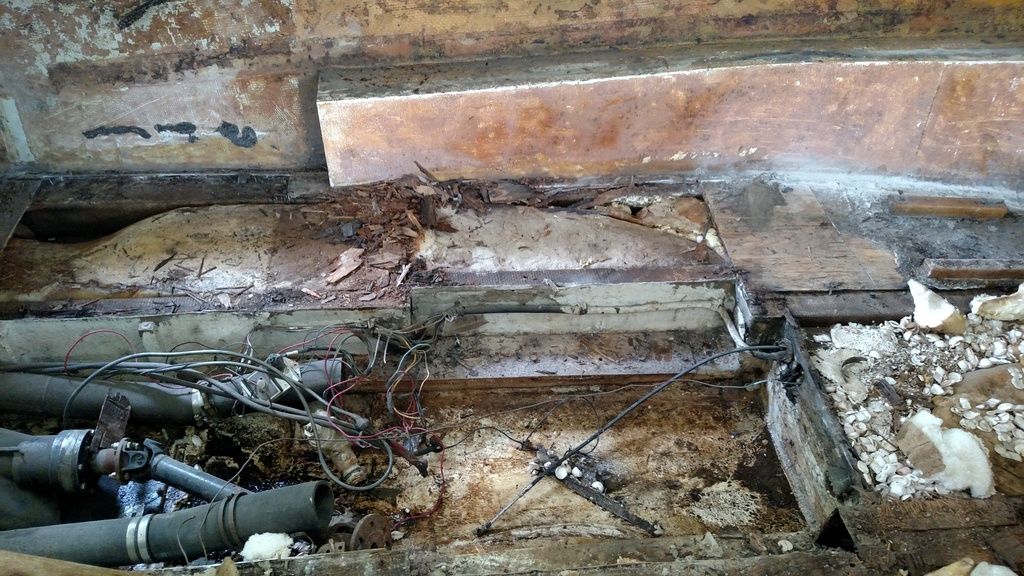
Got quite a bit of work done on it Sunday. I ended up using an electric grinder and cut off wheel to get the shelves out. I was able to control the depth of cut and get into the tighter spaces without removing the cap that way. Then I siphoned out about 18 gallons of gas circa 1994. That was quite some strong stuff! Then I removed the rest of the forward decking and the foam that was underneath it. I found some interesting things. The foam appeared to be a mixture of poured and packing peanuts. There was a vacuum hose that provided routing for the coolant temp gauge copper tubing under the floor, and there was an empty hose running from the forward decking under the bow back to the engine compartment. I'm assuming it was originally hooked up to what looks like a small hood scoop on the bow to circulate fresh air to the engine. It was completely crushed by the foam. Would PVC be the best alternative for these hoses under the deck? Without that foam in there, the boat feels a lot lighter, I actually found a bunch of water under the foam forward of the engine bulkhead. The bulkhead was also completely soaked and crumbled when peeled from the fiberglass. I'll get pictures up tonight hopefully.
 

zdeyonker

Seaman Apprentice
Joined
Jun 7, 2016
Messages
33
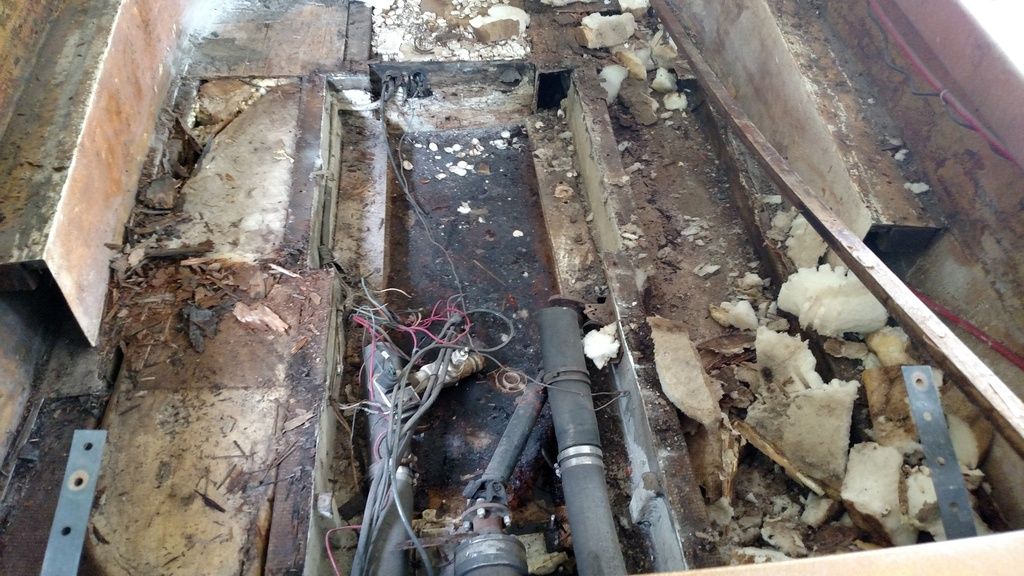
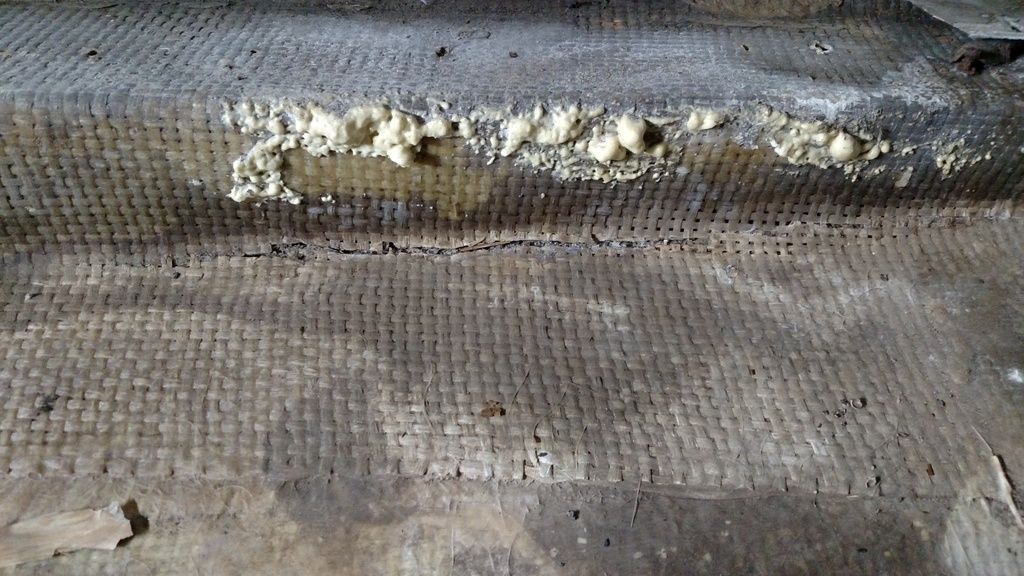
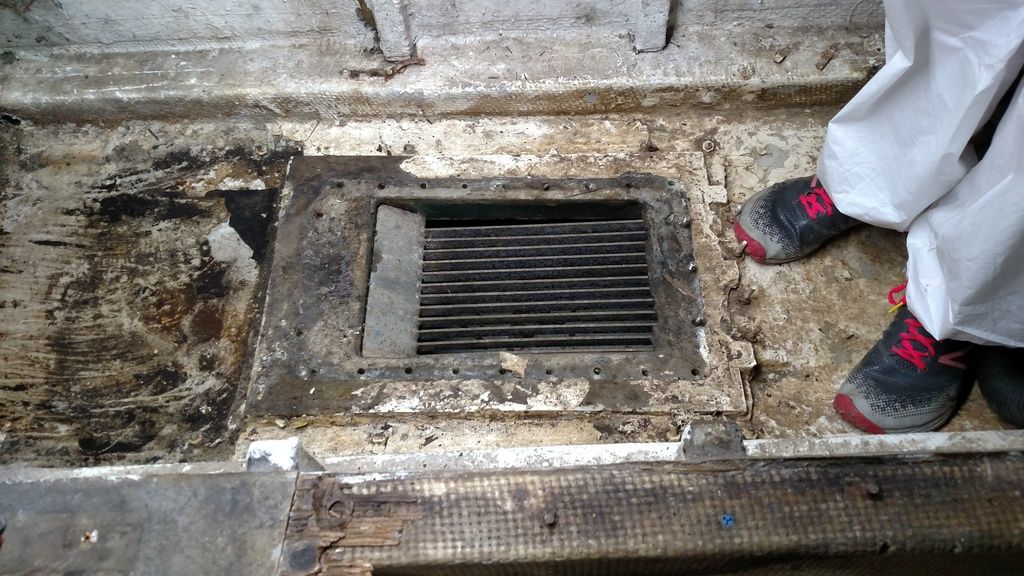
Been a while, hard to dedicate the needed time to this with two full time jobs. Here is where I got last night, I vacuumed everything out, then pulled the jet drive assembly out, and removed the hand rails. That was a chore itself that should not have taken long at all. Turns out that the bolts they used to secure the pump to the hull on the bottom side around the intake grate were all carriage bolts. Of course some wanted to spin, so I got a pair of pliers to grab onto the bolt above the nut enough to break them loose then move the nut up enough to put the pliers on the bottom side. Found an interesting item underneath the drive right by the transom. Looks like a huge chunk of resin that was covered with roofing shingles. Not sure what that was, maybe left over resin or someone trying to make it seal again? Not sure, but it was blocking the drain holes from the stringers. I'll be working on removing the remnants of the floor and hopefully start grinding this weekend! And I found a crack in one of the stringer caps, I already had to remove them anyways, will this heavy woven cloth they used be an issue, or will I have to grind that down? As I now have everything removed, I'm noticing that the sides of the boat have a lot of deflection when pressed on by hand. Is this something I should worry about? I was thinking that I might have to sand them down on the inside and add another layer of CSM or 1708 to strengthen them up. I can push with two fingers and it goes in a solid 1/2" or so. What do you guys think?


That huge chunk is from the area to the left of the grate in the last picture. Also, is there any special precautions or treatments for that area surrounding the intake grate? Any better way to secure the pump down other than the carriage bolts that spun in the fiberglass? There are also two wooden sponsons that are held to the hull the same way. What is the best way to take these off and seal them without damaging them?
 

zdeyonker

Seaman Apprentice
Joined
Jun 7, 2016
Messages
33
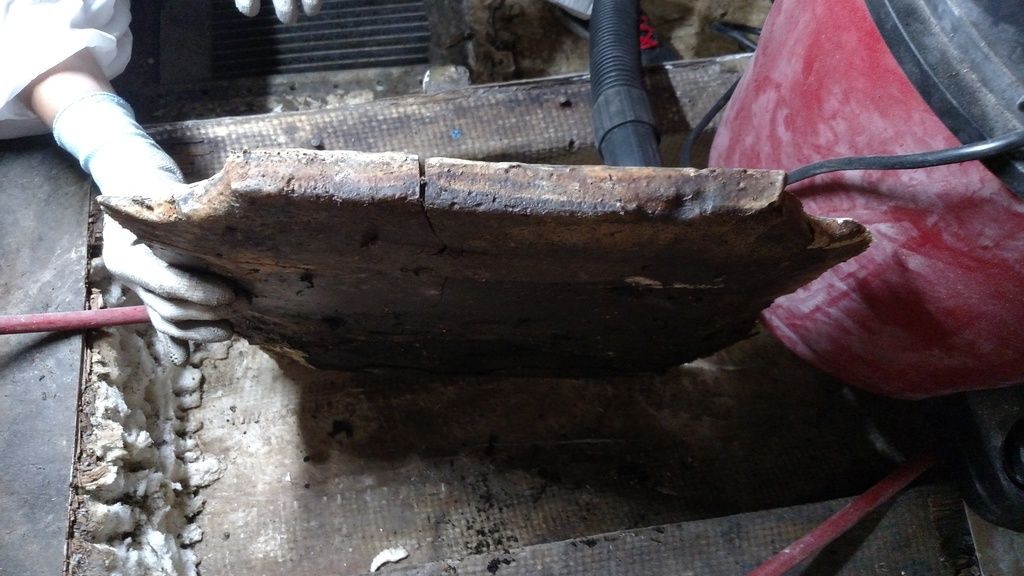
In a surprising turn of events, I got off work for my second job yesterday! So once them temp dropped below 90, about 7p.m., I put on the Tyvek, ear muffs, safety glasses, face mask, and started cutting stuff out. I managed to get the two outside stringers cut out as well as the bulkhead and stringers forward of the bulkhead. Found even more interesting stuff. The screws holding the decking to the stringers appeared to be going into drywall anchors. I'm guessing someone tried replacing the floor previous and found the wood soft at that point and said screw it. The other thing, these stringers were all about 4-5 inches wide, but only had about 1/8", as good as I can guess to the condition of the wood, plywood on either side of the stringer and another piece on the top. Looked the opposite of this I_I. I am wondering if that was for a reason? What benefit could it add being hollow, and is there a better way to do the stringers when I place them in? I also noticed that the thick weave material they used to tab the stringers in was wanting to lift up with the stringer caps I cut off. There were a couple places I didn't cut quite deep enough and that is how I saw that. So my guess is that I'm going to have to remove a lot of fiberglass before I can start installing stuff again. The "wood" that came out of the boat looked like the perfect topsoil for growing plants in! If only it didn't have fiberglass dust in it :( I'll take more pictures when I get home from work and there is light.
 

zdeyonker

Seaman Apprentice
Joined
Jun 7, 2016
Messages
33
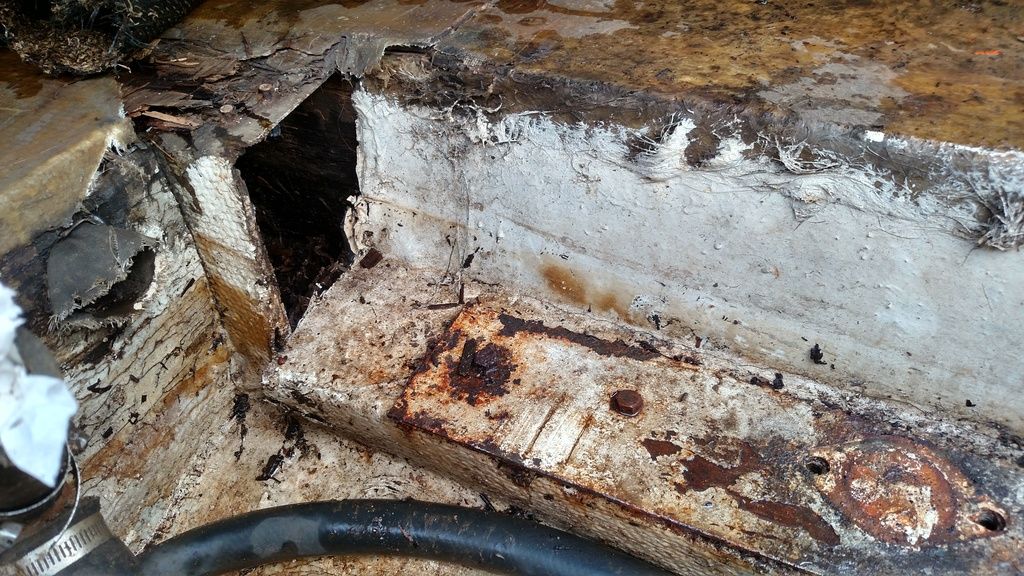
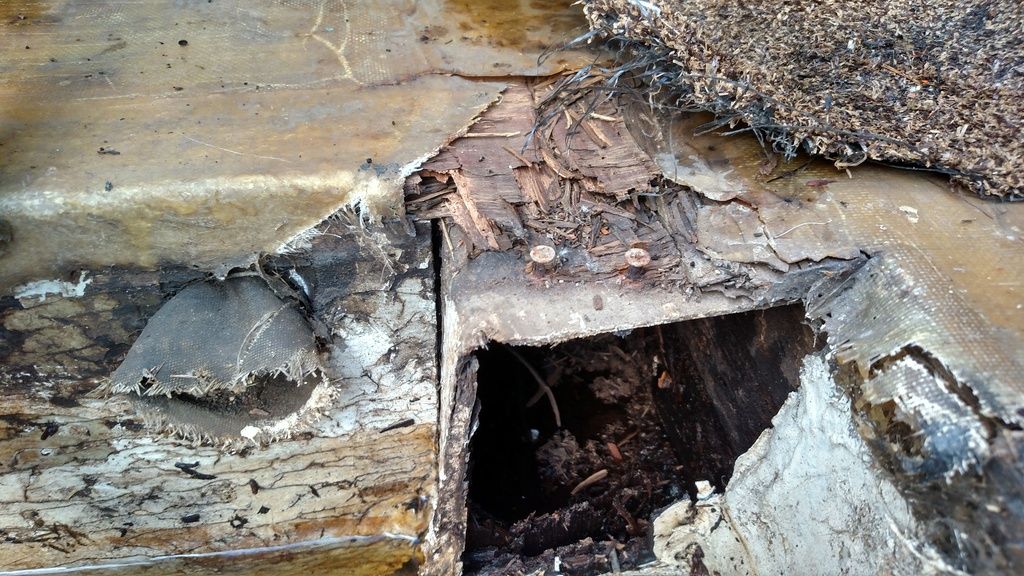
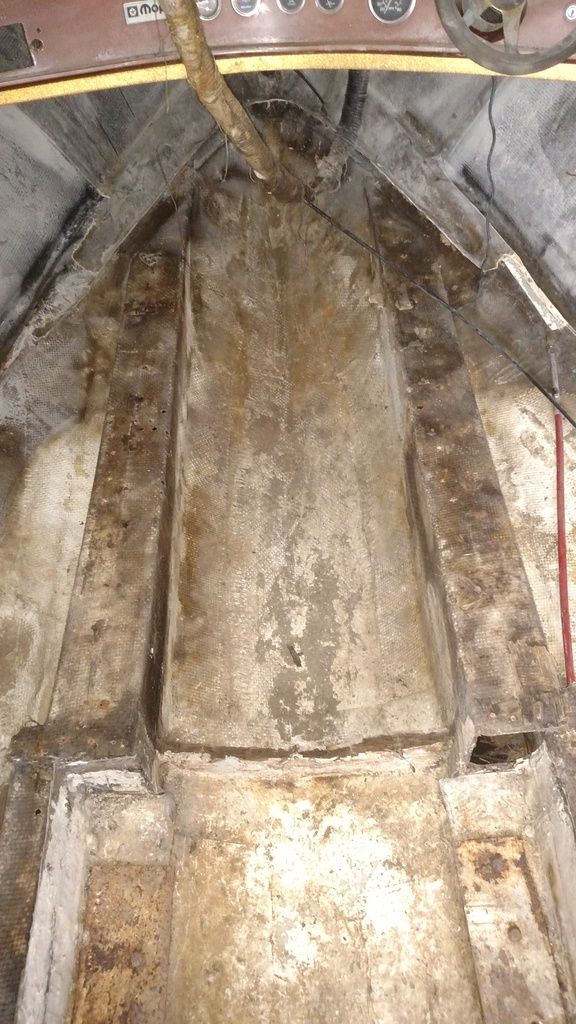
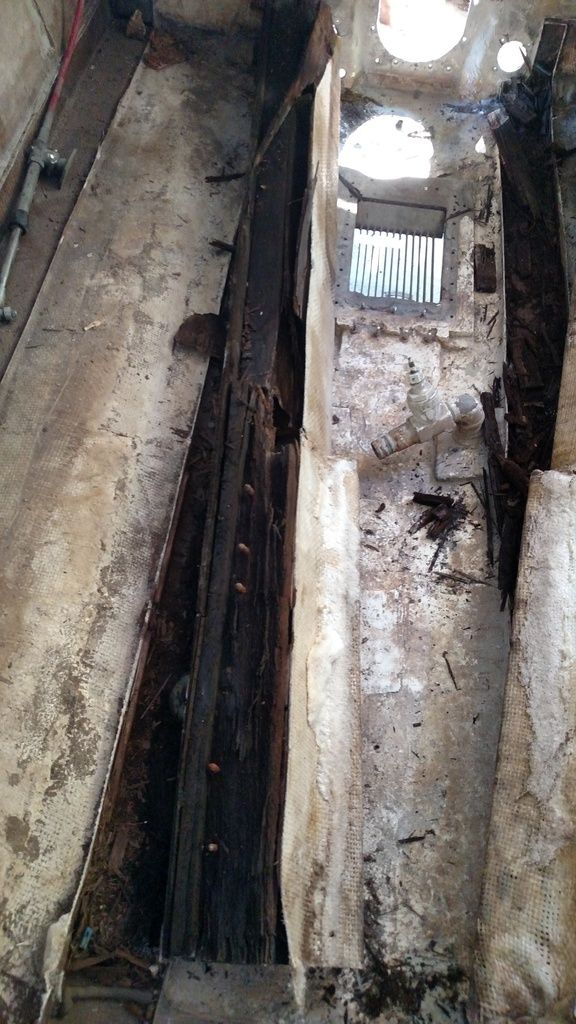
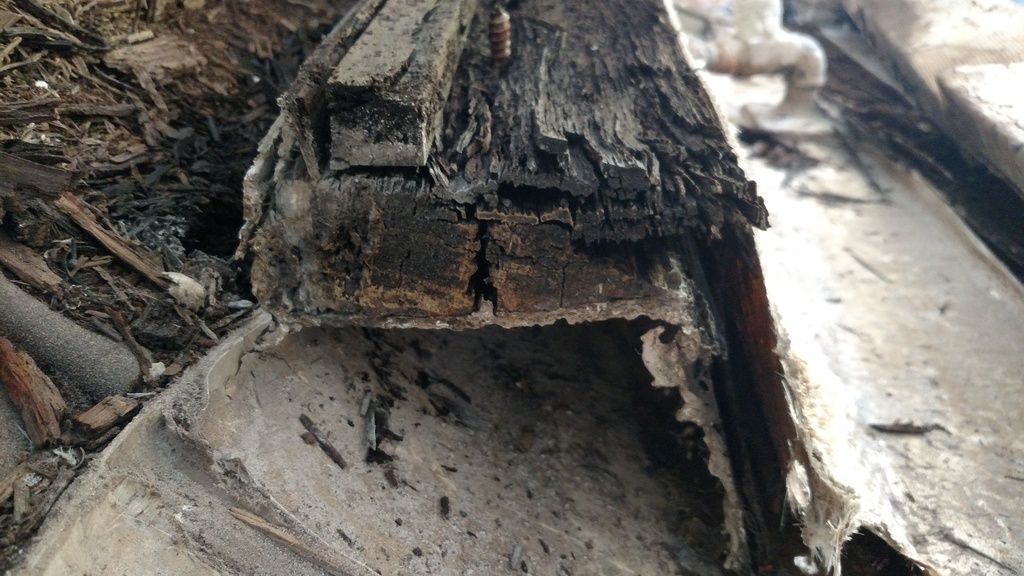
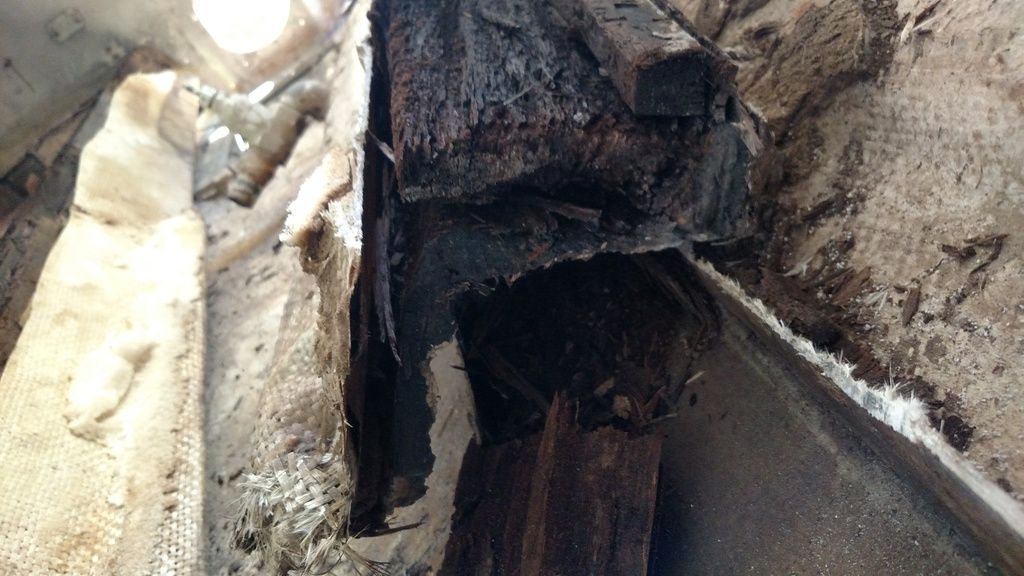
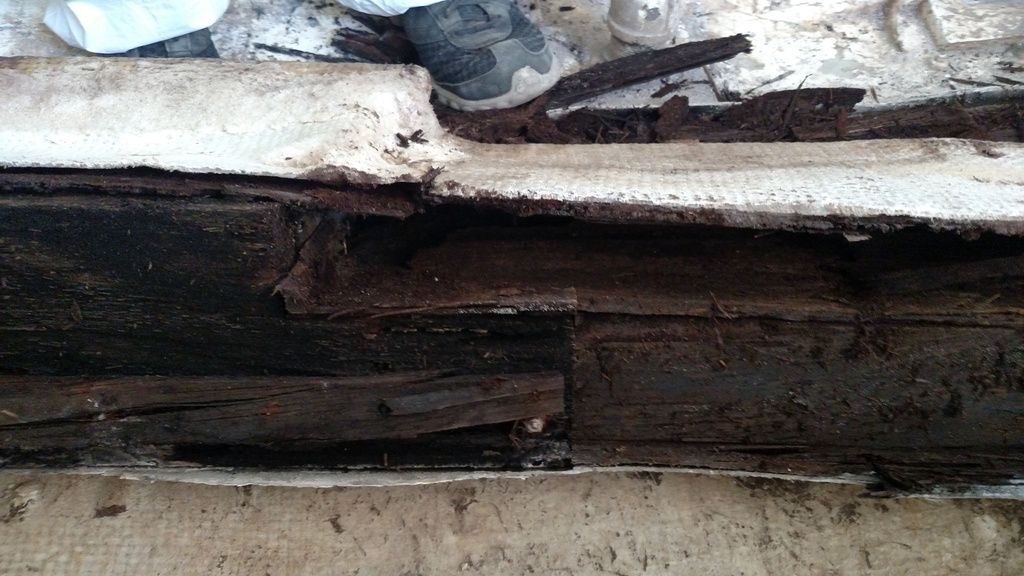
It's been a couple of weeks, but I finally got the rest of the stringers measured and cut out, then started grinding the hull down where I cut the stringer caps. Here are a few pictures.

Before


Both stringers and engine supports cut out, look at all that rotten wood!


Starboard stringer


Port Stringer


Some of the middle of the stringer


I also started cutting the fiberglass off of the transom on the inside as it was delaminating on the port side and soggy around all the holes for the exhaust and jet drive.

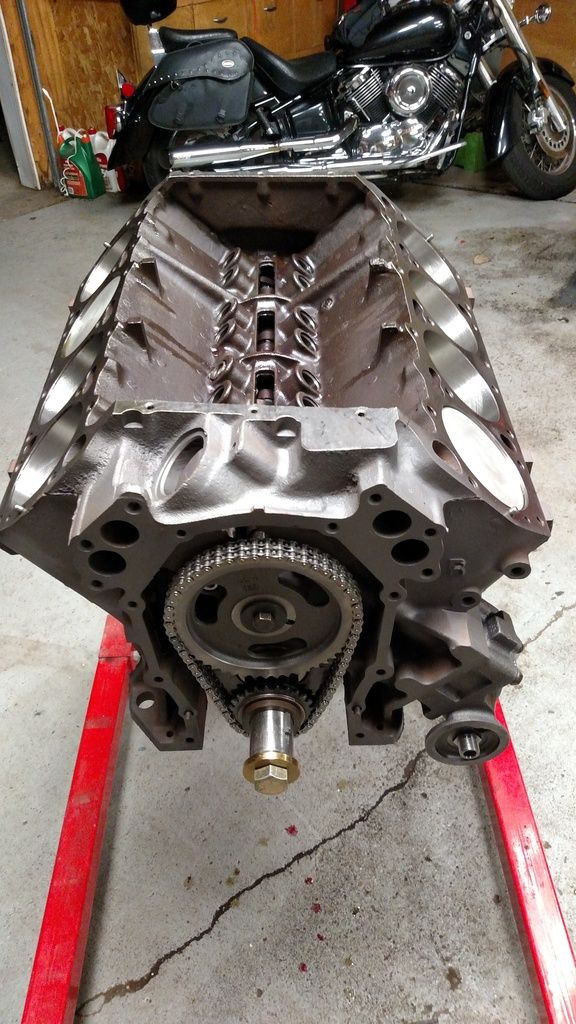
After I lost light, I started work on assembling the power plant for this old boat.


I do have a few questions if anyone can help, that would be awesome!

1.) When pushing on the sides of the hull, I notice great deflection of over 1/2" depending where you push. Is this normal, or should I through some mat on it when doing the rest of the fiberglass to strengthen it?

2.) For the stringers, they are done in 5 inch wide sections and there are 4 of them, the plywood according to what I was able to measure was about 1/8" think and in the shape of a doorway. I'm thinking it would be really hard to duplicate this and seal the wood on the inside without adding tons of weight in resin and mat. What can I do about this, can I do stringers out of 3/4" play tabbed in where the sides of the old ones were and add some bulkheads to give it enough strength?

3.) For the engine mount portion of the stringers, they used a LOT of wood, looks like 2" x 6" on top of 1 1/4" square with more ply behind to create height to the deck. Does this seem right to replicate when redoing it, or should I look at using ply and building up in fiberglass?

4.) Dependent on the answer to the above question, what is the best layup for this area? Keep in mind that this is a jetboat and powered by a massive Chrysler 440. So this means that it should have plenty of power, but I get that it also needs to be lightweight to plane easier.

5.) This is probably a silly one, but when grinding down the old tabbing from the stringers, is it necessary to grind all of the tabbing down, or just to what is solid?
I did come across some areas where the tabbing was able to be ripped up by hand and some where as I ground it down, it got really stringy. I did grind these areas down to solid fiberglass and I also ground down some rather large chunks of resin where it looked like they just used to hull to dispose of leftovers. I figure the more I can get rid of, the easier it will be to keep this boat from being too heavy and easier it will be to tab in the new stuff with a flat surface.

All suggestions are welcome, I want to build this thing right and to last, I'm sure with your help, it'll last a lifetime!
 

mickyryan

Rear Admiral
Joined
Apr 18, 2016
Messages
4,214
1 I would say its normal but check for stess cracks if you don't see any you should be fine .
2. can use foam to reproduce the stringer and double up on the layup .
3.id go with wood there for support and spreading weight out .
4.id go with wog diagram for stringers and double it if using foam core.
5 the cleaner it is the easier it is to put stuff back, take lots of pictures and measurements so you don't have any oh crap moments about layout. plumb bob works great for this as well.
 

zdeyonker

Seaman Apprentice
Joined
Jun 7, 2016
Messages
33
Okay, I didn't see any stress cracks anywhere, so that is good. What wood do you recommend for building the engine support stringers out of? Is framing grade okay? Not sure I have many options as far as the 1 1/4" square stock goes. I was planning on either doing the two part pour foam or the pink foam from Lowe's cut up between the stringers. Is one better than the other? I have tons of pictures, over 75 at this point and a whole notebook filled with dimensions, as many as I could get, lol. Some stuff still needs to be ironed out to fix some work that was done. The previous build used a collapsible clothe hose, the one that uses a thin wire coil spring to keep it from collapsing and ran all of the wiring through that under the floor to the engine bay. It was crushed, rusted, and torn by time I got to it. I was thinking that I could use PVC to replicate this and put a gradual bend 90 on it, then I could run new wiring through it easily if needed. Would this be too rigid for under the floor? It would go through the floor and a bulkhead into the engine bay. And as far as air supply goes, there is a ram air horn on the bow of the boat, and there was a short hose hanging from it, was this supposed to feed to a hose going under the floor into the engine bay as well to provide fresh air?
 

DeepBlue2010

Lieutenant
Joined
Aug 19, 2010
Messages
1,305
M8, have mercy on our eyes and use line breaks. A huge chunk of text is very hard to read specially on those darn Android screens.

For engine mount stringers, you can use blanks of plywood cut and glued together to form the shape you need so that at the end, the pieces are standing vertical.

All Plywood that will be glassed over need to be pre coated with resin first to prevent resin starvation during glassing (i.e dry wood "steels" all the resin from the glass leaving you with resin starved laminate)

PVC under the deck is fine. Make sure to use rubber grommets and surround it with foam to reduce noise. Plan your wire needs wisely and make room for the future. These things get filled in a hurry. I would plan for a spare one on the other side just in case. Make small whole with a drill in the pipe and it can be used for ventilating under deck.

Foam sheets will not provide the same structural support as 2-parts pour in foam

Regarding your last question, I have no idea if this was the intention of the designer or not. Did you find any traces of a hose extended all the way to the engine? Was there any cuts in the bulkheads for it to pass through?
 

Woodonglass

Supreme Mariner
Joined
Dec 29, 2009
Messages
25,927
Uhmmm, I kinda disagree about the foam. The blue and or Pink slab insulation foam when placed on edge and firmly packed into the boats cavity, WILL provided as good of support as a 2 part pour in foam product. I'm referencing Deck Support only. The KEY is to ensure the cavity is firmly packed with it. If you cut it properly to fit the area, it'll be just fine. Pour in is Easier, less time consuming and probably about the same in costs. If I were doing it I would use the Pour in. It WILL add to the overall structural integrity of the boat since it adheres to ALL surfaces and therefore makes it a homogolgous unit.
 

zdeyonker

Seaman Apprentice
Joined
Jun 7, 2016
Messages
33
Sorry, I just get soo excited! That sounds good, but will placing them vertical create an issue with the steel engine mount plates? They were secured to the stringers using decent size 5/16" lags bolts.

I've heard about this, I'm hoping I get the right amount on them, kind of nervous as this will be my first fiberglass job.

Yeah, I want to use at least 2", there was a gob of wiring in there, some of the hacked up stuff I'll be trying to condense down for sure. So just drill a small hole in the pipe somewhere in the portion that will be concealed by the floor? Will the foam try filling in the hole if I do that?

There were two 2" hoses that went through the floor to the engine bay, one was the cloth with wiring, the other was what looked exactly like a vacuum hose. It had a copper line running through it for the oil pressure sending unit. I'm thinking it was originally an electric one and they just decided that ram air scoop wasn't needed and stuffed it in there. The whole bow of the boat had a kick panel across it, so there wasn't much use from what I could see of having the ram air going into it.

I am thinking that I will leave the bow open this time to provide an area for storage of the life jackets and towing accessories. Just wondering if I should route the air scoop to the engine bay. The engine is under a doghouse in the middle of the boat and had to provision for a fan to exhaust fumes from what I could see. Is this something I should look into doing?

While I have everything out of the boat, I want to make sure the sponsons on bottom get properly treated, how can I preserve these the best?

And if anyone has any idea of a different way to attach the jet drive to the bottom of the hull, it would be great! It had carriage bolts going through the bottom with nuts on the inside of the hull. The bolts of course spun when trying to get the nuts off of the rusty bolts. Any ideas? Looks like they just put extra resin in the area, then chiseled a small square for the bolt to fit into, then called it good, no sealant or anything.......


Sorry about all the questions, I just want to do it right and get it back on the water. I know my dad has been dying to get it back out there since it went down in 94.
 

DeepBlue2010

Lieutenant
Joined
Aug 19, 2010
Messages
1,305
Uhmmm, I kinda disagree about the foam. The blue and or Pink slab insulation foam when placed on edge and firmly packed into the boats cavity, WILL provided as good of support as a 2 part pour in foam product. I'm referencing Deck Support only. The KEY is to ensure the cavity is firmly packed with it. If you cut it properly to fit the area, it'll be just fine. Pour in is Easier, less time consuming and probably about the same in costs. If I were doing it I would use the Pour in. It WILL add to the overall structural integrity of the boat since it adheres to ALL surfaces and therefore makes it a homogolgous unit.

I disagree WoG. I performed an impact test on both and pour in foam was able to take significantly more force than blue sheets. I also posted - in one of my old posts about the subject - the impact resistance data from the manufacturing datasheets of both. Not trying to start an argument here, only sharing my findings.
 

zdeyonker

Seaman Apprentice
Joined
Jun 7, 2016
Messages
33
Got some more work down last night, de-skinned the transom and chiseled out the wood that was there. Used WoodOnGlass's technique of cutting a grid and it worked great! Most of it peeled up with a paint scraper it was so wet. Most of the wood came off, then when I thought it was deep enough, I found some spots that were still flexing like de-lamination. Picked at it a little and found it was a layer of fiberglass that was wrapped on the transom before it was glued to the hull. I pulled off as much as possible, going to have to grind a lot of it off though. That hull was about 1/16"-1/8" thick after pulling that piece off. The top of the wood gave me a real fit. They tabbed the bottom of the hull to the cap with the transom wood extending a little north of the cap seam, so that was a little tricky to cut out without cutting the hull glass. Now I just need to make a template of the wood piece in the keyhole and grind, then I can start finally putting stuff back in!
 
Top